Cheesy Chicken & Olive Pasta Bake: Perfectly Tender, Never Dry
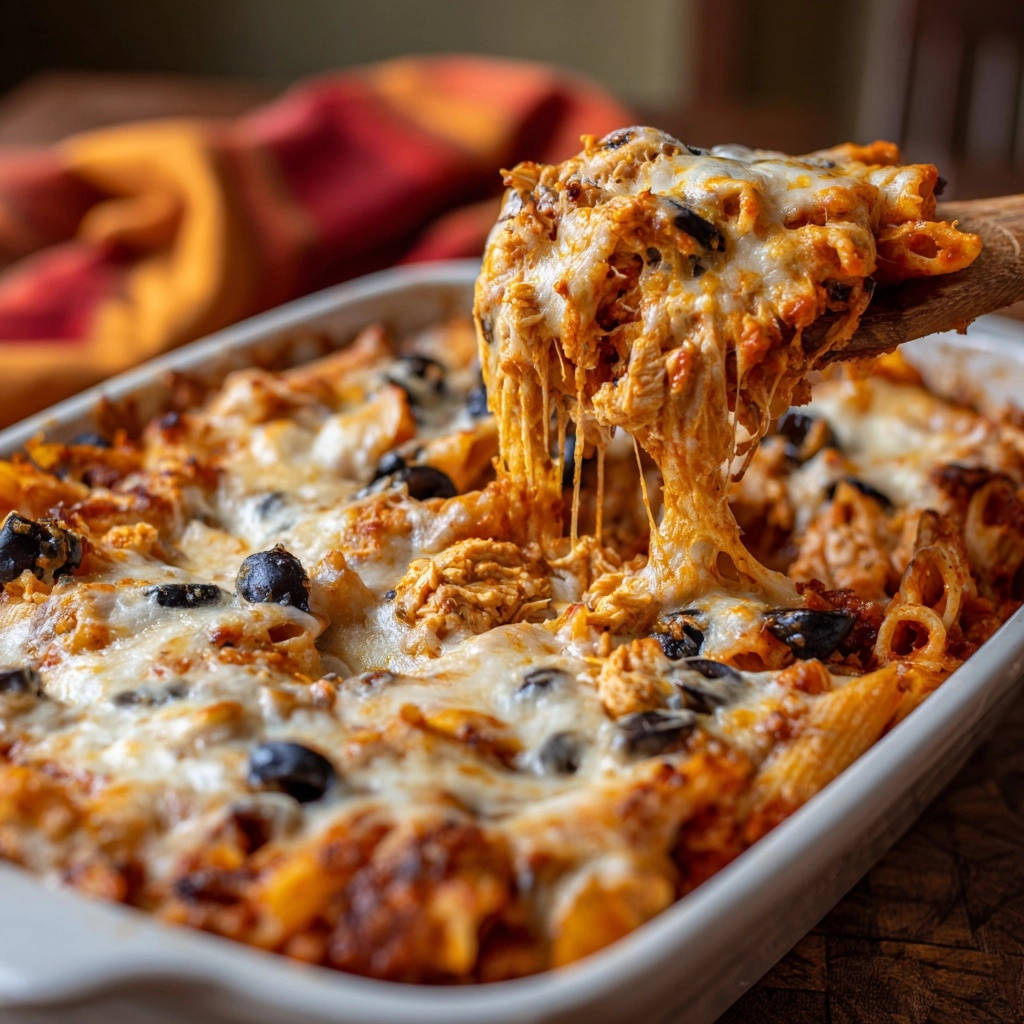
There’s nothing more disappointing than craving a warm, comforting pasta bake, only to find the pasta turns out stiff and dry after baking. I used to struggle with that exact problem! After years of tweaking, I finally perfected a simple trick that guarantees every bite of this Cheesy Chicken & Olive Pasta Bake is perfectly tender and bursting with flavor.
This recipe transforms a classic comfort food into a reliable, foolproof dish, ensuring ideal texture every time. You’ll be amazed at how easily you can achieve that sought-after tender pasta and melty cheese.
Beyond Basic: Why This Cheesy Chicken & Olive Pasta Bake Stands Out
The “Never Dry” Secret: Achieving Perfectly Tender Pasta Every Time
The common frustration with pasta bakes often stems from pasta that dries out in the oven. Our recipe strategically undercooks the pasta initially, allowing it to finish cooking and absorb the savory sauce and added liquid during baking.
This technique prevents that unappealing stiff texture, creating a consistently tender and deeply flavorful baked pasta. It’s the key to truly exceptional results.
A Weeknight Winner: Quick Prep, Maximum Comfort
This Cheesy Chicken & Olive Pasta Bake is designed for convenience without sacrificing taste. With minimal hands-on time, it quickly comes together, making it an ideal candidate for busy weeknights.
It delivers a hearty, satisfying meal that truly warms the soul, making it a beloved family dinner choice.
If you enjoy the creamy, cheesy base of this pasta bake, you should try this juicy breaded chicken parmesan over rigatoni for a similar comforting meal.
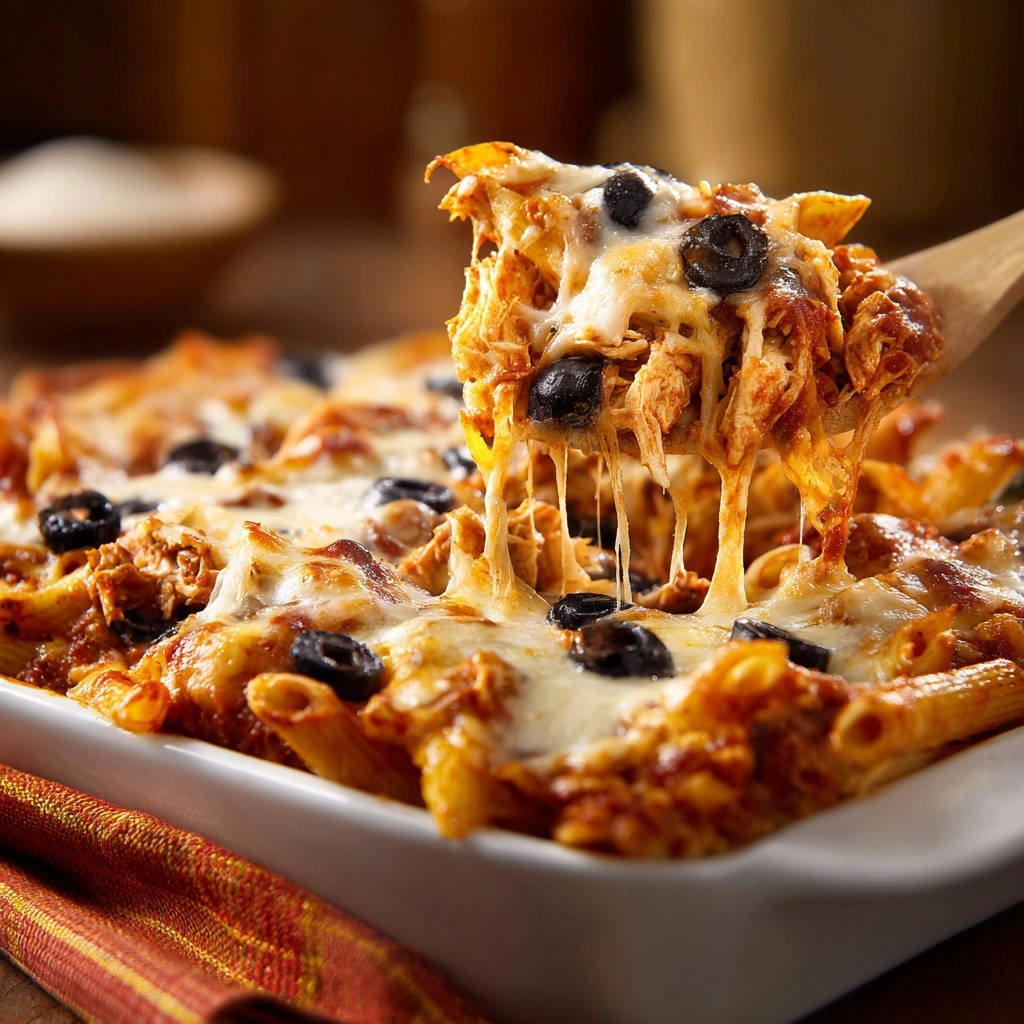
Family-Favorite Flavors, Customizable for Everyone
The combination of tender chicken, rich marinara, briny olives, and gooey mozzarella offers a universally appealing flavor profile. These classic ingredients make it a guaranteed crowd-pleaser.
Its robust base also provides excellent versatility, allowing for easy customization to suit various preferences or dietary needs.
The Essential Elements: Building Your Cheesy Chicken & Olive Pasta Bake
Choosing Your Pasta: The Foundation of Flavor
Penne pasta is excellent for this dish, with its tubular shape perfectly capturing the sauce and small pieces of chicken and olive. Its sturdy structure holds up well to baking.
You could also use ziti, rigatoni, or rotini. The most critical factor is cooking it very al dente before baking to prevent a mushy texture.
The Savory Heart: Chicken, Marinara, and Olives Explored
Cooked, shredded chicken provides a lean protein source and tender texture. Using leftover roast chicken or a store-bought rotisserie chicken simplifies prep immensely.
A good quality marinara sauce forms the rich, flavorful base. Choose your favorite brand or use a homemade sauce for an even more personalized touch.
Sliced black olives add a distinct briny, umami note that complements the other flavors beautifully. If you’re not a fan, green olives or capers can offer a different savory kick.
The Melty Magic: Mozzarella and Seasoning Insights
Shredded mozzarella cheese is indispensable for its incredible melt and creamy texture. It creates that irresistible cheesy crust on top.
Dried Italian seasoning, along with salt and black pepper, infuses the bake with classic aromatic herbs. Adjust these to your personal taste for the perfect balance.
The Hydration Heroes: Olive Oil and Broth
Olive oil serves a dual purpose: it greases the baking dish to prevent sticking and adds a subtle richness to the overall flavor profile.
The addition of water or chicken broth is a game-changer. This liquid provides the essential moisture for the pasta to absorb while baking, ensuring it remains tender and flavorful, never dry.
Equipping Your Kitchen: Tools for a Smooth Pasta Bake Journey
Baking & Mixing Essentials
A 9×13 inch baking dish is the perfect size for this casserole, allowing for even cooking and a generous family-sized portion. Glass or ceramic dishes work beautifully.
A large mixing bowl is crucial for combining all the ingredients thoroughly and without spills. This ensures every piece of pasta is coated in sauce and flavor.
Pots and Utensils
You’ll need a large pot with a lid for boiling the pasta. Ensure it’s big enough to allow the pasta to move freely during cooking.
Measuring cups and spoons are essential for accurate ingredient quantities. A sturdy spoon or spatula is perfect for gently stirring the pasta mixture.
Mastering the Method: Your Step-by-Step Guide to Cheesy Chicken & Olive Pasta Bake
- Preheat and Prep the Dish:
Set your oven to 375°F (190°C) to ensure even cooking from the start and a consistent baking environment.
Lightly grease a 9×13 inch baking dish with olive oil. This prevents the pasta bake from sticking and makes for easier serving and clean-up.
- The “Al Dente” Pasta Trick:
Bring a large pot of generously salted water to a rolling boil. Salting the water seasons the pasta from within.
Add the penne pasta and cook for approximately 2 minutes LESS than the package directions suggest. The pasta should be very al dente, almost firm, as it will continue cooking and absorb moisture in the oven.
Drain the pasta thoroughly. This removes excess water that could dilute your sauce.
- Combining the Hearty Flavors:
In a large mixing bowl, combine the drained pasta, shredded chicken, marinara sauce, sliced black olives, and 1 cup of the shredded mozzarella cheese.
Pour in the 1/2 cup of water or chicken broth. This is a critical step, providing the necessary moisture for the pasta to become perfectly tender without drying out during baking.
Season with salt, black pepper, and dried Italian seasoning, adjusting to your taste preference for a well-balanced flavor.
Stir everything gently until all ingredients are well combined. This ensures every bite of your Cheesy Chicken & Olive Pasta Bake is packed with flavor.
- Assembling Your Bake:
Transfer the pasta mixture into your prepared baking dish. Spread it out evenly to ensure consistent cooking and cheese distribution.
- The Covered Bake: Steaming to Perfection:
Cover the baking dish tightly with aluminum foil. This step traps steam, helping the pasta cook through and remain moist and tender.
Bake for 20 minutes in the preheated oven. This initial phase allows the flavors to meld and the pasta to soften further.
- The Unveiling: Adding More Cheese:
Carefully remove the foil, being mindful of escaping steam. The pasta should look plump and the sauce bubbly.
Sprinkle the remaining 1 cup of mozzarella cheese evenly over the top of the casserole for a truly decadent and golden crust.
- The Golden Finish:
Return the dish to the oven, uncovered, and continue baking for another 15-20 minutes.
Look for the cheese to be beautifully melted, bubbly, and lightly golden brown on top, indicating a perfect, irresistible finish.
- The Crucial Resting Period:
Let the casserole rest for 5-10 minutes before serving. This allows the sauce to set and prevents a watery dish.
Resting also makes for easier, cleaner scooping, ensuring neat portions of your delicious baked pasta dish.
Chef’s Secrets: Elevating Your Cheesy Chicken & Olive Pasta Bake Experience
The Al Dente Advantage: Precision Pasta Cooking
Undercooking your pasta by a few minutes is paramount for this pasta casserole. It prevents the pasta from becoming mushy after absorbing moisture in the oven.
The starch in the pasta continues to swell and tenderize in the hot, saucy environment, resulting in a perfect bite every time.
Flavor Customization: Beyond the Recipe
Enhance your Cheesy Chicken & Olive Pasta Bake by stirring in a handful of fresh spinach or sautéed bell peppers with the sauce for added nutrition and color.
Experiment with different cheeses like provolone or fontina for varied melt and flavor. A pinch of red pepper flakes can introduce a subtle warmth and spice.
Achieving the Perfect Golden Crust
For an extra crispy, golden-brown cheese topping, consider sprinkling a tablespoon of grated Parmesan over the mozzarella before the final uncovered bake.
If you enjoy this creamy pasta bake, you’ll love the crunchy topping on this crispy cheesy chicken casserole.
If your oven has a broiler, a brief 1-2 minute stint under it (watching carefully!) can achieve that ultimate bubbly, browned finish.
The Art of Resting: Why It Matters
The resting period is not optional for a superior baked pasta dish. It allows the starches in the sauce to gel and thicken, preventing a runny dish.
This setting time also helps the internal temperature to equalize, resulting in more cohesive, easier-to-serve portions and richer flavor.
Pre-Shredded vs. Block Cheese: What’s Best?
While convenient, pre-shredded mozzarella often contains anti-caking agents that can hinder a perfectly smooth melt. For the ultimate gooey texture, grate your own block of whole-milk mozzarella.
Grating your own cheese delivers a superior melt and a creamier finish, truly enhancing the “cheesy” aspect of this family dinner.
Solving Common Challenges: Your Cheesy Chicken & Olive Pasta Bake Rescue Guide
“My Pasta is Dry and Hard!”
This usually happens if the pasta was overcooked initially, or if there wasn’t enough liquid in the bake, or if it wasn’t covered properly during the initial baking phase.
Ensure your pasta is very al dente, always add the specified broth/water, and cover tightly with foil for the first 20 minutes to trap moisture.
“The Cheese Isn’t Bubbly Enough!”
If your cheese isn’t reaching that ideal bubbly, golden state, try moving the dish to a higher rack in your oven for the final uncovered bake.
A quick minute or two under the broiler can also do the trick, but watch it constantly to prevent burning.
“My Sauce Seems Too Watery/Thick!”
If your sauce appears too watery, it might be due to residual water from the pasta or too much added broth. You can thicken it slightly by simmering the marinara on the stovetop for a few minutes before mixing.
If the sauce seems too thick, simply add a splash more broth or water when combining ingredients. Remember the pasta will absorb some liquid as it bakes.
Beyond the Dish: Perfect Pairings and Presentation
Complementary Sides for a Complete Meal
To balance the richness of this comfort food, serve it alongside a crisp green salad tossed with a light vinaigrette. This adds a refreshing contrast.
Garlic bread or crusty Italian bread is also a perfect accompaniment for soaking up every last bit of delicious sauce. Steamed green beans or roasted broccoli offer a simple, healthy vegetable pairing.
Beverage Recommendations
For a refreshing option, a light-bodied red like a sparkling grape juice beautifully complements the savory flavors of the chicken and marinara. A crisp, white grape juice such as sparkling grape juice also works well.
For non-alcoholic options, iced tea, sparkling water with lemon, or a classic Italian soda will perfectly refresh the palate.
Elevating Your Presentation
Before serving, garnish your Cheesy Chicken & Olive Pasta Bake with a sprinkle of fresh chopped parsley or basil for a vibrant pop of color and fresh aroma.
A final drizzle of good quality extra virgin olive oil over individual servings can add a touch of gourmet flair. A generous dusting of freshly grated Parmesan cheese is always a welcome finish.
Plan Ahead & Enjoy Later: Prep, Storage, and Reheating
Prepping Your Bake in Advance
You can assemble the entire Cheesy Chicken & Olive Pasta Bake up to the point of baking (Step 4), then cover it tightly with plastic wrap and refrigerate for up to 24 hours.
When ready to bake, remove it from the fridge 30 minutes prior to baking. You may need to add 5-10 minutes to the covered baking time.
Storing Leftovers Safely and Deliciously
Allow any leftover Cheesy Chicken & Olive Pasta Bake to cool completely before transferring it to airtight containers.
Store in the refrigerator for up to 3-4 days. Proper storage helps maintain quality and ensures food safety.
Best Ways to Reheat Your Pasta Bake
For individual portions, microwave on medium power, stirring occasionally, until heated through. Add a splash of broth or water if it seems dry.
To reheat the entire dish, cover loosely with foil and bake at 325°F (160°C) for 20-30 minutes, or until warm, moistening with a little broth if needed.
Your Questions Answered: Cheesy Chicken & Olive Pasta Bake FAQs
Can I substitute the pasta type?
Absolutely! While penne is recommended, other short, sturdy pasta shapes like ziti, rigatoni, or rotini work beautifully.
Just remember to still cook them 2 minutes less than the package directions for that essential al dente texture before baking.
What if I don’t like black olives?
No problem at all! You can simply omit the black olives if they’re not to your taste.
Alternatively, try substituting them with sun-dried tomatoes, capers, or even finely diced artichoke hearts for a different burst of flavor.
Is there a vegetarian version of this recipe?
Yes, this recipe is highly adaptable for a meat-free diet! Simply omit the chicken.
You can replace it with extra vegetables like sautéed mushrooms, zucchini, or roasted eggplant. Cooked lentils or cannellini beans also make excellent protein substitutes.
Can I freeze this pasta bake?
Yes, the Cheesy Chicken & Olive Pasta Bake freezes wonderfully! You can freeze it either baked or unbaked.
For unbaked: assemble, cover tightly with foil and plastic wrap, then freeze for up to 3 months. Thaw in the fridge overnight before baking as directed.
For baked: cool completely, portion, then freeze in airtight containers for up to 3 months. Thaw in the fridge and reheat as suggested above, adding extra liquid if needed.
Ready to Bake? Share Your Cheesy Chicken & Olive Pasta Bake Success!
Now that you’re equipped with all the secrets, it’s time to create your own perfectly tender and incredibly flavorful Cheesy Chicken & Olive Pasta Bake. This dish promises to be a comforting staple in your kitchen.
What’s Next?
Try these delicious pairings:
- Chopped Antipasto Salad: Crisp Italian-Inspired Crunch
- Crispy Pepperoni & Cheese Bites: The Secret to Never-Soft Perfection
Don’t forget to share your culinary triumphs with us! We love seeing your delicious creations and hearing how this foolproof recipe became your new favorite.
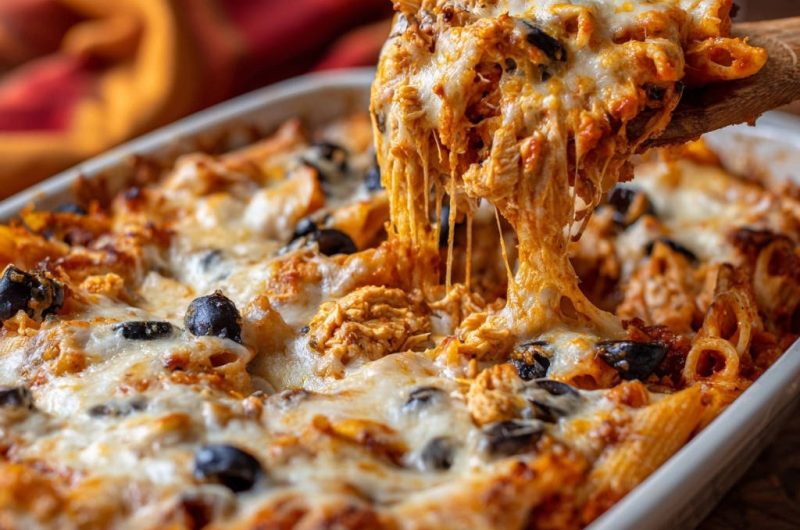
Cheesy Chicken Olive Pasta Bake
Course: Main CourseCuisine: Italian-AmericanDifficulty: easy6
servings20
minutes40
minutes480
kcal60
minutesThis Cheesy Chicken & Olive Pasta Bake guarantees perfectly tender pasta every time, avoiding the common issue of dry, stiff noodles. Packed with flavorful chicken, olives, and two kinds of cheese, it’s a comforting and satisfying meal.
Ingredients
1 pound penne pasta
2 cups cooked, shredded chicken
1 (24 ounce) jar marinara sauce
1 cup sliced black olives
2 cups shredded mozzarella cheese
1 tablespoon olive oil
1/2 cup water or chicken broth
Salt to taste
Black pepper to taste
1/2 teaspoon dried Italian seasoning
Directions
- Preheat your oven to 375°F (190°C). Lightly grease a 9×13 inch baking dish with olive oil.
- Bring a large pot of salted water to a rolling boil. Add the penne pasta and cook it for about 2 minutes less than the package directions (the pasta should be very al dente, almost firm). Drain the pasta thoroughly.
- In a large mixing bowl, combine the drained pasta, shredded chicken, marinara sauce, sliced black olives, and 1 cup of the shredded mozzarella cheese. Pour in the 1/2 cup of water or chicken broth, then season with salt, black pepper, and dried Italian seasoning. Stir everything gently until it’s all well combined.
- Transfer the pasta mixture into your prepared baking dish, spreading it out evenly.
- Cover the baking dish tightly with aluminum foil.
- Bake for 20 minutes.
- Carefully remove the foil, then sprinkle the remaining 1 cup of mozzarella cheese over the top of the casserole.
- Return the dish to the oven, uncovered, and continue baking for another 15-20 minutes, or until the cheese is beautifully melted, bubbly, and lightly golden brown on top.
- Let the casserole rest for 5-10 minutes before serving. This helps the sauce set and makes for easier scooping.
Notes
- Letting the casserole rest for 5-10 minutes before serving helps the sauce set and makes for easier scooping.