Beef & Cheese Quesadillas: Your Guide to Crispy Perfection
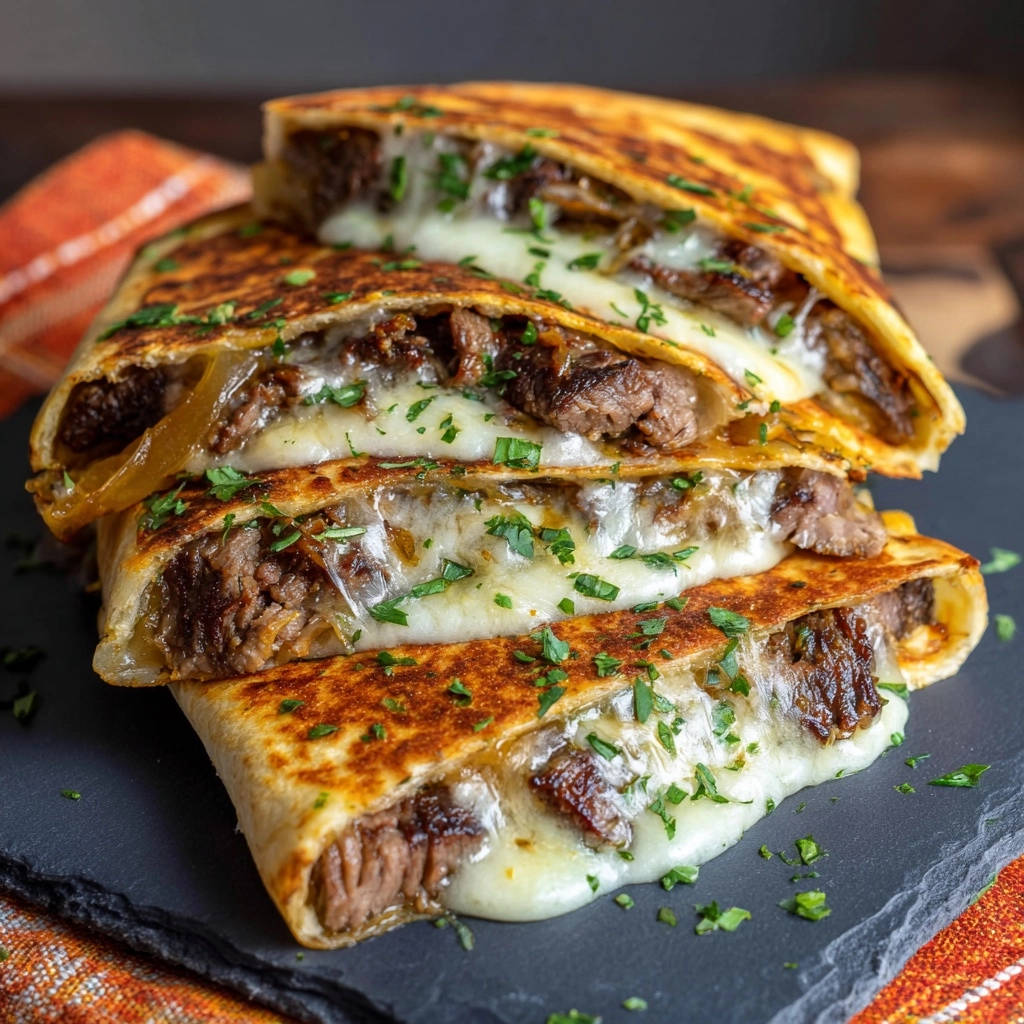
Have you ever tried to achieve that perfect golden crunch with your homemade quesadillas, only to end up with a disappointingly soft, steamy mess? It’s a common frustration many home cooks face, and I’ve certainly been there!
Through countless experiments, I’ve finally cracked the code to crafting the ultimate Beef & Cheese Quesadillas, where every bite delivers that glorious, satisfying crispy texture you’ve been dreaming of, paired with intensely savory flavors.
This recipe isn’t just about combining ingredients; it’s about mastering a technique that guarantees restaurant-quality results, turning a simple dish into an unforgettable meal perfect for any weeknight or casual gathering.
Unlocking Quesadilla Perfection: Why This Recipe Shines
The “Gloriously Crisp” Tortilla Technique
The secret to a truly exceptional quesadilla lies in its exterior. Our method focuses on achieving a consistently golden, non-soggy crunch.
By using a clean, dry, preheated skillet and precise timing, we ensure the tortilla gets perfectly toasted, not steamed, creating an irresistible crispy shell that holds its own.
Beyond Basic: Rich Flavors from Caramelized Onions & Seared Beef
This recipe elevates the humble quesadilla with layers of sophisticated flavor.
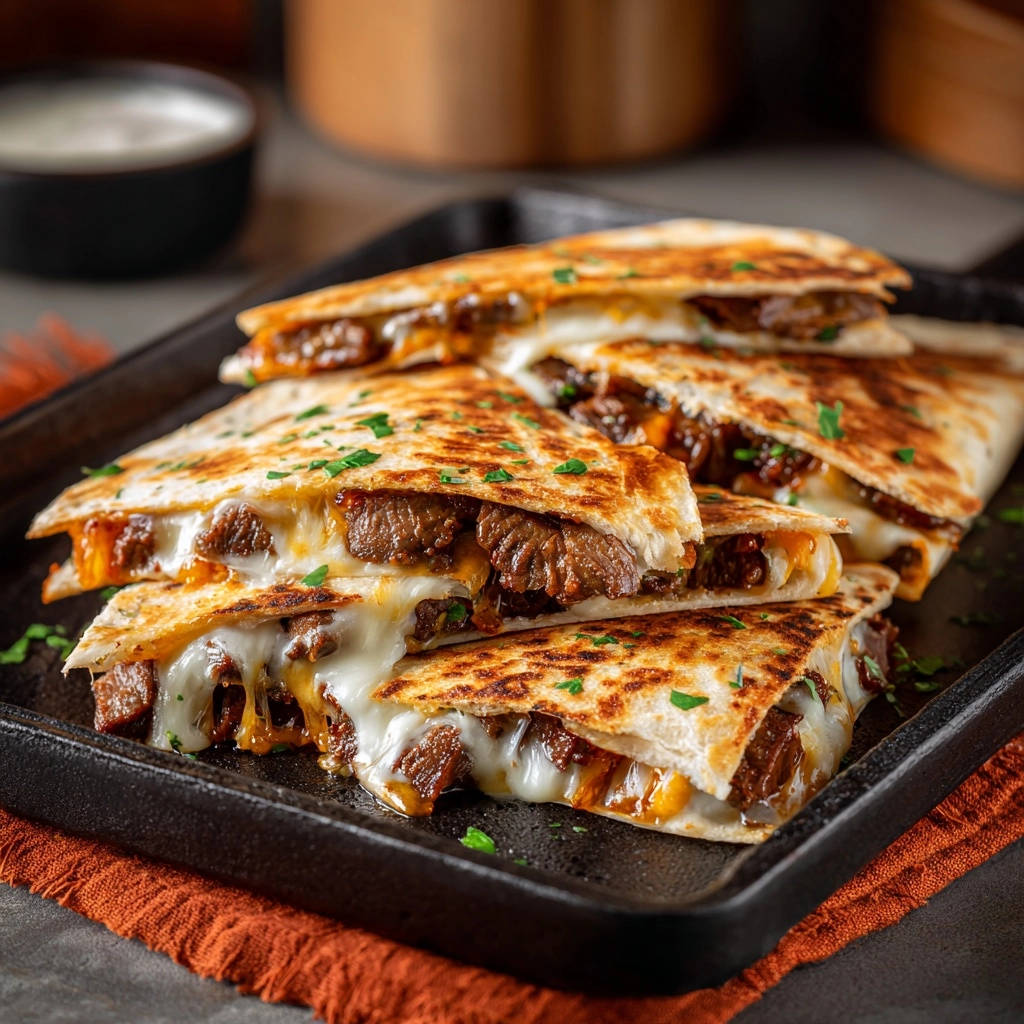
Thinly sliced beef, seared to perfection, offers a robust, savory foundation. This is beautifully complemented by the slow-cooked, deeply caramelized onions, which add an exquisite sweetness and umami depth.
Effortless Elegance: A Weeknight Favorite That Impresses
Despite its gourmet-level taste, these Beef & Cheese Quesadillas are surprisingly straightforward to prepare.
They strike a perfect balance, making them an ideal choice for a quick yet impressive weeknight dinner or a crowd-pleasing option for entertaining friends and family without extensive effort.
If the crispy, layered texture works here, you’ll want to try these cheesy beef tacos for another take on a savory, crunchy filling.
Crafting Your Masterpiece: The Essential Ingredients
- 1 pound thinly sliced beef (such as flank or skirt steak)
- 1 tablespoon vegetable oil, plus more as needed for cooking
- 1 teaspoon salt
- 1/2 teaspoon black pepper
- 1 large onion, thinly sliced
- 8 large flour tortillas
- 2 cups shredded Monterey Jack cheese (or a blend of Monterey Jack and Mozzarella)
- 2 tablespoons fresh parsley or cilantro, chopped (for garnish)
Selecting Your Sliced Beef: Flavor & Texture First
Flank or skirt steak are excellent choices for their rich beefy flavor and tenderness when sliced correctly.
Thin slices are crucial for quick cooking and a pleasant texture in your cheesy beef filling, ensuring every bite is tender and not chewy.
The Melty Heart: Choosing Your Cheese Blend
Monterey Jack cheese is renowned for its superior melting qualities, creating that irresistible gooey texture.
Blending it with Mozzarella can enhance the stretchiness and add a subtle creaminess, making these crispy quesadillas truly decadent.
Sweet & Savory Depth: Onions and Seasonings
The thinly sliced, caramelized onions are a game-changer, infusing the quesadillas with a delicate sweetness and profound umami.
Simple salt and black pepper for the beef allow its natural flavors to shine, providing a robust contrast to the sweet onions.
The Perfect Wrapper: Flour Tortilla Essentials
Large flour tortillas are essential here, providing ample surface area for filling and folding.
Their flexibility and ability to crisp up beautifully are key to achieving our desired non-soggy, golden-brown shell for these Beef & Cheese Quesadillas.
Equip Your Kitchen: Essential Tools for Crispy Quesadillas
The Right Skillet Makes All the Difference
A large, heavy-bottomed non-stick skillet is your most important tool for quesadilla success.
It ensures even heat distribution, prevents sticking, and is crucial for achieving that consistent, glorious crispiness without burning.
Beyond the Pan: Other Handy Helpers
Beyond your skillet, a sturdy spatula is vital for pressing down and flipping your quesadillas evenly.
A sharp knife for slicing the beef and finished quesadillas, along with standard measuring spoons and cups, will complete your setup.
From Skillet to Sensation: Your Step-by-Step Cooking Guide
Preparing Your Protein: Perfectly Seared Beef
Begin by generously seasoning your thinly sliced beef with salt and black pepper.
Heat 1 tablespoon of vegetable oil in a large skillet over medium-high heat. Sear the beef for just 2 to 3 minutes per side until it’s nicely browned and cooked through, ensuring maximum flavor.
Remove the beef from the skillet, let it rest for a few minutes to retain its juices, then thinly slice or shred it against the grain for ultimate tenderness.
Pro Tip: Don’t overcrowd the pan when searing the beef; work in batches if necessary. This ensures a proper sear, preventing the meat from steaming and becoming bland.
Achieving Golden Sweetness: Caramelizing the Onions
In the same skillet, adding a small amount of additional oil if needed, introduce your thinly sliced onion.
Cook over medium heat, stirring occasionally, until the onions become deeply caramelized and wonderfully tender, a process that typically takes about 15 to 20 minutes.
Set the caramelized onions aside. This slow cooking develops an incredible natural sweetness and complex flavor that wonderfully complements the savory beef and cheese quesadillas.
The Art of Assembly: Building Your Quesadilla
For that signature crispy quesadilla texture, begin by heating a clean, dry large non-stick skillet over medium heat. It is paramount that the pan is dry and properly preheated before any tortilla touches it.
Place one large flour tortilla into the hot, dry skillet. Immediately sprinkle about 1/4 cup of shredded cheese onto one half of the tortilla.
On top of the cheese, evenly distribute a portion of the cooked beef and caramelized onions. Finish the filling with a small sprinkle of additional cheese; this crucial top layer acts as a delicious “glue,” helping the quesadilla hold together as it melts.
The Golden Moment: Cooking to Crisp Perfection
Carefully fold the empty half of the tortilla over the filled half. Using a sturdy spatula, press down gently and firmly across the entire quesadilla to ensure excellent contact with the hot pan, promoting even crisping.
Cook for 2 to 3 minutes until the underside is a beautiful golden brown and gloriously crispy. If the tortilla seems to stick or you desire a deeper crisp, very lightly brush the outside of the tortilla with a tiny amount of vegetable oil before flipping.
Flip the quesadilla and cook for another 2 to 3 minutes, continuing to press gently, until the second side is equally golden brown and crispy, and the cheese inside is completely melted and wonderfully gooey.
Presentation & Enjoyment: Serving Your Creation
Carefully remove the finished Beef & Cheese Quesadilla from the skillet. Immediately transfer it to a cutting board, slice it into neat triangles, and garnish generously with fresh chopped parsley or cilantro for a burst of color and fresh flavor.
Repeat this process with the remaining tortillas and filling, serving each crispy quesadilla immediately to ensure the best texture and maximum enjoyment.
Chef’s Playbook: Elevating Your Beef & Cheese Quesadillas
Secrets to the Ultimate Crispy Shell
Always start with a clean, dry, and properly preheated non-stick skillet over medium heat. Excess oil or moisture will steam the tortilla instead of crisping it.
Firmly pressing the quesadilla with a spatula throughout cooking ensures maximum contact with the hot surface, guaranteeing even browning and crunch.
Ensuring Tender, Flavorful Beef Every Time
Avoid overcooking your beef; sear it quickly to medium-rare or medium for maximum tenderness and juiciness.
Always slice the rested beef against the grain after cooking. This technique shortens the muscle fibers, making each bite incredibly tender in your cheesy beef filling.
Speeding Up Onion Caramelization (or a Shortcut)
For slightly faster caramelization, you can add a tiny pinch of baking soda to the onions, which helps break them down more quickly.
In a pinch, if time is very short, a dash of onion powder and a spoonful of brown sugar can mimic some of that sweet and savory depth, though true caramelization is always superior.
Achieving That Perfect Cheese Pull
Layering cheese both under and over the filling ensures the entire quesadilla melts into a cohesive, gooey unit.
Using a consistent medium heat allows the cheese to melt slowly and thoroughly without burning the tortilla, creating that coveted cheese pull.
Quesadilla Conundrums Solved: Expert Fixes
Why is My Quesadilla Soggy?
Your pan might not be hot enough, or it could be holding too much oil. Ensure your skillet is thoroughly preheated and dry, using only the barest whisper of oil if absolutely necessary on the exterior.
Overfilling can also lead to a steamy interior; less is often more when aiming for a crispy quesadilla.
My Filling is Escaping!
This usually happens from overfilling or not pressing firmly enough during cooking. Start with a modest amount of filling, ensuring it stays confined to one half of the tortilla.
Pressing down gently but consistently with your spatula helps to seal the edges and prevent spillage as the cheese melts.
The Beef is Dry or Chewy.
Overcooking the beef is the primary culprit here. Sear quickly to a medium doneness and remove promptly from the heat.
Always allow the beef to rest for a few minutes after cooking before slicing, then slice against the grain to maintain its juiciness and tender texture.
Beyond the Plate: Perfect Pairings for Your Quesadillas
Classic Toppings & Dips
Elevate your Beef & Cheese Quesadillas with classic accompaniments like tangy salsa, rich guacamole, cool sour cream, or a dash of your favorite hot sauce.
If you love the bold flavors here, these cheesy pulled beef tacos use the same kind of juicy shredded beef.
For a vibrant, flavorful side, consider serving them alongside a batch of zesty skillet street-style corn, which adds a fantastic pop of color and taste.
Fresh Sides & Salad Ideas
A crisp, simple green salad with a light vinaigrette provides a refreshing contrast to the richness of the quesadillas.
What to Serve Alongside Those Quesadillas
If you want to round out the meal with something warm and bready that shares the same cheesy, spicy notes, these two options fit right in.
- Bake a pan of Cheesy Beef Jalapeño Cornbread for a crumbly, savory side that picks up on the beef and pepper theme from the quesadillas.
- Pull apart a batch of Skillet Cheesy Jalapeno Biscuits for a soft, buttery alternative that still brings the heat and cheese factor.
You could also pair them with a fresh pico de gallo or a light cucumber and jicama slaw for added crunch and brightness.
Beverage Pairings
Mexican sodas, iced tea, or even a crisp, sparkling water make excellent companions for these savory quesadillas.
For a refreshing non-alcoholic option, a vibrant agua fresca (like hibiscus or lime) is always a hit.
Smart Strategies: Storing & Reheating Your Quesadilla Delights
Best Practices for Leftover Quesadillas
To keep leftover Beef & Cheese Quesadillas fresh, allow them to cool completely before wrapping tightly in foil or plastic wrap.
Store them in an airtight container in the refrigerator for up to 3-4 days.
Reheating for Retained Crispness
Avoid the microwave at all costs for reheating quesadillas, as it will inevitably lead to a soggy result.
Reheat them in a dry skillet over medium heat, in a toaster oven, or in an air fryer at 350°F (175°C) for a few minutes until heated through and crispy again, ensuring that glorious crunch is revived.
Making Components Ahead: Prep for Success
The cooked beef and caramelized onions can be prepared a day or two in advance and stored separately in the refrigerator.
This advance prep significantly speeds up assembly, making these Beef & Cheese Quesadillas an even quicker weeknight option.
Your Quesadilla Queries Answered: A Quick Reference
Can I use ground beef instead of sliced steak?
Absolutely! If using ground beef, brown it thoroughly, drain any excess fat, and season well before adding to the quesadillas.
This will change the texture slightly but still yield a delicious, satisfying cheesy beef filling.
What’s the best cheese for quesadillas?
Monterey Jack and Mozzarella are excellent for their melt, but you can also use Colby, mild Cheddar, or a Mexican blend.
The key is a cheese that melts smoothly and becomes gooey, contributing to the irresistible texture of your crispy quesadillas.
How do I make a larger batch?
To make a larger batch, simply scale up the ingredients proportionally. You can cook the beef and onions in larger quantities or multiple batches.
For assembly, use two skillets simultaneously or keep cooked quesadillas warm in a low oven (around 200°F/95°C) on a wire rack while you finish the rest.
Is it possible to make these gluten-free?
Yes, many excellent gluten-free flour tortillas are available today. Choose a brand known for its good texture and flexibility.
The cooking method for crispiness remains the same, ensuring your gluten-free Beef & Cheese Quesadillas are equally delicious and crunchy.
Can I bake quesadillas instead of frying?
While pan-frying offers the best crisp, you can bake quesadillas in a preheated oven at 400°F (200°C) for about 8-10 minutes, flipping halfway.
For extra crispness, lightly brush the tortillas with oil before baking. Remember, pan-frying delivers the superior, classic crispy texture.
Your Crispy Beef & Cheese Quesadillas Await!
You now possess the expertise to create truly exceptional Beef & Cheese Quesadillas, mastering the art of the crispy tortilla and the depth of savory, sweet flavors.
Don’t let another soggy quesadilla dampen your dinner plans; confidently embark on this culinary adventure. Whip up these amazing crispy quesadillas tonight, and maybe even serve them with some loaded fiesta potatoes for a complete meal!
We’d love to see your creations! Share your photos and leave a comment below to tell us how your quest for perfect quesadillas turned out.
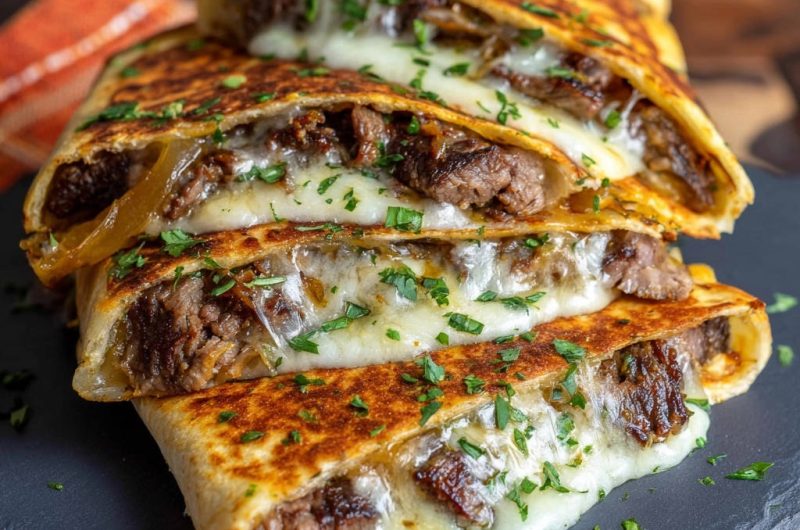
Beef Cheese Quesadillas
Course: Main CourseCuisine: MexicanDifficulty: medium8
servings15
minutes1
hour450
kcal75
minutesSay goodbye to soggy quesadillas! This recipe reveals the secret to achieving gloriously crisp tortillas for the ultimate Beef & Cheese Quesadillas. Experience perfect texture and savory fillings in every bite.
Ingredients
1 pound thinly sliced beef (such as flank or skirt steak)
1 tablespoon vegetable oil, plus more as needed for cooking
1 teaspoon salt
1/2 teaspoon black pepper
1 large onion, thinly sliced
8 large flour tortillas
2 cups shredded Monterey Jack cheese (or a blend of Monterey Jack and Mozzarella)
2 tablespoons fresh parsley or cilantro, chopped (for garnish)
Directions
- Season the thinly sliced beef with salt and black pepper. Heat 1 tablespoon of vegetable oil in a large skillet over medium-high heat. Sear the beef for 2 to 3 minutes per side until cooked through and nicely browned. Remove the beef from the skillet, let it rest for a few minutes, then thinly slice or shred it.
- In the same skillet, add a small amount of additional oil if needed. Add the thinly sliced onion and cook over medium heat, stirring occasionally, until the onions are deeply caramelized and tender, about 15 to 20 minutes. Set the caramelized onions aside.
- For the perfect crispy quesadilla: Heat a clean, dry large non-stick skillet over medium heat. It is important that the pan is dry and properly preheated before adding the tortilla.
- Place one tortilla into the hot, dry skillet. Immediately sprinkle about 1/4 cup of shredded cheese onto one half of the tortilla.
- On top of the cheese, add a portion of the cooked beef and caramelized onions. Top the filling with a small sprinkle of additional cheese; this helps the quesadilla hold together.
- Fold the empty half of the tortilla over the filled half. Press down gently and firmly with a spatula to ensure good contact with the hot pan.
- Cook for 2 to 3 minutes until the underside is golden brown and crispy. If the tortilla appears to be sticking or you desire a deeper crisp, very lightly brush the outside of the tortilla with a tiny amount of oil before flipping. Flip the quesadilla and cook for another 2 to 3 minutes, continuing to press gently, until the second side is also golden brown and crispy, and the cheese is completely melted and gooey.
- Remove the finished quesadilla from the skillet, cut it into triangles, and garnish with fresh chopped parsley or cilantro. Repeat with the remaining tortillas and filling.