Caramel Chocolate Pinwheel Cookies: Effortless Swirls Every Time
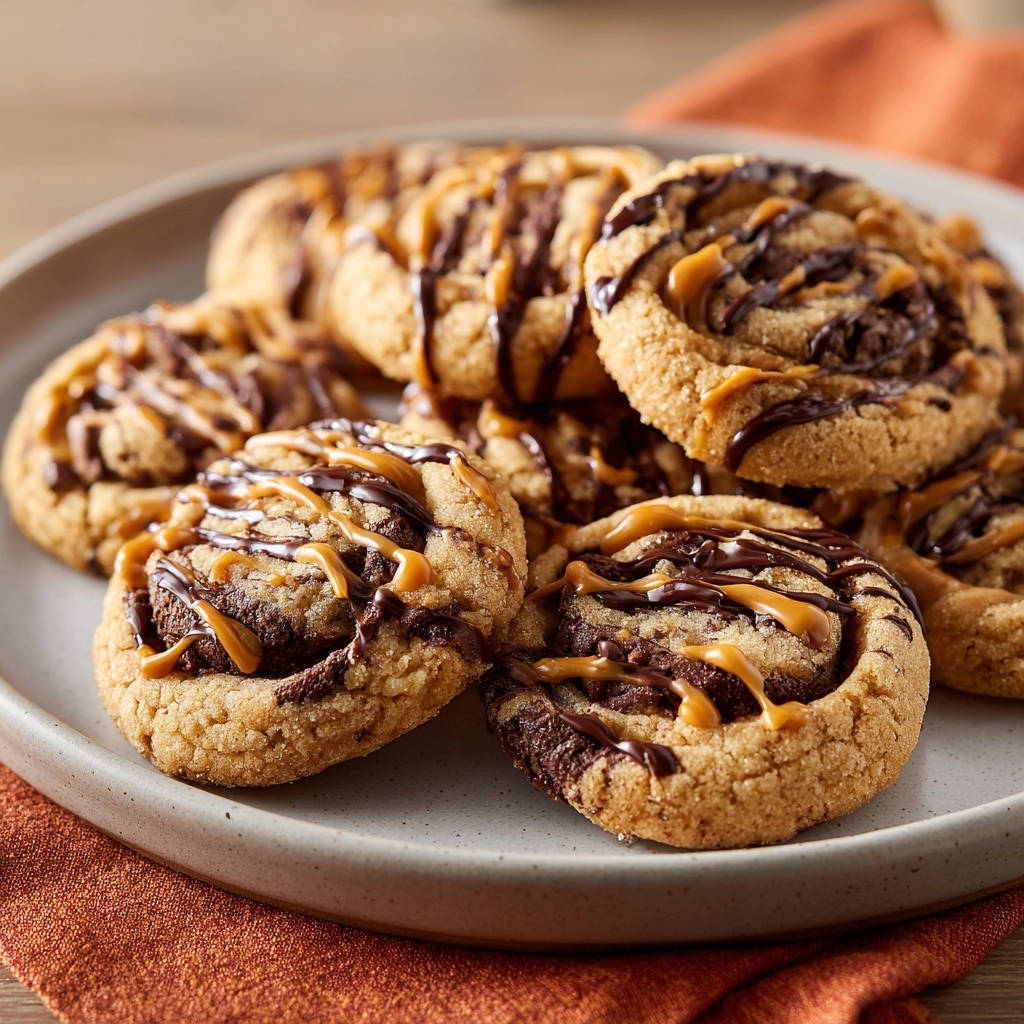
Remember those frustrating moments, trying to create beautiful swirl cookies only to face annoying cracks, tears, or messy shapes? My go-to recipe for Caramel Chocolate Pinwheel Cookies takes all that stress away, guaranteeing picture-perfect swirls without a single crack, every single time.
After years of baking, I’ve honed the technique that makes these stunning treats practically effortless. Prepare for soft, buttery homemade cookies with defined layers of rich chocolate and sweet caramel, a delight for any occasion.
Tired of Cracking Dough? The Secret to Perfect Pinwheel Swirls is Here!
The quest for stunning, perfectly swirled cookies often ends in frustration, with dough cracking during rolling or smears where defined lines should be. This recipe eliminates those common pitfalls, providing a foolproof method for gorgeous pinwheel cookies.
We’ll walk through techniques that ensure your dough is always pliable, rolls effortlessly, and yields crisp, beautiful patterns.
What Makes Our Caramel Chocolate Pinwheel Cookies Stand Out?
Our method focuses on precision and patience, primarily through strategic chilling, which solves the most common pinwheel cookie problems.
You’ll achieve effortless swirls with defined chocolate and plain layers, making these treats visually impressive and easy to execute.
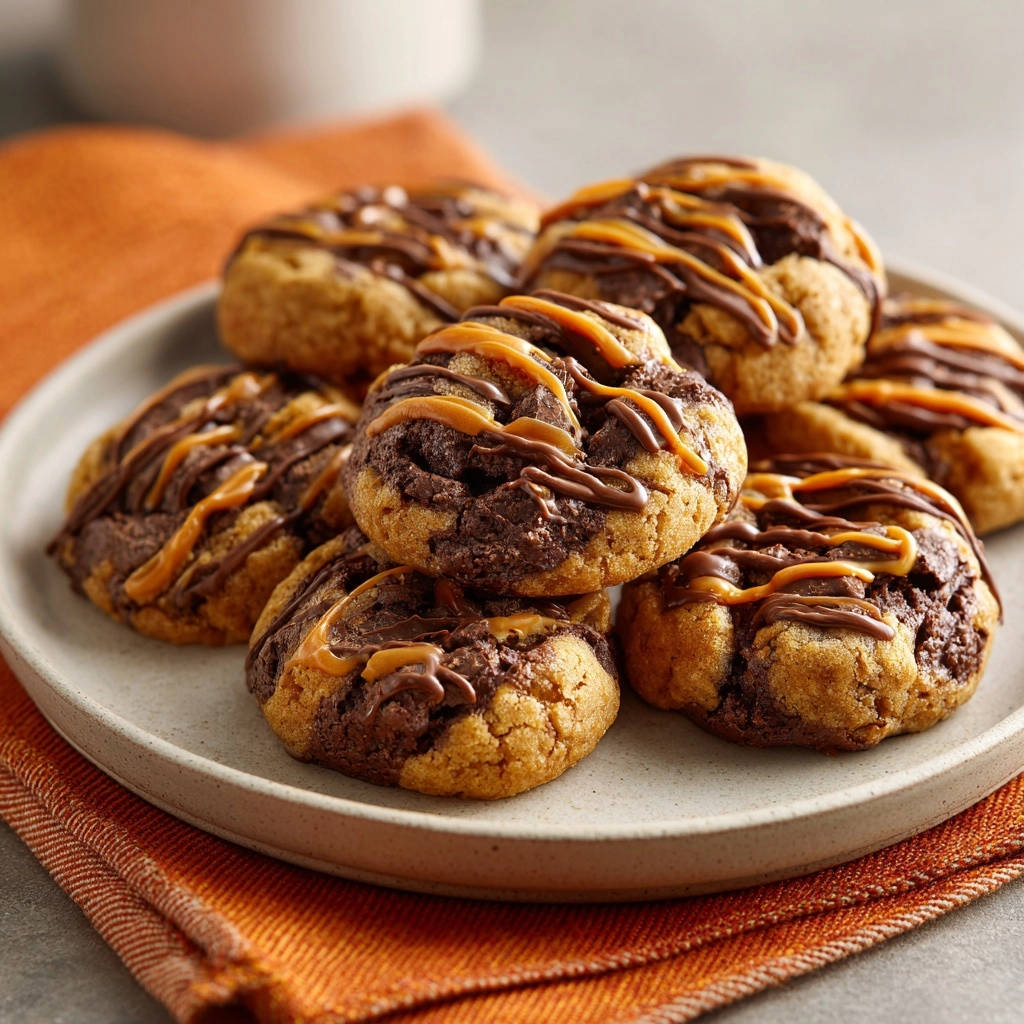
This recipe guarantees perfect results every time, preventing cracking and ensuring a smooth baking experience from start to finish.
Why You’ll Fall in Love with Every Bite
Beyond their stunning appearance, these Caramel Chocolate Pinwheel Cookies offer an unforgettable sensory experience.
Each bite delivers a harmonious blend of rich, deep cocoa and sweet, gooey caramel, a classic combination that satisfies every craving. The soft, tender texture of these chocolate caramel cookies practically melts in your mouth.
Their exquisite flavor and beautiful pinwheel patterns make them a feast for both the eyes and the palate, perfect for sharing or savoring yourself. They evoke the same comforting indulgence as decadent chocolate crumb cheesecake bars.
Essential Ingredients for Your Pinwheel Masterpiece
Quality ingredients are the backbone of any exceptional cookie, and these Caramel Chocolate Pinwheel Cookies are no exception. Selecting the right components ensures both fantastic flavor and perfect texture.
Paying attention to ingredient details will elevate your baking from good to truly outstanding.
The Foundation: Dough Essentials
Unsalted Butter, softened: Crucial for a smooth, creamy base. Softened butter creams easily with sugar, incorporating air for a light, tender cookie texture.
Granulated & Light Brown Sugar: Granulated sugar provides a crisp edge, while light brown sugar adds moisture, chewiness, and a subtle caramel note to the dough.
Large Egg: Acts as a vital binder, adding richness and helping to hold the cookie’s structure together during baking, contributing to its chewiness.
Vanilla Extract: Enhances all the other flavors, bringing a classic warmth and depth to the cookie base. Use a good quality pure vanilla extract.
All-Purpose Flour: The structural backbone of your cookie. Measure it correctly by spooning into a cup and leveling with a straight edge, avoiding compaction.
Baking Soda & Salt: Baking soda helps the cookies rise slightly and spread, ensuring a tender crumb. Salt balances the sweetness and elevates all the flavors in the dough.
Flavor Dimensions: Chocolate & Caramel
Unsweetened Cocoa Powder: Provides the deep chocolate flavor without adding extra sweetness, perfectly balancing the sugars in the dough and the caramel drizzle.
Milk (any kind): Hydrates the chocolate dough, ensuring it matches the consistency of the plain dough. This uniformity is key for even rolling and achieving those perfect pinwheel swirls.
Chocolate Chips, melted: Used for a delightful post-bake drizzle. Opt for good quality chocolate chips for the best flavor and melt them gently to prevent seizing.
Caramel Sauce, warmed: The other half of our irresistible drizzle. Warming the caramel ensures a smooth, easy flow over the cooled cookies, making for a beautiful finish.
Gearing Up: What You’ll Need to Bake Like a Pro
Having the right tools at hand makes the baking process smoother and more enjoyable, especially when crafting intricate treats like swirl cookies.
While most items are standard kitchen fare, a couple of specialty tools can truly elevate your results.
Standard Kitchen Necessities
Large Mixing Bowls & Whisk: Essential for combining wet and dry ingredients separately before bringing them together for the dough.
Electric Mixer (handheld or stand): Makes creaming butter and sugar significantly easier, achieving that light, fluffy texture that’s critical for tender cookies.
Measuring Cups & Spoons: Accuracy is paramount in baking. Precise measurements ensure consistent results every time you make these Caramel Chocolate Pinwheel Cookies.
Rubber Spatula: Perfect for scraping down bowls, ensuring all ingredients are fully incorporated, and gently mixing dough without overworking it.
Baking Sheets: Choose light-colored sheets to prevent the cookie bottoms from over-browning. Parchment-lined sheets are best for even baking.
Specialty Items (and Why They Help)
Parchment Paper: An absolute game-changer for pinwheel cookies! It prevents sticking and makes rolling out the dough and transferring layers incredibly easy, ensuring perfectly shaped pinwheel cookies.
Sharp Knife: Crucial for slicing the chilled dough log cleanly. A sharp blade creates crisp, defined pinwheel patterns without squishing or distorting the dough.
Plastic Wrap: Essential for chilling the dough. It prevents the dough from drying out and helps it firm up properly, which is vital for perfect rolling and slicing.
Crafting Your Caramel Chocolate Pinwheel Cookies: A Step-by-Step Guide
Mixing the Perfect Dough Base
Begin by creaming the softened unsalted butter with both granulated and light brown sugars in a large bowl. Beat with an electric mixer until the mixture is light, fluffy, and pale, a process that usually takes about 2-3 minutes. This critical step incorporates air, giving your cookies a wonderfully tender texture.
Next, beat in the large egg and vanilla extract until they are fully combined and smooth. In a separate bowl, whisk together the all-purpose flour, baking soda, and salt. Gradually add these dry ingredients to your wet mixture, mixing only until a soft, cohesive dough just forms. Avoid overmixing, as this can develop gluten and lead to tough cookies.
Introducing the Chocolate Swirl
Divide the freshly made dough precisely in half. To one half, add the unsweetened cocoa powder and 2 tablespoons of milk. Mix this portion until the cocoa is completely incorporated, and the chocolate dough boasts a uniform, rich brown color.
It’s important that both doughs have a similar consistency for easy layering. If your chocolate dough feels too dry or stiff, add an additional teaspoon of milk at a time, mixing after each addition, until its pliability closely matches the plain dough.
The Crucial Chilling Phases
This is where the magic for perfect Caramel Chocolate Pinwheel Cookies truly begins! Take each half of the dough (plain and chocolate) and flatten it into an approximate rectangular shape. Wrap each rectangle separately and tightly in plastic wrap, pressing out any excess air.
Chill both doughs in the refrigerator for at least 30 minutes. This initial chill makes the dough firm enough to roll out without frustrating cracking or tearing, ensuring a smooth process for your beautiful pinwheel patterns.
Rolling, Layering, and Forming Your Log
On a lightly floured surface, or even better, between two sheets of parchment paper, roll out the plain dough into an approximately 12×8 inch rectangle. Repeat this exact process with your chocolate dough, ensuring both rectangles are the same size and thickness for even layers.
Carefully peel off the top parchment paper from the chocolate dough. Then, invert the chocolate dough directly onto the plain dough, peeling the bottom parchment paper off as you go. Gently align the edges as precisely as you can to create a seamless base for your swirls.
Starting from one long edge, tightly roll the layered dough into a snug log. The chilling you did earlier ensures the dough is pliable enough to roll without cracking, creating beautifully defined layers. Wrap this entire log tightly in plastic wrap once more and chill for at least 2 hours, or until it is very firm. This second chill is absolutely crucial for easy, clean slicing and to maintain that stunning swirl shape.
Baking to Golden Perfection
When you’re ready to bake, preheat your oven to 375 degrees F (190 degrees C). Line your baking sheets with fresh parchment paper; this prevents sticking and aids in even baking. Remove the thoroughly chilled dough log from the refrigerator and unwrap it.
Using a very sharp knife, slice the log into precise 1/4 inch thick rounds. A sharp knife is key here to prevent squishing and ensure neat, distinct pinwheel shapes. Place the cookie rounds about 2 inches apart on your prepared baking sheets, allowing for slight spreading.
Bake for 8-10 minutes. Watch them closely: the edges should be lightly golden, and the centers should appear just set. Avoid overbaking, as this will lead to dry, hard cookies. Remember, cookies continue to set as they cool.
The Finishing Touch: Drizzles of Delight
Once baked, let the Caramel Chocolate Pinwheel Cookies cool on the baking sheets for about 5 minutes. This allows them to firm up slightly before you attempt to move them. Then, carefully transfer the cookies to a wire rack to cool completely.
When fully cooled, it’s time for the final, decadent touch! Drizzle the melted chocolate chips and warm caramel sauce generously over the cookies. The combination of sweet caramel and rich chocolate elevates these pinwheel cookies to an extraordinary treat.
Unlocking the “No-Crack” Secret: Why Chilling is Key
The success of perfectly defined Caramel Chocolate Pinwheel Cookies lies in understanding and executing the chilling phases correctly. It’s the secret weapon against cracking dough and distorted swirls.
These two distinct chilling steps serve different, yet equally vital, purposes in the baking process.
The First Chill: Pliable Dough, No Tears
The initial 30-minute chill transforms the freshly mixed dough from a soft, sometimes sticky texture into a more manageable, firm state. This firmness is essential because it provides the structural integrity needed for rolling without the dough tearing or cracking under pressure.
Cold dough is significantly less likely to stick to your rolling surface or parchment paper, making the process of creating even rectangles and layering the two doughs significantly easier and cleaner. This prevents frustration and ensures a smooth start to your pinwheel pattern.
The Second Chill: Sliceable Logs, Defined Swirls
The extended 2-hour (or longer) chill is absolutely critical for the success of your Caramel Chocolate Pinwheel Cookies. During this period, the butter in the dough fully solidifies and firms up both the plain and chocolate layers.
This firmness allows you to slice the dough cleanly with a very sharp knife, yielding perfectly round, distinct pinwheel shapes. Without this thorough chill, the dough would be too soft, leading to squished, distorted cookies and messy, ill-defined swirls.
Troubleshooting Common Pinwheel Cookie Problems
Even with expert guidance, baking can sometimes present challenges. Here are solutions to common issues you might encounter while making your swirl cookies.
Don’t be discouraged; a little troubleshooting can turn any batch into a triumph!
My Dough is Cracking While Rolling!
Ensure your dough was chilled for the full 30 minutes, or even longer if your kitchen is warm. Cold dough is pliable, not brittle. If it still cracks, let it sit at room temperature for just 2-3 minutes to slightly soften, then try again.
You might also be using too much flour on your surface, which can dry out the dough and make it more prone to cracking. Try rolling between two sheets of parchment paper instead for minimal flour use and easier handling.
My Swirls Aren’t Defined!
This often points to insufficient chilling of the rolled log. It needs to be very firm before slicing to hold its shape. Make sure the log is wrapped tightly in plastic wrap, pressing out any air, and chilled for the full 2 hours or more.
Another factor could be not rolling the layered dough tightly enough in step 7. A loose roll will result in gaps and less distinct, blurry swirls in your finished cookies.
The Cookies Spread Too Much!
Warm dough is a common culprit for excessive spreading. If your kitchen is hot, or your dough sat out too long before baking, the butter softens excessively. Pop the sliced cookies back into the fridge for 10-15 minutes before baking to firm them up.
Also, double-check your oven temperature with an oven thermometer; an inaccurate oven that runs too cool can lead to unexpected spreading as the cookies take too long to set.
My Cookies Are Dry/Hard!
Overbaking is almost always the cause of dry or hard cookies. Pinwheel cookies bake relatively quickly, so keep a close eye on them during the final minutes of baking.
Remove them from the oven when the edges are just barely golden and the centers look slightly soft. They will continue to set and firm up as they cool on the baking sheet, achieving that perfect tender texture.
Expert Tips for Your Best Batch Yet
Don’t Overmix!
Once you add the dry ingredients to the wet, mix only until just combined. Overmixing develops the gluten in the flour, which can lead to tough, dense cookies instead of the desired tender texture. Stop mixing as soon as no dry streaks of flour remain.
Precision Rolling for Perfect Layers
Aim for even thickness when rolling both the plain and chocolate doughs. Inconsistent thickness will result in uneven layers and a less appealing pinwheel pattern. Use a ruler to help achieve those accurate 12×8 inch rectangles for flawless layering.
The Sharp Knife Advantage
A very sharp knife is your best friend when slicing the chilled dough log. It will cut through the firm dough cleanly without dragging or distorting the beautiful pinwheel shape. A dull knife will squish the dough, creating uneven, messy cookies.
Customize Your Drizzle
While chocolate and caramel are classic and delicious, feel free to get creative with your toppings! You could use white chocolate, a different flavored ganache, or even a sprinkle of sea salt flakes over the caramel for a salted caramel chocolate cookie. For another customizable dessert idea, try these decadent pumpkin pie truffles!
Serving Suggestions & Storage Solutions
Once your beautiful Caramel Chocolate Pinwheel Cookies are baked and decorated, you’ll want to enjoy them at their best. Here’s how to serve them and keep them fresh.
These tips ensure every cookie is as delightful as the first.
Ways to Enjoy Your Caramel Chocolate Pinwheel Cookies
These stunning homemade cookies are perfect on their own with a cup of coffee, tea, or a cold glass of milk. They also make a fantastic addition to any dessert platter, especially during holidays or special occasions, thanks to their eye-catching design.
Consider packaging them in a beautiful box as a thoughtful homemade gift for friends, family, or teachers. They’re also delightful crumbled over vanilla ice cream for an extra-special treat, adding texture and a burst of flavor.
Keeping Them Fresh: Storage Tips
Store baked and cooled Caramel Chocolate Pinwheel Cookies in an airtight container at room temperature for up to 3-4 days. For slightly longer freshness, you can refrigerate them for up to a week.
If you’re making a big batch, layering parchment paper between cookie layers in your container helps prevent sticking and preserves their beautiful appearance and shape.
Can You Make Them Ahead?
Absolutely! You can prepare the entire dough log (before slicing) and keep it tightly wrapped in plastic wrap in the refrigerator for up to 3 days. When ready to bake, simply remove, slice, and proceed with baking as directed.
This makes them an excellent option for entertaining, as most of the prep can be done in advance, allowing for warm, freshly baked cookies at a moment’s notice.
Frequently Asked Questions (FAQs)
Can I Use Different Flavors for the Dough?
Yes, you can certainly experiment with different flavors! Instead of cocoa, you could add a teaspoon of espresso powder to one half for a mocha swirl, or even a different food coloring for a vibrant, fun look. The key is to maintain the dough’s consistency between the two halves. If you enjoy patterned bakes, you might also love making a classic marble bundt cake for a different kind of swirl!
Can I Freeze Caramel Chocolate Pinwheel Cookies?
Yes, these Caramel Chocolate Pinwheel Cookies freeze beautifully! You can freeze the unsliced dough log, tightly wrapped first in plastic wrap and then in foil, for up to 3 months. Thaw it slightly in the refrigerator before slicing and baking.
Baked cookies can also be frozen in an airtight container for up to 2 months; simply thaw them at room temperature before serving for the best texture and flavor.
What if I Don’t Have Parchment Paper?
While highly recommended for ease and perfect results, you can roll the dough directly on a lightly floured surface. However, be extra careful when transferring the chocolate dough layer to the plain dough, as it can be more prone to tearing without the parchment’s help.
You might need to use a large spatula or gently flip it over by hand, working quickly to minimize tearing and maintain the shape of your layers.
Are There Gluten-Free Alternatives?
You can substitute the all-purpose flour with a 1:1 gluten-free baking blend that contains xanthan gum. The texture might be slightly different, potentially a bit more crumbly or less crisp, but the flavor will still be delicious.
Follow the recipe as written for all other ingredients and steps, as those generally won’t require gluten-free adjustments.
Ready to Bake? Your Perfect Pinwheel Journey Awaits!
Now that you’re armed with all the secrets to flawless Caramel Chocolate Pinwheel Cookies, it’s time to get baking! This recipe truly takes the guesswork out of creating these show-stopping treats, ensuring beautiful results every time.
Dive in, create your own stunning swirls, and savor the delightful combination of rich chocolate and gooey caramel. Don’t forget to share your masterpieces with us – we can’t wait to see your perfect pinwheels!
Caramel Chocolate Pinwheel Cookies
Course: DessertCuisine: AmericanDifficulty: medium3
dozen cookies50
minutes10
minutes470
kcal240
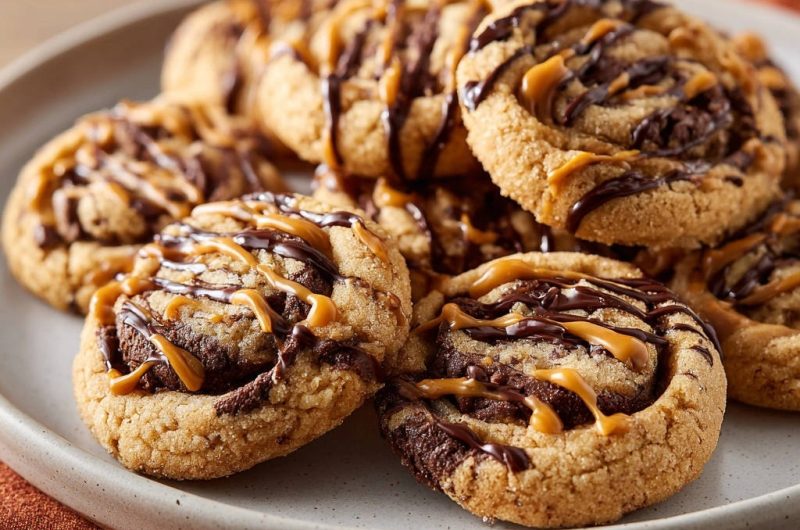
minutesMaster the art of beautiful pinwheel cookies with this easy-to-follow recipe, designed to prevent cracking and tearing. Enjoy perfectly swirled Caramel Chocolate Pinwheel Cookies, enhanced with a luscious drizzle of melted chocolate and warm caramel sauce. The secret is in the chilling, ensuring impressive results every time.
Ingredients
1 cup unsalted butter, softened
1/2 cup granulated sugar
1/2 cup packed light brown sugar
1 large egg
1 teaspoon vanilla extract
2 1/4 cups all-purpose flour
1 teaspoon baking soda
1/2 teaspoon salt
1/4 cup unsweetened cocoa powder
2 tablespoons milk (any kind)
1/2 cup chocolate chips, melted
1/4 cup caramel sauce, warmed
Directions
- In a large bowl, cream together the softened butter, granulated sugar, and light brown sugar until light and fluffy. Beat in the egg and vanilla extract until well combined.
- In a separate bowl, whisk together the all-purpose flour, baking soda, and salt. Gradually add the dry ingredients to the wet ingredients, mixing until just combined and a soft dough forms.
- Divide the dough in half. To one half, add the unsweetened cocoa powder and milk. Mix until the cocoa is fully incorporated and the chocolate dough is a uniform color. If the chocolate dough feels too dry, add an additional teaspoon of milk at a time until it matches the consistency of the plain dough.
- This is the key to perfect swirls! Flatten each dough half into a rectangle, wrap separately in plastic wrap, and chill both doughs in the refrigerator for at least 30 minutes. This makes the dough firm enough to roll without cracking.
- On a lightly floured surface, or between two sheets of parchment paper, roll out the plain dough into an approximately 12×8 inch rectangle. Repeat with the chocolate dough, rolling it to the same size.
- Carefully peel the top parchment paper off the chocolate dough. Invert the chocolate dough onto the plain dough (peeling the bottom parchment paper off as you go), aligning the edges as best you can.
- Starting from one long edge, tightly roll the layered dough into a log. The chilling ensures the dough is pliable enough to roll without cracking, creating clean, defined layers. Wrap the log tightly in plastic wrap and chill for at least 2 hours, or until very firm. This second chill is crucial for easy slicing and maintaining the swirl shape.
- Preheat your oven to 375 degrees F (190 degrees C). Line baking sheets with parchment paper.
- Remove the dough log from the refrigerator and unwrap it. Using a sharp knife, slice the log into 1/4 inch thick rounds. Place the cookie rounds about 2 inches apart on the prepared baking sheets.
- Bake for 8-10 minutes, or until the edges are lightly golden and the centers are just set. Do not overbake.
- Let the cookies cool on the baking sheets for 5 minutes before transferring them to a wire rack to cool completely.
- Once cooled, drizzle the melted chocolate chips and warm caramel sauce over the cookies for an extra touch of deliciousness.
Notes
- Ensure thorough chilling of the dough at each stage for perfect swirls and easy slicing.