Sticky Herb Glazed Chicken: Your Secret to Tender Perfection
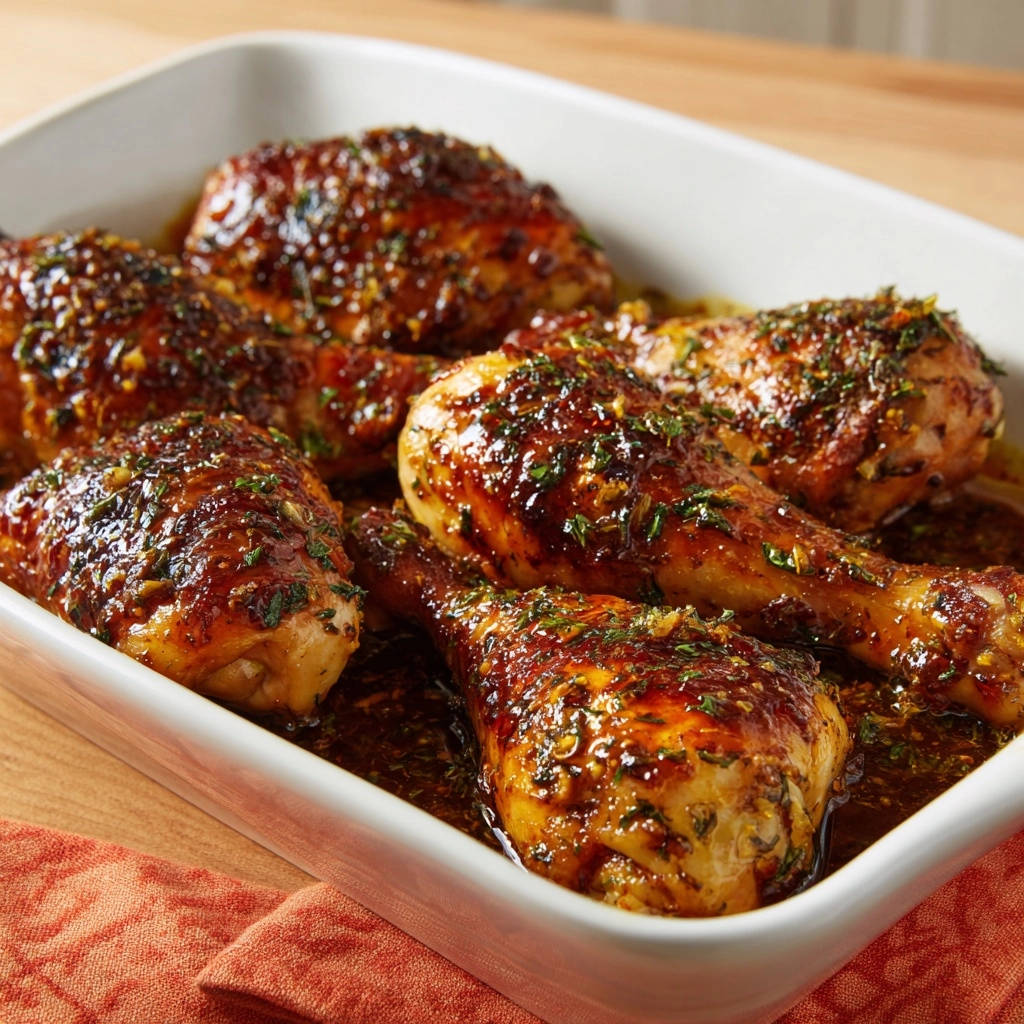
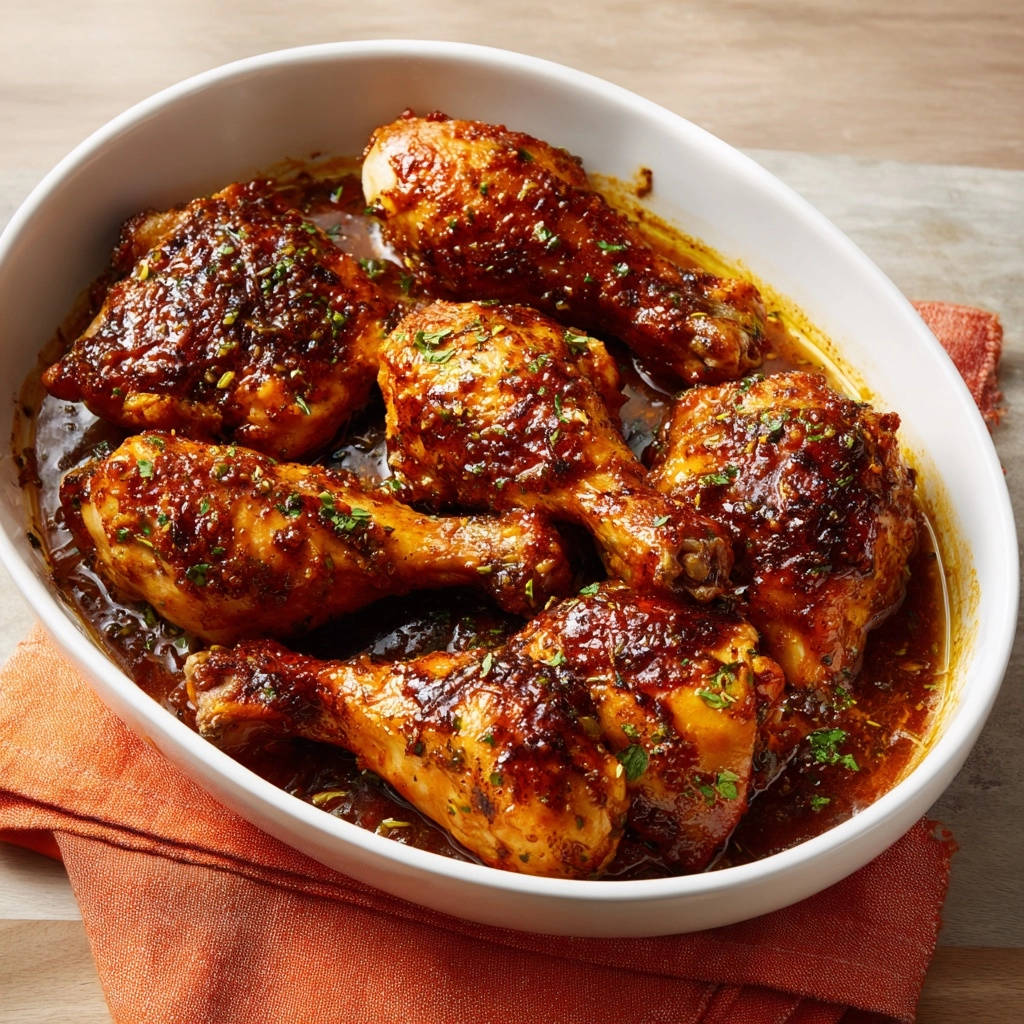
There’s nothing quite as disheartening as pulling a beautiful roast chicken from the oven, only to find it disappointingly dry. My culinary journey changed forever the day I perfected this Sticky Herb Glazed Chicken recipe.
It’s the ultimate solution to consistently achieve perfectly tender, juicy chicken every single time, enveloped in a rich, irresistible glaze that will have everyone asking for seconds. This dish promises a truly unforgettable meal experience.
Why This Sticky Herb Glazed Chicken Will Transform Your Dinner Table
Achieving Unmatched Tenderness and Juiciness
This recipe employs a strategic two-stage baking process that locks in moisture from the very start. Covering the chicken creates a steamy environment, ensuring it cooks gently and absorbs flavor without drying out.
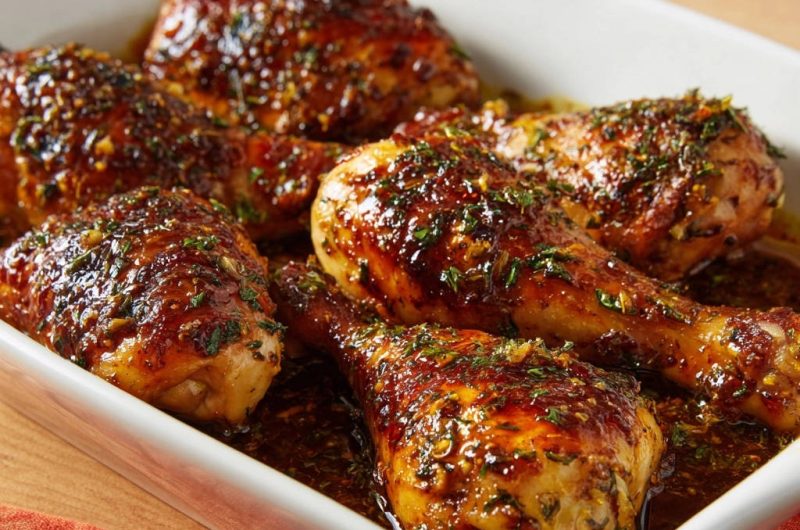
The subsequent uncovered baking, combined with frequent basting, develops that desirable sticky glaze while keeping the chicken incredibly juicy right up to the crisp skin.
The Irresistible Herb Glaze: A Flavor Powerhouse
Our unique glaze is a masterful blend of sweet brown sugar, savory soy sauce, bright apple cider vinegar, pungent garlic, and aromatic herbs.
This combination creates a complex, perfectly balanced flavor profile that beautifully caramelizes onto the chicken, making every bite a delight.
Effortless Preparation, Impressive Results
Despite its gourmet taste and appearance, this Sticky Herb Glazed Chicken is remarkably simple to prepare.
It’s perfect for busy weeknights, yet elegant enough to impress guests at a special gathering, requiring minimal hands-on time for maximum impact.
The Building Blocks: Ingredients for Your Perfect Glazed Chicken
The Star: Chicken Cuts and Preparation
We opt for chicken drumsticks and thighs, cuts celebrated for their rich flavor and natural juiciness.
Patting the chicken thoroughly dry before seasoning is crucial; this step ensures the seasoning adheres properly and promotes a beautifully crisp skin during the final bake.
Crafting the Luscious Herb Glaze
Light brown sugar provides the perfect sweetness and caramelization, while soy sauce adds deep umami and saltiness.
Apple cider vinegar introduces a crucial tangy balance to cut through the richness. Minced garlic infuses the glaze with aromatic depth.
Fresh parsley offers a vibrant, herbaceous freshness, complementing the earthy dried thyme (if used). Chicken broth thins the glaze to the perfect consistency for coating and ensures tenderness.
Pantry Staples for Seasoning
Generous seasoning with salt and black pepper forms the foundational layer of flavor for the chicken itself.
This simple yet essential step enhances the chicken’s natural taste and ensures the glaze has a flavorful canvas to adhere to.
Equipping Your Kitchen: Must-Have Tools for Success
Large Baking Dish: Essential for comfortably accommodating all chicken pieces and containing the generous amount of delicious glaze.
Whisk: Used for smoothly combining all the glaze ingredients, ensuring a uniform and lump-free sauce.
Aluminum Foil: Crucial for tightly covering the baking dish during the initial cooking phase, which locks in moisture and tenderizes the chicken.
If this caramelization is what you are after, try these glazed baked chicken thighs for an even crispier finish.
Meat Thermometer: Your best friend for ensuring perfectly cooked chicken every time. It guarantees the chicken reaches a safe internal temperature of 165°F (74°C) without overcooking.
Basting Spoon or Brush: Indispensable for spooning the pan juices over the chicken during the uncovered baking, which builds the sticky glaze and adds flavor.
Your Path to Sticky Herb Glazed Chicken Perfection: A Detailed Guide
- Prepare and Season the Chicken:
Pat the chicken pieces thoroughly dry with paper towels to ensure crispy skin and better seasoning adherence.
Season generously with salt and black pepper on all sides, ensuring a flavorful base for the glaze.
- Whisk Together the Glaze:
In a medium bowl, combine the minced garlic, packed light brown sugar, soy sauce, apple cider vinegar, fresh chopped parsley, dried thyme (if using), and chicken broth.
Whisk well until all ingredients are fully incorporated and the sugar has dissolved, creating your rich, aromatic glaze.
- Arrange Chicken and Add Glaze:
Place the seasoned chicken pieces in the prepared baking dish.
Pour the entire glaze mixture evenly over the chicken, ensuring each piece is well-coated and nestled in the luscious liquid at the bottom of the dish.
- Initial Covered Baking:
Cover the baking dish tightly with aluminum foil.
Bake for 30 minutes in the preheated 375°F (190°C) oven. This crucial step creates a steamy environment, locking in moisture and allowing the chicken to gently cook while absorbing the delicious flavors.
- Uncover and Increase Heat:
Carefully remove the foil from the baking dish, being mindful of the steam.
Increase the oven temperature to 400°F (200°C) to facilitate browning and glaze development on the chicken’s surface.
- Uncovered Baking and Basting:
Continue baking uncovered for another 25-35 minutes, or until the chicken reaches an internal temperature of 165°F (74°C) when measured with a meat thermometer at the thickest part.
During this final baking phase, baste the chicken every 10 minutes with the pan juices. This frequent basting is key to building that beautiful, sticky glaze and keeping the chicken incredibly juicy as it finishes cooking and browns to perfection.
- Rest Before Serving:
Once cooked, remove the chicken from the oven.
Let it rest in the baking dish for 5-10 minutes before serving. This allows the juices to redistribute throughout the meat, ensuring maximum tenderness and flavor in every bite.
Spoon any remaining pan glaze over the chicken before serving for an extra burst of flavor and a beautiful presentation.
If you enjoy the sticky glaze on this chicken, the same technique works beautifully on these lemon thyme glazed thighs.
Chef’s Secrets: Elevating Your Sticky Herb Glazed Chicken Game
The Art of Basting: Maximizing Glaze & Moisture
Frequent basting isn’t just about flavor; it’s a critical technique for moisture retention and glaze development. Each time you baste, you re-coat the chicken with the rich pan juices, allowing layers of the sticky glaze to build up and caramelize.
This process also helps to regulate the surface temperature of the chicken, preventing it from drying out as it browns.
Temperature Control: The Key to Juicy Chicken
A reliable meat thermometer is your secret weapon against dry chicken. Always aim for an internal temperature of 165°F (74°C) in the thickest part of the meat, avoiding the bone.
Equally important is the resting period after baking; this allows the muscle fibers to relax and reabsorb juices, resulting in incomparably tender chicken.
Customizing Your Herb Glaze
Feel free to experiment with the glaze to suit your palate. For an Asian-inspired twist, add a teaspoon of grated fresh ginger or a dash of sesame oil to the mixture.
If you prefer more heat, a pinch of red chili flakes will add a subtle kick. Vary your herbs with fresh rosemary or sage for a different aromatic profile that complements the sweet and savory notes beautifully.
Perfect Pairings: What to Serve with Your Glazed Chicken
Steamed Rice: An absolute classic, perfect for soaking up every last drop of the delectable sticky herb glaze.
Roasted Asparagus: Its slightly bitter, fresh flavor provides a lovely contrast to the richness of the chicken.
Garlic Mashed Potatoes: Creamy and comforting, they offer another excellent vehicle for the savory glaze.
Sautéed Green Beans with Toasted Almonds: A simple, vibrant side that adds texture and a fresh crunch.
Simple Green Salad with Vinaigrette: A light, refreshing salad can balance the meal beautifully, offering a palate cleanser.
Meal Prep & Leftover Magic: Storing Your Glazed Chicken
Safe Storage for Freshness
To keep your Sticky Herb Glazed Chicken fresh and safe, allow it to cool completely before transferring to an airtight container.
Store it in the refrigerator for up to 3-4 days. For longer storage, the chicken can be frozen for up to 2-3 months, ideally in individual portions.
Reheating for Optimal Flavor
For best results, reheat the chicken in the oven at 300°F (150°C) until warmed through, often about 15-20 minutes, to prevent drying out.
Alternatively, you can gently reheat individual portions in a microwave or a covered skillet on the stovetop over low heat, adding a splash of broth if needed to maintain moisture.
Make-Ahead Marvel: Prep in Advance
The glaze can be prepared up to 2-3 days in advance and stored in an airtight container in the refrigerator.
On cooking day, simply pat dry and season your chicken, pour over the pre-made glaze, and proceed with the baking instructions. This significantly cuts down on active prep time.
What goes well with sticky herb chicken?
That sticky glaze and tender meat work great with something cool and crunchy, plus a soft roll to catch every last bit of sauce.
- A tangy, crisp side like this Crunchy Creamy Southern Style Coleslaw cuts through the richness of the chicken and adds texture contrast.
- For sopping up the glaze, try these Soft Buttery Garlic Herb Dinner Rolls – the garlic butter matches the herb notes in the chicken.
Troubleshooting Your Sticky Herb Glazed Chicken: Common Issues Solved
Why Is My Chicken Dry?
The most common culprit for dry chicken is overcooking. Even a few degrees past 165°F (74°C) can make a significant difference in texture.
Ensure you use a reliable meat thermometer and remove the chicken promptly once it reaches the target temperature. Insufficient basting can also contribute; make sure to baste frequently during the uncovered stage.
Glaze Not Thickening Enough?
If your glaze seems too thin after the chicken is cooked and rested, you can easily thicken it.
Carefully pour the pan juices into a small saucepan and simmer over medium-high heat, stirring occasionally, until it reduces to your desired consistency. A cornstarch slurry (1 tsp cornstarch mixed with 1 tsp cold water) can also be whisked in for quicker thickening.
Chicken Not Browning?
Ensure your oven temperature is accurate; an oven thermometer can confirm this. Make sure the chicken isn’t overcrowded in the baking dish, allowing for proper air circulation.
Consistent basting helps build the caramelized crust. For a quick fix, if the chicken is cooked through but lacks color, a short stint under the broiler (watching carefully!) can achieve that beautiful golden-brown finish.
Your Top Questions About Sticky Herb Glazed Chicken, Answered
Can I Substitute Chicken Cuts?
Absolutely! This Sticky Herb Glazed Chicken recipe works beautifully with other cuts. Boneless, skinless chicken thighs or breasts can be used, but adjust cooking times accordingly, as they will cook faster (typically 20-30 minutes total).
For a whole chicken, you would need to increase the baking time significantly and adjust the glaze quantity.
Is This Recipe Gluten-Free?
The original recipe contains soy sauce, which typically contains wheat. To make this recipe gluten-free, simply substitute the regular soy sauce with a gluten-free tamari or a certified gluten-free coconut aminos.
Always double-check all ingredient labels for hidden gluten.
Can I Make This Spicier or Sweeter?
Yes, the glaze is very adaptable! To add a kick, whisk in a pinch of red pepper flakes, a dash of hot sauce like Sriracha, or a teaspoon of finely grated fresh ginger.
For a sweeter glaze, you can slightly increase the amount of brown sugar or add a tablespoon of honey or maple syrup to the mixture.
What About Fresh vs. Dried Herbs?
Fresh parsley is specified for its vibrant flavor and visual appeal. While dried thyme is optional, fresh thyme can also be used for an even more pronounced herbaceous note.
When substituting, remember the general rule: use three times the amount of fresh herbs compared to dried herbs (e.g., 1 tablespoon fresh parsley for 1 teaspoon dried).
Unleash the Flavor: Your Next Dinner Awaits!
This Sticky Herb Glazed Chicken is more than just a meal; it’s a promise of consistent perfection, delivering juicy, flavorful chicken every time. It’s a dish that brings smiles to the table and confidence to the cook.
Go ahead, give this recipe a try tonight, and prepare to elevate your dinner game. We can’t wait to hear how this becomes a new favorite in your kitchen!
Sticky Herb Glazed Chicken
Course: Main CourseCuisine: AmericanDifficulty: easy4
servings15
minutes1
hour450
kcal75
minutesTired of dry chicken? This recipe reveals the simple secret to perfectly tender, flavorful chicken every time. Featuring juicy drumsticks and thighs coated in a luscious herb glaze, it’s guaranteed to change your chicken game.
Ingredients
4 chicken drumsticks
4 chicken thighs
1 tablespoon olive oil
4 cloves garlic, minced
1/4 cup light brown sugar, packed
1/4 cup soy sauce
2 tablespoons apple cider vinegar
1 tablespoon fresh parsley, chopped
1 teaspoon dried thyme (optional, for flavor depth)
1/2 cup chicken broth
Salt, to taste
Black pepper, to taste
Directions
- Preheat your oven to 375 degrees Fahrenheit. Lightly grease a large baking dish.
- Pat the chicken pieces thoroughly dry with paper towels. Season generously with salt and black pepper.
- In a medium bowl, whisk together the minced garlic, brown sugar, soy sauce, apple cider vinegar, parsley, dried thyme (if using), and chicken broth. This will be your luscious glaze.
- Place the seasoned chicken pieces in the prepared baking dish. Pour the entire glaze mixture evenly over the chicken, making sure each piece is well-coated and sitting in some of the liquid.
- Cover the baking dish tightly with aluminum foil. This is the crucial step for keeping your chicken moist! Bake for 30 minutes, allowing the chicken to gently cook and absorb the flavors while locking in its natural juices.
- Remove the foil. Increase the oven temperature to 400 degrees Fahrenheit.
- Continue baking uncovered for another 25-35 minutes, or until the chicken reaches an internal temperature of 165 degrees Fahrenheit. During this time, baste the chicken every 10 minutes with the pan juices. This frequent basting will help build that beautiful, sticky glaze and ensure the chicken stays incredibly juicy as it finishes cooking and browns.
- Once cooked, remove the chicken from the oven. Let it rest in the baking dish for 5-10 minutes before serving, allowing the juices to redistribute for maximum tenderness. Spoon any remaining pan glaze over the chicken before serving.
Notes
- Basting frequently during the uncovered baking phase is key for a sticky glaze and juicy result.