Creamy Dill & Bacon Cheese Ball: The Non-Watery Secret!
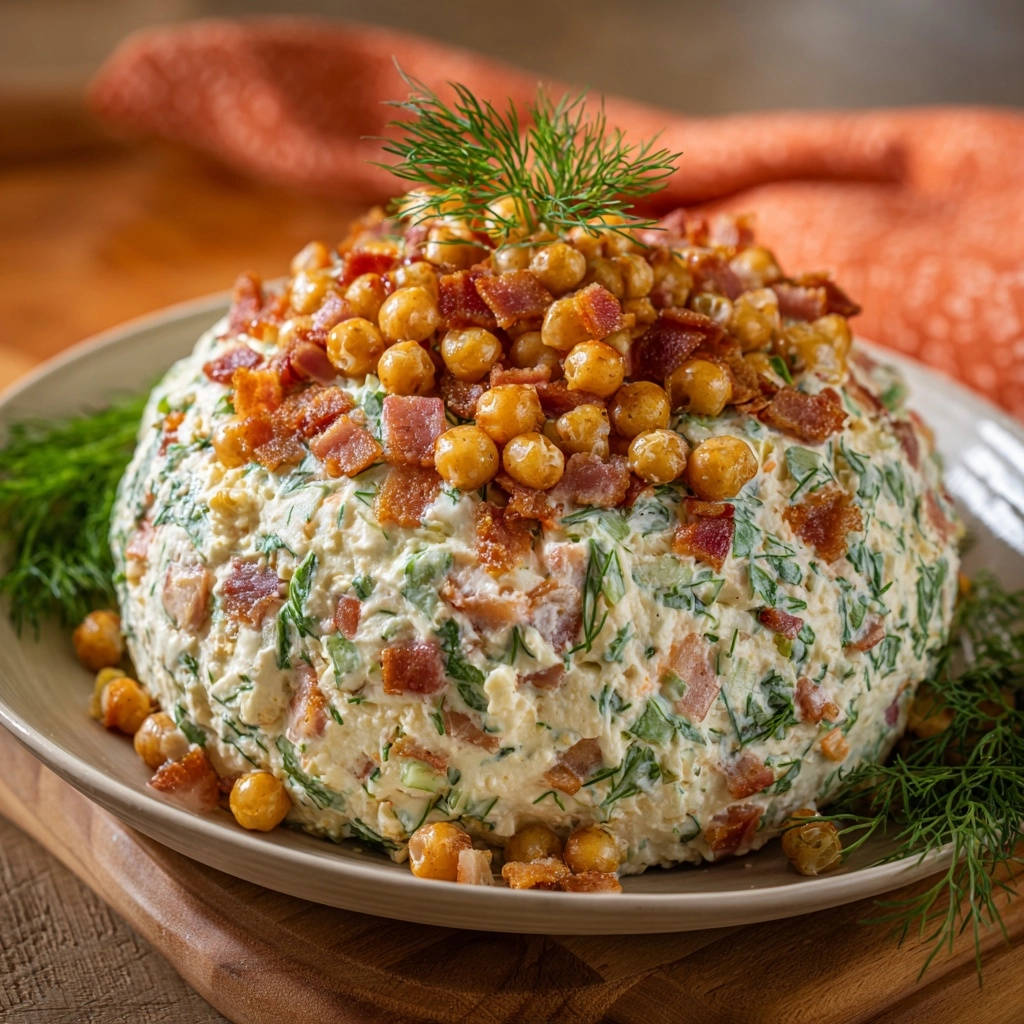
There’s nothing more disheartening than preparing a beautiful party dip, only to watch it become a watery, sad mess after sitting out. If you’ve ever struggled with a cheese ball that just won’t hold its fresh, creamy texture, I have the definitive secret. This recipe ensures every scoop of our incredible Creamy Dill & Bacon Cheese Ball stays perfectly thick and delightfully firm, from the first elegant spread to the very last bite!
The Cheese Ball That Stays Creamy: No More Watery Dips!
Why Our Recipe Stands Out from the Rest
Unlike many traditional cheese ball recipes, ours meticulously addresses the common issue of watery texture. We employ specific techniques to ensure a consistently firm and delightful spread from start to finish.
Our focus on precise ingredient preparation, particularly the cucumber, combined with a crucial chilling step, guarantees your Creamy Dill & Bacon Cheese Ball maintains its luxurious consistency and vibrant flavor profile without compromise.
Perfect for Every Occasion
Whether you’re hosting a sophisticated holiday gathering, a casual game night, or simply looking for an elevated appetizer, this cheese ball fits seamlessly into any menu. It consistently earns rave reviews and is always a crowd-pleaser.
If you love the creamy, no-watery texture of this cheese ball, you’ll want to try this creamy chicken bacon Brussels dip for your next gathering.
Its incredibly make-ahead friendly nature makes it an ideal choice for busy hosts, allowing you to focus on enjoying your guests rather than stressing about last-minute kitchen tasks.
Building Your Flavor Foundation: Ingredients for Success
The Creamy Base: Softened Essentials
Full-fat cream cheese provides the rich, decadent foundation for our cheese ball. Ensure it’s fully softened to room temperature for a smooth, lump-free mixture that blends beautifully.
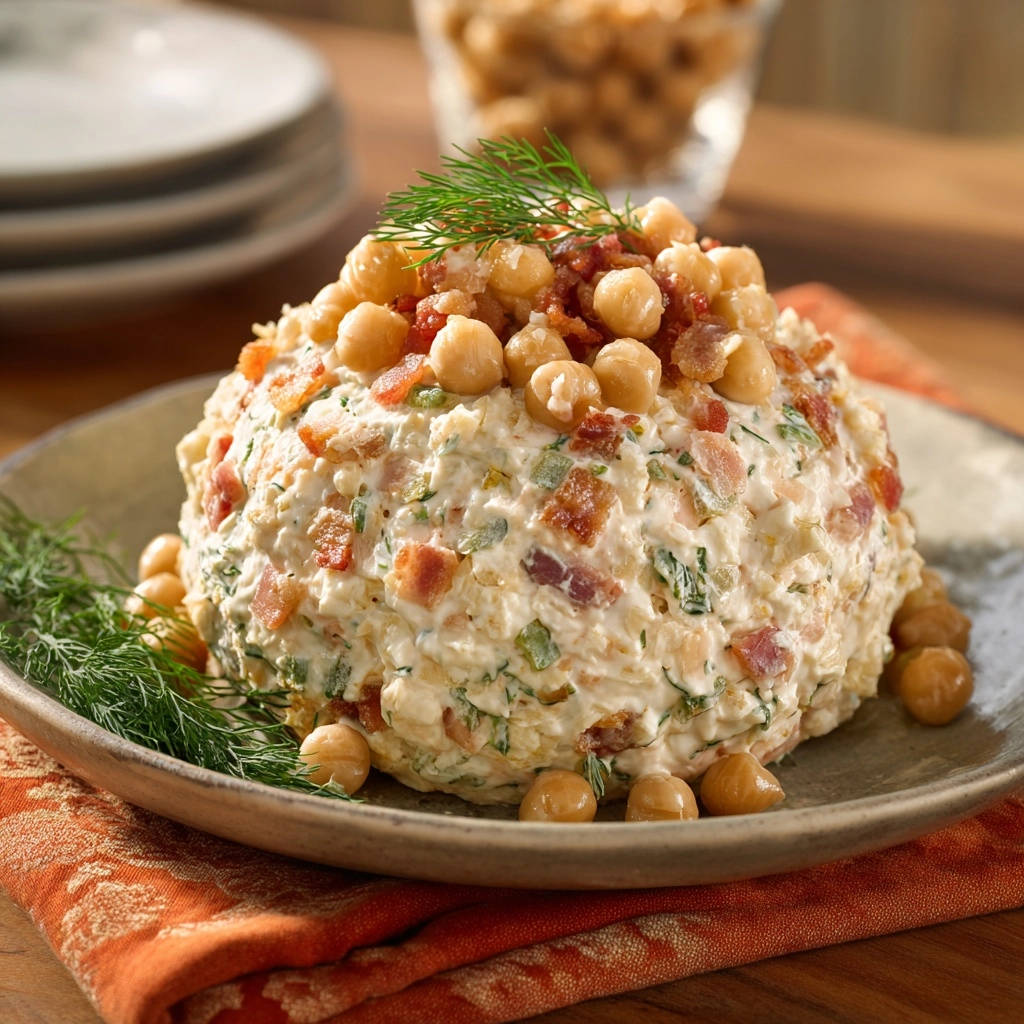
Mayonnaise adds an extra layer of luscious creaminess and a subtle, balancing tang. It complements the other flavors without ever overpowering the delicate dill notes.
Fresh Herbs & Vibrant Veggies: The Dill & Cucumber Difference
Fresh dill is paramount in this recipe, offering a bright, herbaceous note that truly defines the cheese ball’s signature flavor. Chop it finely for even distribution throughout the mix.
Finely chopped fresh chives or parsley introduce a mild, oniony freshness or a complementary green accent. Use whichever is available or suits your preference for a subtle aromatic lift.
English cucumber, when meticulously prepped, is our secret weapon against a watery dip. Its crispness adds a refreshing texture, while careful deseeding and drying prevent any unwanted moisture release.
Savory Crunch: Bacon & Chickpeas
Crispy bacon bits provide an irresistible smoky, salty counterpoint and a delightful crunch. Cooking until very crisp and draining well are crucial for the best texture and flavor.
Roasted chickpeas offer a unique, healthy crunch and an earthy flavor. They are a delightful alternative to nuts, adding satisfying texture without heaviness.
Spices & Seasoning: Elevating Every Bite
Garlic powder and onion powder infuse the cheese ball with essential aromatic depth. They create a savory backbone that perfectly supports the fresh dill and creamy base.
Salt and black pepper are essential for seasoning, balancing and enhancing all the other ingredients. Always adjust these to your personal taste preference for a perfectly seasoned spread.
Essential Tools for Your Creamy Dill & Bacon Cheese Ball
Mixing & Prepping Must-Haves
Large Mixing Bowl: Essential for combining all the cheese ball ingredients effectively and with plenty of room.
Hand Mixer or Sturdy Spoon: To ensure the softened cream cheese and mayonnaise are perfectly smooth and lump-free.
Fine-Mesh Sieve or Colander: Absolutely critical for draining excess moisture from the cucumber, directly preventing a watery cheese ball.
Paper Towels: For thoroughly drying the cucumber after draining, a step that cannot be skipped for optimal texture.
Shaping & Chilling Aids
Plastic Wrap: Indispensable for forming and tightly sealing the cheese ball. This helps it achieve its perfect spherical shape and firm consistency during chilling.
Serving Plate: To beautifully present your finished Creamy Dill & Bacon Cheese Ball masterpiece.
Crafting Your Creamy Dill & Bacon Cheese Ball: Step-by-Step Perfection
-
Step 1: The “No Watery Dip” Cucumber Prep
Begin by peeling and deseeding the English cucumber, then finely dicing it into small, uniform pieces. This precision ensures both an even texture throughout the cheese ball and faster moisture release.
Place the diced cucumber in a fine-mesh sieve or colander, sprinkle it with a pinch of salt, and let it sit for 15-20 minutes. This crucial step draws out excess moisture, actively preventing your cheese ball from becoming watery later.
Press firmly with a spoon or your hands to squeeze out as much liquid as possible, then pat the cucumber completely dry with paper towels. Thorough drying is non-negotiable for achieving a firm, deliciously textured cheese ball.
-
Step 2: Bacon & Chickpea Crunch
Cook the crispy bacon until it is very crisp, then drain any excess fat thoroughly on paper towels. Once cooled slightly, crumble it into small, bite-sized bits, ready to be incorporated and used as a topping.
If you’re not using pre-roasted chickpeas, drain, rinse, and thoroughly dry canned chickpeas before roasting them in the oven or air fryer until they are golden and delightfully crispy. This adds a delightful, unexpected textural element and earthy flavor.
-
Step 3: Whipping the Creamy Base
In a large mixing bowl, combine the fully softened full-fat cream cheese and mayonnaise. Use a hand mixer or a sturdy spoon to mix until the mixture is completely smooth and thoroughly combined.
Ensure there are absolutely no lumps of cream cheese, as this perfectly smooth foundation is key for the cheese ball’s luxurious and spreadable texture.
-
Step 4: Folding in Flavors & Textures
Gently fold in the finely chopped fresh dill, chives (or parsley), garlic powder, onion powder, salt, pepper, and most of the thoroughly dried cucumber. At this point, reserve a small amount of the crispy bacon bits and roasted chickpeas for topping later.
Add the remaining bacon bits and chickpeas to the cream cheese mixture and mix gently until just combined. Be careful not to overmix, as this can develop the cheese too much, potentially leading to a tougher or less airy texture.
-
Step 5: Forming the Perfect Sphere
Lay out a piece of plastic wrap on a clean, flat surface. Carefully spoon the Creamy Dill & Bacon Cheese Ball mixture into the center of the plastic wrap.
Gather the edges of the plastic wrap, gently shaping the mixture into a firm, round ball. Twist the top of the plastic wrap tightly to seal, ensuring a compact and well-formed shape.
-
Step 6: The Chill Factor: Flavor Melding & Firmness
Refrigerate the cheese ball for a minimum of 2 hours, or ideally overnight. This chilling period is absolutely crucial for two important reasons.
First, it allows all the delicious flavors from the herbs, spices, and bacon to meld together, significantly deepening and harmonizing the taste. Second, and most importantly, it firms up the cheese ball, ensuring it holds its shape beautifully and prevents it from becoming watery or soft when you serve it.
-
Step 7: The Grand Unveiling: Serving Your Masterpiece
When you’re ready to serve, unwrap the thoroughly chilled Creamy Dill & Bacon Cheese Ball and carefully place it onto your chosen serving plate.
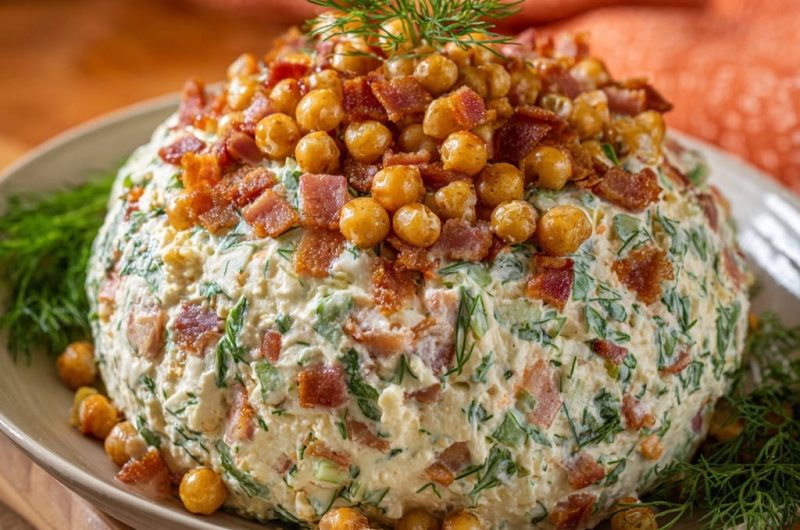
Generously top with the reserved crispy bacon bits and roasted chickpeas. Garnish artfully with fresh dill sprigs around and on top for an appealing, professional presentation.
Serve immediately with an assortment of crackers, warm pita bread, or crisp vegetable sticks for dipping, inviting everyone to enjoy your perfect party appetizer.
Chef’s Secrets: Elevate Your Creamy Dill & Bacon Cheese Ball Game
Mastering the Cucumber Prep: Never rush or skip the cucumber salting and drying process. This is the single most important step to prevent a watery cheese ball; press out every last drop of moisture!
Temperature Matters for Cream Cheese: Ensure your full-fat cream cheese is truly at room temperature. This allows it to blend smoothly with the mayonnaise, avoiding lumps and creating a uniformly creamy, irresistible base.
Customizing Your Crunch: While roasted chickpeas are fantastic, feel free to experiment with other crunchy additions like toasted pecans, walnuts, or even crushed pretzels for a different texture profile. For another delicious textural addition to your spread, consider trying our crispy baked asparagus as a side for a balanced appetizer platter.
Herb Freshness & Substitutions: Always opt for fresh dill and chives or parsley for the most vibrant flavor. If fresh herbs are unavailable, use about one-third the amount of dried herbs, but note the flavor will be less intense and fresh.
Seasoning to Taste: Taste your mixture before chilling (after all ingredients are combined, except for toppings) and adjust salt and pepper as needed. Flavors will meld and intensify slightly during the chilling process.
Aesthetic Garnish: Beyond just flavor, a beautiful presentation enhances the appeal of any dish. Use fresh dill sprigs, extra bacon bits, and chickpeas artfully arranged for a truly professional and inviting look.
Troubleshooting Common Cheese Ball Challenges
“Why is My Cheese Ball Too Soft or Watery?”
This common issue is almost always due to insufficient chilling time or inadequate moisture removal from the cucumber. Ensure you chilled the cheese ball for at least 2 hours, and preferably overnight, and rigorously dried the cucumber as instructed.
Overmixing the cream cheese can also slightly warm the mixture, contributing to a softer texture. Always mix just until the ingredients are combined and smooth.
“My Cheese Ball Crumbled When Serving!”
A crumbling cheese ball typically indicates it wasn’t chilled long enough to fully firm up. Extend the chilling time, as a well-chilled ball will be much easier to slice or scoop without falling apart.
Ensure your cream cheese was fully softened before mixing; if it started too cold, hard lumps could create weak points in the cheese ball’s structure.
“Flavors Aren’t Blending Well”
This often happens when the Creamy Dill & Bacon Cheese Ball isn’t given enough time to chill. The chilling period is absolutely essential for all the delicious ingredients to meld and their flavors to deepen and harmonize.
Always prioritize fresh herbs, as dried herbs can sometimes offer a less integrated or vibrant flavor profile if not properly incorporated or rehydrated.
Prep Ahead & Storage: Enjoying Your Cheese Ball Longer
Make-Ahead Magic: Saving Time
This Creamy Dill & Bacon Cheese Ball is a dream for make-ahead meal prep! You can prepare and form the cheese ball up to 2-3 days in advance of your event. Ensure it’s tightly wrapped in plastic wrap to prevent air exposure and kept refrigerated.
If you love the creamy, make-ahead convenience of this cheese ball, you will enjoy this loaded bacon chive dip for your next gathering.
Crucially, wait to add the reserved toppings (extra crispy bacon, roasted chickpeas, and fresh dill sprigs) until just before serving. This ensures optimal freshness, crunch, and visual appeal.
Optimal Storage for Freshness
Store any leftover cheese ball tightly wrapped in plastic wrap or an airtight container in the refrigerator for up to 3-4 days. This keeps it fresh and prevents it from absorbing any other refrigerator odors.
For the best quality and spreadability, bring it out of the refrigerator 10-15 minutes before serving. This allows it to soften slightly, enhancing its creamy texture and flavor.
Perfect Pairings: What to Serve with Your Creamy Dill & Bacon Cheese Ball
Classic Dippers & Beyond
An assortment of crackers, from buttery Ritz to crisp water crackers, is always a winning choice. Their neutral flavor allows the rich and herbaceous cheese ball to truly shine.
What to Serve With That Cheese Ball
If you are putting together a spread for guests or just want more cheesy options, these casseroles fit right alongside the creamy dill dip.
- For a side with crispy edges and a soft center, this Cheesy Hash Brown Casserole shares the same rich, baked-cheese appeal.
- If you want a version that stays firm and never turns watery, try this Cheesy Hash Brown Casserole for a reliable texture that pairs well with cold dips.
For a lighter and more refreshing option, offer a vibrant vegetable platter with crisp cucumber slices, crunchy carrot sticks, crisp celery, colorful bell pepper strips, and juicy cherry tomatoes. Toasted pita bread, thin baguette slices, or even mini bagels also make excellent and satisfying dippers.
Beverage Pairings
Pair this rich and flavorful Creamy Dill & Bacon Cheese Ball with a crisp, white grape juice like sparkling grape juice. The acidity cuts through the richness beautifully, refreshing the palate.
For non-alcoholic options, sparkling water with a hint of lemon or lime, or a light, unsweetened iced tea, offers a delightful and refreshing contrast to the savory notes.
Your Top Creamy Dill & Bacon Cheese Ball Questions Answered
Can I make this dairy-free?
While this specific recipe is built on traditional dairy cream cheese and mayonnaise, you can certainly experiment with plant-based cream cheese alternatives and vegan mayonnaise. Be aware that the texture and firmness might vary with substitutions, so adjust chilling time as needed to achieve your desired consistency.
How far in advance can I make it?
You can prepare and form the Creamy Dill & Bacon Cheese Ball up to 2-3 days in advance. Always keep it tightly wrapped in plastic wrap and stored in the refrigerator. Remember to add the fresh toppings just before serving to maintain their crispness and visual appeal.
What if I don’t have fresh dill?
Fresh dill is highly recommended for its vibrant, defining flavor in this recipe. If you absolutely must substitute, use about one-third the amount of dried dill. However, the flavor will be less intense and fresh; consider adding a squeeze of fresh lemon juice to brighten the overall taste.
Can I use different nuts instead of chickpeas?
Absolutely! Toasted pecans, walnuts, or even slivered almonds would be delicious substitutions for the roasted chickpeas. They will each add their own unique crunch and flavor profile, so ensure they are lightly toasted for the best aroma and texture.
Can I freeze the cheese ball?
Freezing is generally not recommended for cheese balls made with fresh vegetables and mayonnaise, as the texture can become watery and separated upon thawing. It’s truly best enjoyed fresh after refrigeration, ensuring the optimal creamy consistency.
Share Your Creamy Dill & Bacon Cheese Ball Success!
Now that you have the secret to a perfectly firm, incredibly flavorful, and never-watery Creamy Dill & Bacon Cheese Ball, it’s time to impress your family and friends at your next gathering!
We’d absolutely love to see your culinary creations! Share your photos and tag us on social media, or leave a comment below with your favorite serving suggestions. Your delicious adventures inspire us all.
For more delicious appetizer ideas and entertaining tips that make any gathering unforgettable, explore our collection of easy party recipes designed to delight every guest.
Cheese Ball
Course: AppetizerCuisine: AmericanDifficulty: easy1
large cheese ball (serves 8-12)30
minutes20
minutes350
kcal50
minutesTired of watery dips? This Creamy Dill & Bacon Cheese Ball recipe ensures a perfectly thick and delightful texture from the first scoop to the last. Featuring fresh dill, crispy bacon, and a crucial step for preventing wateriness, it’s ideal for any gathering.
Ingredients
2 (8-ounce) blocks full-fat cream cheese, softened
1/2 cup full-fat mayonnaise
1/4 cup fresh dill, finely chopped, plus sprigs for garnish
2 tablespoons fresh chives or parsley, finely chopped
1/2 cup English cucumber, peeled, deseeded, and finely diced
6 slices crispy bacon, cooked and crumbled
1/2 cup roasted chickpeas, lightly seasoned
1/2 teaspoon garlic powder
1/4 teaspoon onion powder
1/2 teaspoon salt (or to taste)
1/4 teaspoon black pepper (or to taste)
Directions
- Prep Vegetables for No Watery Dip: Peel and deseed the English cucumber. Finely dice it. Place the diced cucumber in a fine-mesh sieve or colander and sprinkle with a pinch of salt. Let it sit for 15-20 minutes to draw out excess moisture. Press firmly with a spoon or your hands to squeeze out as much liquid as possible, then pat completely dry with paper towels. This step is crucial to preventing a watery dip.
- Prepare Toppings: Cook the bacon until very crispy. Drain well on paper towels, then crumble into small bits. If not using pre-roasted chickpeas, roast canned chickpeas (drained, rinsed, and dried) in the oven or air fryer until crispy and golden.
- Combine Base Ingredients: In a large mixing bowl, combine the softened cream cheese and mayonnaise. Mix with a hand mixer or sturdy spoon until smooth and well combined.
- Add Flavor and Texture: Fold in the finely chopped fresh dill, chives (or parsley), garlic powder, onion powder, salt, pepper, and most of the thoroughly dried cucumber. Reserve a small amount of the bacon bits and roasted chickpeas for topping. Add the remaining bacon bits and chickpeas to the cream cheese mixture and mix gently until just combined.
- Form the Cheese Ball: On a piece of plastic wrap, spoon the mixture into the center. Gather the edges of the plastic wrap to form the mixture into a firm, round ball. Twist the top of the plastic wrap to seal it tightly.
- Chill for Firmness (Crucial for Shape and Texture): Refrigerate the cheese ball for at least 2 hours, or preferably overnight. This chilling period allows the flavors to meld and the cheese ball to firm up, ensuring it holds its shape beautifully and maintains a perfect consistency without becoming watery.
- Serve: When ready to serve, unwrap the cheese ball and place it on a serving plate. Generously top with the reserved crispy bacon bits and roasted chickpeas. Garnish with fresh dill sprigs around and on top. Serve with crackers, pita bread, or vegetable sticks.
Notes
- Crucial chilling and cucumber prep ensure a firm, non-watery dip.