Mastering Cheesy Garlic Butter Chicken and Asparagus
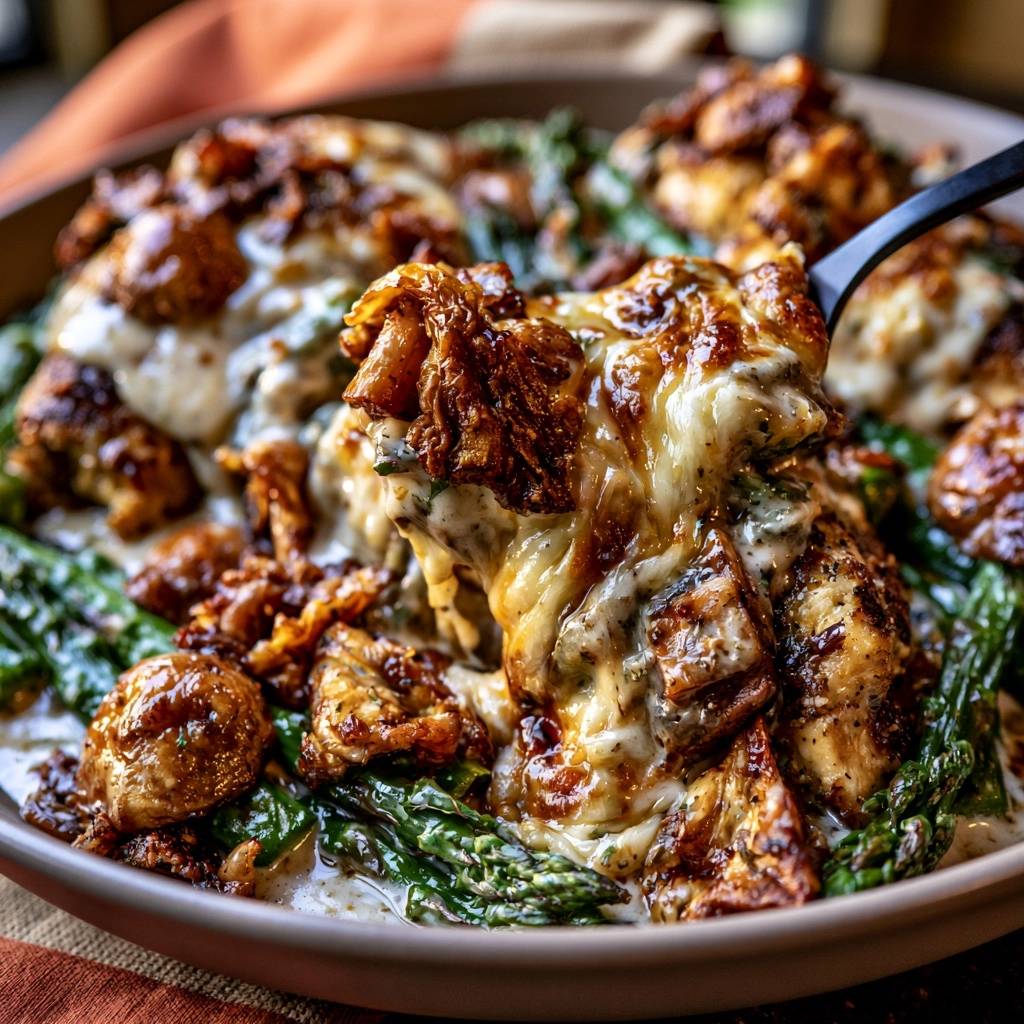
Most home cooks struggle with chicken breast because it turns into a dry, rubbery mess the second it hits the heat. You’ve likely experienced that disappointing texture where the meat feels more like a chore to chew than a meal to enjoy. This recipe solves that problem by using a high-heat sear to lock in moisture before finishing under a broiler for a bubbly, golden crust.
Combining the richness of garlic butter with lean protein and fresh greens creates a high-protein, low-carb powerhouse that feels indulgent. With a total time of just 35 minutes and a profile of 445 kcal per serving, it’s the perfect solution for a busy weeknight. You get the satisfying contrast of crispy, caramelized chicken edges against gooey, melted mozzarella and tender-crisp asparagus.
The secret to success here is starting with a bone-dry surface on your poultry. I’ve found that even a little bit of surface moisture causes the chicken to steam rather than sear, which is the primary cause of that “rubbery” texture. By patting the meat dry with paper towels, you ensure the Maillard reaction happens instantly, creating a flavorful crust that keeps the inside juicy.
The Science of Searing Poultry for Maximum Juiciness
The Maillard reaction is a chemical process between amino acids and reducing sugars that gives browned food its distinctive flavor. When you sear chicken at high heat, you aren’t just changing the color; you’re creating hundreds of different flavor compounds. This golden-brown barrier acts as a shield, helping to retain the internal juices while the dish finishes cooking under the broiler.
Moisture is the absolute enemy of a good sear. If your chicken pieces are damp, the heat of the pan will go toward evaporating that water instead of browning the meat. This leads to gray, boiled-looking chicken that lacks depth. Always take the extra thirty seconds to press the moisture out of your chicken cubes before they hit the oil.
Why Bite-Sized Pieces Change the Cooking Physics
Cooking whole chicken breasts is risky because the thin ends often overcook before the thick center is safe to eat. By cutting the meat into 1-inch cubes, you increase the total surface area significantly. This means more “sear” per bite and a much faster cooking time, which prevents the center from drying out.
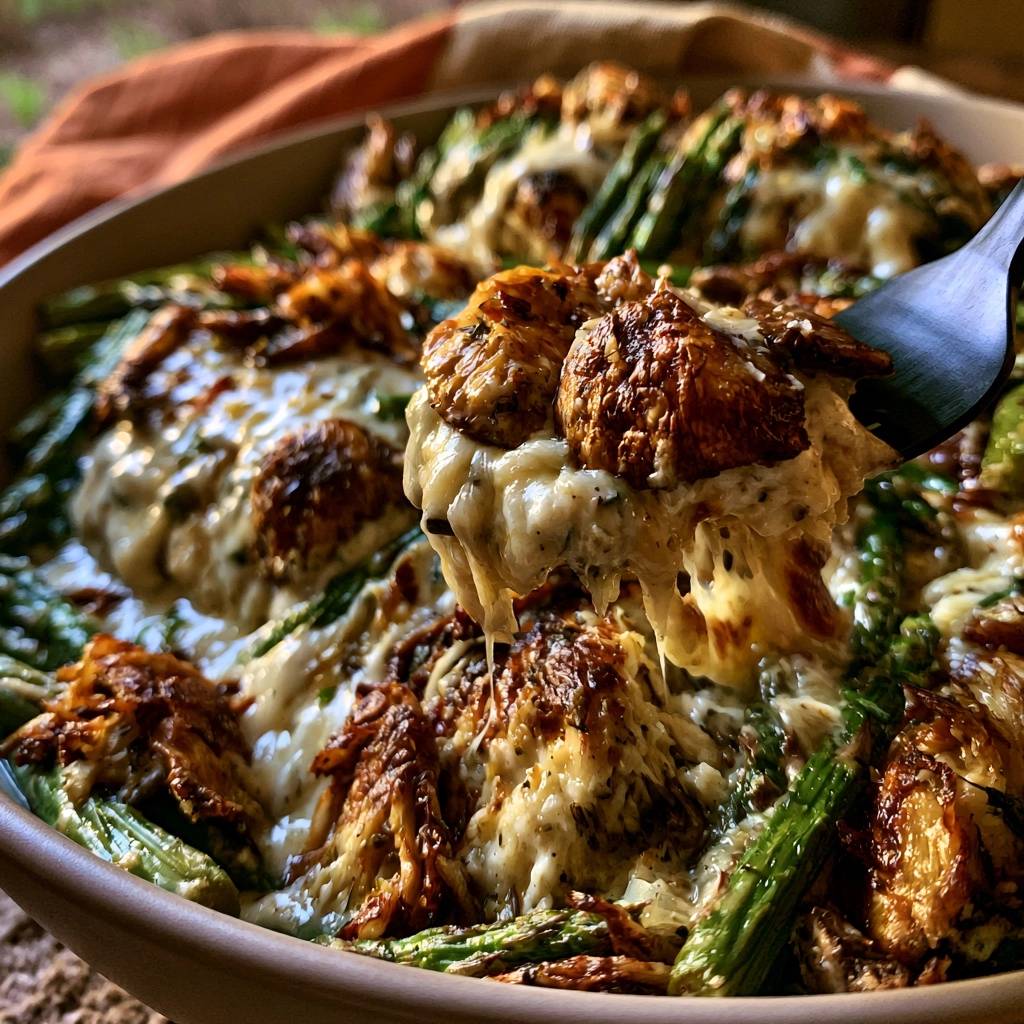
These smaller pieces also allow the garlic butter to coat every single side of the meat. Instead of just having flavor on the top of a breast, every morsel is bathed in seasoning. This physics-based approach ensures that every forkful is as flavorful as the last.
Essential Components for Cheesy Garlic Butter Chicken
The quality of your ingredients dictates the final outcome of this simple skillet meal. When selecting asparagus, look for medium-sized spears that feel firm to the touch. Pencil-thin asparagus can turn to mush too quickly, while overly thick spears might remain woody in the center after a quick sauté.
Freshly grated Parmesan is another non-negotiable element for the best results. Pre-shredded cheese in a green can or plastic bag is often coated in cellulose or potato starch to prevent clumping. These additives interfere with the melting process and can leave your sauce feeling gritty rather than silky and smooth.
Selecting the Right Fat: Butter vs. Olive Oil
We use a two-step fat strategy to maximize both texture and flavor. Olive oil has a higher smoke point than butter, making it ideal for the initial high-heat sear. If you started with butter, the milk solids would burn and turn bitter before the chicken ever got a chance to brown.
Unsalted butter is added later in the process to provide that signature rich mouthfeel. This allows the butter to foam and brown slightly, creating a nutty base for the garlic. Using unsalted butter also gives you total control over the sodium levels in the final dish.
The Aromatic Profile: Garlic, Paprika, and Oregano
The spice blend is designed to provide a “grilled” depth without needing an actual barbecue. Smoked paprika is the heavy lifter here, offering a subtle wood-fired aroma and a beautiful red hue. It transforms the chicken from plain to professional with just a teaspoon.
While fresh garlic provides the punch, onion powder offers a foundational savory note that ties everything together. Fresh onions wouldn’t have enough time to soften and caramelize in this short cooking window. The dried oregano adds an earthy, herbal finish that cuts through the richness of the cheese.
Step-by-Step: Executing the Perfect Skillet Sear
When you add the chicken to your cast iron skillet, the “single layer” rule is your best friend. If you crowd the pan, the temperature drops and the chicken releases juices that have nowhere to go, resulting in steaming. Work in two batches if your pan isn’t large enough to give every piece its own space.
Listen to the pan for visual and auditory cues. The chicken should sizzle loudly the moment it touches the oil. If you try to flip a piece and it sticks, leave it alone for another thirty seconds. It will naturally release from the surface once a proper crust has formed.
Managing the Asparagus Texture
Trimming asparagus is easy if you use the “snap test.” Hold a spear at both ends and bend it until it breaks; it will naturally snap right where the woody, fibrous part ends. Use that first spear as a guide to trim the rest of the bunch with a knife.
The sauté stage for the asparagus is very brief, only about three minutes. You want the spears to turn a vibrant, bright green and pick up just a few charred spots from the pan. Remember that they will continue to soften slightly during the two minutes they spend under the broiler.
The 30-Second Garlic Window
Garlic is delicate and can turn from sweet to acrid in a matter of seconds. This is why we add the minced cloves at the very end of the stovetop process. You only need about 30 seconds of heat to release the aromatic oils into the butter.
By waiting until the very last moment, you ensure the garlic stays sweet and fragrant. It will continue to infuse the butter as the dish sits under the broiler. If you see the garlic turning dark brown, move immediately to the next step to stop the cooking.
Achieving the Golden Broil and Cheese Melt
The transition from the stovetop to the oven is where the magic happens. While “melted” cheese is fine, “caramelized” cheese is superior. Those deep golden-brown toasted spots, often called “frico,” provide a salty, crunchy texture that contrasts beautifully with the juicy chicken.
Position your oven rack about 6 inches below the broiler element. A cast-iron skillet is the best vessel for this because it holds onto the heat from the stove. This ensures the bottom of the dish stays hot while the top gets blasted with intense heat to brown the cheese.
The Dual-Cheese Strategy: Mozzarella and Parmesan
Using two types of cheese serves two different purposes. Mozzarella is the king of the “cheese pull,” providing a mild, creamy moisture that blankets the chicken. It melts easily and creates a soft, gooey layer that everyone loves.
Parmesan, on the other hand, brings the flavor and the crunch. Because it has a lower moisture content, it browns more effectively than mozzarella. Together, they create a complex topping that is both stretchy and crispy at the same time.
Troubleshooting Common Texture Issues
If you find your chicken is still coming out rubbery, you are likely overcooking it. Chicken breast is very lean and has a narrow window of perfection. Once the pieces are seared on both sides, they are nearly done; the broiler is just there to finish them off and melt the cheese.
Soggy asparagus is usually the result of trapped steam. Never cover the pan with a lid during the sauté or broil phases. If you prefer your vegetables very crisp, you can even add the asparagus a minute later than the recipe suggests to reduce its total heat exposure.
How to Save an Overcrowded Pan
If you accidentally add too much chicken at once and see liquid pooling in the pan, don’t panic. Immediately drain the excess liquid into a bowl and turn the heat up to high. This removes the “boiling” environment and allows the searing process to resume before the meat gets tough.
You can also use a slotted spoon to remove half the chicken, sear the remaining half, and then swap them. It takes a few extra minutes, but it saves the texture of the entire meal. Learning to pivot when the pan looks too full is a hallmark of a great home cook.
Flavor Variations and Ingredient Swaps
This recipe is incredibly versatile if you need to swap ingredients based on what’s in your fridge. If asparagus isn’t in season, zucchini coins or small broccoli florets work beautifully. Just keep in mind that broccoli may need an extra minute of sautéing to soften the stems.
For those who like a bit of heat, a teaspoon of red pepper flakes added with the garlic provides a nice kick. If you want a brighter, Mediterranean feel, stir in some fresh lemon zest and a squeeze of juice right before serving. The acid cuts through the butter and cheese perfectly.
Dairy-Free and Alternative Fat Options
If you are looking for a higher smoke point than standard butter, ghee or clarified butter is an excellent choice. It provides the buttery flavor without the milk solids that can burn. It’s a favorite for many who follow a paleo-style diet.
For a dairy-free version, you can use a high-quality vegan butter substitute and a dairy-free mozzarella. Nutritional yeast can be sprinkled on top in place of the Parmesan to provide that savory, umami-rich “cheesy” flavor without the actual dairy.
Optimal Pairings for a Complete Meal
Since this is naturally a low-carb dish, it pairs perfectly with cauliflower rice or zoodles to keep things light. A simple arugula salad with a lemon vinaigrette provides a peppery bite that balances the richness of the garlic butter. It’s a great way to add more volume to the plate without many calories.
If you aren’t watching your carbs, a piece of crusty sourdough bread is essential for soaking up every drop of that garlic butter at the bottom of the pan. You could also serve this over a bed of orzo or angel hair pasta for a more filling, comfort-food vibe.
Storage and Reheating for Meal Prep
Leftovers can be stored in an airtight container in the refrigerator for up to three days. To keep the chicken from becoming tough during reheating, avoid the microwave if possible. The high intensity of a microwave often toughens the proteins and makes the cheese oily.
Instead, reheat the mixture in a covered skillet over low heat with a splash of water or broth. This creates a gentle steam that softens the cheese and warms the chicken without drying it out. A toaster oven also works well for reviving that slightly crispy cheese topping.
Freezing Limitations
While the garlic butter chicken itself freezes quite well, I don’t recommend freezing the asparagus. Once frozen and thawed, asparagus loses its structural integrity and becomes quite mushy. It won’t have that satisfying “snap” that makes this dish so good.
If you must freeze this, I suggest freezing the cooked chicken and sauce separately. When you are ready to eat, thaw the chicken and sauté fresh asparagus in a pan before combining them. This ensures the meal tastes just as good as the day you first made it.
Expert Tips for Professional Results
The most important tip I can give you is to let the dish rest for at least two minutes after it comes out of the oven. This allows the muscle fibers in the chicken to relax and redistribute the juices. If you cut into it immediately, all that moisture will run out onto the pan.
For the garlic, try using a microplane instead of a knife. This creates a garlic paste that melts into the butter almost instantly. It ensures you get a consistent garlic flavor in every single bite without any large, crunchy bits of raw garlic.
The Importance of an Oven-Safe Skillet
Using an oven-safe skillet, like cast iron or stainless steel, is vital for this recipe. Transferring the ingredients from a frying pan to a baking dish causes a massive loss of heat and flavor. You lose the “fond”—those little browned bits stuck to the bottom of the pan—which is where the best flavor lives.
A 12-inch skillet provides enough surface area to cook everything efficiently without overcrowding. If you don’t own one yet, it’s the single best investment you can make for your kitchen. It allows you to move seamlessly from the stove to the broiler, which is the key to this entire recipe.
How do I store leftovers and does this freeze well?
Store any leftovers in an airtight container in the refrigerator for up to 3 days. When reheating, use a skillet over low heat with a lid to keep the moisture in. I do not recommend freezing this dish because the asparagus becomes very mushy and watery once thawed, though the chicken and cheese will stay safe to eat.
Why is my chicken still tough or rubbery?
Tough chicken is usually caused by two things: overcrowding the pan or overcooking. If the pan is too full, the chicken steams in its own juices instead of searing. Also, remember that the chicken continues to cook under the broiler, so ensure you don’t over-fry it during the initial skillet stage.
Can I use chicken thighs instead of breasts?
Yes, chicken thighs are a great substitute and are actually more forgiving because they have a higher fat content. If you use thighs, you may need to sear them for an extra minute or two as they take slightly longer to cook through than breast meat, but they will stay very juicy.
What can I use if I don’t have a cast iron skillet?
You can use any oven-safe stainless steel skillet. If you only have non-stick pans that aren’t oven-safe, you will need to sear the chicken and asparagus on the stove and then transfer them to a preheated baking dish before adding the cheese and placing it under the broiler.
Can I use frozen asparagus for this recipe?
I don’t recommend using frozen asparagus. Frozen vegetables release a lot of excess water as they cook, which will prevent the chicken from staying crispy and will turn the garlic butter sauce into a watery mess. Fresh, trimmed asparagus provides the best texture and flavor for this specific cooking method.
How do I prevent the garlic from burning?
The key is timing. Only add the minced garlic during the last 30 seconds of the stovetop sauté. The residual heat of the pan and the intense heat of the broiler will finish cooking the garlic without scorching it. If the garlic turns dark brown or black, it will become bitter and ruin the sauce.
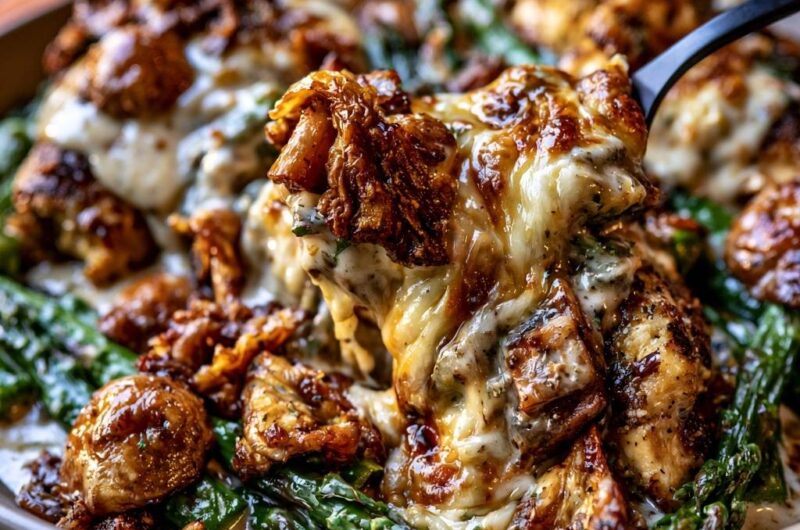
Cheesy Garlic Butter Chicken and Asparagus
Course: Main CourseCuisine: AmericanDifficulty: easy4
servings15
minutes20
minutes35
Minutes445
kcalAmerican
Ingredients
1.5 lbs chicken breast, cut into 1-inch bite-sized pieces
1 lb fresh asparagus, woody ends trimmed
2 cups shredded mozzarella cheese
1/2 cup freshly grated Parmesan cheese
4 tablespoons unsalted butter
2 tablespoons olive oil
4 cloves garlic, minced
1 teaspoon dried oregano
1 teaspoon smoked paprika
1/2 teaspoon onion powder
Salt and black pepper to taste
Fresh parsley for garnish
Directions
- Pat the chicken pieces completely dry with paper towels. This is the most important step to prevent steaming and ensure a golden crust. In a bowl, toss the chicken with olive oil, salt, pepper, paprika, oregano, and onion powder until evenly coated.
- Preheat your oven to a high broil setting.
- Heat a large, oven-safe cast iron skillet over medium-high heat. Add 1 tablespoon of butter. Once the butter is foaming and slightly browned, add the chicken in a single layer. Do not crowd the pan; work in batches if necessary.
- Sear the chicken for 4 minutes without moving it to develop a deep, dark golden crust. Flip and cook for another 2 minutes. The chicken is done when it reaches 165°F (74°C) in the thickest part.
- Push the chicken to the edges of the pan and add the remaining 3 tablespoons of butter to the center. Add the asparagus and sauté for 3 minutes, tossing in the butter until bright green and slightly charred.
- Stir in the minced garlic and cook for just 30 seconds until fragrant.
- Toss the chicken and asparagus together so everything is coated in the garlic butter. Spread the mixture into an even layer.
- Top the entire skillet generously with the shredded mozzarella and Parmesan cheese.
- Place the skillet under the broiler for 2-3 minutes. Watch closely; remove once the cheese is melted, bubbling, and shows the deep golden-brown toasted spots seen in the image.
- Let the dish rest for 2 minutes before serving. This resting period allows the juices to redistribute, ensuring the chicken is at its peak juiciness. Garnish with fresh parsley.
Notes
- The secret to success is patting the chicken completely dry before seasoning to ensure a proper sear. Always use an oven-safe skillet like cast iron for the transition from stovetop to broiler.