Mastering the Crispy Mushroom and Bacon Chicken Skillet
Nothing ruins a dinner quite like the disappointment of a soggy crust. You spend time breading and frying chicken to a perfect golden hue, only to watch it turn into a mushy mess the moment it touches a sauce. It’s a common kitchen heartbreak that usually happens because the steam from the meat gets trapped against the coating.
This recipe changes the game by using a “staggered sauce” method and a high-heat shallow fry. We aren’t just making dinner; we’re engineering a restaurant-quality crunch that actually holds its integrity on the plate. By the time you finish this skillet, you’ll have mastered the balance of earthy cremini mushrooms, salty bacon, and a Panko crust that stays shatteringly crisp.
The real secret to this success lies in the resting period before the chicken ever touches the oil. Most home cooks rush the meat from the breading bowl straight into the pan, which causes the coating to slide off like a loose jacket. Letting the breaded chicken sit for ten minutes allows the proteins to bind, creating a permanent bond between the bird and the breadcrumbs.
The Science of the Permanent Crunch
The “Staggered Sauce” method is your best friend if you value texture. Instead of simmering the chicken inside the liquid, which effectively boils the crust, we build the sauce independently. By pouring the sauce into the bottom of the pan and nestling the chicken on top, we keep the upper 90% of the crust dry and crunchy.
Furthermore, using a wire rack is non-negotiable for the serious cook. When you place hot, fried chicken on a flat plate or paper towel, the heat trapped underneath creates steam. That steam has nowhere to go but back into the breading, leading to the dreaded “sweat factor.” A rack allows air to circulate entirely around the meat, locking in that crystalline texture.
Why Panko Outperforms Standard Breadcrumbs
Panko flakes are larger and airier than traditional, sandy breadcrumbs because they are made from crustless bread. These jagged edges create more surface area, which means more “oil pockets” for frying. This results in a lighter, more delicate crunch that doesn’t feel heavy or greasy on the palate.
However, Panko needs a strong foundation to stay attached. The flour acts as a primer, drying the surface of the chicken so the egg can grip it. The egg then acts as the glue, ensuring every single Panko flake stays put during the high-heat transformation in the skillet.
Essential Components for the Skillet
Quality ingredients are the backbone of this dish, starting with the chicken itself. Boneless skinless breasts are the ideal canvas because they are easy to pound to a uniform thickness. This ensures that every bite cooks at the same rate, preventing the edges from drying out while the center finishes.
For the mushrooms, skip the basic white buttons and reach for Cremini (often sold as Baby Bellas). They have a lower water content and a much deeper, woodsy umami flavor. When paired with the saltiness of thin-cut beef or turkey bacon, they create a savory profile that balances the richness of the butter-finished sauce.
Selecting the Right Frying Oil
You need an oil with a high smoke point to achieve that deep mahogany color without filling your kitchen with smoke. Vegetable oil or grapeseed oil are fantastic choices because they can handle the 350°F threshold required for a proper shallow fry. Avoid extra virgin olive oil here, as its low smoke point will burn and leave a bitter aftertaste on your crust.
Maintaining that temperature is vital for success. If the oil is too cold, the breading will soak up the fat like a sponge, leaving you with a greasy, heavy meal. If it’s too hot, the outside will burn before the chicken reaches a safe internal temperature. Look for a gentle shimmer on the surface before you start.
Preparation: The Three-Stage Breading Station
Organization is the key to a mess-free kitchen, so set up your station from left to right: flour, then egg, then Panko. Use the “dry hand/wet hand” technique to keep your fingers from becoming breaded themselves. Use your left hand for the dry flour and Panko, and your right hand for the egg wash.
When you dredge the chicken in the flour, give it a firm shake. You want a thin, invisible layer of dust, not a thick paste. If there is too much flour, the egg wash will eventually slide off during frying, taking your beautiful crust along with it.
The 10-Minute Rest: Why Patience Matters
This is the most overlooked step in home cooking. While the chicken rests on the wire rack, the moisture from the egg hydrates the flour and the base of the Panko. This creates a singular, inseparable bond that “sets” the coating.
Think of this as the curing stage for your crust. If you skip this, you’ll likely see large patches of breading falling off in the skillet. Those ten minutes also give you the perfect window to slice your mushrooms and prep your bacon, making the rest of the process seamless.
Step-by-Step: Searing the Chicken to Perfection
Once your oil is shimmering, lay the chicken into the pan away from you to avoid splashes. Don’t overcrowd the skillet! If you put too many pieces in at once, the oil temperature will plummet, and you’ll lose that immediate sear that seals in the juices.
Cook the chicken for about 4-5 minutes per side. You are looking for a deep golden brown color and a firm feel when pressed with tongs. Once they’re done, move them back to that clean wire rack. This keeps them elevated and away from any residual oil while you build the flavor base in the pan.
Achieving Even Thickness Through Pounding
Before you even start breading, take the time to pound your chicken breasts to a consistent 1/2-inch thickness. You can use a meat mallet or even the bottom of a heavy saucepan. This mechanical tenderizing breaks down tough fibers and ensures the meat stays juicy.
Uniformity is the secret to professional results. Without it, the thin “tail” of the chicken breast will become dry and rubbery by the time the thickest part is safe to eat. A flat, even surface also means more of the chicken makes direct contact with the hot pan for better browning.
Developing the Mushroom and Bacon Base
After removing the chicken, you’ll see brown bits stuck to the bottom of the pan. This is called the “fond,” and it is pure flavor gold. Pour out the excess oil but keep about a tablespoon of the fat to sauté your mushrooms and bacon.
The bacon should go in toward the end of the mushroom sauté. You want the bacon to render its fat and get crispy edges without burning. This fat then coats the mushrooms, infusing them with a smoky, salty richness that water or oil alone simply can’t provide.
If mushrooms are your favorite part of this skillet, you will love the earthy depth of this hearty mushroom carrot lentil soup.
Sautéing Mushrooms for Maximum Umami
The biggest mistake people make with mushrooms is salting them too early. Salt draws out moisture immediately, which causes the mushrooms to boil in their own liquid. They’ll turn grey and spongy instead of golden and meaty.
Let the mushrooms sit undisturbed in the hot fat for a few minutes first. Once they start to brown and shrink slightly, then you can toss them and add your seasonings. This patience results in a concentrated, savory flavor that stands up to the bold bacon and crispy chicken.
The Deglazing Process and Emulsion
Deglazing is the magical moment where the sauce comes together. Pour in your chicken broth and use a wooden spoon to scrape up all those caramelized bits from the bottom of the skillet. Those bits dissolve into the liquid, creating a complex, dark base for your glaze.
To finish the sauce like a pro, use the “Monte au Beurre” technique. Whisk in a tablespoon of cold unsalted butter right at the end. The cold butter emulsifies with the hot broth, creating a glossy, thickened sauce that clings to the mushrooms rather than running all over the plate.
Assembling Without Sacrificing Texture
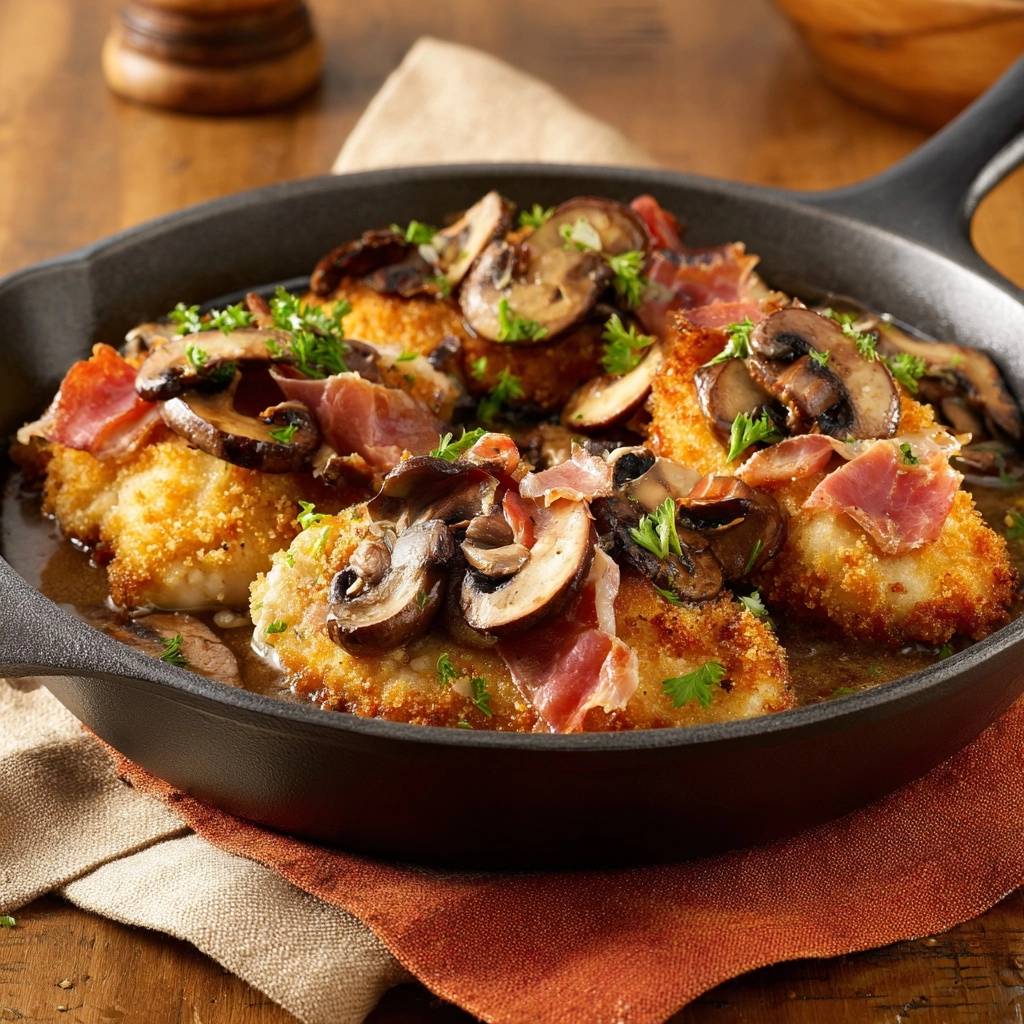
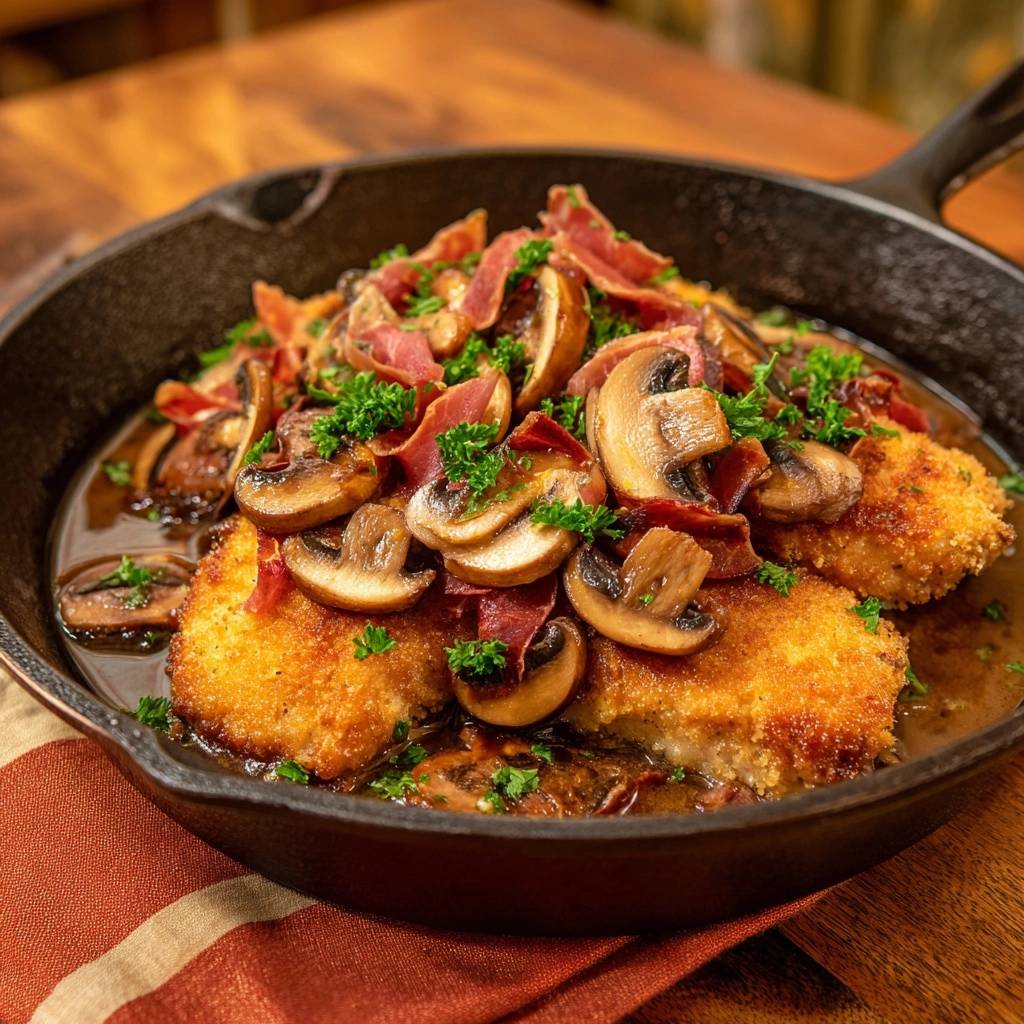
Now comes the most important part: the assembly. Pour that beautiful, glossy mushroom and bacon sauce into the bottom of your serving dish or the skillet. Then, carefully nestle the crispy chicken on top of the sauce.
By doing this, only the very bottom of the chicken absorbs the sauce, while the top remains perfectly crunchy. Spoon the mushrooms and bacon directly over the center of the chicken. This presentation looks stunning and ensures that every bite has a mix of textures.
Troubleshooting Common Skillet Failures
If you find your breading is browning too fast, your heat is likely too high. Don’t be afraid to turn the burner down to medium and add a splash of fresh oil to cool the pan slightly. It’s better to take an extra minute than to serve burnt Panko.
If your sauce feels too salty, it might have reduced too much. Simply whisk in a tablespoon or two of water or more broth to balance it out. Remember, the bacon adds a lot of salt on its own, so always taste your sauce before adding any extra salt at the end.
Managing Heat in Cast Iron
Cast iron is famous for its heat retention, which is both a blessing and a curse. It stays hot for a long time, meaning the second batch of chicken will often cook faster than the first. Keep a close eye on the pan and adjust your flame accordingly.
If the pan starts to smoke, it’s telling you it’s too hot. Slide it off the heat for thirty seconds to let it calm down. Managing the temperature of your vessel is just as important as the ingredients you put inside it.
Optimal Side Dish Pairings
Since this dish has a rich, savory sauce, you want sides that can soak up the extra glaze. Garlic mashed potatoes or a simple bed of buttered noodles work beautifully. They act as a neutral base that lets the mushroom and bacon flavors shine.
To cut through the richness, consider something bright and acidic. A simple arugula salad with a lemon vinaigrette or some roasted asparagus with a squeeze of lime provides a necessary contrast. The acidity cleanses the palate between bites of the crispy, buttery chicken.
Expert Tips for Storage and Reheating
If you have leftovers, try to store the sauce and the chicken in separate containers. This prevents the chicken from sitting in moisture overnight. The microwave is the enemy of fried food; it will turn your beautiful Panko crust into a soft, rubbery shell.
To reheat, use an air fryer or an oven set to 375°F. Place the chicken on a rack and heat for about 5-8 minutes until the oil in the crust starts to sizzle again. Warm the sauce separately in a small pan on the stove, adding a splash of broth if it has thickened too much in the fridge.
Frequently Asked Questions
Can I use chicken thighs instead of breasts?
Yes, you certainly can! Chicken thighs are more forgiving and stay very juicy. However, they usually take a few minutes longer to cook through. Make sure you trim any excess fat and pound them slightly so they lay flat in the pan for an even sear.
How do I know the oil is ready if I don’t have a thermometer?
You can use the wooden spoon trick. Dip the handle of a wooden spoon into the oil; if steady bubbles start to rise around the wood, the oil is ready for frying. If it bubbles violently, it’s too hot. If there are no bubbles, give it another minute to heat up.
Can I make this recipe gluten-free?
Absolutely. Replace the all-purpose flour with a gluten-free 1-to-1 baking flour and use gluten-free Panko-style breadcrumbs. The technique remains exactly the same, and you’ll still get a fantastic crunch that holds up to the mushroom sauce.
Why did my breading fall off in the pan?
This usually happens for two reasons: the chicken was too wet before the flour stage, or you didn’t let the breaded chicken rest. Make sure to pat the chicken dry with paper towels before starting, and never skip that 10-minute rest on the wire rack to let the coating set.
What can I use if I don’t have chicken broth?
You can substitute with vegetable broth or even a mix of water and a little extra butter. If you want a deeper flavor, a splash of apple juice mixed with water can provide a nice sweetness that complements the salty bacon and earthy mushrooms perfectly.
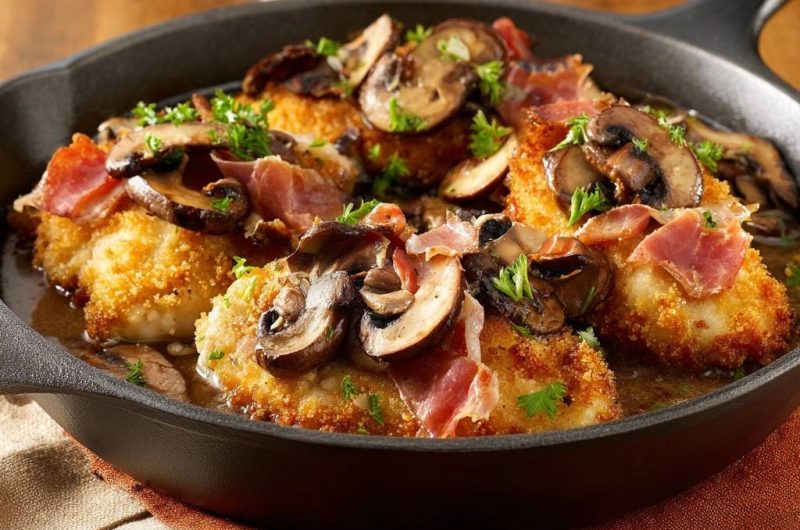
Crispy Chicken
Course: Main CourseCuisine: AmericanDifficulty: medium4
servings15
minutes25
minutes750
kcal40
MinutesA restaurant-quality chicken dinner that maintains its crunch using a staggered sauce method. Breaded chicken is shallow-fried to perfection and served over a savory mushroom and bacon reduction.
Ingredients
4 boneless skinless chicken breasts, pounded to 1/2-inch thickness
1 1/2 cups Panko breadcrumbs
1/2 cup all-purpose flour
2 large eggs, beaten with 1 tablespoon water
1 teaspoon garlic powder
1/2 teaspoon onion powder
Salt and black pepper to taste
1/2 cup vegetable oil (for shallow frying)
8 ounces cremini mushrooms, sliced
4 slices thin-cut bacon, torn into pieces
1/2 cup chicken broth
1 tablespoon cold unsalted butter
1 tablespoon fresh parsley, chopped
Directions
- Set up a breading station with three shallow bowls: flour in the first; beaten eggs in the second; and Panko mixed with garlic powder, onion powder, salt, and pepper in the third.
- Dredge each chicken breast in flour (shaking off excess), dip in egg, and press firmly into the Panko to ensure full coverage. Let the breaded chicken rest on a wire rack for 10 minutes. This “sets” the crust, preventing it from falling off in the pan.
- Heat the vegetable oil in a large cast iron skillet over medium-high heat. Once the oil is shimmering (about 350°F), add the chicken. Fry for 4-5 minutes per side until deep golden brown and cooked through. Remove chicken and set aside on a wire rack to maintain airflow and crunch.
- Carefully pour out the excess frying oil, leaving about 1 tablespoon of fat in the skillet. Add the sliced mushrooms and sauté for 5-6 minutes until they are browned and tender.
- Add the torn bacon to the pan for the last 2 minutes of sautéing to render the fat and crisp the edges.
- Pour in the chicken broth to deglaze the pan, scraping up the flavorful brown bits. Simmer for 3 minutes until reduced by half. Whisk in the cold butter to create a glossy, thickened glaze.
- To keep the chicken crispy, do not submerge it. Pour the sauce into the bottom of the skillet first, then nestle the crispy chicken on top so only the very bottom touches the liquid.
- Spoon the mushrooms and bacon directly over the chicken. Garnish with fresh parsley and serve immediately.
Notes
- Letting the breaded chicken rest on a wire rack for 10 minutes before frying helps the crust set. To maintain maximum crunch, nestle the chicken on top of the sauce rather than submerging it.