Pea & Rice Patties: Golden Crunch, Never Crumble
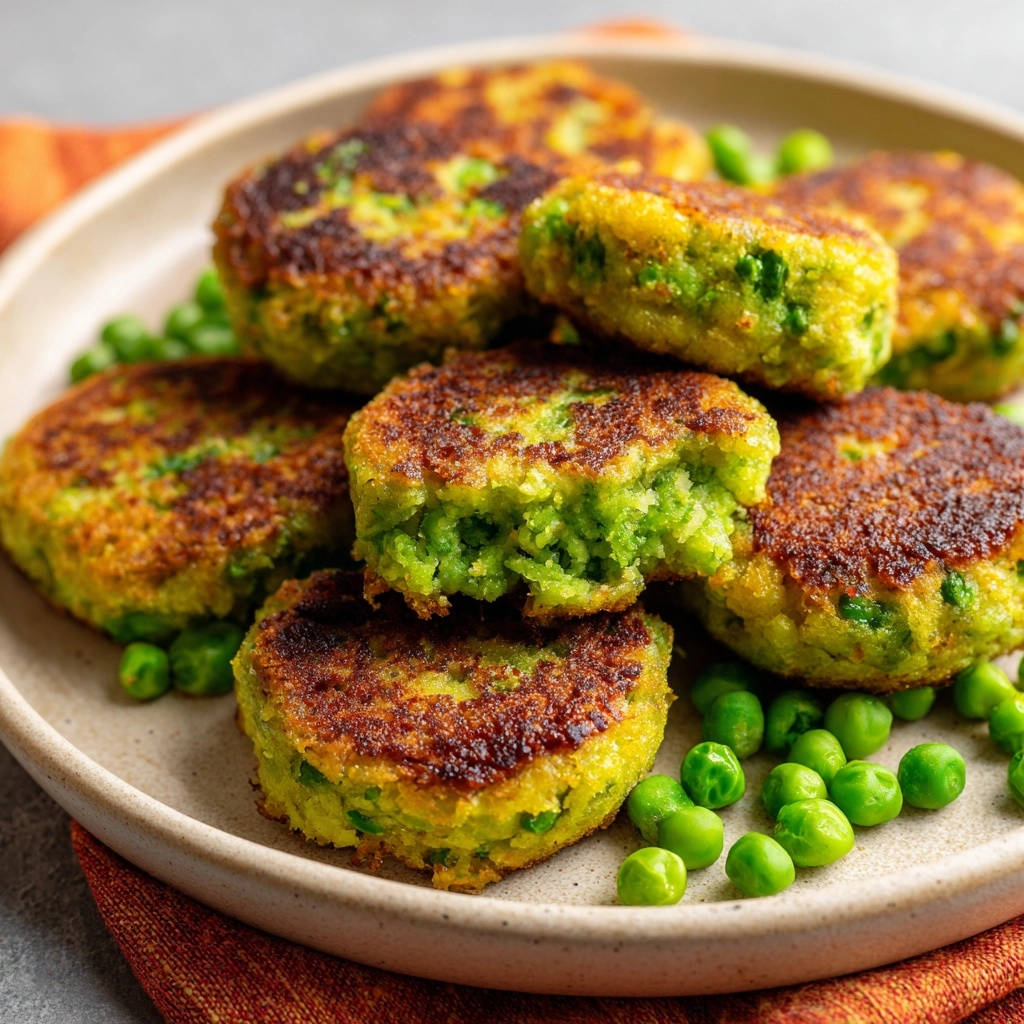
Ever found yourself frustrated when delicious veggie patties fall apart in the pan? I’ve been there! But I’m thrilled to share my foolproof method for Pea & Rice Patties that promises a consistently perfect, golden crunch without any crumbling catastrophe.
This recipe isn’t just easy; it introduces a simple, game-changing trick that ensures your patties hold their shape beautifully. Get ready to enjoy a vibrant, versatile dish that’s a true winner for any meal, proving that plant-based can be incredibly satisfying and simple.
Beyond Basic: What Makes Our Pea & Rice Patties So Special?
The Secret to Patties That Won’t Crumble
The biggest challenge with homemade patties is often their tendency to fall apart. Our recipe includes a crucial chilling step that transforms the texture, allowing the binders to set firmly.
This simple technique guarantees your Pea & Rice Patties emerge from the pan perfectly intact, making mealtime stress-free and delicious.
Effortless Flavor for Any Meal
These versatile patties are a culinary chameleon, adapting seamlessly to any dining occasion. They serve beautifully as a light vegetarian main, a flavorful side dish, or even a satisfying snack.
Their quick preparation makes them an ideal choice for busy weeknights or a delightful addition to your weekend brunch spread.
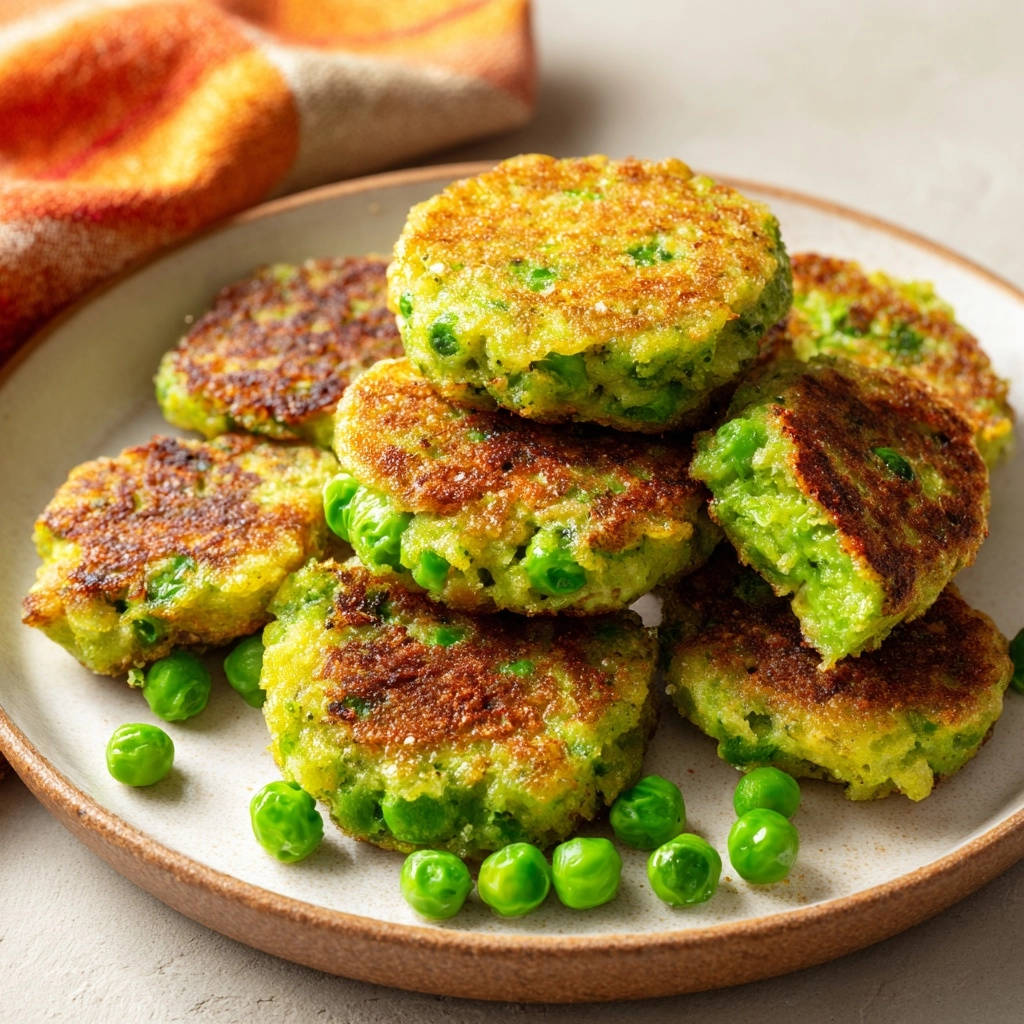
Why You’ll Crave That Golden Crunch
Texture is paramount, and this recipe delivers on the promise of an irresistible exterior. Each patty boasts a wonderfully crispy, golden-brown crust achieved through mindful frying.
Inside, they remain tender and flavorful, offering a delightful contrast that will keep you coming back for more.
Gather Your Goodies: Simple Ingredients, Stellar Pea & Rice Patties
Crafting exceptional Pea & Rice Patties starts with a handful of accessible ingredients. Each component plays a vital role in achieving the perfect flavor and texture.
The Humble Green Pea: Star of the Show
Frozen green peas are the vibrant heart of this recipe, offering natural sweetness and a beautiful color. Thawing them first is essential for proper mashing and integration.
Mashing about two-thirds of the peas creates a sticky base for binding, while leaving some whole adds delightful bursts of texture and freshness to each bite.
Rice: The Binding & Bulk Foundation
Cooked white rice provides the necessary bulk and helps to bind the patties together. Its neutral flavor allows the peas to shine, while its starch contributes to the firm structure.
Ensure your rice is cooled before mixing, as warm rice can make the mixture too soft and harder to handle.
Flour’s Crucial Role in Structure
All-purpose flour acts as a key binder, absorbing moisture and helping the patties hold their shape. It’s instrumental in preventing the dreaded crumble.
The flour’s starches activate during mixing and chilling, creating a resilient structure that withstands the heat of the pan.
Seasoning for the Perfect Savory Touch
Simple salt and black pepper are all you need to elevate the natural flavors of the peas and rice. They enhance the savory notes and bring balance to the patties.
Feel free to adjust the quantities to your personal preference, ensuring each patty is seasoned to perfection.
Choosing Your Frying Oil
Vegetable oil is recommended for frying these patties due to its neutral flavor and high smoke point. This ensures a clean, crisp finish without imparting unwanted tastes.
Other neutral oils like canola or sunflower oil can also be used effectively for achieving that coveted golden exterior.
Essential Tools for Your Pea & Rice Patties Journey
Having the right kitchen tools on hand streamlines the patty-making process. These simple items ensure a smooth and enjoyable cooking experience.
Mixing Bowls & Mashers
A medium-sized mixing bowl provides ample space for combining all your ingredients. A fork or potato masher is perfect for gently mashing the peas, allowing you to control the texture.
The goal is a partially mashed consistency, which is easily achieved with these basic tools.
If you enjoy the binding technique here, you’ll find the same method works well for this garden vegetable rice pilaf.
The Perfect Non-Stick Skillet
A large non-stick skillet is indispensable for frying these patties. It prevents sticking, ensuring easy flipping and beautiful browning without damaging their delicate structure.
The non-stick surface helps in achieving that desirable golden, crispy crust evenly.
Other Helpful Utensils
A sturdy spatula is crucial for carefully flipping the patties once they’ve developed their crust. Parchment paper, laid on a plate or baking sheet, prevents patties from sticking during their crucial chilling time.
Finally, paper towels are essential for draining any excess oil after frying, ensuring your Pea & Rice Patties are perfectly crisp and not greasy.
Your Path to Pea & Rice Patties Perfection: A Detailed Guide
Step 1: Preparing the Peas for Texture
Start by thawing your frozen green peas completely; this is key for proper mashing. In a medium bowl, use a fork or potato masher to gently crush about two-thirds of the peas.
The aim is a mix of mashed peas to create a sticky base and some whole or partially mashed peas to add delightful texture to your patties.
Step 2: Uniting the Flavors & Binders
To the bowl with the peas, add the cooked white rice, all-purpose flour, salt, and black pepper. Mix thoroughly with a spoon or your hands until all ingredients are well combined.
You’ll notice the mixture start to come together, thanks to the flour actively binding everything into a cohesive mass.
Step 3: Forming Your Patties with Care
Divide the mixture into 6-8 equal portions. Lightly wet your hands – this prevents sticking and helps create a smoother surface – and form each portion into a compact, flat patty.
Aim for about 1/2 inch thick, ensuring the edges are firm and smooth for patties that hold their shape beautifully.
Step 4: The Crucial Chilling Secret (Don’t Skip This!)
This step is absolutely non-negotiable for patties that won’t crumble. Place your formed Pea & Rice Patties on a plate or baking sheet lined with parchment paper.
Transfer them to the refrigerator and chill for a minimum of 30 minutes. This chilling time allows the flour to fully absorb moisture and the starches to set, making the patties significantly firmer and resilient during cooking.
Step 5: Frying for that Golden Exterior
Heat 2 tablespoons of vegetable oil in a large non-stick skillet over medium heat until it’s shimmering. Carefully place the chilled patties into the hot skillet, ensuring you don’t overcrowd the pan.
Cook them for 4-5 minutes per side, or until they achieve a gorgeous golden brown color and a delightfully crispy exterior. Resist the urge to move them too soon; let that crust form.
Step 6: The Final Drain & Serve
Once your Pea & Rice Patties are cooked to golden perfection, transfer them to a plate lined with a paper towel. This allows any excess oil to drain, ensuring maximum crispiness.
Serve immediately as a delicious side, a satisfying snack, or a light, flavorful meal.
Chef’s Secrets: Elevate Your Pea & Rice Patties Game
Mastering the Mash: Getting the Right Consistency
The ideal pea mash is crucial for patty success. Don’t pulverize them completely; aim for a chunky texture where some peas are still recognizable.
This balance creates both the necessary binding stickiness and delightful textural interest in every bite.
The Art of Patty Formation
To create perfectly uniform and sturdy patties, ensure your hands are lightly wet while shaping. This prevents the mixture from sticking and allows you to compact them firmly.
Pressing the mixture together thoroughly eliminates air pockets, making the patties less prone to breaking during cooking.
Why Chilling is Non-Negotiable
Skipping the chilling step is the most common reason for crumbling patties. The cold temperature allows the flour and rice starches to firm up, creating a stable structure.
If you enjoy pairing your patties with a creamy dip, try this chicken veggie fried rice for a fluffy, satisfying side.
Think of it as setting the foundation; a minimum of 30 minutes, or even an hour, yields the best results.
Achieving the Perfect Fry: Heat & Patience
Maintain a consistent medium heat; too low, and the patties will absorb too much oil and be greasy; too high, and they’ll burn before cooking through.
Patience is key – wait for a deep golden crust to form on the first side before attempting to flip, ensuring a truly crispy finish.
Seasoning Adjustments for Your Palate
Before forming and chilling, taste a tiny bit of the mixture (it’s safe as there’s no raw meat). This allows you to adjust salt and pepper to your preference.
Consider adding a pinch of garlic powder or a dash of your favorite dried herb for an extra layer of flavor complexity.
Creative Twists & Substitutions for Your Pea & Rice Patties
Spice It Up: Flavor Boosters
Introduce a kick to your Pea & Rice Patties with a pinch of red pepper flakes or a dash of cayenne. Garlic powder and onion powder can add a foundational savory depth.
For an adventurous twist, a small amount of mild curry powder can infuse them with warm, aromatic notes.
Herbaceous Additions for Freshness
Fresh herbs bring a vibrant lift to these patties. Finely chopped mint, parsley, or cilantro can be folded into the mixture.
These additions enhance the freshness and add a delightful aroma, complementing the sweetness of the peas.
Gluten-Free & Vegan Friendly Options
This recipe is inherently vegan, making it accessible to many diets. For a gluten-free version, simply substitute the all-purpose flour with a high-quality gluten-free all-purpose baking blend.
Chickpea flour (gram flour) also works beautifully, offering a slightly nuttier flavor and excellent binding properties.
Rice Alternatives: Brown Rice, Quinoa, or Lentils
While white rice provides a neutral base, you can experiment with other cooked grains. Brown rice offers a nuttier flavor and more fiber, though it might require slightly more flour for binding.
Cooked quinoa or lentils can also be used, providing different textures and nutritional profiles. You might need to adjust the moisture content slightly.
Hidden Veggies: Sneaking in More Nutrition
Boost the nutritional value and complexity by finely grating other vegetables into the mix. Carrots, zucchini (squeeze out excess moisture), or spinach are excellent additions.
These hidden veggies blend seamlessly, making these patties an even healthier option, especially for picky eaters.
Pairing Perfection: How to Serve Your Pea & Rice Patties
Dipping Delights: Sauces & Dips
The right sauce can elevate your Pea & Rice Patties to new heights. A creamy lemon-dill yogurt sauce (perhaps inspired by the fresh flavors in a creamy dill salmon salad) offers a tangy counterpoint.
Other fantastic options include sriracha mayo for a spicy kick, a classic ketchup, or even a vibrant homemade pesto for herbaceous depth.
As a Main Dish or Hearty Side
Serve these patties as a delightful vegetarian main course alongside a fresh green salad or roasted vegetables. They’re hearty enough to satisfy without being overly heavy.
As a side, they beautifully complement grilled chicken or fish, or stand proudly next to a colorful dish like crispy baked asparagus for a well-rounded meal.
Creative Ways to Use Leftovers
Don’t let any leftover patties go to waste! Crumble them over a fresh garden salad for added protein and crunch, or tuck them into a burger bun with your favorite toppings for a veggie burger.
They also make a fantastic breakfast served alongside fried eggs and a sprinkle of fresh herbs.
What to Serve with Those Crispy Patties
These golden pea-and-rice patties are light and crunchy, so they pair nicely with something saucy or refreshing. Try one of these:
- For a sticky-sweet contrast, the orange cauliflower bites add a tangy glaze that complements the mild patty flavor.
- A cool minty fruit salsa with crunchy pita chips brings a fresh, bright element that cuts through the richness of the fried patties.
Plan Ahead: Make-Ahead & Storage Tips
Prepping Patties in Advance
These Pea & Rice Patties are perfect for meal prep. You can form and chill the raw patties up to 24 hours in advance, keeping them covered in the refrigerator.
This allows you to simply fry them fresh when you’re ready to eat, minimizing last-minute effort.
Refrigeration Guidelines
Cooked patties can be stored in an airtight container in the refrigerator for up to 3-4 days. Ensure they are completely cooled before storing to prevent condensation.
They make for quick and easy grab-and-go lunches or snacks throughout the week.
Freezing for Future Feasts
Both raw (after chilling) and cooked patties freeze exceptionally well. For raw patties, freeze them individually on a parchment-lined tray until solid, then transfer to a freezer-safe bag.
Cooked patties should also be frozen solid on a tray before bagging. They will keep for up to 2-3 months, ready to be reheated directly from frozen.
Reheating for Best Results
To maintain their crispiness, avoid reheating patties in the microwave, which can make them soft. For best results, reheat cooked Pea & Rice Patties in a preheated oven at 350°F (175°C) for 10-15 minutes.
An air fryer at 375°F (190°C) for 5-8 minutes also works wonderfully, or a skillet over medium heat for a few minutes per side until heated through and re-crisped.
Troubleshooting Your Pea & Rice Patties: Common Issues Solved
Problem: Patties Crumbled in the Pan
Solution: The most common culprit is insufficient chilling time. Ensure you chill the formed patties for at least 30 minutes, or even longer, to allow the flour and starches to properly bind and set.
Also, make sure you’ve mashed enough peas to create a sticky base; a too-chunky mixture might lack sufficient binding.
Problem: Patties Are Too Soft or Mushy
Solution: This can happen if the peas or rice retain too much moisture. Ensure peas are well-thawed and any excess water is drained.
If the mixture feels overly wet, you can add another tablespoon of flour to absorb moisture, re-mix, and then proceed with chilling.
Problem: Not Getting Golden & Crispy
Solution: Check your oil temperature and quantity. Ensure the oil is hot and shimmering over medium heat, and use enough oil to generously coat the bottom of the pan.
Overcrowding the skillet can also lower the oil temperature and lead to steaming rather than frying, so cook in batches if necessary.
Problem: Patties Taste Bland
Solution: Don’t be afraid to adjust your seasoning! Add a little more salt and pepper to taste, or incorporate fresh herbs like mint or parsley for brighter flavor.
A pinch of garlic powder or a squeeze of lemon juice in the mixture can also significantly boost the overall taste profile.
Your Pea & Rice Patties Questions Answered
Can I use brown rice instead of white rice?
Yes, you can absolutely use cooked brown rice! It will impart a slightly nuttier flavor and a chewier texture. You might find the mixture slightly less cohesive, so consider adding an extra teaspoon of flour if needed.
How do I make these patties gluten-free?
To make these Pea & Rice Patties gluten-free, simply swap the all-purpose flour for a cup-for-cup gluten-free all-purpose flour blend or chickpea flour. All other ingredients are naturally gluten-free.
Can I bake these instead of frying?
While frying yields the crispiest results, you can bake them. Preheat your oven to 400°F (200°C). Brush both sides of the chilled patties with a little oil and bake for 15-20 minutes, flipping halfway, until golden and firm. The texture will be slightly less crispy.
What kind of sauce goes well with these?
These patties are incredibly versatile with sauces. A simple yogurt-based dip with lemon and dill, a spicy sriracha mayo, a fresh tomato salsa, or even a sweet chili sauce would all be fantastic choices.
Are these suitable for meal prep?
Absolutely! You can prepare the mixture and form the patties ahead of time, chilling them until ready to fry. Cooked patties store well in the refrigerator for several days and can also be frozen, making them perfect for future meals.
Ready to Impress? Share Your Pea & Rice Patties Masterpiece!
You’re now equipped with all the secrets to creating perfectly golden, non-crumbling Pea & Rice Patties. This recipe isn’t just a meal; it’s a testament to simple ingredients transforming into something truly extraordinary.
Don’t hesitate to give them a try, and when you do, share your culinary creations with us! We love seeing your delicious results and hearing about your favorite ways to enjoy these fantastic vegetarian treats.
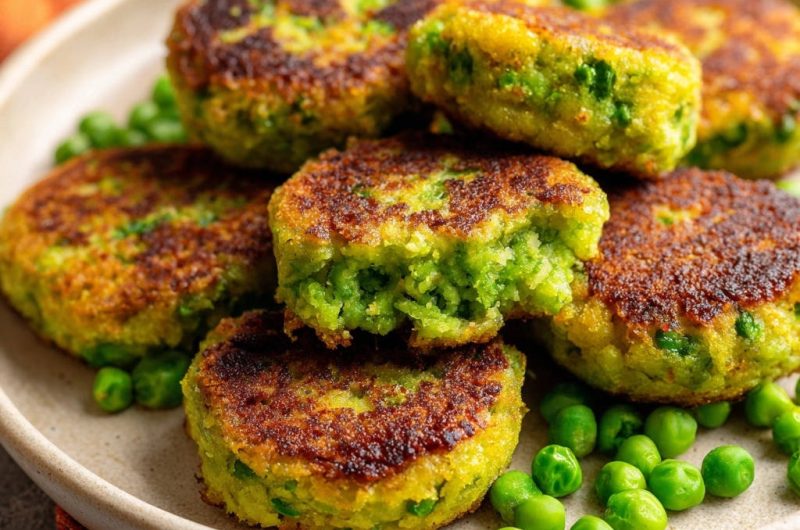
Pea Rice Patties
Course: Side DishCuisine: AmericanDifficulty: easy6
patties15
minutes20
minutes240
kcal60
minutesSay goodbye to crumbling patties! These vibrant Pea & Rice Patties use a simple trick to ensure they stay perfectly together and achieve a golden, crispy crunch. An easy, delicious meal every time.
Ingredients
2 cups frozen green peas, thawed
1 cup cooked white rice
1/4 cup all-purpose flour
1/2 teaspoon salt
1/4 teaspoon black pepper
2-3 tablespoons vegetable oil, for frying
Directions
- In a medium bowl, add the thawed green peas. Using a fork or a potato masher, gently mash about two-thirds of the peas. You want some peas to remain whole or partially mashed for texture, but enough mashed to create a sticky base.
- Add the cooked white rice, all-purpose flour, salt, and black pepper to the bowl with the mashed peas. Mix thoroughly with a spoon or your hands until everything is well combined and the mixture starts to come together. The flour will help bind everything.
- Divide the mixture into 6-8 equal portions. Lightly wet your hands and form each portion into a compact, flat patty, about 1/2 inch thick. Ensure the edges are firm and smooth.
- This is the crucial step for patties that hold their shape: Place the formed patties on a plate or baking sheet lined with parchment paper. Transfer them to the refrigerator and chill for at least 30 minutes. This chilling time allows the flour to fully absorb moisture and the starches to set, making the patties much firmer and preventing them from falling apart during cooking.
- Heat 2 tablespoons of vegetable oil in a large non-stick skillet over medium heat. Once the oil is shimmering, carefully place the chilled patties into the hot skillet, ensuring not to overcrowd the pan. You may need to cook them in batches.
- Cook the patties for 4-5 minutes per side, or until they are beautifully golden brown and crispy on the outside. Resist the urge to move them too much before they’ve had a chance to form a crust on the first side.
- Once cooked, transfer the pea and rice patties to a plate lined with a paper towel to drain any excess oil. Serve immediately as a delicious side, snack, or light meal.
Notes
- Chilling the patties for at least 30 minutes is crucial for them to hold their shape and prevent crumbling during cooking.