Mastering the Garden Vegetable Rice Pilaf: A Guide to Fluffy Grains
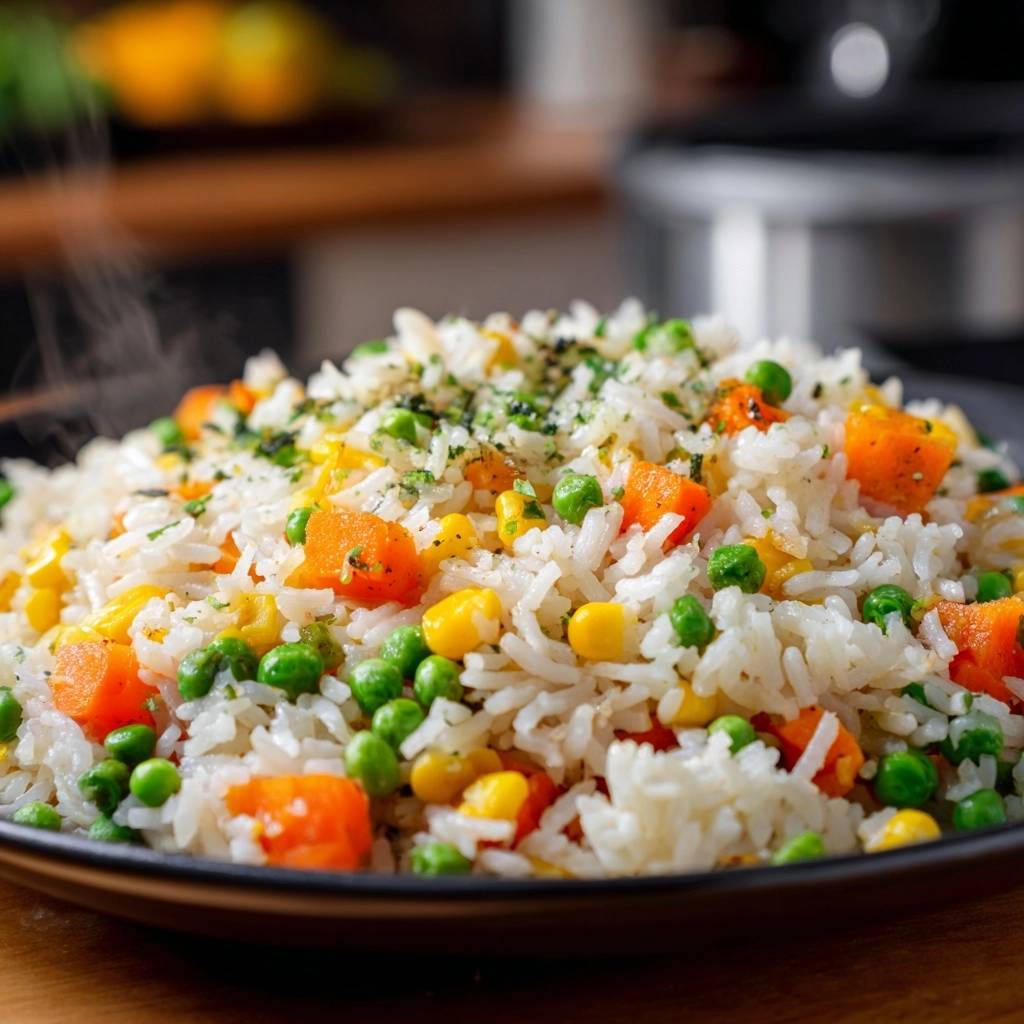
Stop settling for gummy, clumped together rice that ruins your side dish. Most home cooks struggle with rice that turns into a sticky paste, but the fix is simpler than you think. A true Garden Vegetable Rice Pilaf should feature distinct, individual grains that practically fall away from each other when touched with a fork.
The secret to restaurant-quality results lies in starch management and a specific heat control method. By treating the rice grains with a bit of fat before adding liquid, you lock in their shape and create a beautiful, fluffy texture. This dish isn’t just a side; it’s a vibrant display of colorful vegetables and perfectly cooked grains that hold their own on any plate.
I’ve found that the most common mistake is skipping the rinse or peeking under the lid too early. To get that professional finish, you must remove the surface starch that acts like glue. Once you master the “toasting” phase, you’ll never go back to the standard boiling method again. Let’s dive into how you can achieve this perfect structural integrity every single time.
The Anatomy of a Perfect Garden Vegetable Rice Pilaf
A great pilaf is a balance of savory depth and natural sweetness. By using vegetable broth instead of plain water, you infuse every grain with a foundational layer of flavor. The aromatics like garlic and onion powder provide a consistent savory backbone without the risk of burning fresh minced garlic during the high-heat toasting phase.
Texture contrast is just as important as flavor. You want the rice to be tender but firm, providing a base for the slight snap of the carrots and the pop of the sweet peas. The corn adds a juicy burst that complements the earthy notes of the dried parsley, creating a well-rounded bite that feels light yet satisfying.
Selecting the Right Grain for Structural Integrity
Not all rice is created equal when it comes to making a pilaf. Long-grain varieties like Basmati or Jasmine are the gold standard here because of their high amylose content. This specific type of starch helps the grains stay separate and fluffy rather than sticking together like short-grain sushi rice.
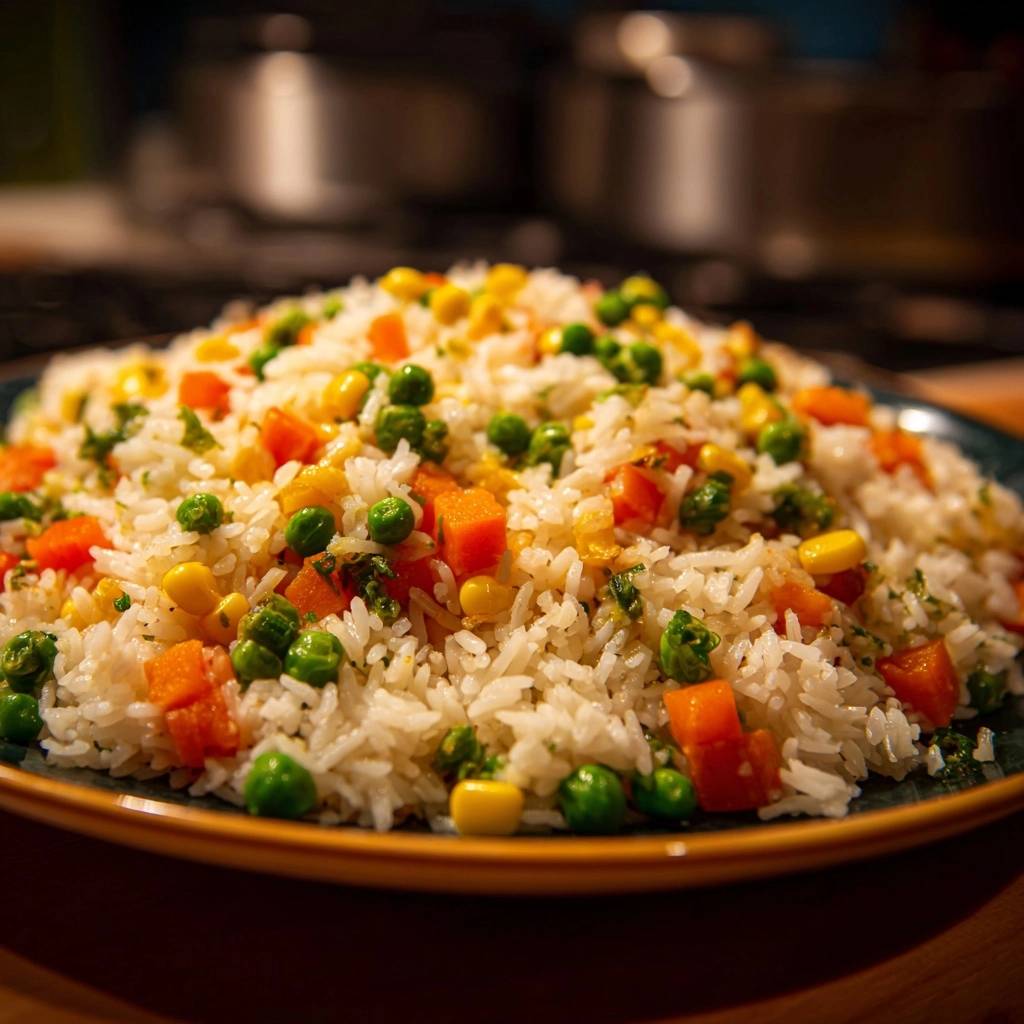
Basmati is particularly prized for its ability to elongate during cooking, providing a beautiful visual appeal. Jasmine offers a slightly floral aroma that pairs wonderfully with garden vegetables. Both options ensure that your finished dish has the “separate grain” finish that defines a high-end pilaf.
Essential Pantry Staples and Fresh Produce
The fat source is critical for both flavor and technique. I use a blend of olive oil and butter because the oil has a higher smoke point for toasting, while the butter adds a rich sheen and classic flavor. This combination ensures the rice doesn’t burn while it develops that necessary nutty aroma.
For the vegetables, size matters. Cutting carrots into 1/2 inch chunks ensures they soften at the exact same rate the rice cooks. We use dried parsley during the simmer because it stands up to the heat and infuses the liquid, while fresh parsley is saved for the very end to provide a hit of color and herbal brightness.
The Science of Starch: Why Rinsing is Non-Negotiable
If you’ve ever wondered why your rice turns out mushy, the culprit is almost always amylopectin. This is the surface starch that coats every grain of rice. When it hits hot water, it gelatinizes and turns into a sticky “glue” that binds the grains together into a clump.
The same toasting method works beautifully for this carrot pea couscous for fluffy grains.
To prevent this, you must rinse your rice in a fine-mesh strainer for at least two full minutes. Use your hands to agitate the grains, rubbing them together under cold running water. You’ll notice the water starts out milky and opaque; this is the excess starch washing away.
Keep rinsing until the water running through the bottom of the strainer is completely clear. This physical preparation is the single most important step for achieving a professional texture. Once the water is clear, drain the rice thoroughly so it’s ready to hit the hot fat in the pan without splattering.
Step-by-Step: Executing the Toasted Grain Method
Phase 1: The Initial Fat Infusion and Toasting
Heat your oil and butter until the butter is foamy but not browning. Add your rinsed rice and stir it constantly. You aren’t just coating the grains; you are actually frying the exterior of each one. This creates a hydrophobic barrier that prevents the rice from absorbing water too quickly and bursting.
Watch for the rice to change from translucent to a bright, opaque white. You’ll also start to smell a distinct nutty aroma, almost like popcorn. This phase usually takes about 3 to 4 minutes and is the key to ensuring the grains remain individual and firm after they are steamed.
Phase 2: Integrating Aromatics and Liquid Ratios
Once the rice is toasted, toss in your carrots and spices. We use a 1.5:1 liquid-to-rice ratio here (3 cups of broth for 2 cups of rice). This is slightly less liquid than the standard 2:1 ratio found on most bags, but it’s intentional. Since we are steaming the rice with a tight lid, we don’t need the extra water that usually evaporates in open-pot cooking.
Pour in the vegetable broth and bring it to a full, rolling boil. Give it one quick stir to make sure no grains are sticking to the bottom of the pot. This is the last time you will touch the rice until it is finished cooking, so make sure everything is well-distributed now.
Phase 3: The Precision Simmer and Steam Lock
As soon as the broth boils, turn the heat down to the lowest possible setting and clamp on a tight-fitting lid. This is the “No Peeking” zone. The thermodynamics of the pot rely on trapped steam to cook the center of each grain evenly. If you lift the lid, the temperature drops instantly and the steam escapes.
Lifting the lid results in rice that is hard in the middle and mushy on the outside. Set a timer for 15 minutes and trust the process. The low heat ensures the bottom doesn’t scorch while the steam does the heavy lifting of hydrating the toasted grains.
The Residual Heat Technique for Vibrant Vegetables
Peas and corn are delicate. If you boil them for the full 15 minutes with the rice, they will turn a dull, unappetizing grey and lose their sweetness. Instead, we use the “carry-over cooking” method. After the 15-minute simmer, remove the pot from the heat entirely.
If you want to skip the delicate vegetable timing entirely, try this cheesy mushroom carrot rice casserole where everything bakes together.
If you have leftover rice from this pilaf, try transforming it into these pea and rice patties for a crispy second meal.
Quickly lift the lid, scatter the frozen peas and corn over the top, and replace the lid immediately. Do not stir them in yet! Let the pot sit undisturbed for another 5 to 8 minutes. The residual steam is more than enough to thaw and cook these vegetables while keeping their vibrant colors and “pop” intact.
Troubleshooting Common Rice Pilaf Obstacles
If your rice is still crunchy after the resting period, don’t panic. Sprinkle one tablespoon of hot water over the top, replace the lid, and let it sit on the lowest heat for another 3 minutes. This usually provides just enough extra moisture to finish the softening process without making it gummy.
If you find the rice is burnt at the bottom, your heat was likely too high or your pot is too thin. Use a heavy-bottomed pot or a heat diffuser if your stove runs hot. Also, remember that the flavor comes from the broth; if the dish tastes bland, ensure you are seasoning the liquid itself before the simmer begins.
Flavor Variations and Seasonal Swaps
This Garden Vegetable Rice Pilaf is a fantastic canvas for other flavors. For a Mediterranean twist, stir in some fresh lemon zest and chopped dill at the very end. The acidity of the lemon cuts through the richness of the butter beautifully.
If you want to add more protein, toasted pine nuts or a can of rinsed chickpeas can be folded in during the final fluffing stage. For seasonal changes, try swapping the carrots for diced bell peppers in the summer or small cubes of parsnip in the winter to keep the dish fresh all year round.
Optimal Pairings for Garden Vegetable Rice Pilaf
This pilaf is incredibly versatile and acts as the perfect partner for roasted proteins. It pairs beautifully with grilled chicken skewers or a roasted leg of lamb. The lightness of the rice balances out the richness of the meat without competing for attention.
For a vegetarian feast, serve this alongside a hearty lentil stew or roasted cauliflower steaks. Because the pilaf is so colorful and textured, it elevates simple main courses into a complete, restaurant-style meal. It also works well as a base for “bowls” topped with fresh greens and a dollop of hummus.
Storage, Reheating, and Food Safety
Leftover rice needs careful handling because of a bacteria called Bacillus cereus, which can survive the cooking process. To stay safe, cool your leftover pilaf quickly by spreading it out on a baking sheet before moving it to an airtight container in the fridge. It will stay fresh for up to three days.
When reheating, avoid the microwave if possible, as it can make the grains rubbery. Instead, place the rice in a skillet with a splash of vegetable broth or water. Cover it and heat over medium-low, stirring occasionally. This creates a mini-steam environment that restores the original fluffy texture and prevents the rice from drying out.
What to Serve with Your Rice Pilaf
If you want to round out the meal with something that matches the vegetable-forward, fluffy grain vibe, here are two solid choices.
- For a sweet-and-savory contrast that picks up on the same veggie theme, try these Sticky Orange Cauliflower Bites; the citrus glaze cuts through the earthy rice nicely.
- If you’d rather keep it all in one bowl, the Chicken Veggie Fried Rice adds protein and uses similar grain-cooking principles, so the textures stay consistent.
Expert Tips for Restaurant-Quality Presentation
The way you handle the rice after it’s cooked is just as important as the cooking itself. Never use a spoon to stir the finished pilaf; the flat surface of a spoon can mash the grains. Always use a fork to gently “fluff” the rice, lifting and turning it to incorporate the vegetables and parsley.
For a fancy presentation, you can pack the rice into a small bowl or ring mold and invert it onto the plate. However, I prefer serving it in a wide, shallow bowl. This allows the vibrant colors of the peas, carrots, and corn to be fully visible, showcasing the beautiful distribution of ingredients you worked so hard to achieve.
How do I store leftover Garden Vegetable Rice Pilaf?
You should cool the rice as quickly as possible by spreading it in a thin layer on a tray. Once cool, transfer it to an airtight container and refrigerate for up to 3 days. Do not leave rice at room temperature for more than an hour, as this can allow harmful bacteria to grow.
Why is my rice still crunchy even after 15 minutes?
This usually happens if the lid wasn’t tight enough or the heat was too low to create sufficient steam. To fix it, add 1-2 tablespoons of broth or water, cover tightly, and let it steam on low heat for an additional 5 minutes. Never try to fix crunchy rice by adding a lot of water, or it will turn into mush.
Can I use brown rice for this recipe?
You can, but you will need to adjust the liquid and time significantly. Brown rice typically requires a 2:1 or 2.5:1 liquid ratio and takes 40-45 minutes to cook. The vegetables would also need to be added much later in the process to prevent them from disintegrating during the long simmer.
What is the best way to reheat rice without it getting hard?
The best method is on the stovetop. Add the rice to a pan with a small splash of water or broth, cover it with a lid, and heat on low. The steam will rehydrate the grains. If you must use a microwave, cover the bowl with a damp paper towel to keep the moisture locked in.
Can I substitute the vegetable broth?
Yes, you can use chicken broth if you prefer a meat-based flavor. If you only have water, make sure to increase the salt and perhaps add a bit more onion and garlic powder to compensate for the loss of the savory base that broth provides.
Why do I have to toast the rice in oil first?
Toasting the rice creates a physical barrier around each grain. This prevents the grains from absorbing water too quickly and releasing too much starch. This step is the “secret” to getting that fluffy, non-sticky texture where every grain remains separate.
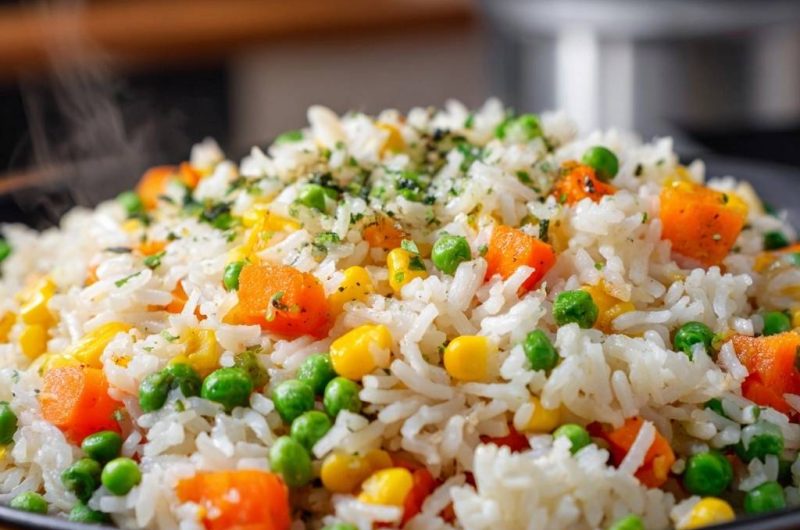
Rice Pilaf
Course: Side DishCuisine: AmericanDifficulty: easy4
servings10
minutes20
minutes320
kcal30
MinutesA vibrant and fluffy rice dish packed with carrots, peas, and corn. This recipe focuses on starch management and toasting techniques to ensure every grain remains individual and perfectly textured.
Ingredients
2 cups long-grain white rice (Basmati or Jasmine recommended for the visual length shown)
3 cups vegetable broth
1 ½ cups large-diced carrots (cut into ½ inch chunks to match image)
1 cup frozen sweet peas
1 cup sweet corn kernels
2 tablespoons olive oil
1 tablespoon butter (for flavor and sheen)
1 teaspoon garlic powder
1 teaspoon onion powder
1 teaspoon dried parsley (for the herb flecks shown)
Salt and black pepper to taste
Fresh parsley, finely chopped for garnish
Directions
- The most critical step to prevent mushiness is rinsing. Place your raw rice in a fine-mesh strainer and run cold water over it for at least 2 minutes, agitating the grains with your hand, until the water runs completely clear. This removes the surface starch that causes sticking. Drain thoroughly.
- Heat the olive oil and butter in a large pot or deep skillet over medium-high heat. Add the rinsed, drained rice to the hot fat. Stir constantly for 3 to 4 minutes. You are looking for the rice to smell nutty and turn a bright opaque white. This toasting step creates a protective barrier around each grain.
- Add the diced carrots to the pot and sauté with the rice for 2 minutes.
- Pour in the vegetable broth, garlic powder, onion powder, dried parsley, salt, and pepper. Bring the mixture to a full, rolling boil.
- Once boiling, stir once to ensure no grains are stuck to the bottom, then turn the heat down to the lowest possible setting and cover with a tight-fitting lid. Do not lift the lid. Steam is what cooks the rice perfectly; releasing it results in uneven, hard grains.
- Simmer for 15 minutes. Remove from heat. Quickly lift the lid, scatter the frozen peas and corn over the top of the rice (do not stir yet), and immediately replace the lid. Let it sit off the heat for 5 to 8 minutes. The residual steam will perfectly cook the vegetables while the rice finishes absorbing moisture.
- Add the fresh parsley, then fluff gently with a fork to incorporate the vegetables and separate the grains. Serve immediately while steaming hot.
Notes
- Rinsing the rice is the most critical step to remove surface starch and prevent a gummy texture. Do not lift the lid during the steaming process.