Red Velvet Thumbprint Cookies: No-Crack Recipe Perfection

There’s nothing more disheartening than pressing your thumb into a beautifully rolled cookie dough ball, only to watch the edges crack and crumble around the indentation. I’ve faced that frustration countless times with thumbprint cookies!
But through much testing, I’ve perfected this recipe for truly stunning and crack-free Red Velvet Thumbprint Cookies. Get ready to bake bakery-worthy treats that are as delightful to look at as they are to eat.
The No-Crack Promise: Why Our Red Velvet Thumbprint Cookies Are a Must-Bake
This recipe stands out because it guarantees those picture-perfect, smooth indentations every single time. Our carefully developed technique, including the pliable dough and gentle re-pressing, eliminates common cracking issues.
The result is a batch of vibrant, soft, and richly flavored cookies that look professionally made. They feature a beautiful red velvet base crowned with a luscious, tangy cream cheese filling.
These Red Velvet Thumbprint Cookies are surprisingly easy to master, even for novice bakers. They are an absolute showstopper for holiday gatherings, potlucks, gifts, or simply a cozy treat with your afternoon coffee.
Gather Your Delights: Essential Ingredients for Red Velvet Perfection
For the Vibrant Cookie Dough Base
All-purpose flour provides the essential structure for your cookies. Unsweetened cocoa powder gives that signature subtle chocolate flavor and deepens the red hue.
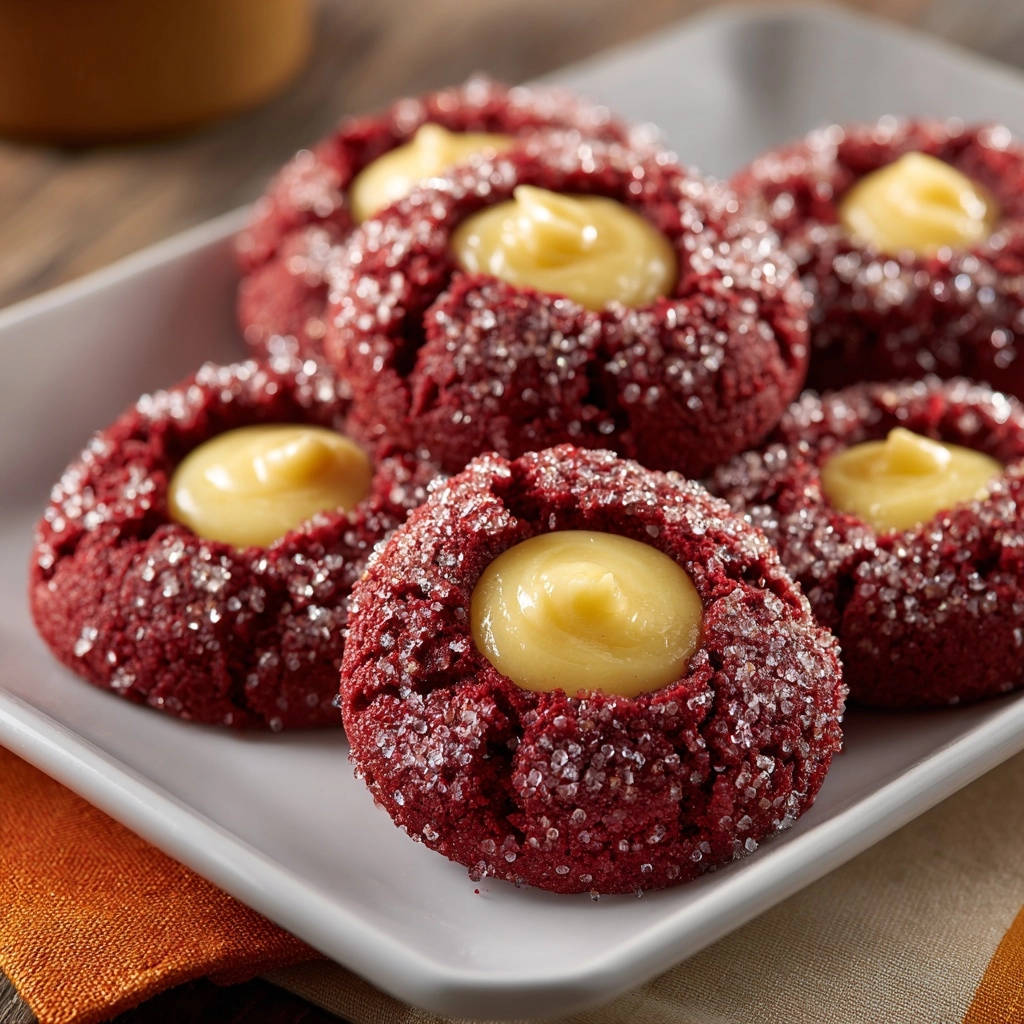
Baking soda acts as a leavening agent, ensuring your cookies have a soft, tender crumb. Salt balances the sweetness and enhances all the flavors.
Unsalted butter and granulated sugar are creamed together to create a light and fluffy base, contributing to the cookie’s rich texture. A large egg binds the ingredients, while vanilla extract adds warmth and depth.
Crucially, red food coloring (gel is highly recommended) gives these cookies their iconic vibrant red color. Buttermilk adds a tangy note and ensures an incredibly tender and moist cookie, reacting with the baking soda for perfect lift.
Crafting the Velvety Cream Cheese Filling
Softened cream cheese and unsalted butter form the creamy, rich base of our irresistible filling. Their softness is key for a smooth consistency.
Powdered sugar sweetens the filling and provides the necessary body to hold its shape. Vanilla extract enhances the classic cream cheese frosting flavor.
A small amount of milk allows for minor adjustments to the filling’s consistency, ensuring it’s perfectly pipeable or spoonable.
The Finishing Touch: Sugar for Rolling
Granulated sugar used for rolling provides a delightful sparkling exterior and a subtle textural contrast. It also helps prevent the dough from sticking and gives the cookies a beautiful, finished look.
Your Baking Arsenal: Tools for Flawless Thumbprints
Electric Mixer: Essential for creaming butter and sugar until light and fluffy, and for whipping up the smooth cream cheese filling.
Medium and Large Mixing Bowls: Needed for separating dry and wet ingredients and for combining the cookie dough and filling components.
If you love the tender crumb of these thumbprints, try the rich filling in these red velvet cream cheese cookies.
Whisk: For thoroughly combining your dry ingredients, ensuring even distribution of leavening agents and flavor.
Measuring Cups and Spoons: Accurate measurements are crucial for consistent baking results.
Rubber Spatula: Perfect for scraping down the sides of the bowl and gently folding ingredients, preventing overmixing.
Baking Sheets: Sturdy sheets are vital for even baking and proper heat distribution.
Parchment Paper: Prevents sticking, makes cleanup a breeze, and ensures consistent baking without hot spots.
Wire Rack: For cooling cookies completely, preventing sogginess and allowing air circulation.
Rounded Teaspoon or Measuring Spoon: The secret weapon for creating perfect, crack-free indentations in your cookie dough balls.
From Bowl to Bake: Your Guide to Perfect Red Velvet Thumbprint Cookies
- Prepare for Baking:
Preheat your oven to 375°F (190°C). This ensures your oven is at the correct temperature for immediate, even baking. Line baking sheets with parchment paper to prevent sticking and aid in easy removal.
- Combine Dry Ingredients:
In a medium bowl, whisk together the all-purpose flour, unsweetened cocoa powder, baking soda, and salt. Whisking thoroughly ensures all dry ingredients are evenly distributed, leading to uniform texture and rise.
- Cream Wet Ingredients:
In a large bowl, use an electric mixer to cream together the softened unsalted butter and 1 1/2 cups granulated sugar. Beat until the mixture is light, fluffy, and pale in color, typically 2-3 minutes. This step incorporates air, which contributes to a tender cookie.
- Incorporate Flavor & Color:
Beat in the large egg, vanilla extract, and red food coloring (gel works best for vibrant color saturation). Continue mixing until all ingredients are well combined and the color is uniformly distributed throughout the butter mixture.
- Alternating Wet and Dry:
Gradually add the whisked dry ingredients to the wet mixture, alternating with the buttermilk. Begin and end with the dry ingredients. Mix on low speed until just combined; avoid overmixing, which can lead to tough cookies.
- Achieving Pliable Dough: The No-Crack Secret!
This is a critical step for crack-free thumbprints. Your dough should be pliable, not too sticky or too firm. If it’s too sticky, chill for 10-15 minutes; if too firm, let it sit at room temperature for a few minutes until it’s easily workable. Take spoonfuls of dough and roll them into uniform 1-inch balls.
- Sugar Coating:
Roll each cookie dough ball generously in the remaining 1/2 cup granulated sugar. This coating adds a lovely sparkle and a slight textural crunch. Place the coated balls about 2 inches apart on your prepared baking sheets, allowing room for slight expansion.
For a perfect pairing, try our Red Velvet Oreo Cheesecake Brownies Recipe.
- Creating the Perfect Indentation: No Cracks Allowed!
The secret to perfect indentations lies in a rounded tool. Use the back of a rounded teaspoon or a clean, rounded measuring spoon. Gently but firmly press into the center of each dough ball to create a deep well. If any minor cracks appear, gently smooth them with your finger or by lightly rotating the spoon as you press. The pliable dough from the previous step will make this incredibly easy.
- Baking & Re-Pressing:
Bake for 9-11 minutes, or until the edges are lightly set but the centers still appear soft. Do not overbake. Remove from the oven, and if any indentations have puffed up during baking, gently re-press them with the back of the spoon while the cookies are still warm and pliable. This ensures well-defined wells for your filling.
- Cooling the Cookies:
Let the cookies cool on the baking sheets for 5 minutes immediately after baking. This allows them to set slightly before they are moved. Then, carefully transfer them to a wire rack to cool completely before filling.
- Whipping Up the Cream Cheese Filling:
While the cookies cool, prepare the filling. In a medium bowl, beat softened cream cheese and 1/4 cup softened butter until smooth and creamy. Gradually add the powdered sugar, beating until the mixture is light and fluffy. Stir in the vanilla extract.
If a thinner consistency is desired for piping, add milk one tablespoon at a time until you reach your preferred texture. For a thicker filling, you may add a touch more powdered sugar.
- Filling & Finishing:
Once the Red Velvet Thumbprint Cookies are completely cool, spoon or pipe the prepared cream cheese filling into the indentations. For a neat finish, a piping bag with a round tip works beautifully, but a small spoon is perfectly effective.
Chef’s Secrets: Elevating Your Red Velvet Thumbprint Cookie Game
The Magic of Pliable Dough: The single most important factor for crack-free thumbprints is the dough’s consistency. It needs to be soft enough to yield easily under pressure but firm enough to hold its shape. Adjusting with a brief chill or a few minutes at room temperature makes all the difference.
Don’t Overmix: Once you add the flour, mix only until just combined. Overmixing develops gluten, which can lead to tough, dense cookies. A light hand ensures a tender, melt-in-your-mouth texture.
Gel vs. Liquid Food Coloring: For the most vibrant red color without altering your dough’s consistency, always opt for gel food coloring. Liquid food coloring can thin the dough and dilute the color.
Accurate Measuring: Especially with flour, proper measurement is key. Use the “spoon and level” method: spoon flour into your measuring cup, then level off the top with a straight edge. This prevents adding too much flour, which can result in dry cookies.
Room Temperature Ingredients: Ensure your butter and cream cheese are truly softened for both the dough and the filling. This allows for seamless incorporation and prevents lumps, resulting in a smooth batter and a silky filling.
Re-Pressing for Perfection: Don’t skip the step of gently re-pressing the indentations immediately after baking if they’ve puffed up. This ensures your wells are deep and defined, perfect for holding generous dollops of cream cheese filling, much like our decadent pumpkin pie truffles maintain their perfect shape.
Troubleshooting Common Thumbprint Cookie Challenges
Why Do My Red Velvet Thumbprint Cookies Crack When Pressed?
Cracking is usually due to dough that’s too cold or too firm. Ensure your dough is pliable, as instructed in Step 6. If it feels stiff, let it warm up slightly at room temperature before pressing. A quick solution is to gently smooth any small cracks with your finger or a damp cloth as you press the indentation.
Why Did My Cookies Spread Too Much While Baking?
Excessive spreading can be caused by butter that’s too soft (or even slightly melted), an oven that isn’t preheated correctly, or simply dough that’s too warm. Always use softened, but not melted, butter, and ensure your oven is fully preheated. If your kitchen is warm, chill the rolled dough balls briefly before baking.
What to Serve with These Cookies
These red velvet thumbprint cookies have a soft, cake-like texture and a sweet cream cheese filling. Balance them with something savory and rich for a full spread.
- Start the meal with a plate of Homemade Biscuits and Sausage Gravy for a hearty, peppery contrast to the cookies’ sweetness.
- For a lighter option alongside the cookies, try a slice of Crustless Spinach Feta Quiche with its fluffy texture and salty feta tang.
My Cream Cheese Filling is Too Runny (or Too Thick)! How Can I Fix It?
If your filling is too runny, gradually beat in more powdered sugar, one tablespoon at a time, until it reaches your desired consistency. If it’s too thick, add milk a teaspoon at a time until it’s smooth and spreadable. Temperature also plays a role; ensure all dairy ingredients are softened before mixing.
Why Are My Cookies Tough or Dry?
Tough or dry Red Velvet Thumbprint Cookies are typically the result of overmixing the dough once flour is added, or overbaking. Mix the dough only until the ingredients are just combined. Bake only until the edges are lightly set and the centers are still soft; they will continue to set as they cool.
Serving Suggestions & Storage Smarts
How to Serve Your Red Velvet Thumbprint Masterpieces
These Red Velvet Thumbprint Cookies are perfect on their own, perhaps with a cup of coffee or tea. Arrange them on a festive platter for holidays or special occasions. They also make a thoughtful and delicious homemade gift, beautifully packaged in a decorative tin.
Storing for Freshness: Keep Them Delicious
Store filled Red Velvet Thumbprint Cookies in an airtight container in the refrigerator for up to 3-4 days due to the cream cheese filling. For optimal flavor, allow them to come to room temperature for about 15-20 minutes before serving.
Can I Make Red Velvet Thumbprint Cookies Ahead of Time?
Absolutely! You can prepare the cookie dough ahead of time and store it, tightly wrapped, in the refrigerator for up to 3 days. Let it come to room temperature for about 15-20 minutes before rolling and baking.
Baked, unfilled cookies can be stored at room temperature in an airtight container for up to 5 days. For longer storage, both the raw dough balls (unbaked) and the baked, unfilled cookies can be frozen. This flexibility makes them perfect for planning ahead, much like preparing dough for chocolate crumb cheesecake bars in advance.
Your Burning Questions Answered: Red Velvet Thumbprint Cookie FAQs
Can I use liquid food coloring instead of gel for Red Velvet Thumbprint Cookies?
While you can use liquid food coloring, gel food coloring is highly recommended. Liquid food coloring can dilute the dough slightly and may not provide as vibrant a red hue, requiring more liquid to achieve the desired color, which can affect the cookie’s texture.
Is there a dairy-free substitute for buttermilk in this recipe?
Yes, if you don’t have buttermilk, you can easily make a substitute. Combine 1/2 cup of regular milk with 1/2 tablespoon of white vinegar or lemon juice. Let it sit for 5 minutes until it slightly curdles, then use as directed. For a fully dairy-free option, you could experiment with a plant-based milk + vinegar combination, though results may vary slightly.
Can I freeze these Red Velvet Thumbprint Cookies?
Yes, both the unbaked dough and the baked, unfilled cookies freeze well. To freeze dough, roll into balls, flatten slightly, and freeze on a baking sheet until solid. Transfer to a freezer-safe bag for up to 3 months. Bake from frozen, adding a minute or two to the bake time. For baked cookies, freeze unfilled cookies in an airtight container for up to 2 months; thaw and fill when ready to serve.
What’s the best way to get consistent cookie size for professional-looking results?
For uniform cookies, use a 1-tablespoon cookie scoop to portion out the dough. This ensures each cookie is roughly the same size, leading to even baking and a more aesthetically pleasing presentation. Alternatively, you can weigh each dough ball for ultimate precision.
How long do Red Velvet Thumbprint Cookies last?
Filled Red Velvet Thumbprint Cookies should be stored in the refrigerator and are best enjoyed within 3-4 days. Unfilled, baked cookies can be stored at room temperature in an airtight container for up to 5 days. For longer preservation, freezing is the best option.
Ready to Bake Your Own Red Velvet Masterpiece?
Creating these stunning Red Velvet Thumbprint Cookies is an incredibly rewarding experience. With our expert tips and the “no-crack” method, you’re equipped to bake a batch that will impress everyone who tastes them.
Dive into your kitchen with confidence, and prepare to delight friends and family with these vibrant, delicious treats. We can’t wait to see your beautiful creations!

Red Velvet Thumbprint Cookies
Course: DessertCuisine: AmericanDifficulty: medium2
dozen cookies30
minutes9
minutes900
kcal60
minutesTired of cracked thumbprint cookies? This recipe reveals the secrets to achieving bakery-worthy red velvet thumbprints with smooth, unblemished edges every time. Filled with a luscious cream cheese frosting, these cookies are as beautiful as they are delicious.
Ingredients
2 1/4 cups all-purpose flour
1/4 cup unsweetened cocoa powder
1 teaspoon baking soda
1/2 teaspoon salt
1 cup (2 sticks) unsalted butter, softened
1 1/2 cups granulated sugar
1 large egg
1 teaspoon vanilla extract
2 tablespoons red food coloring (gel or liquid)
1/2 cup buttermilk (or 1/2 cup milk + 1/2 tablespoon white vinegar, let sit 5 mins)
For the Cream Cheese Filling:
4 ounces cream cheese, softened
1/4 cup unsalted butter, softened
2 cups powdered sugar
1 teaspoon vanilla extract
1-2 tablespoons milk (if needed for consistency)
For Rolling:
1/2 cup granulated sugar
Directions
- Preheat oven to 375 degrees F. Line baking sheets with parchment paper.
- In a medium bowl, whisk together the flour, cocoa powder, baking soda, and salt. Set aside.
- In a large bowl, using an electric mixer, cream together the softened butter and 1 1/2 cups granulated sugar until light and fluffy.
- Beat in the egg, vanilla extract, and red food coloring until well combined.
- Gradually add the dry ingredients to the wet ingredients, alternating with the buttermilk, beginning and ending with the dry ingredients. Mix until just combined.
- This is the key to perfect thumbprints: If your dough seems too sticky or too firm, chill it for just 10-15 minutes or let it sit at room temperature for a few minutes. The trick is to have the dough pliable, not too cold or too warm. Take spoonfuls of dough and roll them into 1-inch balls.
- Roll each cookie dough ball in the 1/2 cup granulated sugar until fully coated. Place them about 2 inches apart on the prepared baking sheets.
- The secret to no cracks: Use the back of a rounded teaspoon or a clean, rounded measuring spoon. Gently press into the center of each dough ball to create an indentation. If the edges start to crack slightly, gently smooth them with your finger or by lightly rotating the spoon as you press. The pliable dough from step 6 will help tremendously here.
- Bake for 9-11 minutes, or until the edges are lightly set and the centers are still soft. Remove from oven. If the indentations have puffed up, gently re-press them with the back of the spoon while the cookies are still warm.
- Let cookies cool on the baking sheets for 5 minutes before transferring to a wire rack to cool completely.
- While cookies cool, prepare the cream cheese filling. In a medium bowl, beat softened cream cheese and 1/4 cup softened butter until smooth. Gradually add the powdered sugar, beating until creamy. Stir in vanilla extract. Add milk 1 tablespoon at a time if a thinner consistency is desired.
- Once cookies are completely cool, spoon or pipe the cream cheese filling into the indentations.
Notes
- The key to perfect thumbprints is dough pliability; re-press indentations while cookies are still warm if needed.