Mastering Red Velvet Cream Cheese Stuffed Cookies
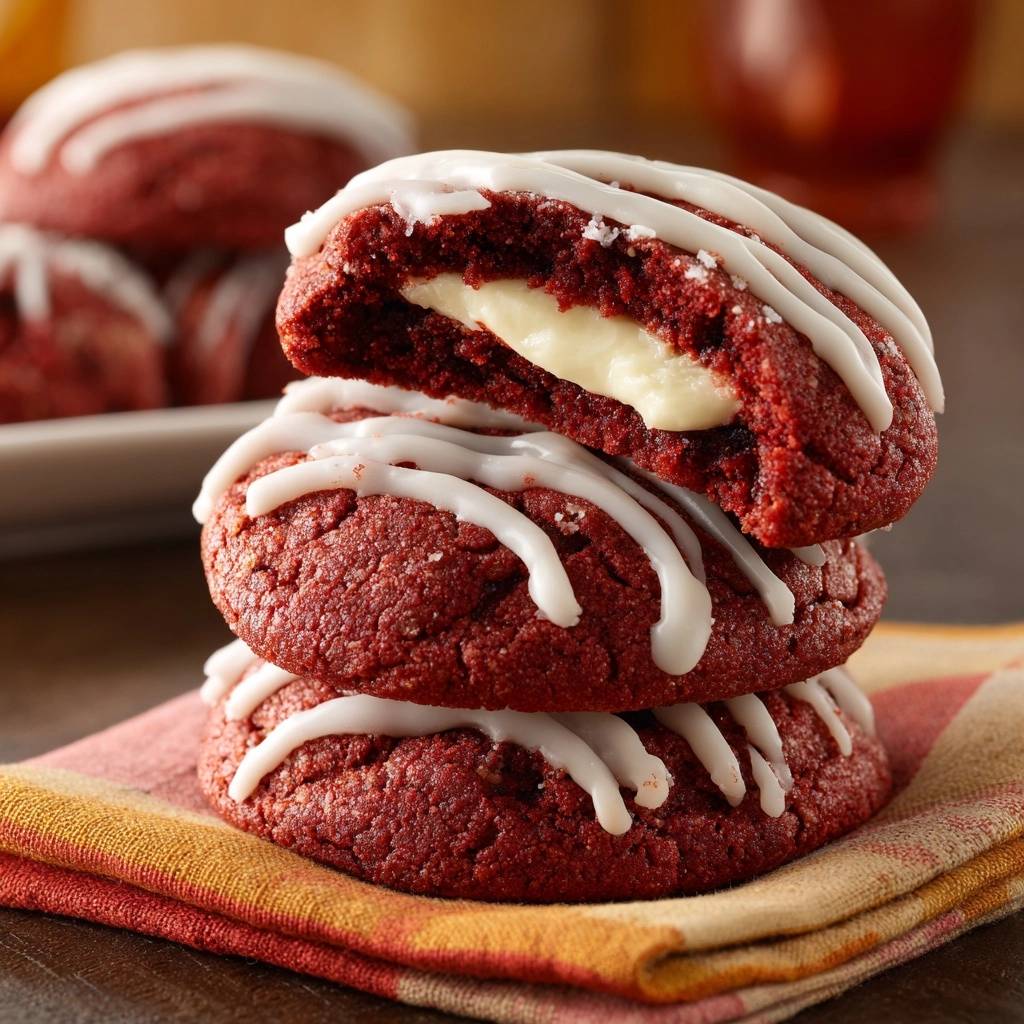
Imagine biting into a cookie that offers a dramatic contrast of deep, velvety crimson and a startlingly white, molten center. These Red Velvet Cream Cheese Stuffed Cookies aren’t just a treat for the eyes; they provide a complex sensory experience that balances rich cocoa with a tangy, cheesecake-like interior. The texture is soft and fudgy, while the center remains creamy and luscious, creating a decadent mouthfeel that feels like a high-end bakery find.
However, many home bakers struggle with stuffed cookies because the filling often leaks out, leaving a hollow shell and a burnt mess on the baking sheet. This recipe solves that frustrating “puddling” problem by utilizing a specific temperature-control technique. By mastering the art of the thermal barrier, you’ll ensure that every single cookie holds its shape while hiding a perfectly centered surprise.
The secret to this professional-grade result is flash-freezing the cream cheese filling before it ever touches the dough. This extra step might seem small, but it’s the difference between a failed experiment and a masterpiece. When the frozen core hits the oven, it stays solid long enough for the surrounding dough to set its structure, locking the filling inside where it belongs.
The Science of Temperature and Texture
To understand why these cookies work, we have to look at the physics of the “Thermal Barrier.” When you place a room-temperature cream cheese filling inside raw dough, both components melt at roughly the same rate. This usually leads to the filling bursting through the sides of the cookie before the edges have a chance to crisp up and seal the deal.
By flash-freezing the cream cheese into rock-solid pucks, you create a delayed melt point. As the cookie bakes at 350°F, the exterior dough begins to dehydrate and set its gluten structure. Meanwhile, the frozen center is slowly absorbing heat, transitioning from a solid to a soft custard only after the “walls” of the cookie are strong enough to contain it.
In addition to temperature, we use cornstarch in the dry mix to manipulate the texture. Cornstarch interferes with gluten development, which is essential for preventing a “bread-like” or tough crumb. It keeps the red velvet base tender and soft, ensuring it mimics the delicate bite of a classic cake rather than a dense biscuit.
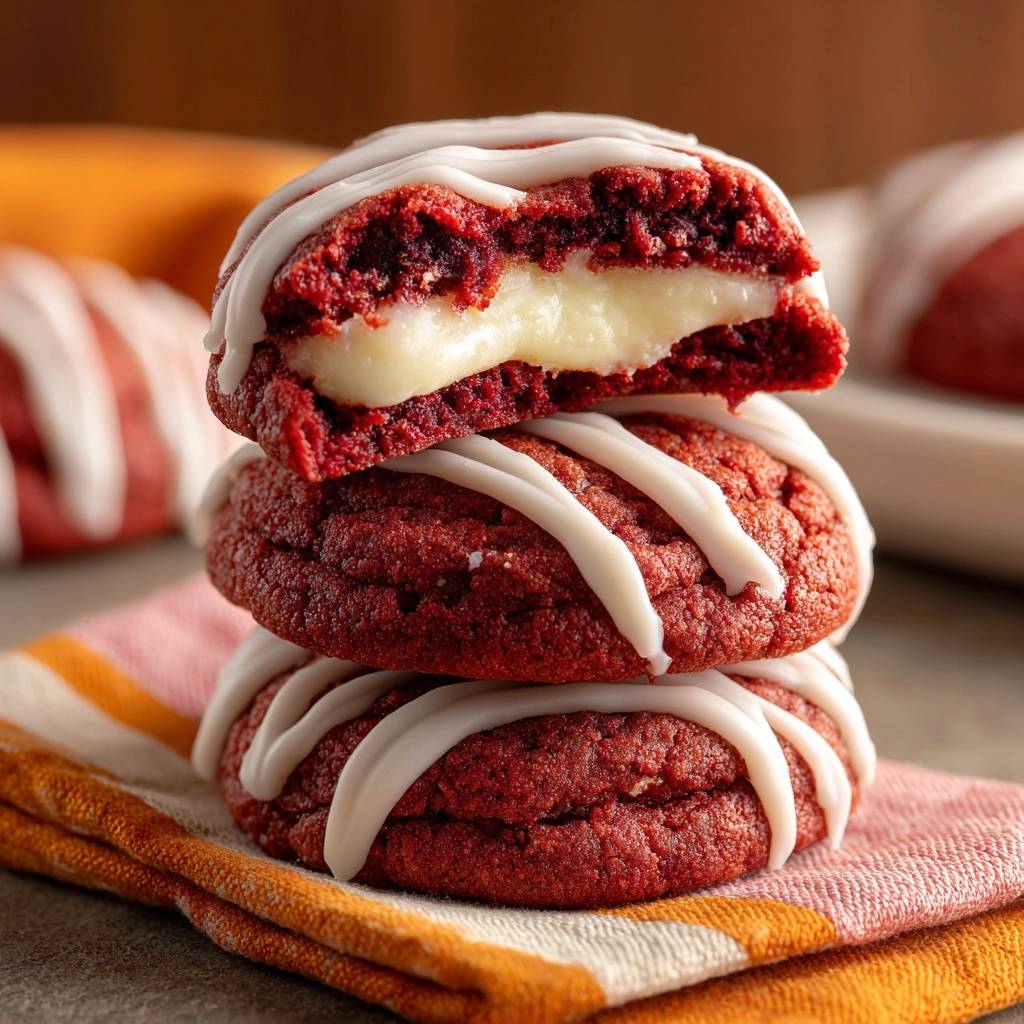
Therefore, the combination of a frozen core and a tenderized dough creates the perfect environment for a stuffed cookie. The exterior becomes firm enough to handle, while the interior remains a gooey, creamy delight. It’s a delicate balance of heat and chemistry that yields a superior result every time.
Essential Components for the Red Velvet Base
The foundation of a great red velvet cookie is the cocoa powder. While many recipes call for Dutch-processed cocoa for its dark color, I recommend a standard unsweetened natural cocoa powder here. Natural cocoa is more acidic, which reacts better with the baking soda to provide a slight lift and that classic, subtle tang red velvet is known for.
When it comes to the color, gel food coloring is your best friend. Liquid food coloring adds too much moisture to the dough, which can lead to spreading and a greasy texture. A high-quality gel provides a vibrant, deep crimson without thinning out the batter, ensuring your cookies look as rich as they taste.
Furthermore, you must use a room-temperature egg. Cold eggs don’t emulsify properly with the creamed butter and sugar, which can cause the dough to “break” or look curdled. A room-temperature egg incorporates smoothly, creating a stable emulsion that supports the heavy cream cheese center during the bake.
Don’t forget the importance of measuring your flour correctly. If you pack the flour into the measuring cup, you’ll end up with too much, resulting in a dry, crumbly cookie. Instead, fluff the flour with a spoon, scoop it into the cup, and level it off with a knife for the most accurate results.
Selecting the Right Cream Cheese
For the filling, full-fat brick cream cheese is absolutely mandatory. Do not reach for the spreadable tubs or whipped versions found in the dairy aisle. Those products contain higher water content and stabilizers that prevent them from freezing into the solid “pucks” we need for this recipe.
The lower moisture content in brick cream cheese ensures a thick, custard-like mouthfeel once baked. If you use a low-fat version, the filling will likely become watery and soak into the dough, causing the cookie to become soggy from the inside out. Stick to the heavy stuff for the best results.
The Role of Sugars and Fats
We use a specific ratio of light brown sugar to granulated white sugar to achieve the perfect chew. The molasses in the brown sugar provides moisture and a slight acidity that keeps the cookie soft for days. It also adds a hint of caramel flavor that complements the cocoa beautifully.
The white sugar, on the other hand, helps the edges crisp up just enough to provide structural integrity. Without the white sugar, the cookie would be too soft to hold the heavy cream cheese center. This balance of fats and sugars is what allows the cookie to be both sturdy and melt-in-your-mouth tender.
Step-by-Step: Preparing the Frozen Core
Start by beating your cold cream cheese with powdered sugar and vanilla until the mixture is completely smooth. You want to ensure there are no lumps, as these will be noticeable in the final baked product. Once smooth, drop rounded teaspoons of the mixture onto a parchment-lined tray.
I highly recommend using a small cookie scoop for this part to ensure every filling is the exact same size. Uniformity is key because it ensures that every cookie in the batch bakes at the same rate. If some fillings are larger than others, you’ll end up with some cookies that are raw in the middle and others that are overbaked.
Place the tray in the freezer for at least 30 to 45 minutes. They need to be “rock solid” to the touch. If they feel tacky or soft when you try to pick them up, give them another 15 minutes. This step is the most important part of the entire process, so don’t rush it!
Mixing the Vibrant Crimson Dough
When you begin the dough, cream the softened butter and sugars for at least two full minutes. You’re looking for a “light and fluffy” texture, which indicates that you’ve incorporated enough air into the fat. This aeration provides the lift needed to keep the cookie from becoming a flat pancake.
After adding the egg and the red gel coloring, the mixture should look like bright red silk. In addition, make sure you scrape down the sides of the bowl frequently. You don’t want any streaks of uncolored butter or sugar hiding at the bottom, as this will lead to splotchy cookies.
Once you add the dry ingredients, turn your mixer to the lowest setting. Mix only until the white streaks of flour disappear. Overmixing at this stage develops gluten, which will turn your soft, velvety cookies into something tough and rubbery. Stop as soon as the dough comes together.
The Assembly: Sealing the Stuffed Centers
Now comes the technical part. Take about two tablespoons of dough and flatten it into a wide disc in the palm of your hand. Place one of your frozen cream cheese balls right in the center. Carefully fold the edges of the dough up and over the filling, pinching the seams tightly.
This shaping technique works perfectly for these thick, chewy chocolate chunk cookies too.
You must ensure there are no “micro-cracks” or thin spots where the white filling is visible. If you see any white peeking through, patch it with a tiny bit of extra dough. Roll the assembled ball between your palms to smooth out the surface and create a perfect sphere.
Work quickly during this stage so the cream cheese doesn’t have time to thaw. If the dough starts to feel too warm or sticky, pop it in the fridge for ten minutes. A cold dough is much easier to handle and helps maintain the shape of the cookie during the initial minutes of baking.
Precision Baking and the Carry-Over Method
Preheat your oven to 350°F and place the dough balls at least three inches apart. These cookies will spread slightly, and they need room for the air to circulate around them. Sprinkle a tiny pinch of flaky sea salt on top before sliding them into the oven.
Bake for 11 to 13 minutes. You are looking for the edges to be firm and set, but the centers should still look slightly soft and underbaked. Do not wait for the centers to look “done,” or you will end up with a dry cookie and a grainy filling.
The “carry-over cooking” method is essential here. Let the cookies rest on the hot baking sheet for at least 15 minutes after removal. The residual heat from the pan will finish cooking the center to a perfect custard consistency while the edges stay crisp. This rest period is what creates that professional, bakery-style texture.
Troubleshooting Common Red Velvet Obstacles
If your cookies spread too thin, your butter was likely too warm when you started. Butter should be soft enough to indent with a finger but still hold its shape. If it’s oily or melting, the cookies will lose their structure in the oven. You can fix this by chilling the dough balls for 30 minutes before baking.
If your red color looks more like a muddy brown, it’s usually a pH issue. Natural cocoa powder is acidic, but if you accidentally used a heavily alkalized Dutch-process cocoa without adjusting the leavening, the color can shift. Stick to the recipe’s cocoa recommendations to keep that vibrant red hue.
Leaking is almost always caused by a loose seal or a filling that wasn’t frozen long enough. If you notice a blowout, don’t panic! You can often use a spoon to gently push the dough back over the leak while the cookie is still hot and soft from the oven.
Preventing the “Bleeding” Effect
To keep the white center looking pristine, try to handle the dough as little as possible once the filling is inside. The red dye in the dough is very strong and can easily stain the white cream cheese if you over-handle it. Use clean hands for each assembly to keep the colors distinct.
Fixing a Runny Glaze
The glaze should be thick enough to hold its shape but thin enough to drizzle. If it’s running off the cookie and disappearing, whisk in another tablespoon of powdered sugar. You want a “thick zigzag” look that sits proudly on top of the crimson dough rather than soaking in.
Storage and Make-Ahead Strategies
Because these cookies contain a significant amount of dairy in the center, they must be stored in the refrigerator. Place them in an airtight container, and they will stay fresh for up to five days. The cold temperature actually makes the cream cheese center even fudgier and more delicious.
If you prefer that “molten” experience, you can reheat a cold cookie in the microwave for about 10 to 15 seconds. This will soften the center without drying out the red velvet exterior. It’s the perfect way to enjoy a “fresh from the oven” taste even days later.
You can also freeze the unbaked, stuffed dough balls for up to three months. When you’re ready for a treat, just bake them directly from the freezer. You may need to add two or three minutes to the total baking time, but the result will be just as spectacular as a fresh batch.
Expert Tips for Professional Presentation
The flaky sea salt on top isn’t just for looks; it’s a functional ingredient. The salt cuts through the intense sweetness of the glaze and the richness of the cream cheese, making the cocoa flavors pop. It provides a sophisticated finish that balances the entire palate.
If your cookies come out of the oven looking a bit wonky in shape, use the “cookie scoot” trick. Take a large round glass or cookie cutter, place it over the hot cookie, and gently move it in a circular motion. This will tuck in the edges and give you perfectly round, professional-looking cookies every time.
Frequently Asked Questions
Can I use liquid food coloring instead of gel?
It is not recommended. Liquid food coloring is much less concentrated, meaning you have to use a lot more to get a deep red color. This extra liquid can throw off the hydration of the dough, leading to cookies that spread too much or become greasy. Gel coloring provides the best color without changing the texture.
Why did my cream cheese filling disappear into the cookie?
This usually happens if the cream cheese wasn’t frozen solid or if you used a low-fat/tub-style cream cheese. High moisture content causes the filling to melt too quickly and soak into the surrounding dough. Always use full-fat brick cream cheese and ensure it is frozen “rock solid” before assembly.
Do I have to use a stand mixer for this recipe?
No, you can certainly use a hand mixer or even mix by hand with some elbow grease. The most important part is the creaming stage where you beat the butter and sugar. If mixing by hand, ensure you beat the mixture until it noticeably lightens in color and looks fluffy to ensure proper aeration.
How long do these cookies stay fresh?
When stored in an airtight container in the refrigerator, these cookies stay fresh and delicious for up to 5 days. If you leave them at room temperature, they should be consumed within 2 hours due to the cream cheese content. For longer storage, you can freeze the baked cookies for up to 2 months.
Can I skip the cornstarch in the dough?
You can skip it, but the texture will change. Cornstarch is the secret to that “velvety” crumb that mimics red velvet cake. Without it, the cookies will be slightly crispier and more like a standard sugar cookie. If you don’t have cornstarch, you can substitute it with an equal amount of all-purpose flour.
Why did my cookies turn out brown instead of red?
This is often due to the type of cocoa powder used or overbaking. Natural cocoa powder helps maintain the red hue, while some Dutch-processed cocoas can darken the dough significantly. Additionally, if the cookies are overbaked, the sugars will caramelize and turn the vibrant red into a duller maroon or brown color.
Red Velvet Cookies
Course: DessertCuisine: AmericanDifficulty: medium12
cookies1
hour13
minutes240
kcal73
MinutesA decadent red velvet cookie with a rich cocoa flavor, stuffed with a sweet cream cheese center and finished with a vanilla glaze and flaky sea salt. The recipe uses a flash-freezing technique to ensure the filling stays intact during baking.
Ingredients
For the Filling:
6 ounces cream cheese, cold
1/2 cup powdered sugar
1/2 teaspoon vanilla extract
For the Cookies:
1/2 cup unsalted butter, softened
1/2 cup light brown sugar, packed
1/3 cup granulated white sugar
1 large egg, room temperature
1 teaspoon vanilla extract
1 tablespoon red food coloring (gel preferred for deep color)
1 1/2 cups all-purpose flour
1/4 cup unsweetened cocoa powder
1 teaspoon cornstarch (for softness)
1/2 teaspoon baking soda
1/4 teaspoon salt
Flaky sea salt (for topping)
For the Glaze:
3/4 cup powdered sugar
1 tablespoon milk or heavy cream
1/4 teaspoon vanilla extract
Directions
- Prepare the Filling: In a small bowl, beat the cream cheese, powdered sugar, and vanilla until smooth. Line a small tray with parchment paper. Drop 12 rounded teaspoons of the mixture onto the tray. Freeze for at least 30-45 minutes until rock solid. This is mandatory to prevent leaking.
- Preheat and Prep: Preheat your oven to 350°F (175°C). Line a large baking sheet with parchment paper.
- Cream Butter and Sugars: In a large bowl, cream the softened butter, brown sugar, and white sugar together until light and fluffy (about 2 minutes). Beat in the egg, vanilla, and red food coloring until the color is vibrant and uniform.
- Mix Dry Ingredients: In a separate bowl, whisk together the flour, cocoa powder, cornstarch, baking soda, and salt.
- Combine: Gradually add the dry ingredients to the wet ingredients, mixing on low speed until just combined. Do not overmix.
- Stuff the Cookies: Scoop about 2 tablespoons of dough and flatten it into a disc in your palm. Place one frozen cream cheese ball in the center. Fold the dough up and around the filling, pinching the seams tightly to ensure no white is showing. Roll into a smooth ball.
- Bake: Place dough balls 3 inches apart on the baking sheet. Sprinkle the tops with a tiny pinch of flaky sea salt. Bake for 11-13 minutes. The edges should be firm, but the centers will look slightly underbaked; they will firm up as they cool.
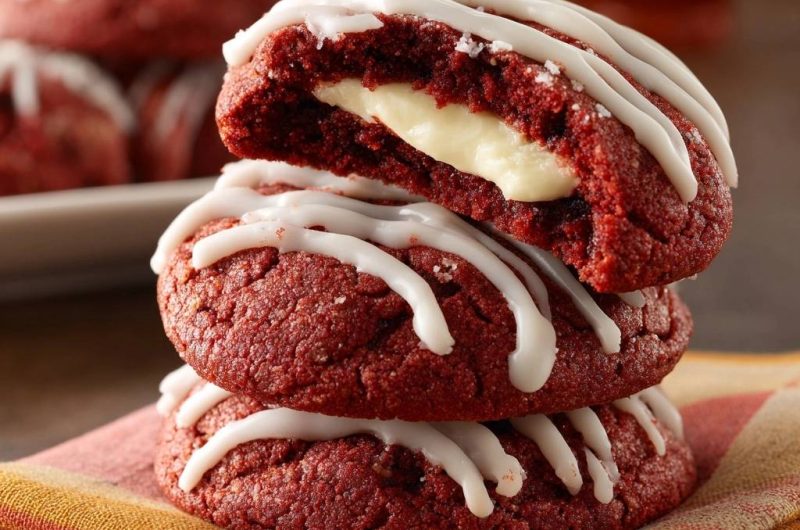
- Cool: Let the cookies cool on the baking sheet for at least 15 minutes. This “carry-over cooking” is essential for the cream cheese to set into the custard-like texture seen in the image.
- Glaze: Whisk the glaze ingredients until thick but pourable (add more sugar if too thin). Using a spoon or piping bag, drizzle the glaze in thick zigzag lines across the cookies. Let the glaze set for 10 minutes before serving.
Notes
- Flash-freezing the cream cheese filling for at least 30-45 minutes is mandatory to prevent the center from leaking. Use gel food coloring for a deeper red color. Let cookies cool on the sheet for 15 minutes to allow the center to set properly.