Ultimate S’mores Bars: The Secret to Perfectly Clean Slices
For years, I faced the common struggle of sticky, crumbling layers when attempting to slice indulgent S’mores bars. It felt impossible to achieve those picture-perfect, clean-edged squares everyone craved.
But I’ve finally cracked the code, and this recipe for Ultimate S’mores Bars delivers flawless, distinct layers every single time, solving that universal kitchen frustration with elegant simplicity.
Beyond Basic: Why These Ultimate S’mores Bars Will Impress
These aren’t just any S’mores bars; they are engineered for enjoyment and ease. Say goodbye to the frustrating mess of traditional bars that stick to the knife and fall apart.
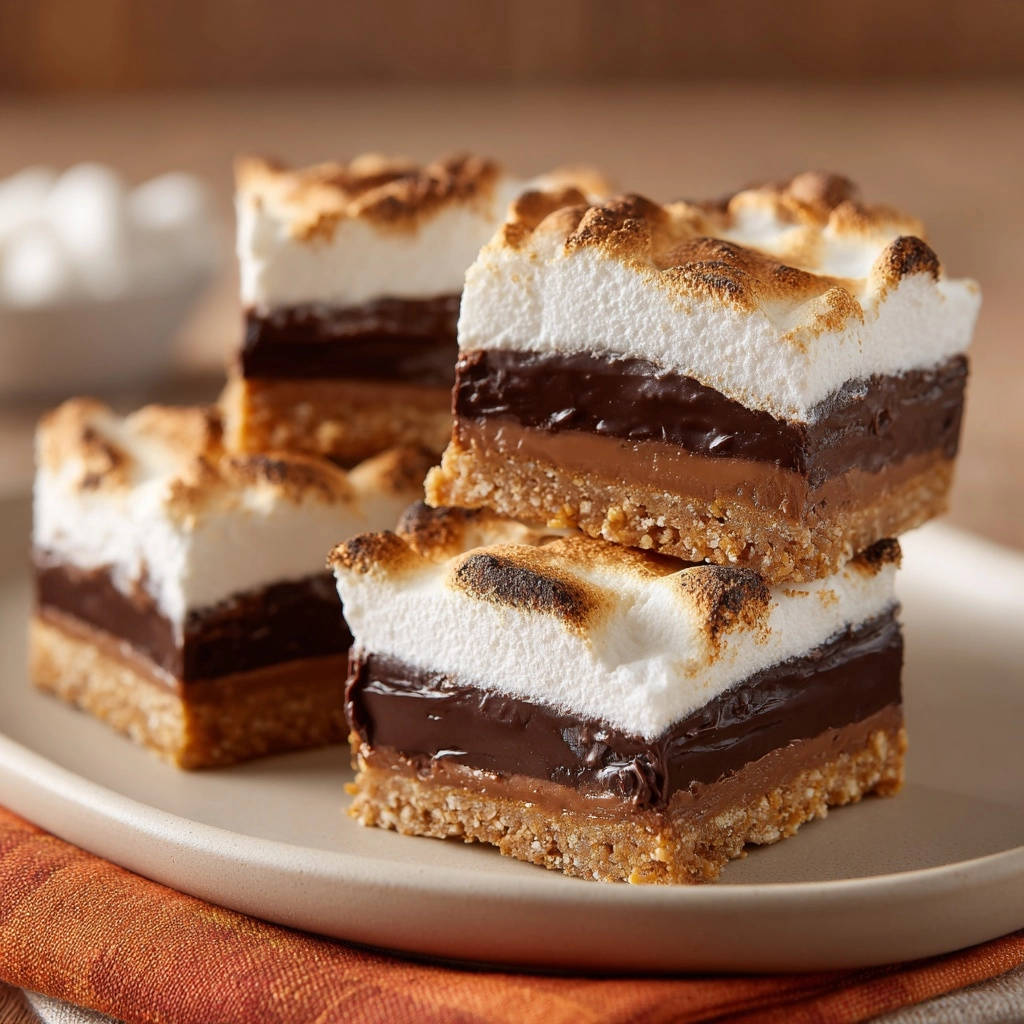
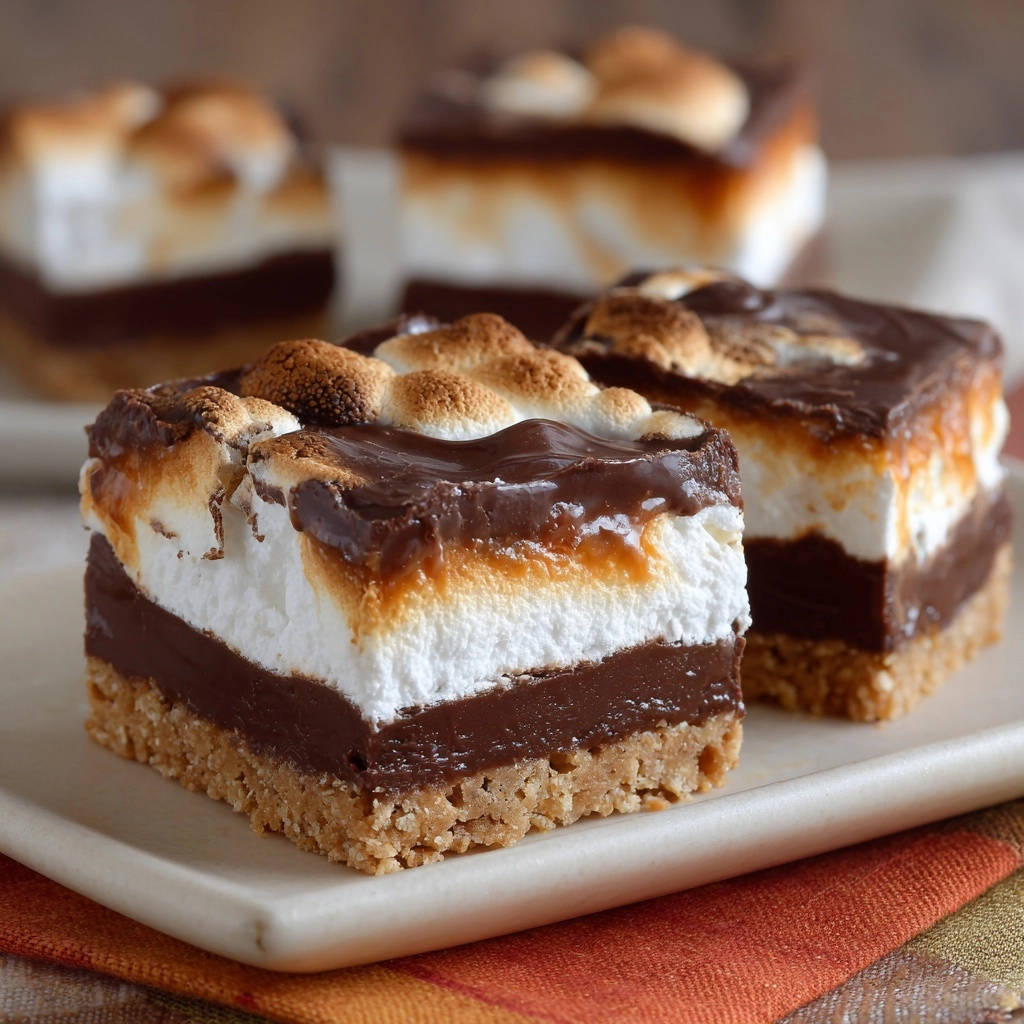
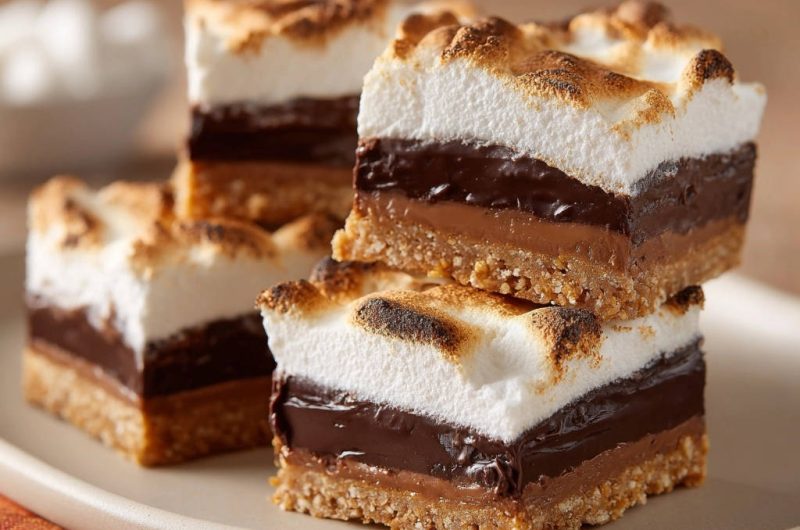
Our method ensures you achieve beautiful, picture-perfect, clean-edged slices, making them as visually appealing as they are delicious. Each square holds its form, showcasing distinct layers of graham, caramel, chocolate, and marshmallow.
Despite their layered complexity, this recipe is surprisingly straightforward. It transforms a campfire classic into an elegant, oven-baked treat perfect for any occasion.
The irresistible combination of a crisp graham cracker crust, chewy caramel, rich chocolate ganache, and golden toasted marshmallows creates an unparalleled sensory experience.
This same graham cracker crust works beautifully for these caramel peanut cheesecake bars as well.
The Building Blocks: Ingredients for Your Perfect S’mores Bars
For the Irresistible Graham Cracker Crust
Graham Cracker Crumbs: The classic base that evokes campfire nostalgia. A finely ground crumb is essential for a firm, cohesive crust that doesn’t crumble.
Granulated Sugar: Adds a touch of sweetness to balance the salty butter and helps in binding the crumbs together for a sturdy foundation.
Melted Unsalted Butter: The crucial binding agent that perfectly holds the crust together. Unsalted butter allows you to control the overall saltiness of your bars.
Crafting the Velvety Caramel Layer
Soft Caramel Candies (Unwrapped): The star of this layer, providing a wonderfully chewy, sweet, and gooey texture. Using soft caramels ensures a smooth melt and saves valuable prep time.
Heavy Cream: Essential for melting the caramels into a perfectly smooth, pourable, and luxurious sauce. It prevents scorching and contributes to the layer’s velvety texture.
The Rich, Decadent Chocolate Layer
Semi-Sweet Chocolate Chips: Offers a balanced chocolate flavor that isn’t overly sweet, creating a classic and crowd-pleasing ganache. High-quality chips melt more smoothly.
Heavy Cream: Combines with the chocolate to create a silky, spreadable ganache. This rich mixture sets beautifully, forming a distinct and satisfying layer.
Vanilla Extract: Enhances the deep chocolate flavor and adds a warm, aromatic note. Always use pure vanilla extract for the best taste.
Toasted Marshmallow Topping
Mini Marshmallows (or Large, Sliced): The signature fluffy, gooey, and ultimately toasted topping. Mini marshmallows provide more even coverage and achieve that golden toast faster under the broiler.
Essential Tools for Your Ultimate S’mores Bars Journey
9×13 Inch Baking Pan: This standard size is perfect for creating bars with consistent thickness, ensuring even baking and setting of all layers.
Parchment Paper: Crucial for preventing sticking and, most importantly, providing an easy way to lift the chilled bars from the pan for clean, effortless cutting.
Medium Saucepan: Ideal for gently melting the caramel layer over low heat, ensuring it remains smooth and doesn’t scorch.
Microwave-Safe Bowl: Convenient for quickly preparing the chocolate ganache, allowing for controlled heating and easy stirring.
Wire Rack: Essential for cooling the crust thoroughly and quickly before adding subsequent layers, preventing premature melting.
Sharp, Non-Serrated Knife: THE essential tool for achieving those signature clean slices. When combined with the hot water trick, it glides through layers without dragging.
Mastering Ultimate S’mores Bars: A Detailed Process
Prepare and Bake the Golden Crust
Preheat your oven to 350°F (175°C).
Line a 9×13 inch baking pan with parchment paper, ensuring there’s an overhang on the sides. This overhang is your secret weapon for easily lifting the chilled bars later.
In a medium bowl, combine the graham cracker crumbs, granulated sugar, and melted butter. Mix well until everything is evenly moistened and resembles wet sand.
Press this mixture firmly and evenly into the bottom of the prepared pan. Use the flat bottom of a glass or your hands to create a compact, uniform layer.
Bake for 8 to 10 minutes, until the edges are lightly golden and the crust is fragrant. This slight baking helps set the crust.
Let the crust cool completely on a wire rack. This is vital before adding the caramel; a warm crust will cause the caramel to melt into it.
Create the Silky Caramel Layer
In a medium saucepan over low heat, combine the unwrapped soft caramel candies and 2 tablespoons of heavy cream.
Stir frequently, almost constantly, until the caramels are completely melted and the mixture is smooth and glossy. Maintain low heat to prevent the caramel from scorching or seizing.
Pour the melted caramel evenly over the completely cooled graham cracker crust, spreading it gently with a spatula if needed.
Place the pan in the refrigerator for at least 30 minutes. This chilling time allows the caramel to firm up and prevents it from mixing with the chocolate layer, ensuring clean lines.
Layer on the Rich Chocolate Ganache
In a microwave-safe bowl, combine the semi-sweet chocolate chips and 1/2 cup heavy cream.
Microwave on high for 60 seconds. Do not stir immediately after microwaving.
Let the mixture stand for 1 minute to allow the residual heat to fully melt the chocolate thoroughly. This standing time is crucial for achieving a smooth ganache.
Stir until the chocolate and cream are completely smooth and form a luxurious ganache. If any unmelted chips remain, microwave for another 15-20 seconds and stir again.
Stir in the vanilla extract for an added layer of warm, complex flavor.
Pour the chocolate ganache evenly over the chilled caramel layer, spreading gently with a spatula to cover completely.
Return the pan to the refrigerator for another 30 minutes. This allows the chocolate to set firmly, creating distinct, beautiful layers.
Top with Fluffy Marshmallows
Once the chocolate layer is firm to the touch, arrange the marshmallows in an even, single layer over the top.
Mini marshmallows are ideal for quick, even toasting, but slicing larger marshmallows can also be done for a different aesthetic or texture.
Achieve That Golden Toast
Place the pan under a preheated broiler set to high. Position your oven rack so the marshmallows are a few inches from the heat source; too close and they will burn instantly.
Broil for 1 to 3 minutes, watching very carefully and rotating the pan as needed. Marshmallows can go from perfectly golden to burnt in mere seconds, so do not walk away.
Remove from the oven once the marshmallows are golden brown and toasted to your liking, achieving that classic S’mores char.
Let the bars cool at room temperature for about 15 minutes. This allows the hot, gooey marshmallows to settle and slightly firm up before the final chill.
The Game-Changer: Unlocking Perfectly Clean-Cut Ultimate S’mores Bars
The Power of Prolonged Chilling
This is the absolute most crucial step for achieving those picture-perfect, non-sticky slices that define exceptional Ultimate S’mores Bars. You must thoroughly chill the entire pan of bars.
Place the cooled bars in the refrigerator for a minimum of 4 hours, or ideally, overnight. This prolonged chilling allows all the layers-the buttery graham crust, the chewy caramel, and the rich chocolate ganache-to set firmly and bond together.
A truly firm set prevents the layers from smushing, separating, or sticking to your knife during cutting. This ensures crisp, defined edges and structurally sound squares.
The Hot Knife Technique: Your Best Friend for Smooth Slices
Once fully chilled, lift the bars out of the pan using the parchment paper overhang and place them on a clean cutting board.
To achieve truly clean, professional-looking slices, fill a tall glass with very hot tap water (or freshly boiled water).
Dip a sharp, non-serrated knife (a chef’s knife or carving knife works best due to its long, smooth blade) into the hot water for a few seconds. The heat is key here.
Immediately wipe the hot knife clean and completely dry with a paper towel. The heat prevents sticking, and being dry prevents any water marks or dilution of your layers.
Make one swift, decisive cut through the bars, pressing down firmly. Do not saw or drag the knife, as this will create messy edges.
Repeat this precise process: dip the knife, wipe it clean and dry, then make the next cut. This ensures every single Ultimate S’mores Bar has crisp, clean edges without any messy residue, highlighting your careful layering.
Chef’s Secrets: Elevate Your Ultimate S’mores Bars Experience
Don’t Rush the Chill Time
Resist the temptation to cut the bars early. The extensive chilling is the non-negotiable step for mess-free slicing and structural integrity, especially for these Ultimate S’mores Bars. Patience truly pays off here, yielding perfect results.
Watch the Broiler Like a Hawk
Marshmallows go from perfectly golden to burnt in mere seconds. Never leave them unattended under the broiler, even for a moment. Have your oven mitts ready to pull the pan out immediately once they reach your desired toastiness.
Experiment with Chocolate
While semi-sweet is classic, feel free to use milk chocolate for a sweeter bar or dark chocolate for a richer, more intense flavor in your chocolate ganache. Adjust sweetness elsewhere in the recipe if you make a significant change.
Vary Your Marshmallows
Mini marshmallows are easiest for even coverage and quick toasting, but slicing larger gourmet marshmallows can add a different texture or visual appeal. For extra flavor, try flavored marshmallows if you can find them for a unique twist on Ultimate S’mores Bars!
Solving Common Ultimate S’mores Bar Dilemmas
My Bars Are Sticky and Hard to Cut
This is almost always due to insufficient chilling. Ensure your bars are refrigerated for at least 4 hours, or ideally overnight, before attempting to cut them. The layers need to be firm.
Also, make sure you’re consistently using the hot, clean knife technique. Without a hot, dry blade, even well-chilled layers can stick and create a sticky mess.
The Marshmallows Burned Under the Broiler
The broiler is incredibly powerful, so timing is everything. Keep a very close eye on them throughout the entire broiling process, rotating the pan as needed to ensure even toasting and prevent hot spots.
Next time, try moving your oven rack a bit lower in the oven, or reduce the initial broil time and check more frequently, removing them as soon as they reach golden brown.
My Caramel Layer Is Too Hard/Too Runny
If your caramel is too hard, you might have used too little cream or overheated it slightly during the melting process. For a runny caramel, you might have used too much cream or didn’t allow sufficient chilling time.
Always use ‘soft caramel candies’ as specified; harder varieties won’t melt as smoothly and can result in a tougher layer with this method.
Your Ultimate S’mores Bars Questions Answered
Can I make these S’mores Bars ahead of time?
Absolutely! These Ultimate S’mores Bars are fantastic for making ahead. In fact, making them a day in advance allows for optimal chilling, which is the key for perfect, clean slices. This also saves you time on the day of your event.
Store them covered in the refrigerator until ready to serve, ensuring they remain fresh and firm.
How should I store leftover S’mores Bars?
Store leftover Ultimate S’mores Bars in an airtight container in the refrigerator for up to 5-7 days. For the best texture, bring them to room temperature for about 15-20 minutes before serving, allowing the caramel and chocolate to soften slightly.
Can I freeze Ultimate S’mores Bars?
Yes, you can! Wrap individual bars or small portions tightly in plastic wrap, then place them in an airtight freezer-safe container or bag. Freeze for up to 1-2 months without loss of quality. Thaw them in the refrigerator overnight before serving.
What if I don’t have parchment paper?
While parchment paper is highly recommended for easy removal and crucially, for clean cutting, you can try greasing and flouring your pan thoroughly as an alternative. However, removal will be more challenging, and you won’t have the convenient overhang for lifting the bars completely.
Serving Suggestions: Making Your Ultimate S’mores Bars an Event
Classic Presentation: Serve your perfectly cut Ultimate S’mores Bars on a simple platter, allowing their beautiful layers and toasted tops to shine. A light dusting of cocoa powder can add an elegant touch.
With a Scoop of Ice Cream: Pair a bar with a scoop of premium vanilla bean or chocolate ice cream for an extra indulgent, hot-and-cold dessert experience.
Coffee Companion: These rich, sweet bars are a wonderfully comforting accompaniment to a fresh cup of coffee, a bold espresso, or a warm mug of hot chocolate.
If you enjoy the rich chocolate base here, try these gooey chocolate pecan bars for another sweet treat.
Dessert Board Star: Arrange S’mores bars alongside other treats like fresh berries, mixed nuts, and small cookies for an impressive and varied dessert spread that caters to all tastes.
Ready to Impress? Share Your Ultimate S’mores Bars Masterpiece!
Now that you’ve unlocked the secrets to crafting the Ultimate S’mores Bars with picture-perfect, clean slices, it’s time to share your masterpiece with friends and family.
What to Serve with S’mores Bars
These s’mores bars have that toasted marshmallow and chocolate thing going on, so you want sides that lean into the cozy, sweet-baked-goods vibe without competing too hard.
- For a soft, cinnamon-spiced contrast, try these Caramel Apple Cinnamon Rolls with Tangzhong Fluff — the tangzhong method keeps them pillowy next to the dense, crunchy bar base.
- If you want something lighter to snack on alongside, these Chocolate Chip Mini Muffins are airy and not too sweet, so they balance the rich chocolate and marshmallow in the bars.
Whether for a backyard barbecue, a cozy family night, or a special celebration, these bars are guaranteed to be a crowd-pleaser and spark joy with every delightful bite. Say goodbye to sticky struggles and hello to S’mores perfection!
We’d love to see your creations and hear about your experience with achieving those flawless cuts! Tag us on social media or leave a comment below. Happy baking!
S’mores Bars
Course: DessertCuisine: AmericanDifficulty: easy24
bars15
minutes15
minutes60
kcal30
minutesSay goodbye to messy s’mores bars! This recipe reveals the secret to perfectly clean-edged, indulgent squares every time. Enjoy layers of graham cracker crust, gooey caramel, rich chocolate, and toasted marshmallows without the usual struggle.
Ingredients
For the Graham Cracker Crust:
1 1/2 cups graham cracker crumbs
1/4 cup granulated sugar
1/2 cup unsalted butter, melted
For the Caramel Layer:
14 ounces soft caramel candies, unwrapped
2 tablespoons heavy cream
For the Chocolate Layer:
1 1/2 cups semi-sweet chocolate chips
1/2 cup heavy cream
1/2 teaspoon vanilla extract
For the Marshmallow Topping:
5 cups mini marshmallows (or about 25 large marshmallows)
Directions
- Prepare the crust: Preheat your oven to 350F (175C). Line a 9×13 inch baking pan with parchment paper, leaving an overhang on the sides for easy removal later.
- In a medium bowl, combine the graham cracker crumbs, sugar, and melted butter. Press the mixture firmly and evenly into the bottom of the prepared pan. Bake for 8 to 10 minutes, until lightly golden. Let cool completely on a wire rack.
- Make the caramel layer: In a medium saucepan over low heat, combine the unwrapped caramels and 2 tablespoons of heavy cream. Stir frequently until the caramels are completely melted and smooth. Pour the caramel evenly over the cooled graham cracker crust. Place the pan in the refrigerator for at least 30 minutes to allow the caramel to set.
- Prepare the chocolate layer: In a microwave-safe bowl, combine the chocolate chips and 1/2 cup heavy cream. Microwave on high for 60 seconds, then let stand for 1 minute before stirring until smooth. Stir in the vanilla extract. Pour the chocolate ganache over the chilled caramel layer, spreading evenly. Return the pan to the refrigerator for another 30 minutes to allow the chocolate to set firmly.
- Add the marshmallow topping: Once the chocolate layer is firm, arrange the marshmallows in an even layer over the top. You can use mini marshmallows or slice larger ones if preferred.
- Broil the marshmallows: Place the pan under a preheated broiler set to high. Broil for 1 to 3 minutes, watching carefully and rotating the pan as needed, until the marshmallows are golden brown and toasted to your liking. Remove from the oven and let cool at room temperature for about 15 minutes.
- The Secret to Clean Cuts: This is the most crucial step! For perfectly defined, non-sticky slices, you must thoroughly chill the entire pan of bars. Place the cooled bars in the refrigerator for a minimum of 4 hours, or ideally, overnight. This firm set is what prevents the layers from smushing or sticking together during cutting.
- Once fully chilled, lift the bars out of the pan using the parchment paper overhang. Place them on a cutting board. To achieve truly clean slices, fill a tall glass with very hot water. Dip a sharp, non-serrated knife into the hot water, wipe it clean and dry with a paper towel, then make one swift cut. Repeat this process, dipping and wiping the knife after each cut, to ensure every single bar has crisp, clean edges. Enjoy your perfectly portioned S’mores bars!
Notes
- Crucial chilling and hot knife technique ensure clean, non-sticky slices.