Crispy Cereal Dessert Tacos: The Secret to Perfect Crunch
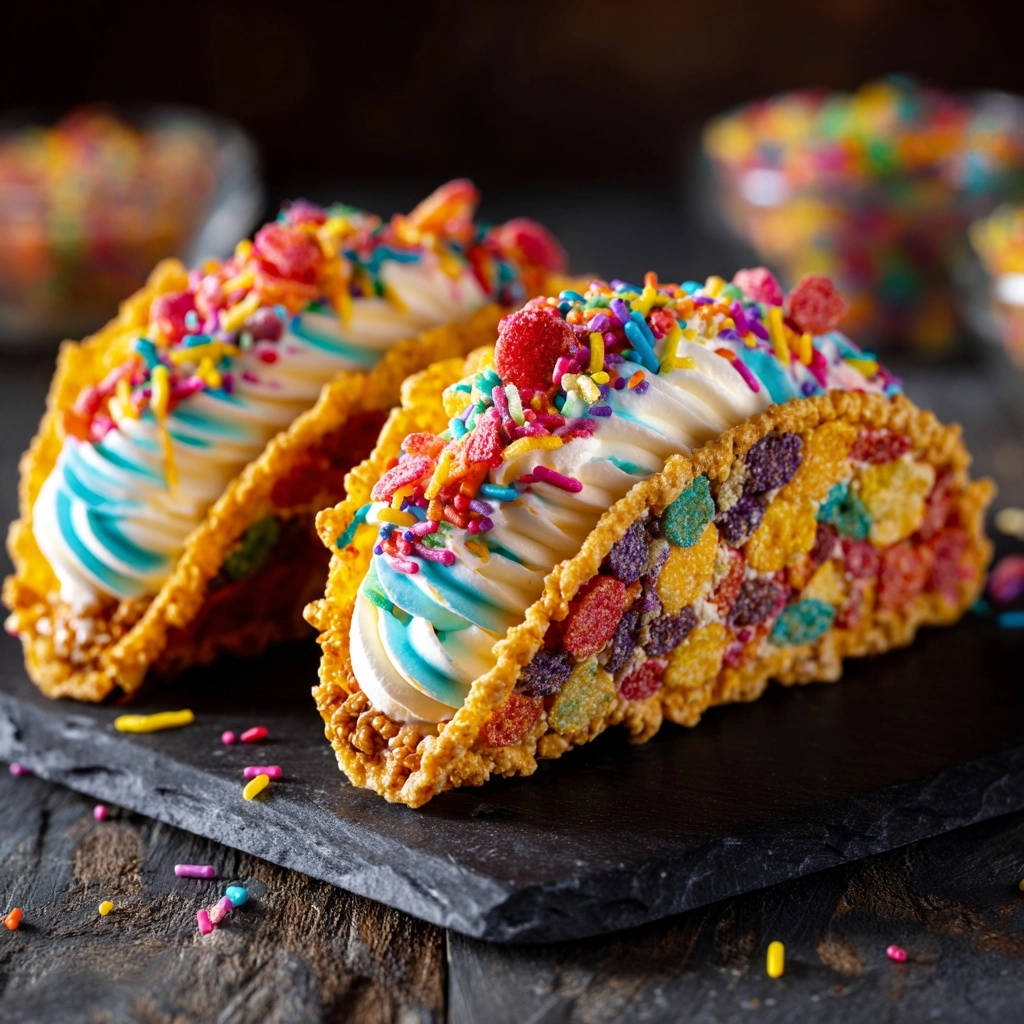
Ever bitten into a dessert that promised an exciting crunch, only to find it had gone soft and disappointing? I used to face this exact dilemma with making vibrant, delightful Crispy Cereal Dessert Tacos.
After countless tests and a fair share of soggy mishaps, I perfected a method that guarantees those colorful, fun shells stay incredibly crisp, holding up beautifully to all the creamy deliciousness within. This recipe isn’t just about making dessert; it’s about making a reliably perfect bite every single time, solving the common problem of lost crispiness.
Unlock the Ultimate Crunch: Why These Crispy Cereal Dessert Tacos Stand Out
Beyond the Basic: Our Unique Crisp-Keeping Secret
The true magic of these Crispy Cereal Dessert Tacos lies in a simple, game-changing step: the white chocolate moisture barrier. This thin, perfectly set layer of chocolate brushed inside each shell acts as an invisible shield.
It prevents the creamy frosting from softening your crunchy cereal shells, ensuring every bite delivers that satisfying snap you crave. It’s a small step that makes a monumental difference in texture and enjoyment.
Simple Steps, Stunning Results: Perfect for All Skill Levels
Forget complicated baking techniques. This recipe is designed for accessibility, making it perfect for bakers of all skill levels, from complete beginners to seasoned pros looking for a fun project. The steps are straightforward, focusing on quick assembly and vibrant presentation.
You’ll be amazed at how easily you can create such visually stunning and utterly delicious sweet treats.
A Treat for Every Occasion (and Every Palate!)
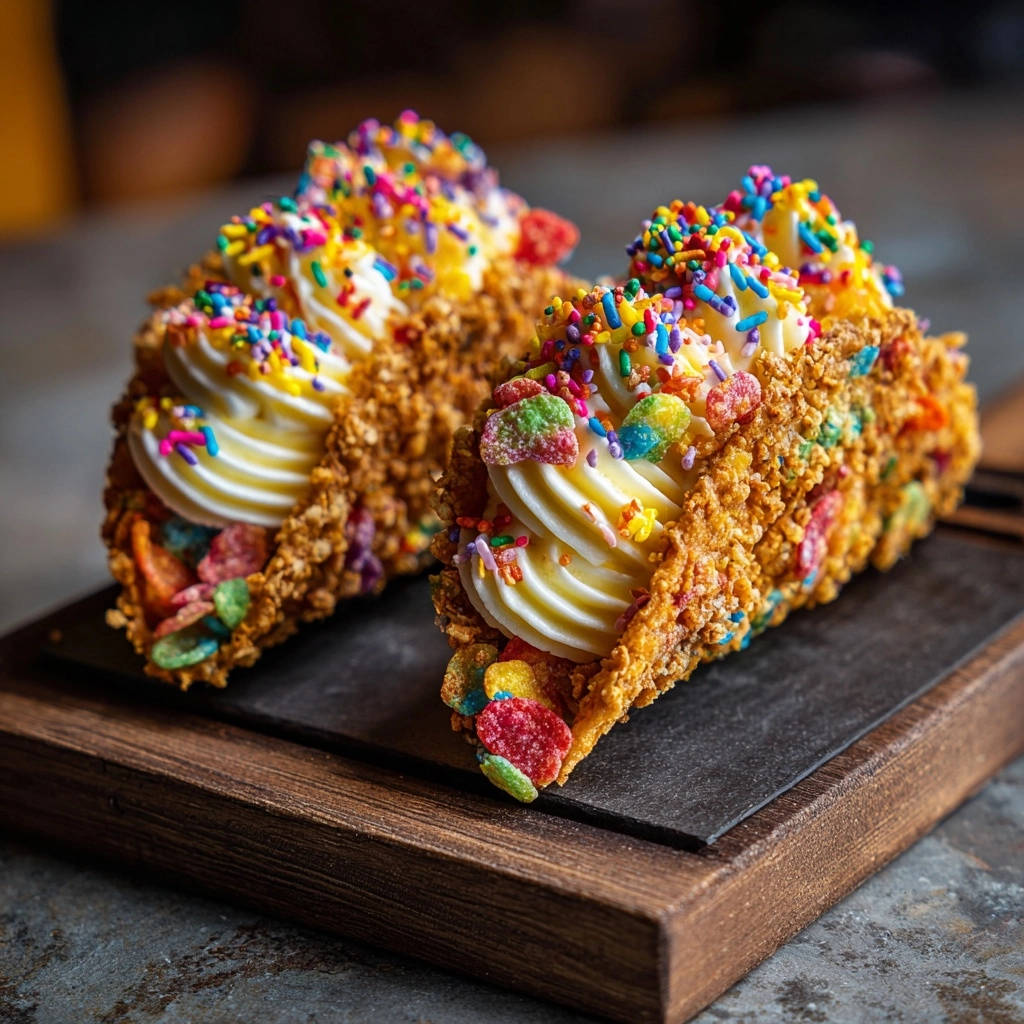
These Crispy Cereal Dessert Tacos are more than just a dessert; they’re an experience! Their playful appearance and irresistible taste make them an instant hit at birthday parties, potlucks, or simply as a fun weeknight surprise.
They appeal to both children and adults, offering endless customization possibilities to suit any flavor preference or theme.
For a perfect pairing, try our Mastering the Salted Caramel S’mores Stack.
Your Flavor Palette: Gathering Ingredients for Crispy Cereal Dessert Tacos
For the Irresistible Cereal Shells
Colorful Toasted Oat Cereal: This forms the whimsical, crunchy foundation. Choosing a vibrant cereal like Fruity Pebbles adds visual appeal and a delightful, sweet crunch to your dessert tacos.
Unsalted Butter (for shells): Essential for binding the cereal and marshmallows. Unsalted butter allows you to control the overall sweetness and provides a rich, pliable base for shaping the shells.
Mini Marshmallows: The crucial adhesive! Mini marshmallows melt smoothly to create that perfect sticky, moldable consistency. They ensure your cereal shells hold their shape beautifully once set.
Crafting the Dreamy, Creamy Filling
Unsalted Butter, Softened (for frosting): Using truly softened unsalted butter is vital for achieving a light, airy, and lump-free frosting. It whips up beautifully for a smooth texture.
Powdered Sugar: Provides the fine texture and sweetness necessary for a silky buttercream. Sifting it can help prevent any stubborn lumps in your frosting.
Milk or Cream: Used to adjust the frosting’s consistency. Add it gradually to ensure your filling is perfectly pipeable, yet holds its delightful shape within the shells.
Vanilla Extract: A classic flavor enhancer, vanilla extract adds a comforting, aromatic warmth to the creamy filling, balancing the sweetness.
Blue Food Coloring (Optional): For an extra pop of fun and visual interest. Gel food coloring is recommended for intense color without significantly altering the frosting’s texture.
Dazzling Toppings & Embellishments
White Chocolate Chips or Candy Melts: The unsung hero! This ingredient creates the vital moisture barrier inside the shells, making them reliably crispy.
Colorful Sprinkles: Add a festive touch and a playful textural element. They instantly elevate the visual appeal of your dessert tacos.
Freeze-Dried Raspberries: Offer a fantastic burst of tangy, fruity flavor that beautifully cuts through the sweetness of the frosting. They also add a lovely pop of natural color.
Tools for Taco Triumph: Essential Kitchen Gear
Taco Mold or Shaping Surface: You’ll need a dedicated taco mold, a rolling pin, or even an inverted oven rack to give your cereal shells their distinctive taco shape.
Large Pot: Ideal for melting the butter and marshmallows, ensuring enough space to thoroughly coat the cereal.
Electric Mixer: Essential for whipping the butter and powdered sugar into a smooth, creamy, and airy frosting.
Microwave-Safe Bowl: For quickly and evenly melting the white chocolate chips or candy melts.
Pastry Brush or Spoon: Perfect for applying a thin, even layer of melted white chocolate to the inside of your shells.
Piping Bag with Tip (Optional): While a spoon works, a piping bag allows for a cleaner, more decorative application of the frosting. A large open star tip works well.
Mastering the Method: Step-by-Step Crispy Cereal Dessert Tacos Guide
Preparing Your Taco Shell Molds
- Mold Prep:
Begin by lightly greasing your chosen taco mold. If you don’t have a mold, line a baking sheet with parchment paper and drape it over a rolling pin or the bars of an oven rack to create a makeshift taco shape. This initial preparation ensures your shells won’t stick and come out cleanly formed.
Building the Brilliant Cereal Base
- Melt & Combine:
In a large pot, melt 4 tablespoons of butter over low heat. Once fully melted, add the mini marshmallows and stir constantly with a rubber spatula. Continue stirring until the mixture is completely melted and smoothly combined. Maintaining low heat prevents scorching and ensures a consistent, pliable binder for your cereal.
- Coat the Cereal:
Immediately remove the pot from the heat. Pour in the colorful toasted oat cereal, stirring gently but quickly. Ensure every single piece of cereal is evenly coated with the warm, sticky marshmallow mixture. Working swiftly is crucial here, as the mixture begins to set very quickly once off the heat.
- Shape & Chill:
While the cereal mixture is still warm and pliable, immediately press it firmly and evenly into your prepared taco molds or over your rolling pin setup. Applying firm, consistent pressure helps create compact, uniform shells that will hold their shape. Allow the shaped shells to cool completely at room temperature, then transfer them to the refrigerator for at least 30 minutes to firm up thoroughly. This initial chill is vital for stabilizing the shells before the next crucial step.
The Game-Changing Crispy Barrier: Your Secret Weapon
- Apply the Moisture Seal:
Once the cereal shells are firm from their chill, melt the white chocolate chips or candy melts in a microwave-safe bowl. Heat in 30-second intervals, stirring well after each, until the chocolate is smooth and fluid. This thin layer of white chocolate acts as the ingenious “secret” to sustained crispiness, forming an impermeable barrier that prevents moisture from the creamy filling from softening your shells.
- Set the Barrier:
Using a pastry brush or the back of a small spoon, apply a thin, even layer of melted white chocolate to the entire inside surface of each cereal taco shell. Place the shells back in the refrigerator for another 15-20 minutes until the chocolate is fully set and hard. This creates that essential moisture barrier, ensuring your Crispy Cereal Dessert Tacos live up to their name!
Whipping Up the Velvety Frosting
- Beat the Butter:
While the chocolate-lined shells are chilling, prepare the dreamy, creamy frosting. In a medium bowl, beat 1 cup of softened unsalted butter with an electric mixer until it’s light, fluffy, and airy (this usually takes about 2-3 minutes). Ensuring your butter is truly softened to room temperature is key for a perfectly smooth, lump-free frosting.
- Combine & Tint:
Gradually add the powdered sugar to the beaten butter, mixing until smooth and thoroughly combined. Next, beat in the milk or cream and vanilla extract, adjusting the liquid a tablespoon at a time until you achieve your desired creamy consistency. For an extra fun touch, divide a small portion of the frosting and tint it with a few drops of blue food coloring, mixing until the color is evenly distributed.
Assembling Your Edible Masterpieces
- Fill the Shells:
Once the white chocolate in the shells is completely set and hard, carefully remove the shells from their molds. Now comes the exciting part! Pipe or spoon the prepared frosting into each cereal taco shell. For a playful, eye-catching effect, you can alternate between the white and blue frosting for a swirled design.
- Garnish & Serve:
Generously sprinkle your freshly filled Crispy Cereal Dessert Tacos with colorful sprinkles, then top with a scattering of tart freeze-dried raspberries. For the absolute best and most satisfying crispy experience, serve these delightful sweet tacos immediately. The contrast of the incredibly crisp shell and the velvety creamy filling is simply irresistible!
Chef’s Secrets: Elevating Your Dessert Taco Game
Achieving Uniform Shells
Work Quickly with Cereal: The marshmallow-cereal mixture sets surprisingly fast once removed from the heat. Have your molds or shaping setup ready and work swiftly to press the mixture in firmly. This ensures you can achieve even thickness and a consistent shape before it becomes too stiff to manipulate.
Consistent Pressure: When molding your shells, apply even pressure across the entire surface. This prevents creating thin spots that could easily break or overly thick areas that might be too chewy. Uniformity is key for a perfect, consistent crispy bite.
Perfecting Your Frosting Consistency
Room Temperature Butter: For the fluffiest, smoothest frosting, your butter must be genuinely at room temperature-softened, but not melted. This allows it to incorporate air properly when beaten. If it’s too cold, your frosting will be lumpy; too warm, it can become greasy and difficult to pipe.
Gradual Liquid Addition: Always add milk or cream one tablespoon at a time to your frosting. It’s much easier to add more liquid to thin out a stiff frosting than it is to thicken a runny one. This precision ensures you reach the perfect pipeable consistency.
Creative Topping Ideas
While sprinkles and freeze-dried raspberries are fantastic, don’t limit your imagination! Consider adding mini chocolate chips, crushed sandwich cookies, chopped nuts, a drizzle of warm caramel or chocolate sauce, or even a dollop of whipped cream with a maraschino cherry. For more inspiration on delightful dessert toppings that elevate any sweet treat, explore our recipe for decadent pumpkin pie truffles.
Taco Troubles? Quick Fixes for Common Hurdles
My Cereal Shells Aren’t Crispy Enough!
Solution: Ensure your white chocolate layer is thin, even, and fully set before filling. A thick or uneven coat won’t provide the best moisture barrier. Also, double-check that the shells were completely cooled and firm before applying the chocolate. For peak crispness, always serve immediately after assembling your dessert tacos.
The Frosting Is Too Runny/Stiff
Solution: If your frosting is too runny, gradually beat in more powdered sugar until it reaches your desired consistency. If it’s too stiff, beat in a teaspoon of milk or cream at a time until it’s perfectly pipeable. Remember, slight temperature changes can impact frosting consistency; a brief chill can firm up overly soft frosting.
My Tacos Are Falling Apart!
Solution: This issue often arises if the cereal mixture wasn’t pressed firmly enough into the molds, or if the shells weren’t chilled sufficiently before handling. Ensure you work quickly to press the warm mixture firmly and evenly. Give the shells ample time in the refrigerator to set completely before removing them from the molds and adding the frosting. Avoid overfilling, which can also stress the shells.
Serve, Store, Savor: Maximizing Your Crispy Cereal Dessert Tacos Experience
Creative Serving Suggestions
Present these vibrant Crispy Cereal Dessert Tacos on a colorful platter to showcase their playful appearance. You can serve them alongside a scoop of vanilla bean ice cream or a bowl of fresh mixed berries for an even more decadent dessert experience.
If you love the crunchy shell, try these chocolate-dipped crispy rice bites for a softer, chewier contrast.
They make a fantastic, unique centerpiece for any dessert table, sparking joy and conversation at parties or family gatherings.
Optimal Storage for Freshness and Crunch
For maximum crispiness, these dessert tacos are truly best enjoyed immediately after assembly. If you need to prepare components ahead, the unfresh shells (with the white chocolate barrier applied) can be stored in an airtight container at room temperature for up to 2 days, or in the refrigerator for up to 5 days.
Store the frosting separately in an airtight container in the fridge. Once filled, the shells may gradually soften over time due to the moisture from the creamy filling, so assemble just before serving for the very best texture and crunch.
Make-Ahead Magic: Prep Smart, Enjoy More
Planning makes dessert creation a breeze! You can prepare the cereal shells, complete with their essential white chocolate moisture barrier, up to 2-3 days in advance. Simply store them as directed above. The frosting can also be made ahead of time and stored in an airtight container in the refrigerator for up to a week.
Before filling, just bring the frosting to room temperature and give it a quick re-beat with an electric mixer until it’s light and fluffy again.
Your Crispy Cereal Dessert Tacos Questions Answered
Can I use different types of cereal?
Yes, absolutely! While colorful toasted oat cereal works wonderfully, feel free to experiment with other sturdy, crispy cereals. Rice Krispies, Cheerios, or even lightly crushed cornflakes can make excellent substitutes. Just avoid very flaky or delicate cereals that might crumble too easily during shaping.
Are these dessert tacos gluten-free or dairy-free?
As written, this recipe is not gluten-free or dairy-free. However, substitutions are possible! Look for certified gluten-free cereals, and for dairy-free versions, use plant-based butter alternatives, dairy-free milk, and dairy-free white chocolate for both the shells and frosting. Always double-check all ingredient labels for hidden allergens.
How long do these dessert tacos stay crispy?
Thanks to the crucial white chocolate barrier, the shells can stay significantly crispier than traditional cereal treats. Unfilled shells, with the chocolate barrier, remain crispy for up to 2 days at room temperature when stored in an airtight container. Once filled, they are best enjoyed within a few hours to ensure peak crispness, as the moisture from the frosting will eventually begin to soften the shell over extended periods.
Can I prepare the shells ahead of time?
Absolutely! Preparing the shells ahead is a great time-saver. The cereal shells, complete with their white chocolate moisture barrier, can be made 2-3 days in advance. Store them in an airtight container at room temperature until you’re ready to fill them. This makes these Crispy Cereal Dessert Tacos perfect for entertaining!
What if I don’t have a taco mold?
No problem at all! You can easily shape your cereal shells by draping the warm mixture over alternative surfaces. A rolling pin, the inverted cups of a muffin tin, or even the bars of your oven rack can work perfectly. Just ensure whatever you use is clean and lightly greased to prevent sticking. This DIY method creates perfectly shaped sweet tacos!
Ready to Create? Share Your Crispy Cereal Dessert Tacos Masterpiece!
Now that you have the secret to making truly crisp and utterly delightful Crispy Cereal Dessert Tacos, it’s time to unleash your inner dessert artist! This recipe is a guaranteed crowd-pleaser and a wonderfully fun project for all ages.
What to Serve Next
These dessert tacos have a crunchy shell and sweet filling, so you might want something soft and fruity to balance the texture.
- For a breakfast-like contrast, try the Fluffy Blueberry Pancakes — the tart berries cut through the sweetness of the tacos.
- If you want another soft, comforting option, the Fluffy Oatmeal Pancakes bring a heartier grain flavor that pairs nicely with the crispy taco shell.
Don’t just keep this incredible secret to yourself – share your vibrant creations with the world! Tag us on social media or leave a comment below with your favorite variations and how you customized your sweet tacos. For more imaginative dessert ideas that combine unique textures and flavors, try our delightful recipe for chewy pumpkin chocolate chip blondies. We can’t wait to see your delicious Crispy Cereal Dessert Tacos!
Cereal Tacos
Course: DessertCuisine: AmericanDifficulty: easy12
tacos30
minutes5
minutes450
kcal60
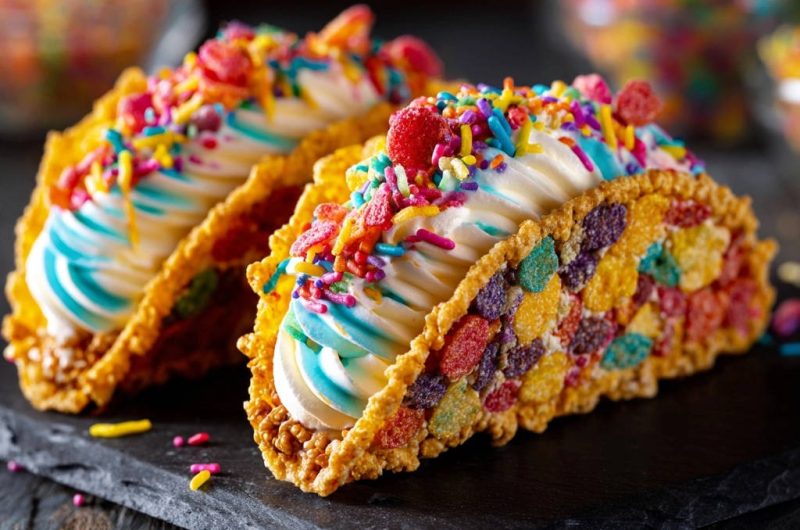
minutesSay goodbye to mushy dessert tacos! This recipe reveals the simple trick to keeping your colorful cereal shells perfectly crisp. Filled with creamy frosting and vibrant toppings, these fun treats are surprisingly easy to make and guaranteed to be a hit.
Ingredients
4 cups colorful toasted oat cereal (like Fruity Pebbles)
4 tablespoons unsalted butter
5 cups mini marshmallows
1 cup unsalted butter, softened
2 cups powdered sugar
2-3 tablespoons milk or cream
1 teaspoon vanilla extract
Blue food coloring (optional)
1/2 cup white chocolate chips or candy melts
1/2 cup colorful sprinkles
1/4 cup freeze-dried raspberries
Directions
- Lightly grease a taco mold or line a baking sheet with parchment paper and drape over a rolling pin or oven rack to create a taco shape.
- In a large pot, melt 4 tablespoons of butter over low heat. Add the mini marshmallows and stir constantly until completely melted and smooth.
- Remove from heat and immediately add the cereal, stirring gently until all the cereal is evenly coated with the marshmallow mixture.
- Working quickly, press the warm cereal mixture into your prepared taco molds or over your rolling pin. Press firmly to create a compact, even shell. Allow to cool completely at room temperature, then transfer to the refrigerator for at least 30 minutes to firm up.
- The Secret to Keeping Them Crisp! Once the cereal shells are firm, melt the white chocolate chips or candy melts in a microwave-safe bowl in 30-second intervals, stirring until smooth. Using a pastry brush or spoon, apply a thin, even layer of melted white chocolate to the inside of each cereal taco shell. Place back in the refrigerator for another 15-20 minutes until the chocolate is fully set and hard. This creates a moisture barrier!
- While the shells chill, prepare the frosting. In a medium bowl, beat 1 cup softened butter with an electric mixer until creamy. Gradually add the powdered sugar, beating until smooth. Mix in the milk or cream and vanilla extract. If desired, divide a small portion of the frosting and tint it with a few drops of blue food coloring.
- Once the white chocolate in the shells is set, carefully remove the shells from their molds. Pipe or spoon the frosting into each cereal taco shell. You can alternate white and blue frosting for a swirled effect.
- Generously sprinkle with colorful sprinkles and top with freeze-dried raspberries. Serve immediately for the best crispy experience.
Notes
- The melted white chocolate layer inside the shells is crucial for keeping them crisp and preventing sogginess.