Cheesy Pulled Beef Sliders: Juicy Perfection Awaits!
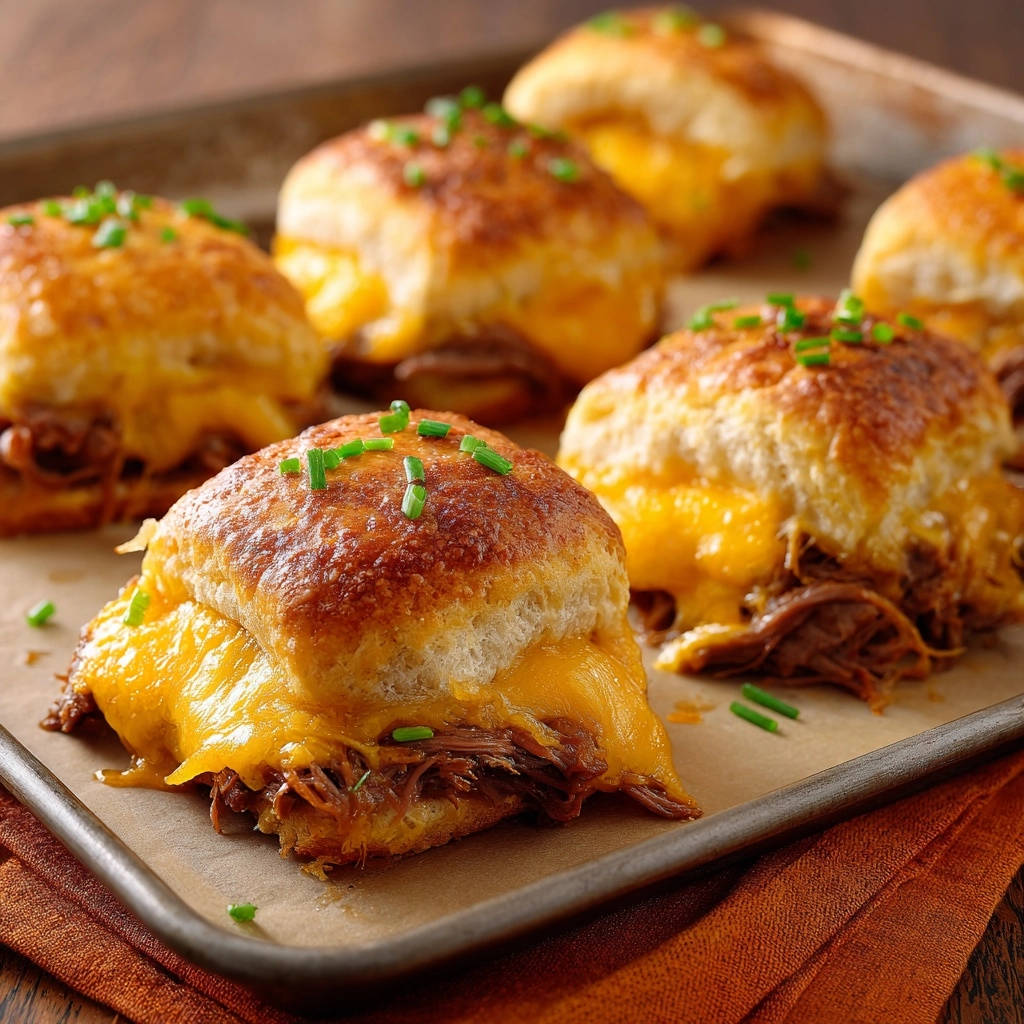
There’s nothing more frustrating than crafting what you hope will be perfect Cheesy Pulled Beef Sliders, only to find the meat disappointingly dry. I’ve been there, but through years of refining, I’ve discovered the absolute secret to achieving impossibly tender, flavorful pulled beef every single time.
This recipe isn’t just about assembling ingredients; it’s about a simple, transformative technique that guarantees succulent, melt-in-your-mouth beef, making these sliders a reliable hit for any occasion.
Beyond Basic: Why These Cheesy Pulled Beef Sliders Shine
These Cheesy Pulled Beef Sliders stand out from the crowd for several compelling reasons, going beyond just good flavor to deliver a truly exceptional experience.
The method is designed for foolproof success, ensuring even beginner cooks can achieve restaurant-quality results.
The “Secret Sauce” to Incredibly Tender Beef
The core innovation here is returning the shredded beef directly into its cooking liquid. This allows the meat to reabsorb all those rich, savory juices it released during cooking.
This crucial step ensures every single strand of beef is infused with moisture and flavor, eliminating any risk of dryness and providing that signature melt-in-your-mouth texture.
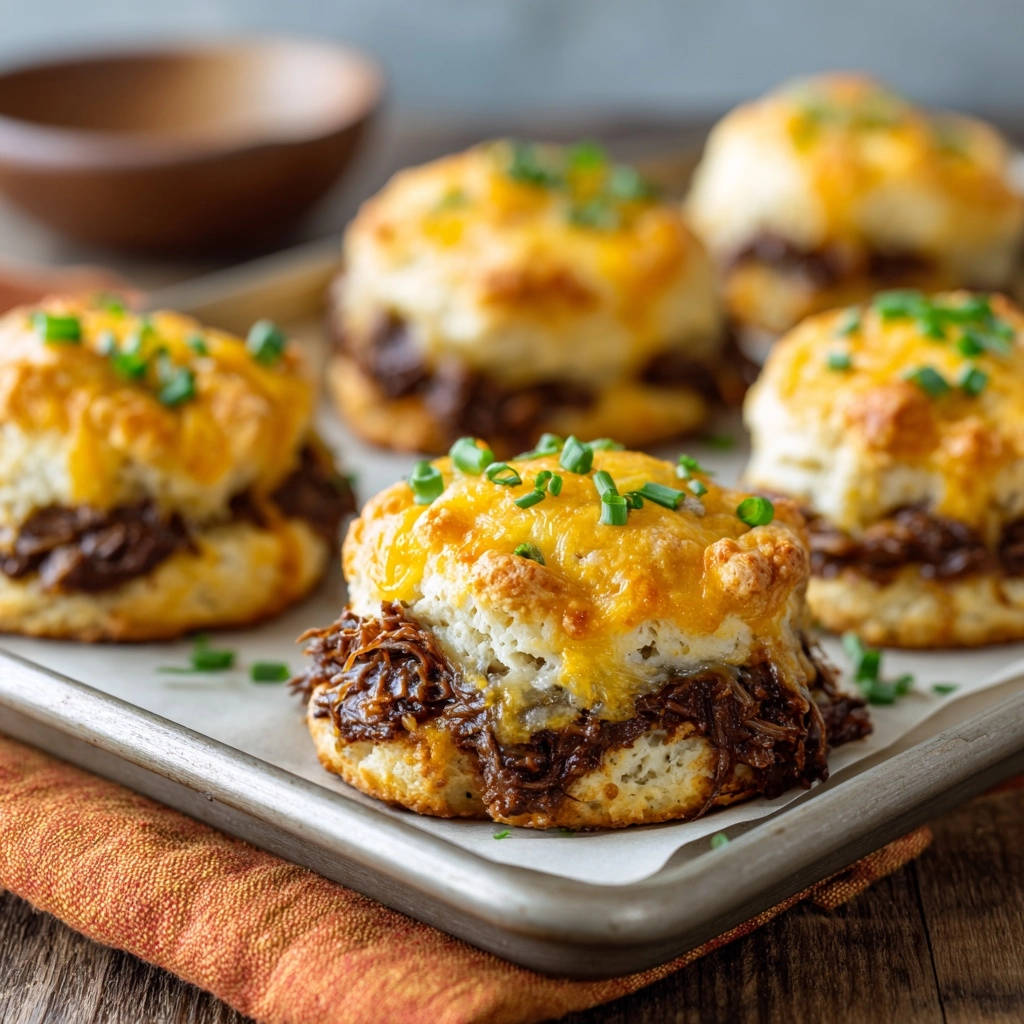
Effortless Entertaining: Family-Friendly & Crowd-Pleasing
These Cheesy Pulled Beef Sliders are an absolute dream for feeding a crowd or a hungry family. They are inherently fun, easy to eat, and universally loved by both kids and adults.
The assembly process is straightforward, allowing you to prepare a large batch with minimal fuss, making them ideal for game days, parties, or casual get-togethers.
Minimal Fuss, Maximum Flavor
Despite their incredibly rich and complex flavor, these sliders are surprisingly simple to prepare. The slow cooking process does most of the work, building deep flavors with very little hands-on time.
This balance of ease and impactful taste ensures you get maximum culinary reward for minimal effort, freeing you up to enjoy your guests or family.
The Flavor Foundation: What You’ll Need
Every great dish starts with quality ingredients. Here’s what makes these Cheesy Pulled Beef Sliders so incredibly delicious.
Star of the Show: Beef Chuck Roast
A well-marbled beef chuck roast is the ideal cut for pulled beef. Its abundance of connective tissue breaks down during the long, slow cooking process, transforming into gelatin.
This gelatin is what gives the pulled beef its incredibly tender, juicy, and succulent texture, making it perfect for shredding and soaking up flavor.
Aromatic Essentials: Onion and Garlic
Chopped yellow onion and minced garlic form the robust aromatic base for the rich cooking liquid. Sautéing them until softened and fragrant builds a foundational layer of savory depth.
These humble ingredients are critical for creating the complex flavor profile that permeates the beef.
Savory Liquids & Spices for Depth
Beef broth provides the necessary liquid for braising, while Worcestershire sauce adds a crucial umami punch and tangy complexity. Brown sugar balances the savory notes with a touch of sweetness.
Smoked paprika, garlic powder, and onion powder further enhance the savory profile, contributing to the rich, slow-cooked taste that defines these sliders.
Slider Buns and Cheesy Goodness
Hawaiian sweet rolls are highly recommended for their soft, slightly sweet, and fluffy texture, which perfectly complements the savory pulled beef. They hold up well to the filling without becoming soggy.
Shredded cheddar cheese delivers classic, melt-in-your-mouth goodness, providing a creamy, tangy counterpoint to the rich beef.
Finishing Touches: Butter and Chives
Melted butter brushed over the tops of the slider buns ensures they turn a beautiful golden brown and adds an irresistible richness and flavor.
Fresh chopped chives are not just a garnish; they add a bright, oniony freshness that cuts through the richness of the beef and cheese, elevating the overall taste.
Gear Up: Tools for Perfect Cheesy Pulled Beef Sliders
Dutch Oven or Oven-Safe Pot: A heavy-bottomed, oven-safe pot with a tight-fitting lid is crucial for searing the beef and then slow cooking it evenly in the oven.
9×13 Inch Baking Dish: This standard size is perfect for assembling and baking a full batch of 12 sliders, allowing them to fit snugly.
Two Forks: These are your best friends for effortlessly shredding the incredibly tender beef once it’s cooked, breaking it down into perfect strands.
Pastry Brush: Essential for evenly coating the tops of your slider buns with melted butter, ensuring a beautiful golden crust and added flavor.
Crafting Your Cheesy Pulled Beef Sliders: A Detailed Guide
Preheat & Prepare Your Beef: Get your oven ready to 300°F and ensure your chuck roast is thoroughly patted dry with paper towels, then seasoned generously with salt and black pepper. This preparation allows for a superior sear and better flavor absorption into the meat.
Sear for Deep Flavor: Heat olive oil in a large oven-safe pot or Dutch oven over medium-high heat. Sear the beef on all sides until deeply browned, about 3-4 minutes per side. This crucial step develops profound, caramelized savory notes that will permeate the entire dish, setting the stage for rich flavor.
Build the Aromatic Base: Add the chopped onion to the same pot and cook until softened, about 5 minutes, making sure to scrape up any delicious browned bits from the bottom of the pot. Then, add the minced garlic and cook for 1 minute more until fragrant. This creates the essential foundation for your rich, savory sauce.
Simmer the Flavorful Liquid: Stir in the beef broth, Worcestershire sauce, brown sugar, smoked paprika, garlic powder, and onion powder. Bring the mixture to a gentle simmer. This step combines all the savory and aromatic elements, creating the flavorful braising liquid for the beef.
Slow Cook to Fork-Tender Perfection: Return the seared beef to the pot, ensuring the liquid comes up about halfway or two-thirds of the way up the beef (add more broth if needed). Cover the pot tightly with a lid and transfer it to the preheated oven. Cook for 3 to 3.5 hours, or until the beef is incredibly fork-tender and easily pulls apart. Patience is key here for the best texture and deepest flavor.
The Juicy Secret: Shred and Soak! Carefully remove the beef from the pot and place it in a large bowl. Using two forks, shred the beef into succulent strands. Now, return the shredded beef directly back into the hot cooking liquid in the pot. Stir well to fully coat every piece, allowing it to soak up all those incredible, flavorful juices. Let it sit in the liquid for at least 15 minutes, or until ready to assemble. This is THE crucial technique for keeping your Cheesy Pulled Beef Sliders moist and bursting with flavor, preventing any dryness.
Assemble Your Sliders: Keep the slider buns connected and slice the entire slab horizontally through the middle, creating a top and bottom layer. Place the bottom layer of buns in a 9×13 inch baking dish. Layer half the juicy pulled beef evenly over the bottom buns, then sprinkle one cup of the shredded cheddar cheese over the beef. Add the remaining shredded beef, followed by the remaining one cup of shredded cheddar cheese. This layering ensures gooey cheese in every bite.
Butter and Bake to Golden Bliss: Place the top layer of buns over the cheese-covered beef. Brush the tops of the buns generously with the melted butter. Bake for 15-20 minutes, or until the cheese is melted and bubbly and the tops of the buns are beautifully golden brown. This creates a perfectly toasted exterior.
Garnish and Serve: Remove the sliders from the oven and let them cool for a few minutes. This allows the cheese to set slightly, making them easier to slice. Slice into individual sliders and garnish with fresh chopped chives before serving. The chives add a vibrant finish and a fresh, subtle oniony flavor.
Chef’s Secrets: Elevating Your Cheesy Pulled Beef Sliders
Choosing the Best Beef for Shredding
Opt for a well-marbled chuck roast. The fat and connective tissue will break down during the long cooking process, ensuring your pulled beef is incredibly tender and flavorful, not dry.
Don’t Skip the Sear – It’s Flavor Gold!
Searing the beef on all sides before slow cooking creates a deep, caramelized crust. This adds an essential layer of rich, complex flavor that you simply can’t achieve otherwise.
Embrace the Soaking Step: Your Moisture Insurance
The most critical tip! After shredding the beef, return it directly to the cooking liquid. Letting it soak for at least 15 minutes allows the meat to reabsorb all the delicious juices, guaranteeing moist, never-dry Cheesy Pulled Beef Sliders.
Layering Cheese for Maximum Melty Goodness
Layering the cheese both between the beef layers and on top ensures that every bite is filled with gooey, melted cheddar. Don’t be shy!
Uniform Slicing for Picture-Perfect Sliders
After baking, let the assembled sliders cool for a few minutes before slicing. This allows the cheese to set slightly, making it easier to get clean, individual slider cuts without everything falling apart.
Troubleshooting Your Sliders: Common Questions, Easy Solutions
“My Beef Isn’t Tender Enough!”
This usually means your beef hasn’t cooked long enough. Beef chuck roast needs time for its connective tissues to break down. Simply return the pot to the oven and continue cooking until the beef easily shreds with a fork, checking every 30 minutes.
“Why is My Pulled Beef Dry?”
The most common culprit is skipping the crucial “shred and soak” step (Step 8). Always return the shredded beef to the cooking liquid to reabsorb all those delicious juices. If you’ve already assembled, you can try adding a splash of beef broth to the cooked sliders before serving, though it’s best prevented.
“My Slider Buns Are Soggy!”
Soggy buns can happen if the beef is too wet when assembled, or if the sliders sit for too long before baking. Ensure you let the beef soak up the liquid, but don’t add excess before assembling. Bake immediately after assembly for the best results and a perfectly crisp bun.
“The Cheese Isn’t Melting Evenly.”
Make sure your oven is fully preheated and that the cheese is evenly sprinkled across the beef layers. For a quick fix, you can always turn on the broiler for 1-2 minutes after the initial bake, watching carefully to prevent burning, to get a beautifully bubbly, golden top.
Perfect Pairings & Serving Inspirations
Classic Side Dishes
Pair your Cheesy Pulled Beef Sliders with classic comfort sides like creamy coleslaw, a tangy potato salad, crispy french fries, or a hearty macaroni and cheese. These rich options complement the savory beef beautifully.
If corn on the cob sounds good, you can also pile these tender sliders onto a soft roll just like a Philly cheesesteak sandwich.
Fresh & Light Options
For a balanced meal, serve alongside a crisp green salad with a vinaigrette dressing, sweet corn on the cob (perhaps even our skillet street-style corn for extra flair), or a bowl of crunchy pickles to cut through the richness. These add freshness and texture contrast.
For a perfect pairing, try our Philly Cheesesteak Sandwich: Juicy Ribeye Mastery.
Condiment Creations
Offer a variety of sauces like a tangy BBQ sauce, a zesty horseradish cream, or even a simple spicy mayonnaise for guests to customize their sliders to their liking.
What to Serve with Your Sliders
These cheesy pulled beef sliders are rich and filling, so you need sides that balance the meal without competing for attention.
- A bowl of Creamy Broccoli Cheddar Soup adds a smooth, vegetable-heavy contrast to the beefy sliders, making the whole meal feel heartier.
- Warm Soft Buttery Garlic Herb Dinner Rolls are great for sopping up any extra juices from the sliders or dipping into the soup.
Plan Ahead: Make-Ahead & Storage Tips
Can I Make the Pulled Beef Ahead?
Absolutely! The pulled beef can be made up to 3 days in advance. Once shredded and re-soaked in its juices, let it cool completely, then store it in an airtight container in the refrigerator. Reheat gently on the stovetop or in the microwave, adding a splash of beef broth if needed, before assembling your sliders. This makes game day prep a breeze, much like our game day nachos.
Assembling Sliders in Advance
You can assemble the unbaked sliders a few hours ahead of time. Cover them tightly with plastic wrap and refrigerate. When ready to bake, remove them from the fridge 30 minutes beforehand to come to room temperature, then bake as directed for fresh results.
Storing Leftovers
Leftover Cheesy Pulled Beef Sliders can be stored in an airtight container in the refrigerator for up to 3-4 days. For best results, reheat individual sliders in the oven or air fryer until warmed through and the cheese is re-melted, helping to maintain crispiness in the buns.
Your Cheesy Pulled Beef Sliders Questions Answered!
Can I use a slow cooker instead of the oven?
Yes, you can! After searing the beef and sautéing the aromatics in a pot (or directly in the slow cooker if it has a sauté function), transfer everything to the slow cooker. Cook on low for 6-8 hours or on high for 3-4 hours, or until the beef is fork-tender. Don’t forget the crucial “shred and soak” step!
What other cheeses can I use?
While cheddar is classic, feel free to experiment! Provolone, Monterey Jack, Colby, or a blend of cheeses would also work wonderfully, adding their own unique flavor profiles to your Cheesy Pulled Beef Sliders. A mix of sharp and mild cheeses can be particularly delicious.
Can I make these gluten-free?
Yes, simply substitute the regular slider buns with your favorite gluten-free slider buns. Ensure your beef broth is also gluten-free. The rest of the ingredients are naturally gluten-free, making this an easy adaptation.
Is it spicy? Can I add heat?
This recipe is not spicy as written. If you prefer a kick, you can add a pinch of red pepper flakes with the spices, or include a dash of your favorite hot sauce to the shredded beef mixture. Serving with pickled jalapeños or a spicy aioli is also a fantastic option to customize the heat.
Ready to Impress? Share Your Cheesy Pulled Beef Sliders Masterpiece!
Now that you’ve unlocked the secret to perfectly juicy, tender Cheesy Pulled Beef Sliders, get ready to become everyone’s favorite host! These aren’t just sliders; they’re a guaranteed crowd-pleaser, perfect for game day, family dinners, or any gathering where delicious, fuss-free comfort food is a must.
We’d love to see your creations! Share your Cheesy Pulled Beef Sliders on social media and tag us. Don’t forget to rate this recipe and leave a comment below with your own tips or favorite variations. For more incredible, easy-to-master recipes like this, explore our other comfort food collection and start your next culinary adventure today!
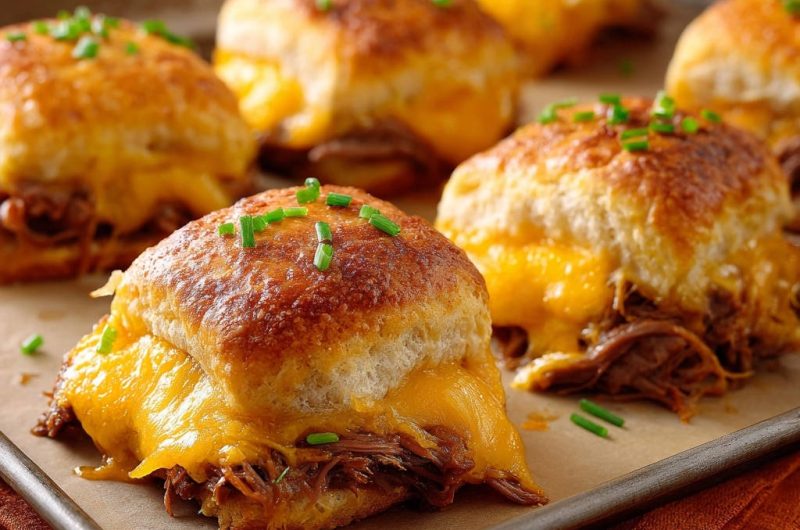
Pulled Beef
Course: Main CourseCuisine: AmericanDifficulty: medium12
sliders45
minutes3
hours220
kcal240
minutesDiscover the secret to perfectly juicy, flavorful pulled beef with these irresistible Cheesy Pulled Beef Sliders. A simple technique ensures the beef stays incredibly tender, making every bite a delight. Ideal for gatherings or a satisfying family meal.
Ingredients
2.5 pounds beef chuck roast, trimmed of excess fat
1 tablespoon olive oil
1 medium yellow onion, chopped
4 cloves garlic, minced
3 cups beef broth
2 tablespoons Worcestershire sauce
1 tablespoon brown sugar
1 teaspoon smoked paprika
1 teaspoon garlic powder
1 teaspoon onion powder
1 teaspoon salt
0.5 teaspoon black pepper
12 slider buns, like Hawaiian sweet rolls
2 cups shredded cheddar cheese
0.5 cup unsalted butter, melted
2 tablespoons fresh chives, chopped, for garnish
Directions
- Preheat your oven to 300°F.
- Pat the beef chuck roast dry with paper towels. Season generously all over with salt and black pepper.
- Heat the olive oil in a large oven-safe pot or Dutch oven over medium-high heat. Sear the beef on all sides until deeply browned, about 3-4 minutes per side. Remove the beef from the pot and set aside.
- Add the chopped onion to the same pot and cook until softened, about 5 minutes, scraping up any browned bits from the bottom. Add the minced garlic and cook for 1 minute more until fragrant.
- Stir in the beef broth, Worcestershire sauce, brown sugar, smoked paprika, garlic powder, and onion powder. Bring the mixture to a simmer.
- Return the seared beef to the pot. The liquid should come up about halfway or two-thirds of the way up the beef. If not, add a little more beef broth. Cover the pot tightly with a lid.
- Transfer the covered pot to the preheated oven and cook for 3 to 3.5 hours, or until the beef is incredibly fork-tender and easily shreds apart.
- The Secret to No More Dry Meat: Carefully remove the beef from the pot and place it in a large bowl. Using two forks, shred the beef. Now, return the shredded beef directly back into the cooking liquid in the pot. Stir well to coat all the shredded beef, allowing it to soak up all those flavorful juices. Let it sit in the liquid for at least 15 minutes, or until ready to assemble. This step is crucial for keeping the beef moist and flavorful.
- To assemble the sliders, keep the slider buns connected. Slice the entire slab of buns horizontally through the middle, creating a top and bottom layer. Place the bottom layer of buns in a 9×13 inch baking dish.
- Layer half of the shredded beef evenly over the bottom buns. Then, sprinkle one cup of the shredded cheddar cheese over the beef.
- Add the remaining shredded beef, followed by the remaining one cup of shredded cheddar cheese.
- Place the top layer of buns over the cheese. Brush the tops of the buns generously with the melted butter.
- Bake for 15-20 minutes, or until the cheese is melted and bubbly and the tops of the buns are golden brown.
- Remove from the oven, let cool for a few minutes, then slice into individual sliders. Garnish with fresh chopped chives before serving.