Mastering Soft Buttery Garlic Herb Dinner Rolls
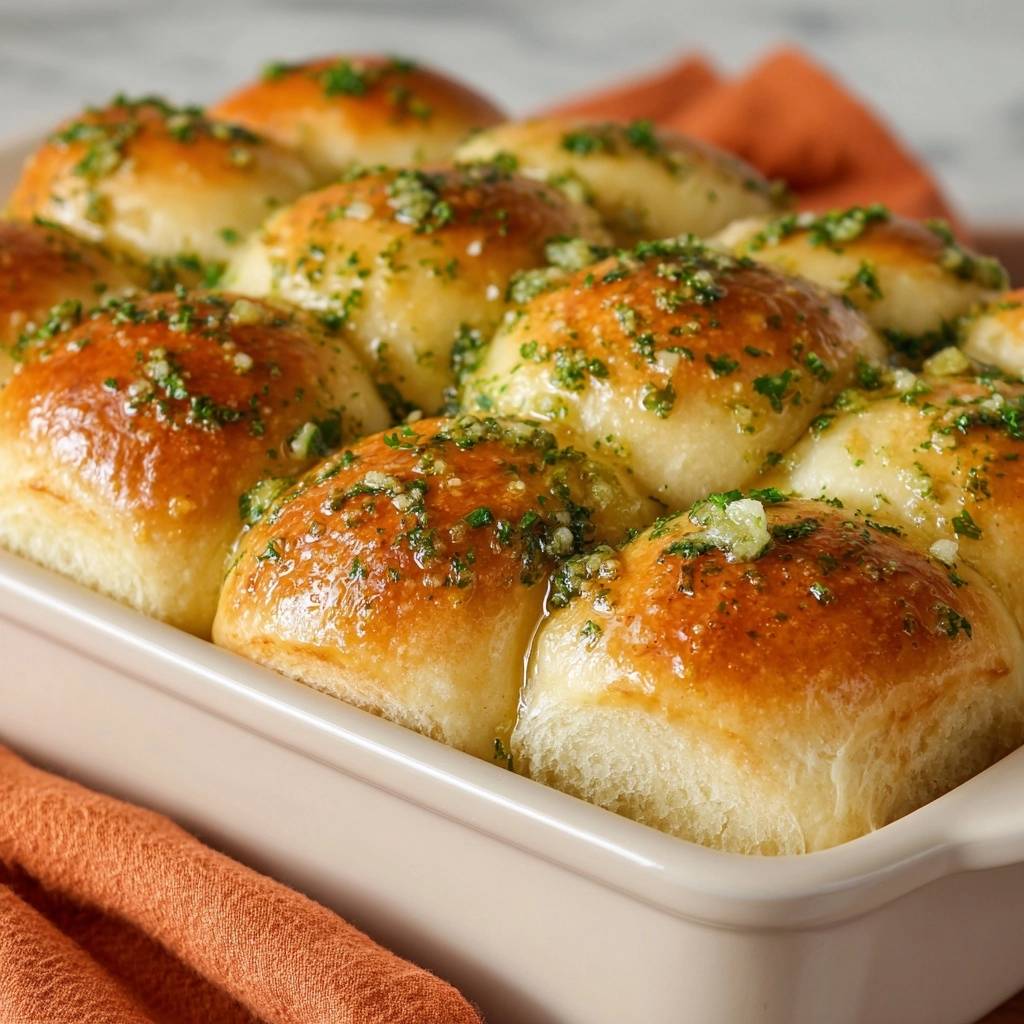
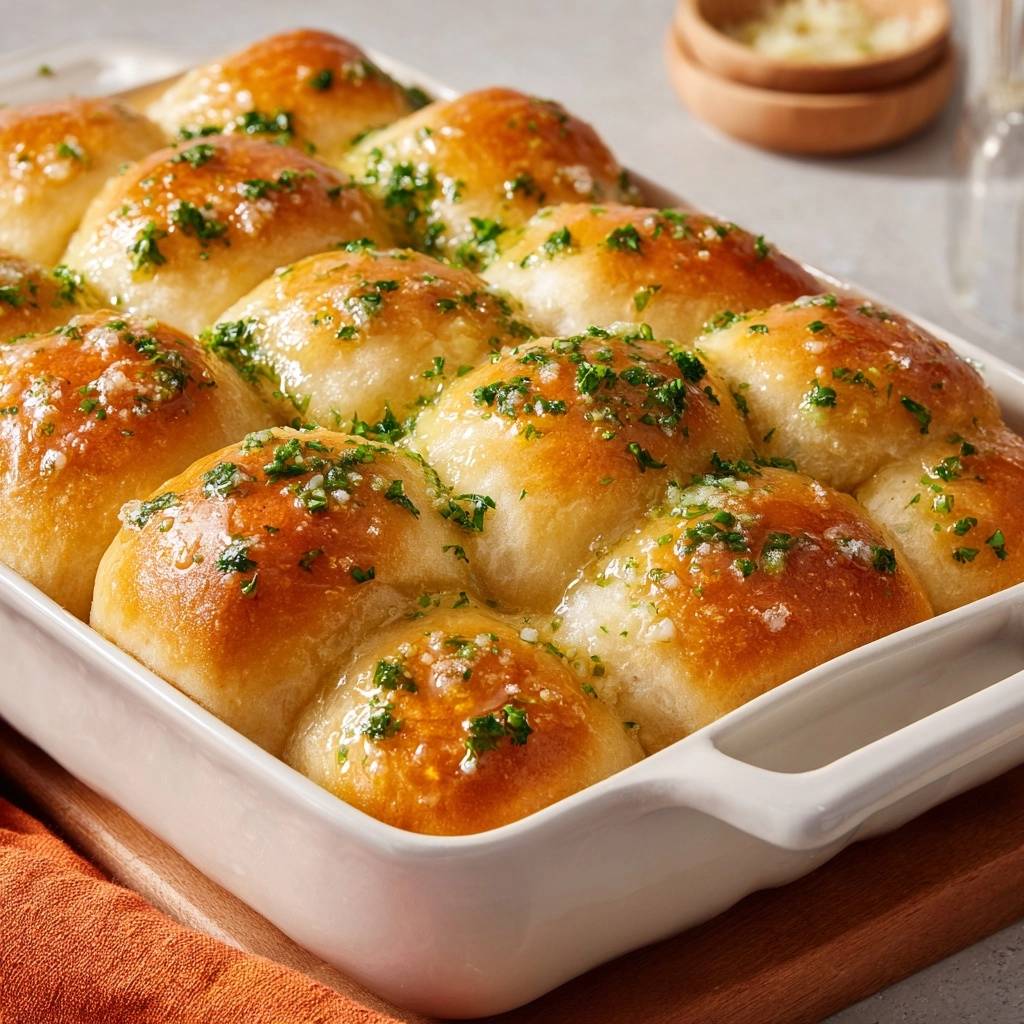
Imagine pulling a tray of golden, shimmering rolls from the oven, the scent of toasted garlic and sweet yeast filling every corner of your kitchen. These aren’t those sad, dense rolls that sit like lead in your stomach. Instead, these Buttery Garlic Herb Dinner Rolls boast a pillowy, cloud-like interior that pulls apart in delicate, feathery layers under a savory, herb-flecked crust.
The contrast between the soft, airy crumb and the rich, slick garlic butter topping makes these the undisputed star of any dinner table. However, many home bakers struggle with yeast bread, often ending up with rolls that are either too dry or surprisingly heavy. This recipe solves that by focusing on high hydration and precise temperature control to guarantee a professional-grade result every single time.
The secret to that legendary “squish” factor lies in the moisture content of your dough. Most people add too much flour because the dough feels sticky, but the key is to stop adding flour while the dough is still slightly tacky. This ensures the rolls stay moist and tender even two days after baking, rather than turning into dry crumbs by the next morning.
The Chemistry of Fluffy Yeast Bread
Yeast is a living organism, and like any living thing, it needs the right environment to thrive. When you stir your yeast into milk warmed to exactly 105 to 110 degrees F, you’re creating a biological catalyst. If the milk is too cold, the yeast stays dormant; if it’s over 120 degrees F, you risk killing the yeast entirely, which results in a flat, lifeless dough.
Sugar plays a dual role in this chemical reaction. While it provides “food” for the yeast to produce carbon dioxide, it also aids in the Maillard reaction during baking. This is the process that gives your rolls that beautiful, deep brown color and complex flavor profile. Without that small amount of sugar, your rolls would look pale and taste one-dimensional.
Using whole milk instead of water or skim milk is a non-negotiable for a premium crumb. The fats and natural sugars in whole milk weaken the gluten structure just enough to ensure the bread is tender rather than chewy. This creates a tight, uniform crumb that feels luxurious on the tongue and absorbs the garlic butter perfectly.
Why Fat and Eggs Create a Richer Crumb
This recipe uses what bakers call an “enriched dough.” By incorporating melted butter and a room-temperature egg, you’re introducing fats that coat the flour’s proteins. This coating prevents the gluten from forming long, tough strands, which is exactly what you want for a soft dinner roll.
The egg also acts as a natural emulsifier, helping the liquids and fats bind together smoothly. Using a room-temperature egg is vital because a cold egg can seize the melted butter, creating tiny clumps instead of a smooth, homogenous dough. This enrichment is what separates a standard dinner roll from a world-class, melt-in-your-mouth experience.
Essential Pantry Staples for Garlic Herb Rolls
While you might be tempted to reach for bread flour, all-purpose flour is actually the better choice here. It has a slightly lower protein content, which helps maintain that signature softness. If you use bread flour, the rolls will have more “chew,” which is great for a baguette but less ideal for a tender side dish.
Fine sea salt is another essential staple because its small crystals dissolve instantly into the dough. Table salt can sometimes be harsh, while coarse kosher salt might not distribute evenly, leading to salty pockets. For the topping, always use fresh garlic cloves; the pre-minced stuff in jars has a metallic aftertaste that ruins the delicate butter sauce.
Selecting the Right Yeast: Active Dry vs. Instant
This recipe specifically calls for active dry yeast because it requires “blooming” in warm liquid. This step is actually a built-in insurance policy for your bake. If the mixture doesn’t become foamy and bubbly within ten minutes, you know your yeast is dead before you waste the rest of your ingredients.
Instant yeast can be mixed directly into dry ingredients, but it lacks the deep, fermented flavor that a slow bloom provides. To test if your yeast is fresh, look for a thick, creamy head of foam on top of the milk. If it just looks like cloudy water after ten minutes, toss it out and start over with a fresh packet.
Step-by-Step: Mixing and Kneading for Maximum Rise
When you begin adding flour to your wet ingredients, do it gradually. You’ll notice the dough starts as a shaggy mass, but as the dough hook works, it will begin to pull away from the sides of the bowl. This is the most critical moment for the texture of your rolls.
You want the dough to be “tacky but not sticky.” This means if you touch it with a clean finger, it should feel slightly moist and stick for a split second, but it shouldn’t leave a messy residue on your skin. If it’s sticking to your hands like glue, add one tablespoon of flour at a time until it reaches that tacky stage.
Knead the dough for about 5 to 7 minutes on medium-low speed. You’re looking for the “windowpane” effect. Take a small piece of dough and gently stretch it between your fingers; if it stretches thin enough to see light through it without tearing, the gluten is perfectly developed. If it snaps immediately, it needs another minute or two of kneading.
The First Proof: Patience and Temperature Control
Once your dough is smooth and elastic, it needs a warm, draft-free place to rest. Yeast is sensitive to temperature fluctuations, so avoid placing the bowl near an open window or an air conditioning vent. A cold kitchen will significantly slow down the rise, leading to a denser roll.
A great pro hack is to place the bowl in your oven (while it’s turned off) with the oven light on. The heat from that tiny bulb creates a perfect “proofing box” environment of about 75-80 degrees F. You’re looking for the dough to truly double in size, which usually takes about an hour.
Don’t rush this stage, but don’t let it go too long either. If the dough over-proofs, the yeast will exhaust its energy, and the air bubbles will collapse. This results in rolls that look great when they go in the oven but come out looking like flat, wrinkled saucers.
Shaping Techniques for Uniform Dinner Rolls
For professional-looking rolls, don’t just eyeball the size. Use a kitchen scale to weigh out 75-gram portions. This ensures every roll is the same size, which means they will all finish baking at the exact same time, preventing some from being burnt while others are doughy.
To shape them, place a dough ball on a clean, un-floured counter. Cup your hand over it like a “claw” and move your hand in a tight circular motion. The friction from the counter helps pull the dough tight, creating surface tension on the top of the roll for a smooth, rounded finish.
Place the rolls in a greased 9×13 inch ceramic or glass dish. These materials distribute heat more evenly than thin metal pans, which can often scorch the bottoms of the rolls before the centers are cooked. Leave a little space between them; they will grow and touch during the second rise.
Achieving the Signature High-Gloss Golden Crust
The secret to that “bakery window” shine is a proper egg wash. By whisking one egg with a tablespoon of water, you create a thin glaze that browns beautifully in the oven. The water thins the proteins in the egg, allowing you to brush on a light, even coat without it clumping.
Use a pastry brush to apply the wash just before the rolls go into the oven. Be gentle so you don’t deflate the puffy dough. Avoid letting the egg wash pool at the bottom of the rolls, as this can create a “scrambled egg” ring around the base of your bread.
This wash doesn’t just add shine; it also acts as a barrier. It helps trap moisture inside the roll while it bakes, contributing to that incredibly soft interior. Without it, the crust can become thick and crusty, which isn’t what we want for a classic dinner roll.
Infusing the Garlic Herb Finishing Butter
While the rolls are in the oven, it’s time to prepare the flavor bomb. Melt your butter over low heat and add the minced garlic. You aren’t trying to brown the garlic here; you just want to “steep” it until it becomes fragrant and loses its sharp, raw bite.
Wait until the very last second to stir in the fresh parsley. If you cook the parsley too long, it will turn a dull, muddy brown. By adding it at the end, it stays vibrant green and tastes fresh. This is also the time to add a pinch of flaky sea salt for that hit of savory crunch.
As soon as the rolls come out of the oven, brush the garlic butter over them while they are screaming hot. The heat causes the bread to act like a sponge, pulling the flavored butter deep into the crust. If you wait until they cool, the butter will just sit on top and feel greasy.
Troubleshooting Common Bread Baking Obstacles
If your rolls turned out like “bricks,” you likely added too much flour during the mixing stage. Remember, the dough should be tacky. Next time, trust the process and stop adding flour even if it feels a bit moist. Your stand mixer will do the work of smoothing it out.
If the rolls didn’t rise at all, your yeast was likely expired or the milk was too hot. Always check the expiration date on your yeast packets and use a digital thermometer for the milk. It’s a small step that saves a lot of frustration and wasted ingredients.
For rolls that are pale despite being fully cooked, you might have skipped the egg wash or your oven temperature is running low. Many home ovens aren’t calibrated correctly. If you find your bakes are always pale, try increasing the heat by 15 degrees or moving the rack to a higher position.
Make-Ahead Strategies and Freezing Instructions
You can easily make these ahead of time to save stress during big holiday meals. After shaping the rolls and placing them in the pan, cover them tightly with plastic wrap and put them in the fridge overnight. The cold slows the yeast down, and you can just bake them the next morning after letting them sit at room temperature for 30 minutes.
To freeze these rolls, it’s best to bake them fully first. Let them cool completely, then wrap the entire pan in foil and a layer of plastic wrap. They will stay fresh in the freezer for up to a month. When you’re ready to serve, thaw them at room temperature and reheat in a 300°F oven for 10 minutes.
If you want to freeze the raw dough, shape the balls and freeze them on a baking sheet before transferring to a bag. When you’re ready to bake, let them thaw and rise in a greased pan for about 4-5 hours. They might not get quite as much lift as fresh dough, but they’ll still be delicious.
Optimal Pairings for Buttery Garlic Herb Dinner Rolls
These rolls are sturdy enough to handle heavy sauces but soft enough to complement a light meal. They are the perfect companion for a slow-roasted pot roast or a hearty beef stew, where you can use the bread to soak up every last drop of savory gravy.
For a perfect pairing, try our Classic Simmered Meatballs: Tender, Juicy & Never Dry.
The garlic and herb profile also pairs beautifully with creamy vegetable soups, like roasted tomato or butternut squash. The saltiness of the butter topping cuts through the sweetness of the vegetables. For a simple Sunday dinner, serve them alongside roasted chicken and mashed potatoes for the ultimate comfort meal.
Expert Tips for Professional Results
1. Always use a digital thermometer to check your milk temperature; guessing is the fastest way to fail with yeast.
2. Weigh your flour in grams if possible, as measuring cups can vary by up to 20% depending on how tightly you pack the flour.
3. Don’t skimp on the second rise; this is where the “fluff” happens, so wait until they are visibly puffy and touching each other.
4. Apply the garlic butter the second they leave the oven to ensure the bread absorbs the flavor rather than just being coated in oil.
Frequently Asked Questions
How should I store leftover rolls to keep them soft?
Store any leftover rolls in an airtight container or a zip-top bag at room temperature for up to 3 days. To maintain that “just-baked” softness, avoid putting them in the refrigerator, as the cold air can actually crystallize the starches and make the bread go stale faster. When you’re ready for a snack, a quick 10-second zap in the microwave will revive that pillowy texture perfectly.
Why did my rolls turn out dense and heavy?
The most common culprit for dense rolls is over-flouring the dough. When the dough feels sticky, it’s tempting to keep dumping in flour, but this creates a dry, heavy crumb. Another reason could be under-proofing; if the dough didn’t double in size during the first or second rise, the air pockets won’t be large enough to create a light texture. Ensure your rising spot is warm enough and give the yeast the time it needs to work.
Can I use dried herbs instead of fresh parsley?
You can use dried herbs in a pinch, but the flavor won’t be as vibrant. If you use dried parsley or an Italian seasoning blend, reduce the amount to 1 tablespoon, as dried herbs are more concentrated than fresh. Add them to the butter while it’s melting so the heat can “rehydrate” the herbs and release their oils into the sauce.
What can I use if I don’t have a stand mixer?
You can absolutely make these by hand! Mix the ingredients in a large bowl with a sturdy wooden spoon until a shaggy dough forms. Turn it out onto a lightly floured surface and knead by hand for about 10 minutes. It’s a bit of a workout, but you’ll know it’s ready when the dough feels smooth, elastic, and bounces back when poked with a finger.
Can I substitute the whole milk with a dairy alternative?
Yes, you can use unsweetened almond milk or oat milk if needed. However, keep in mind that these alternatives have less fat and protein than whole milk, so the rolls might be slightly less rich and may brown a bit differently. Avoid using thin milks like rice milk, as they won’t provide enough structure for the enriched dough.
Dinner Rolls
Course: Side DishCuisine: AmericanDifficulty: medium12
rolls20
minutes25
minutes210
kcal155
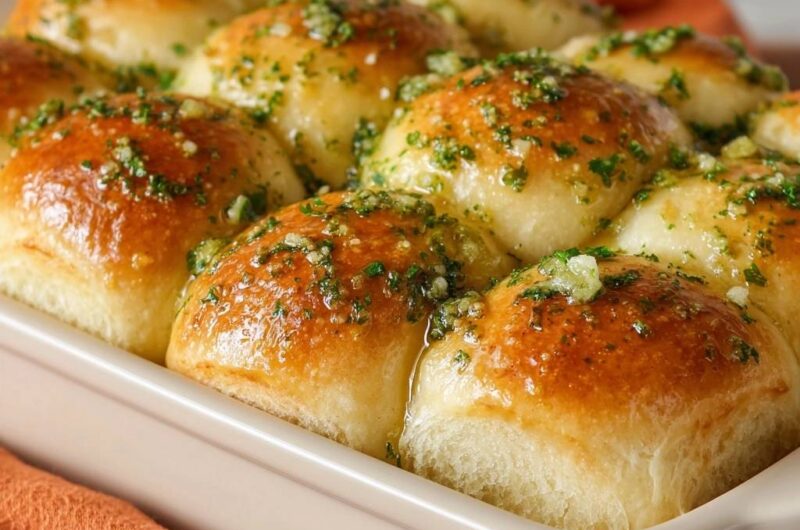
MinutesA foolproof recipe for soft and airy dinner rolls that avoids the common pitfalls of dense or dry bread. These rolls feature a cloud-like texture, a high-gloss finish, and a savory garlic, parsley, and sea salt butter glaze.
Ingredients
3 1/2 cups all-purpose flour (plus 1-2 tablespoons if needed)
1 cup warm whole milk (105 to 110 degrees F)
2 1/4 teaspoons active dry yeast (1 packet)
3 tablespoons granulated sugar
1 1/2 teaspoons fine sea salt
4 tablespoons unsalted butter, melted and cooled
1 large egg, room temperature (for the dough)
1 egg + 1 tablespoon water (for egg wash)
For the Garlic Herb Topping:
6 tablespoons unsalted butter
4 cloves garlic, finely minced
3 tablespoons fresh parsley, finely chopped
1/2 teaspoon flaky sea salt
1/4 teaspoon grated Parmesan (optional, for texture)
Directions
- The secret to the perfect rise starts with the milk temperature. Use a thermometer to ensure your milk is between 105 and 110 degrees F. Stir the sugar and yeast into the warm milk and let it sit for 10 minutes until foamy.
- In the bowl of a stand mixer (or a large mixing bowl), combine the yeast mixture with the 4 tablespoons of melted butter, the room-temperature egg, and the salt.
- Gradually add the flour. Using a dough hook, mix on low speed until the dough clears the sides of the bowl. To solve the “dense roll” problem, stop adding flour as soon as the dough is smooth but still slightly tacky to the touch. Over-flouring is the number one cause of dry bread. Knead for 5 to 7 minutes until elastic.
- Place the dough in a greased bowl, cover with plastic wrap, and let rise in a warm, draft-free spot until doubled in size, about 60 to 90 minutes.
- Gently punch down the dough and divide into 12 equal pieces (approx. 75g each). Roll into tight, smooth balls by tensioning the dough against the counter. Place in a greased 9×13 inch ceramic or glass baking dish. Cover and let rise again for 45 minutes until puffy and touching.
- Preheat your oven to 375 degrees F. To achieve the high-gloss finish seen in the image, whisk the remaining egg with 1 tablespoon of water and brush a thin, even layer over the tops of the rolls.
- Bake for 20 to 25 minutes or until the tops are a deep, rich golden brown.
- While the rolls bake, melt the 6 tablespoons of butter in a small saucepan over low heat. Add the minced garlic and cook for 1-2 minutes just until fragrant but not browned. Stir in the parsley and salt.
- Immediately upon removing the rolls from the oven, pour the garlic herb butter generously over the hot rolls, ensuring the garlic and herbs settle into the crevices between the rolls as shown in the image. Serve warm.
Notes
- To prevent dense rolls, ensure milk is between 105 and 110 degrees F and stop adding flour while the dough is still slightly tacky. Use a digital scale to divide dough into 75g pieces for uniform baking.