Cheesy Stuffed Shells: The Secret to Juicy Flavor
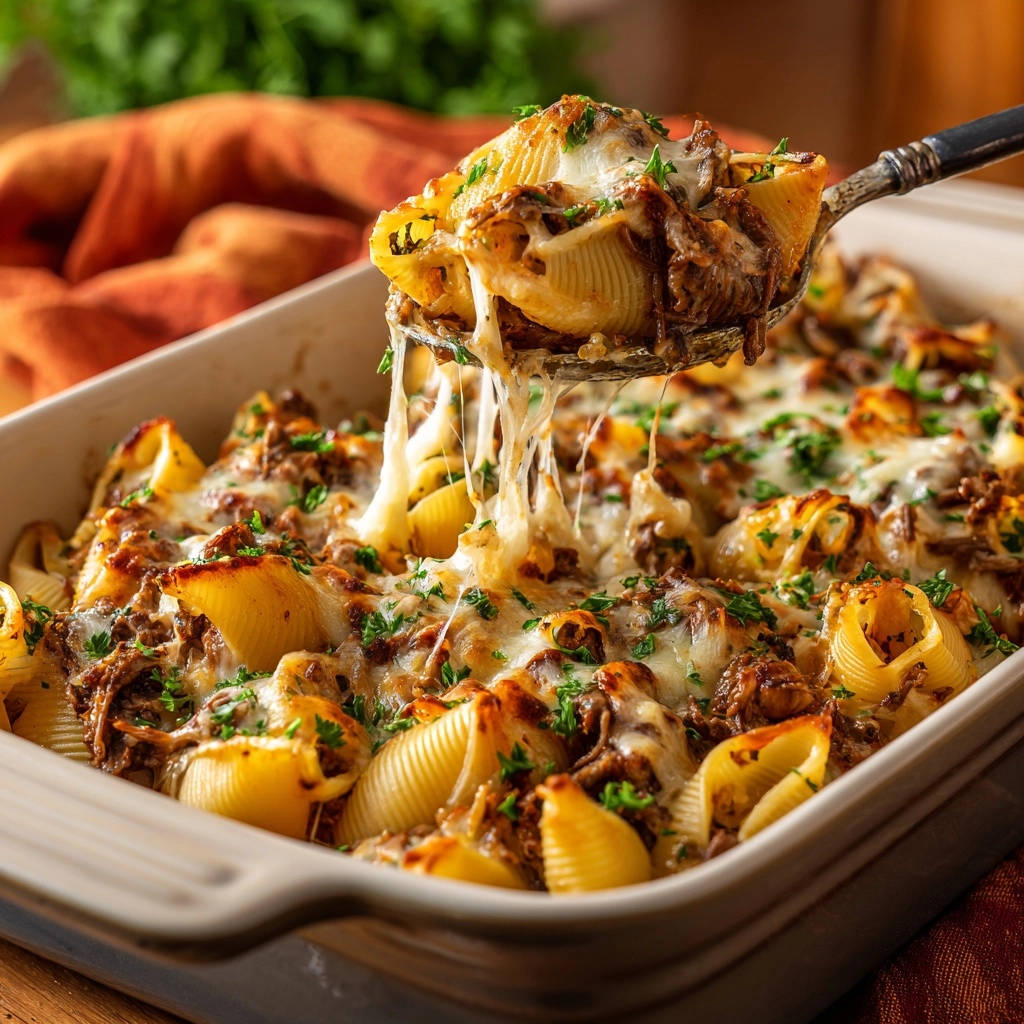
There’s nothing more disappointing than a beautiful plate of baked pasta shells, only to find the meat filling inside dry and uninspired. I used to face this challenge constantly, but I’ve perfected a simple yet transformative technique that ensures every bite of these Cheesy Stuffed Shells is bursting with incredible juiciness and flavor. This is the ultimate comfort food, elevated to a new level of deliciousness.
The Game-Changer: Why This Cheesy Stuffed Shells Recipe Shines
Bidding Farewell to Dry Meat Fillings
The secret to these Cheesy Stuffed Shells lies in a unique step that infuses the ground beef with moisture and rich flavor before baking. This simple addition prevents the meat from drying out, a common pitfall in many stuffed shell recipes.
You’ll enjoy a perfectly moist, savory filling that complements the creamy cheese and tender pasta, creating a harmonious bite every time.
Effortless Elegance for Any Occasion
While the result is undeniably impressive, this recipe for Cheesy Stuffed Shells is surprisingly straightforward to assemble. It’s perfect for a satisfying weeknight dinner, yet elegant enough to serve for special gatherings with family and friends.
The clear, step-by-step instructions ensure a smooth cooking process, allowing you to create a beautiful dish without stress.
A Family Favorite, Guaranteed
These Cheesy Stuffed Shells are a universal crowd-pleaser, appealing to even the pickiest eaters. The combination of savory beef, rich cheese, and tender pasta is pure comfort.
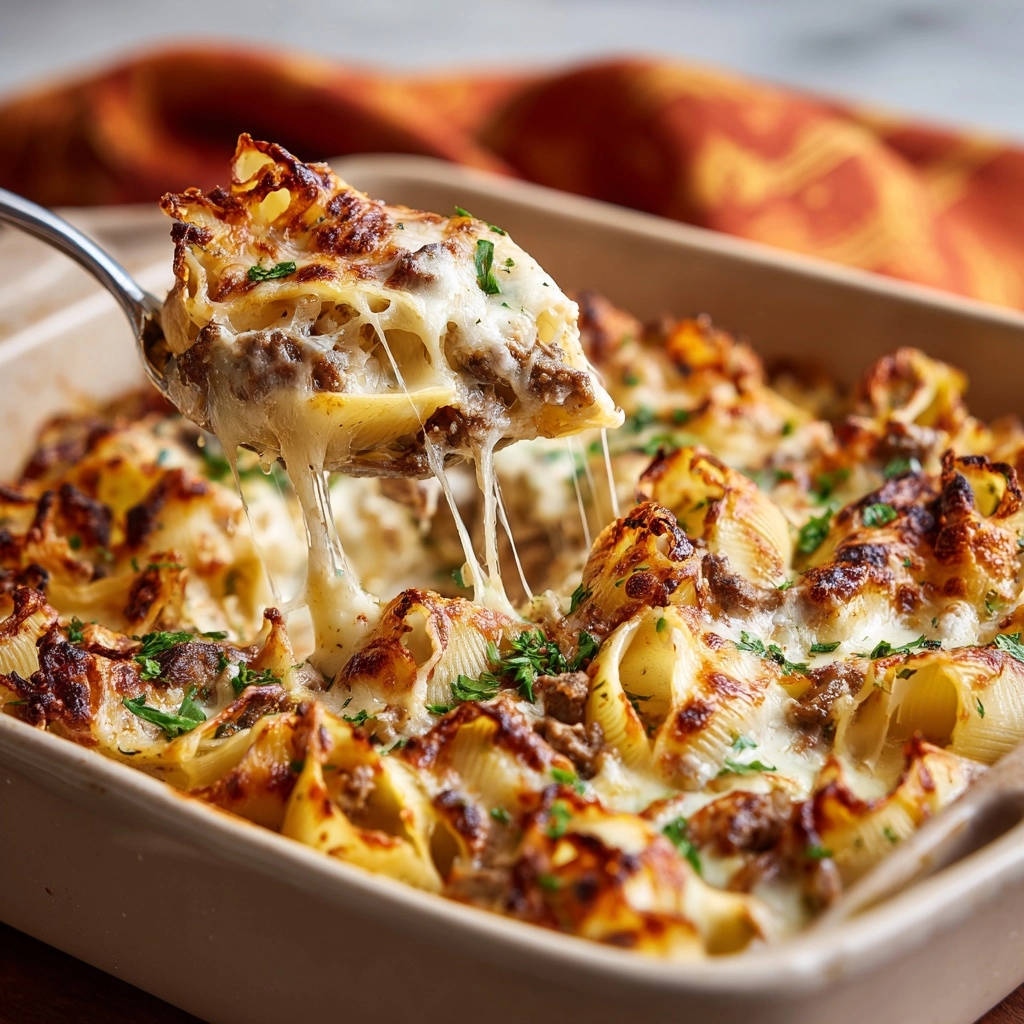
Prepare for requests for seconds and a truly satisfying meal that brings everyone to the table.
Crafting Perfection: The Essential Ingredients for Your Shells
Quality ingredients are the foundation of any exceptional dish. Here’s a closer look at what you’ll need to create the most delicious Cheesy Stuffed Shells.
The Pasta Foundation: Choosing Your Shells
12 ounces large pasta shells (conchiglie): Select a good quality large shell that can hold a generous amount of filling. Conchiglie are ideal due to their sturdy shape.
Ensure they are cooked al dente, providing the perfect bite without becoming mushy during baking.
The Hearty Meat Filling: Key Players
1 pound lean ground beef: Lean ground beef is preferred to minimize excess fat, ensuring your filling isn’t greasy. It provides a robust, savory base.
1 small yellow onion, finely diced: Onion adds a crucial aromatic depth and sweetness when sautéed, building the first layer of flavor in your meat mixture.
2 cloves garlic, minced: Freshly minced garlic is essential for its pungent, savory notes that elevate the beef. Always use fresh for the best impact.
The Moisture Master: Unlocking Juicy Flavor
1/2 cup beef broth: This is our secret weapon! Beef broth introduces vital moisture to the meat filling, preventing it from drying out in the oven. It also deepens the overall savory profile, making every bite incredibly juicy and flavorful.
Don’t skip this critical step; it transforms the texture and taste of your Cheesy Stuffed Shells.
Cheesy Layers: Mozzarella and Parmesan
2 cups shredded mozzarella cheese, divided: Mozzarella offers the classic gooey, stretchy pull and mild flavor essential for baked pasta dishes. Using it in two stages ensures even coverage and a golden top.
1/4 cup grated Parmesan cheese: Parmesan adds a sharp, salty, and nutty complexity that balances the richness of the mozzarella and beef. Freshly grated is always best for superior flavor and melting.
Flavor Enhancers: Seasonings and Garnishes
1 teaspoon dried Italian seasoning: This blend typically includes herbs like oregano, basil, thyme, and rosemary, providing a classic Mediterranean aroma that pairs perfectly with beef and pasta.
1/2 teaspoon salt, 1/4 teaspoon black pepper: Essential for seasoning the meat filling. Adjust to your taste, remembering that the broth and cheeses also contribute saltiness.
1/4 cup fresh parsley, chopped, for garnish: Fresh parsley adds a vibrant green color and a fresh, herbaceous note that brightens the rich dish. Add it just before serving for maximum impact.
Your Kitchen Arsenal: Tools for Stuffed Shells Success
Having the right tools makes the preparation of your Cheesy Stuffed Shells even smoother and more enjoyable. These are the essentials you’ll need.
Pots and Pans for Prep
Large pot: Necessary for boiling the pasta shells. Choose one large enough to allow the shells to cook evenly without sticking.
Large skillet or Dutch oven: Ideal for browning the ground beef and simmering the flavorful filling. A large surface area helps achieve even browning.
The Right Baking Dish
9×13 inch baking dish: This standard size is perfect for arranging all the filled shells in a single layer, ensuring they cook through and cheese melts perfectly.
Handy Utensils for Filling
Slotted spoon or colander: For draining excess fat from the beef. A colander works well for the pasta.
Spatula or wooden spoon: For breaking up and stirring the beef as it browns, and for mixing the filling.
Measuring cups and spoons: For precise ingredient measurement, especially for the broth and seasonings.
Large spoon or small scoop: To easily fill the pasta shells with the meat mixture without tearing them.
Your Guided Path to Irresistibly Juicy Cheesy Stuffed Shells
Follow these detailed steps to create a truly memorable meal, ensuring your Cheesy Stuffed Shells are packed with flavor and moisture.
Prepping Your Workspace & Pasta: Preheat your oven to 375°F (190°C). Bring a large pot of salted water to a rolling boil. Add the pasta shells and cook according to package directions until they are perfectly al dente, typically 8-10 minutes. This ensures they are tender but still have a slight bite and won’t fall apart during filling or baking. Drain them well and set aside to cool slightly, making them easier to handle.
Browning the Beef & Sautéing Aromatics: While the pasta cooks, heat the olive oil in a large skillet or Dutch oven over medium-high heat. Add the ground beef, using a spoon to break it up into small crumbles. Cook until the beef is fully browned, then carefully drain off any excess fat. Reduce the heat to medium. Add the diced onion to the skillet with the cooked beef and cook for about 5 minutes until softened and translucent, which sweetens its flavor. Stir in the minced garlic and cook for just one more minute until it becomes wonderfully fragrant, but be careful not to burn it.
The Moisture Infusion: Our Secret Step: Now for the game-changing step that guarantees a juicy filling! Pour in the beef broth and stir in the Italian seasoning, salt, and black pepper. Bring the mixture to a gentle simmer, cooking for 2-3 minutes while stirring occasionally. This crucial simmering allows the meat to absorb most of the liquid, creating a rich, moist, and flavorful filling that will remain incredibly tender during baking. This step is key to preventing dry, crumbly meat in your Cheesy Stuffed Shells.
Filling and Arranging the Shells: Remove the skillet from the heat and let the meat mixture cool for a few minutes. Lightly grease a 9×13 inch baking dish. Take each cooked pasta shell and carefully fill it generously with the beef mixture using a spoon or small scoop. Arrange the filled shells in a single layer in the prepared baking dish. If you have extra meat or shells, you can make a second smaller dish, or even prepare some cheesy beef skillet shells for another meal.
Layering the Cheese Perfection: Evenly sprinkle 1 and 1/2 cups of the shredded mozzarella cheese over the arranged shells. Follow this with the grated Parmesan cheese, ensuring a good distribution for a rich, nutty flavor. This initial layer of cheese will melt into the shells and filling during the first bake.
Baking for Bubbly Goodness: Cover the baking dish tightly with aluminum foil. Bake for 20 minutes. This covered baking period allows the shells to heat through and the first layer of cheese to melt without drying out the top. Remove the foil, then sprinkle the remaining 1/2 cup of mozzarella cheese over the top. Bake uncovered for an additional 10-15 minutes, or until the cheese is beautifully bubbly and lightly golden brown, creating an irresistible crust.
The Finishing Touch: Garnish and Serve: Once baked to perfection, remove the dish from the oven. Garnish generously with fresh chopped parsley before serving your Cheesy Stuffed Shells. The fresh parsley adds a pop of color and a bright, herbaceous note that cuts through the richness of the dish.
Chef’s Secrets: Elevate Your Cheesy Stuffed Shells Game
Unlock even more potential in your Cheesy Stuffed Shells with these expert tips and variations.
Don’t Overcook Your Pasta
Cooking pasta to al dente is crucial. Overcooked shells become soft and prone to tearing when filled, and they can turn mushy during the final bake.
A slight chewiness in the pasta ensures a perfect texture in the finished dish.
The Art of Filling Without Tearing
Allow the cooked shells to cool slightly before filling. This makes them less delicate and easier to handle.
Use a small spoon or your fingers to gently open each shell and spoon in the filling, being careful not to overstuff them.
Customize Your Cheese Blend
While mozzarella and Parmesan are classic, feel free to experiment with other cheeses. Provolone, fontina, or even a touch of smoked gouda can add unique flavors.
Consider a blend of mild and sharper cheeses for complex cheesy layers.
Beyond Beef: Variations to Explore
This recipe is highly adaptable. You can easily substitute the ground beef with other proteins.
Ground turkey or chicken: For a lighter option, use lean ground turkey or chicken. Just ensure you still use the beef broth (or chicken broth) for moisture.
Italian sausage: A mix of mild and hot Italian sausage, casings removed, adds incredible flavor. Brown and drain as you would ground beef.
Vegetarian: For a vegetarian version, swap the meat for a mix of sautéed mushrooms, spinach, and ricotta cheese. Ensure the ricotta is well-drained to avoid a watery filling. This makes for delicious slow cooker stuffed shells too!
Achieving the Perfect Golden Crust
For an extra crispy and golden cheese topping, you can briefly broil the shells for the last 1-2 minutes of baking. Watch carefully to prevent burning.
Ensure the cheese is evenly distributed before the uncovered baking phase for uniform browning.
Solving Shell Snafus: Troubleshooting Your Cheesy Stuffed Shells
Even expert cooks encounter challenges. Here’s how to troubleshoot common issues when making Cheesy Stuffed Shells.
Shells Tearing During Filling
This usually happens if shells are overcooked or not cooled enough. Ensure you cook them strictly al dente and allow them to cool for 5-10 minutes on a wire rack or baking sheet before handling. Gentle handling is key.
Meat Filling Still Dry
The most common reason for a dry filling is skipping or rushing the beef broth simmering step. Ensure the beef broth has enough time (2-3 minutes) to be fully absorbed by the meat before baking. This step is non-negotiable for juicy results.
Cheese Not Melting Evenly or Browning Too Fast
Uneven melting can be due to cheese not being spread uniformly. If browning too fast, your oven might run hot, or the dish is too close to the top element. Try moving the dish to a lower rack or reducing the heat slightly during the uncovered baking phase. You can also loosely tent with foil if it’s browning too quickly.
Mushy Pasta
Mushy pasta results from overcooking the shells initially. Always cook to al dente, as they will continue to soften slightly during baking. Drain immediately once al dente and cool promptly to stop the cooking process.
The Perfect Accompaniments: What to Serve with Your Cheesy Stuffed Shells
Elevate your Cheesy Stuffed Shells meal with thoughtful side dishes and beverage pairings.
Classic Sides That Complement
Garlic Bread or Crusty Baguette: Perfect for soaking up any extra sauce and adding a satisfying crunch.
Simple Green Salad: A fresh salad with a light vinaigrette provides a refreshing contrast to the richness of the shells.
Roasted Vegetables: Crispy baked asparagus or roasted broccoli would be fantastic. Their slight bitterness and texture balance the cheesy, savory pasta.
Beverage Pairings for an Enhanced Meal
For a non-alcoholic option, sparkling cider or unsweetened iced tea are refreshing choices. If serving with grape juice, a medium-bodied red like a sparkling grape juice (Sparkling grape juice) would complement the beef and tomato flavors well.
Plan Ahead: Make-Ahead, Storage, and Reheating Tips
Cheesy Stuffed Shells are an excellent candidate for meal prepping or enjoying as leftovers.
Prepping for Future Feasts (Make-Ahead)
You can assemble the entire dish up to the point of baking. Cover it tightly with foil and refrigerate for up to 24 hours. When ready to bake, add an extra 10-15 minutes to the covered baking time, as it will be starting from a cold temperature.
Alternatively, you can prepare the meat filling and cook the shells, storing them separately in airtight containers in the fridge for 2-3 days. Assemble just before baking.
Storing Leftovers Safely and Deliciously
Allow any leftover Cheesy Stuffed Shells to cool completely. Transfer them to an airtight container and refrigerate for up to 3-4 days. For longer storage, see freezing instructions below.
Reheating for Optimal Enjoyment
For best results, reheat individual portions in the microwave until warmed through. For a larger portion or the entire dish, cover it with foil and reheat in an oven preheated to 325°F (160°C) until bubbly and hot, usually 20-30 minutes, or longer if frozen.
Your Questions Answered: Cheesy Stuffed Shells FAQs
Can I use a different type of meat?
Absolutely! Ground turkey, ground chicken, or a blend of ground beef and Italian sausage work beautifully. Just ensure you adjust cooking times as needed and drain any excess fat.
Can I make these vegetarian?
Yes, you can! Replace the meat with a mixture of sautéed vegetables like mushrooms, spinach, zucchini, and bell peppers. You can also add a ricotta-based filling (ricotta, Parmesan, egg, herbs) for a classic vegetarian stuffed shell. Ensure your broth is vegetable broth for a fully vegetarian version.
Can I freeze Cheesy Stuffed Shells?
Yes, these freeze very well! Assemble the dish, cover it tightly with a double layer of foil, and freeze for up to 3 months. To bake from frozen, place the covered dish in a cold oven, then set it to 375°F (190°C) and bake for 60-75 minutes, or until heated through and bubbly. Remove foil for the last 15 minutes to brown the cheese.
Do I need to add sauce to the baking dish?
No, this particular recipe focuses on a very juicy meat filling as its core. While some stuffed shell recipes call for a layer of marinara sauce at the bottom of the dish, this recipe is designed to let the rich, moist meat and cheese flavors shine. If you prefer a saucier dish, a thin layer of your favorite marinara could be added to the bottom of the baking dish before arranging the shells.
Ready to Impress? Share Your Cheesy Stuffed Shells Masterpiece!
Now that you have the secret to perfectly juicy and flavorful Cheesy Stuffed Shells, it’s time to bring this incredible dish to your own table. I promise, the rich, savory filling combined with tender pasta and bubbly cheese will become an instant favorite.
Don’t hesitate to try this recipe, and when you do, share your success! I love seeing your culinary creations. Enjoy every delicious, cheesy bite!
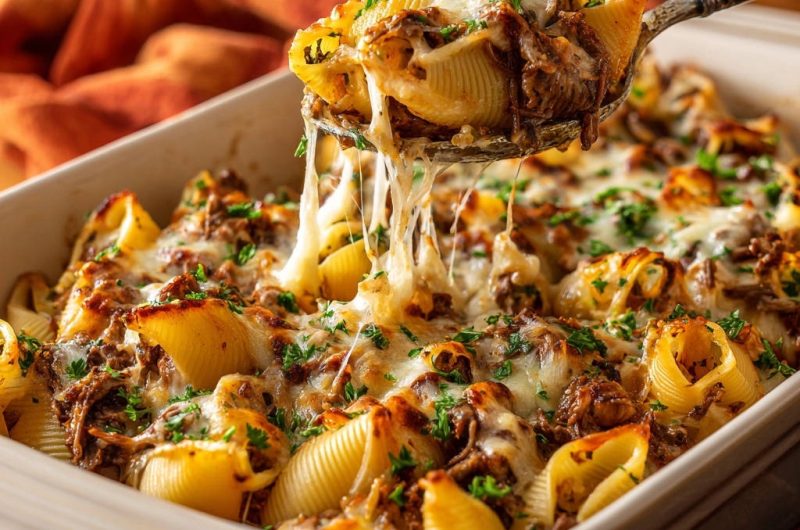
Stuffed Shells
Course: Main CourseCuisine: Italian-AmericanDifficulty: medium6
servings30
minutes1
hour550
kcal90
minutesThere’s nothing worse than biting into a delicious looking stuffed shell, only to find the meat filling dry and crumbly. This recipe reveals a simple trick to keep every single bite incredibly juicy and flavorful, making these classic shells a game-changer.
Ingredients
12 ounces large pasta shells (conchiglie)
1 tablespoon olive oil
1 pound lean ground beef
1 small yellow onion, finely diced
2 cloves garlic, minced
1/2 cup beef broth
1 teaspoon dried Italian seasoning
1/2 teaspoon salt
1/4 teaspoon black pepper
2 cups shredded mozzarella cheese, divided
1/4 cup grated Parmesan cheese
1/4 cup fresh parsley, chopped, for garnish
Directions
- Preheat your oven to 375°F (190°C).
- Bring a large pot of salted water to a boil. Add the pasta shells and cook according to package directions until al dente, usually about 8-10 minutes. Drain well and set aside to cool slightly.
- While the pasta cooks, heat the olive oil in a large skillet or Dutch oven over medium high heat. Add the ground beef, breaking it up with a spoon, and cook until it is fully browned. Drain off any excess fat. Cook until no pink remains and it reaches 160°F (71°C).
- Reduce the heat to medium. Add the diced onion to the skillet with the cooked beef and cook until softened, about 5 minutes. Stir in the minced garlic and cook for another minute until fragrant.
- Now for the key to juicy meat: Pour in the beef broth and stir in the Italian seasoning, salt, and black pepper. Bring the mixture to a gentle simmer and cook for 2-3 minutes, stirring occasionally, until most of the liquid has been absorbed by the meat, creating a rich, moist filling. This crucial step prevents the meat from drying out during baking.
- Remove the skillet from the heat. Let the meat mixture cool for a few minutes.
- Take each cooked pasta shell and carefully fill it with the beef mixture.
- Lightly grease a 9×13 inch baking dish. Arrange the filled shells in a single layer in the dish.
- Sprinkle 1 and 1/2 cups of the mozzarella cheese evenly over the shells, followed by the Parmesan cheese.
- Cover the baking dish with aluminum foil and bake for 20 minutes.
- Remove the foil, sprinkle the remaining 1/2 cup of mozzarella cheese over the top, and bake uncovered for an additional 10-15 minutes, or until the cheese is bubbly and lightly golden.
- Garnish with fresh chopped parsley before serving.
Notes
- The secret to juicy meat filling is simmering it in beef broth until absorbed, preventing dryness during baking.