Chocolate Caramel Truffles: Perfectly Flowing Centers
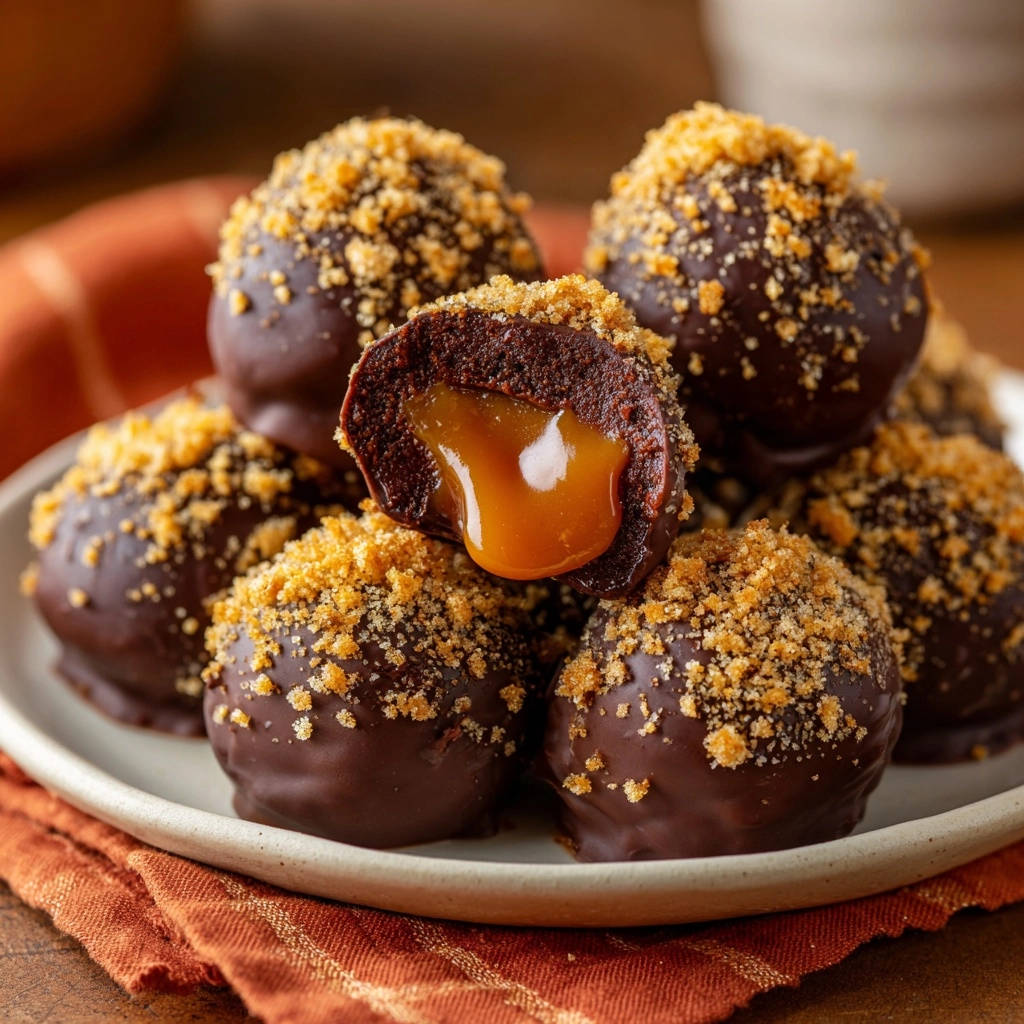
There’s a special kind of magic in biting into a rich chocolate truffle, especially when you discover a luscious, flowing caramel center. I’ve personally faced the challenge of caramel either leaking out or hardening too much, but through countless batches, I’ve cracked the code.
This recipe for Chocolate Caramel Truffles shares a simple, ingenious trick that guarantees perfectly gooey caramel every single time. Get ready to create decadent treats that will impress everyone, from casual snackers to sophisticated dessert connoisseurs.
If you’re working with melted coatings, the same careful handling applies when making white chocolate Oreo truffles.
The Secret to Irresistibly Flowing Caramel Centers
The hallmark of an exceptional truffle is often its surprise center. For these Chocolate Caramel Truffles, that surprise is a perfectly flowing, molten caramel.
The common pitfall with caramel centers is their tendency to leak during dipping or become too firm after chilling. Our unique approach involves briefly freezing the caramel pieces until they are firm but not solid.
If you master the wrapping technique here, you’ll have no trouble forming these peanut butter truffle bites either.
This crucial step provides the structural integrity needed to easily wrap the chocolate cake base around them, preventing leaks and ensuring that signature gooey texture once the truffles come to room temperature. It transforms a tricky process into a reliably delightful experience.
Gathering Your Decadent Ingredients for Chocolate Caramel Truffles
The Heart of the Truffle: Chocolate Cake Crumbs
The foundation of these truffles is a rich chocolate cake or brownie crumb. These crumbs provide the necessary structure and deep chocolate flavor, binding together beautifully with the cream cheese.
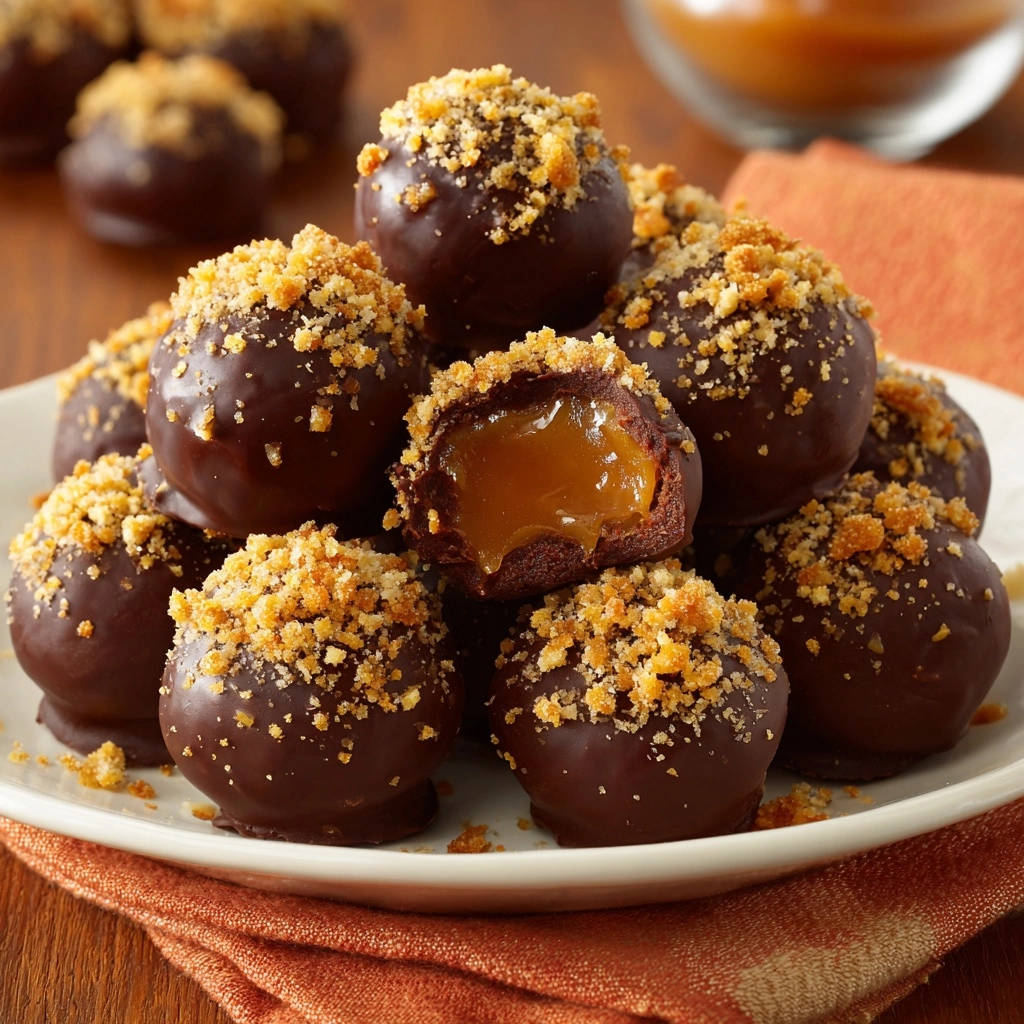
You can use store-bought cake or brownie, or leftover homemade cake; ensure it’s finely crumbled for the best texture.
That Velvety Texture: Cream Cheese and Vanilla
Softened cream cheese is the binding agent that transforms the crumbs into a pliable, moist truffle dough. It contributes a subtle tang and a wonderfully smooth, velvety texture to the truffle base.
Vanilla extract enhances all the sweet flavors, adding a warm, aromatic depth that complements the chocolate and caramel beautifully.
The Star: Soft Caramel Candies
For the luscious center, soft caramel candies are essential. Look for varieties like Werther’s Chewy Caramels or similar soft-block caramels, as their consistency is ideal for melting into a gooey center.
While the recipe lists water, it’s typically used when making caramel from scratch or thinning an already melted, thick caramel. For this recipe, where we use pre-made soft candies, water is generally not needed as the candies melt perfectly on their own once warmed.
The Silky Coating: Dark Chocolate & Coconut Oil
Dark chocolate melting wafers provide a superior, smooth, and glossy coating that sets up beautifully. Their high-quality chocolate flavor perfectly balances the sweetness of the caramel and cake.
Adding a touch of coconut oil, though optional, is highly recommended. It thins the melted chocolate slightly, making it easier to dip the truffles and ensuring a thinner, more professional-looking shell with an appealing shine.
Crunchy Embellishments: Graham Crackers or Shortbread
A final sprinkle of crushed graham crackers or shortbread cookies adds a delightful textural contrast and an elegant visual appeal. These provide a lovely crunch against the smooth chocolate and soft interior.
Feel free to experiment with other toppings like finely chopped nuts, cocoa powder, or even a sprinkle of flaky sea salt to enhance the caramel flavor.
Essential Tools for Your Truffle-Making Journey
Large Mixing Bowl: This is perfect for comfortably combining the truffle base ingredients by hand, allowing for thorough mixing.
Parchment Paper or Silicone Mat: Crucial for preventing your truffles from sticking to plates or trays during chilling and after coating.
Microwave-Safe Bowl: Simplifies the process of melting your chocolate coating in short, controlled bursts, ensuring it doesn’t overheat.
Fork or Dipping Tools: These are indispensable for efficiently coating the truffles, allowing excess chocolate to drip off for a clean finish.
Airtight Container: Essential for proper storage, keeping your finished Chocolate Caramel Truffles fresh and preventing them from absorbing fridge odors.
Crafting Decadent Chocolate Caramel Truffles: Step-by-Step Guide
The Magic of Chilled Caramel: Preparing Your Centers
Prepare the Caramel: Begin by unwrapping your soft caramel candies. If you’re using a block of caramel, carefully cut it into uniform 1/2-inch cubes. Arrange these pieces on a parchment-lined plate or tray, ensuring they don’t touch.
Freeze for Firmness: This is our game-changing secret! Place the plate of caramel into the freezer for 15-20 minutes. The goal is for them to become firm but not frozen solid, which makes them incredibly easy to handle and guarantees a flowing center later.
Building the Irresistible Truffle Base
Combine Base Ingredients: While your caramel chills to perfection, prepare the truffle base. In a large bowl, combine the chocolate cake or brownie crumbs with the softened cream cheese and vanilla extract.
Form the Dough: Use your hands to mix these ingredients thoroughly until a moist, firm dough forms. If the mixture feels too dry and crumbly, add a tiny bit more softened cream cheese, one teaspoon at a time, until it reaches a pliable, uniform consistency.
The Art of Encapsulation: Forming Your Truffles
Assemble Truffles: Retrieve the firm caramel pieces from the freezer. Take about a tablespoon of the chocolate cake mixture and flatten it gently in the palm of your hand. Place one chilled caramel piece directly in the center.
Seal and Roll: Carefully gather and wrap the cake mixture around the caramel, completely enclosing it. Ensure there are no visible cracks or seams where the caramel could escape. Gently roll the truffle between your palms to form a smooth, perfect ball. Repeat this process until all the caramel and cake mixture are used.
Chilling for Success: Setting the Stage
Refrigerate Formed Truffles: Place the newly formed truffles back onto the parchment-lined plate. Transfer them to the refrigerator for at least 30 minutes, or until they are firm to the touch. This crucial chilling step helps them maintain their shape and integrity during the dipping process.
Achieving a Flawless Chocolate Shell
Melt the Chocolate: In a microwave-safe bowl, combine the dark chocolate melting wafers (or chocolate chips) with the optional coconut oil. Melt in 30-second intervals, stirring thoroughly after each, until the chocolate is smooth and fully melted. Be extremely careful not to overheat the chocolate, as this can cause it to seize and become unusable.
Dip the Chilled Truffles: One by one, drop a firm truffle into the perfectly melted chocolate. Use a fork to gently roll it until it’s entirely coated. Lift the truffle out with the fork, tapping it gently against the side of the bowl to remove any excess chocolate, ensuring a thin, even layer.
The Finishing Touch: Decorating and Setting
Decorate Immediately: As soon as you lift each coated truffle, immediately sprinkle its top with the crushed graham crackers or shortbread cookies. This not only adds visual appeal but also a delightful textural contrast. Place the decorated truffle back on the parchment-lined plate. Continue until all truffles are coated and decorated.
Final Chill & Serve: Refrigerate the finished truffles for at least 20-30 minutes, or until the chocolate coating is completely set and firm. For the ultimate perfect flowing caramel experience, allow the truffles to sit at room temperature for about 15-20 minutes before serving. Store any remaining Chocolate Caramel Truffles in an airtight container in the refrigerator.
Expert Tips for Chocolate Caramel Truffles Perfection
Don’t Rush the Chill: Ensuring your caramel pieces and formed truffles are properly chilled is absolutely critical for easy handling and preventing mess or leakage during assembly and dipping. Patience here pays off!
Mastering the Chocolate Melt: Avoid overheating your chocolate at all costs. Melt it slowly in short bursts, stirring frequently, to achieve a smooth, dippable consistency. Overheating can cause it to seize or become grainy.
Coating Consistency: If your melted chocolate starts to thicken during dipping, return it to the microwave for a few seconds or stir in a tiny bit more coconut oil to re-establish a smooth, thin coating. However, be cautious not to add too much oil, which can affect setting.
Preventing Caramel Leaks: Take extra care when wrapping the cake mixture around the caramel to ensure it’s completely enclosed. Any small seam or crack can become an escape route for the delicious caramel.
The Room Temperature Reveal: For that signature gooey, flowing caramel center, always allow your finished truffles to sit out at room temperature for 15-20 minutes before enjoying. Serving straight from the fridge will result in a firmer caramel.
Creative Customization: Feel free to experiment! Use different crumb bases like crushed Oreos, vary the chocolate type for coating (milk or white chocolate), or try alternative toppings such as sea salt flakes, chopped nuts, or festive sprinkles. For another delicious truffle idea, consider making decadent pumpkin pie truffles for a seasonal twist.
Truffle Trouble? Common Issues & Quick Fixes
Caramel Leaking After Dipping?
This usually indicates that the caramel wasn’t completely sealed within the cake mixture, or the truffle wasn’t chilled enough before dipping. Ensure the cake mixture fully encapsulates the caramel with no visible seams, and always chill the formed truffles thoroughly before dipping.
Chocolate Coating Too Thick or Streaky?
Overheating can cause chocolate to thicken, or it might simply be too cool. Ensure your chocolate is melted gently and stirred until silky smooth. Adding the optional coconut oil helps, and if it thickens during dipping, a few seconds back in the microwave or a touch more oil can thin it.
Truffle Base Too Sticky or Dry?
The moisture content of your cake crumbs can vary significantly. If the mixture is too sticky, try adding a touch more crumbs. If it’s too dry and crumbly, slowly incorporate an extra teaspoon of softened cream cheese at a time until the mixture comes together into a pliable dough.
Caramel Not Flowing When Served?
If your caramel is firm rather than flowing, it means the truffles were likely served straight from the refrigerator. Always allow them to sit at room temperature for at least 15-20 minutes before serving to achieve that luscious, flowing caramel center.
Serving, Storing, and Enjoying Your Decadent Truffles
Perfect Presentation: Serving Suggestions
These elegant Chocolate Caramel Truffles are perfect for any occasion! Arrange them beautifully on a dessert platter for parties, box them elegantly as thoughtful homemade gifts, or simply enjoy one (or two, we won’t tell!) with a cup of coffee or a glass of milk for a luxurious personal treat. They also make a fantastic addition to a dessert bar alongside treats like chocolate crumb cheesecake bars.
Optimal Storage for Lasting Freshness
To maintain their exquisite freshness and texture, store your finished truffles in an airtight container in the refrigerator for up to one week. Always remember to bring them to room temperature for 15-20 minutes before serving to ensure the caramel is perfectly soft and flowing.
Make-Ahead Magic: Preparing in Advance
You can prepare the truffle base mixture and form the truffles several days in advance, storing them in an airtight container in the refrigerator. Dip them in chocolate closer to when you plan to serve. The frozen caramel pieces can also be prepared ahead of time and kept in the freezer until ready to use, making party prep a breeze.
Frequently Asked Questions About Homemade Truffles
Can I use homemade caramel instead of candies?
Yes, you can absolutely use homemade caramel! The key is that it needs to be firm enough to handle and hold its shape after chilling, similar to the consistency of the soft caramel candies. You might need to adjust the chilling time to achieve the right firmness.
What if I don’t have melting wafers for the coating?
Good quality chocolate chips (especially dark chocolate) can work as an alternative to melting wafers. However, melting wafers (also known as compound chocolate or couverture if it’s true chocolate) are specifically formulated for easier melting, a smoother consistency, and a harder, glossier finish without the need for tempering.
Can these Chocolate Caramel Truffles be frozen?
Yes, these truffles freeze beautifully! Once fully set, place them in an airtight container with parchment paper between layers and freeze for up to 2-3 months. Thaw them gradually in the refrigerator overnight, then bring to room temperature for 15-20 minutes before serving to ensure the caramel is perfectly soft.
How can I make these truffles more festive?
Beyond graham cracker crumbs, consider rolling them in finely chopped nuts, cocoa powder, colorful sprinkles, or a delicate drizzle of contrasting white chocolate. For an extra gourmet touch, a sprinkle of flaky sea salt on top of the chocolate coating enhances the caramel flavor beautifully.
Is the coconut oil essential for the chocolate coating?
While technically optional, the coconut oil is highly recommended. It significantly helps thin the melted chocolate, making it smoother and easier to dip, which results in a thinner, more professional-looking coating with a lovely shine. Without it, the coating might be thicker and harder to work with, potentially creating a clumpy appearance.
Ready to Create Your Own Chocolate Caramel Truffle Masterpiece?
Now that you’ve unlocked the secret to perfectly flowing caramel centers, there’s nothing stopping you from creating these incredibly indulgent Chocolate Caramel Truffles. This recipe delivers a truly special treat, whether for a grand celebration, a thoughtful homemade gift, or simply a moment of personal bliss.
What’s Next?
Try these delicious pairings:
- Mastering the Loaded Peanut Butter Toffee Dip
- Mastering Sugared Cinnamon Morning Buns with a Crisp Base
This recipe promises delicious results and plenty of “oohs” and “aahs” from everyone who tries them. We’d love to see your truffle triumphs! Share your creations in the comments below or tag us on social media. Happy truffle making!
Chocolate Caramel Truffles
Course: DessertCuisine: AmericanDifficulty: medium24
truffles1
hour80
kcal120
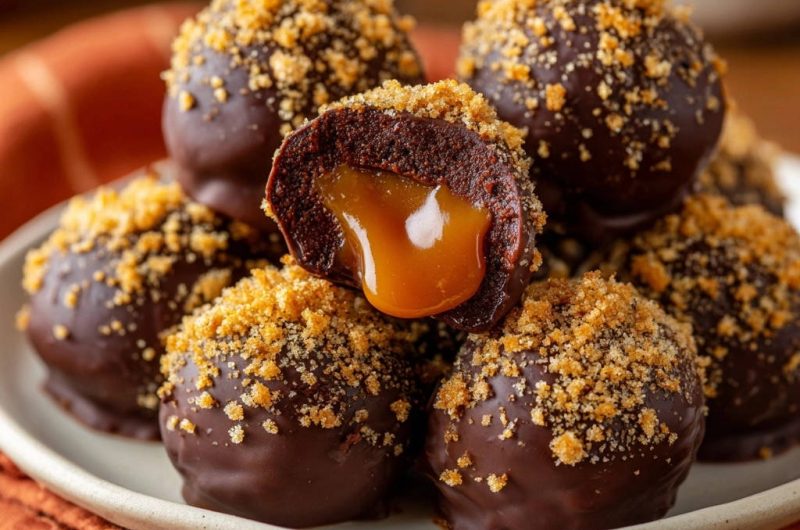
minutesDiscover the secret to making decadent chocolate truffles with perfectly gooey, flowing caramel centers. This recipe uses a simple freezer trick to ensure easy handling and flawless results every time. Impress your friends with these rich, homemade treats.
Ingredients
2 cups cooked chocolate cake or brownie crumbs (store-bought or homemade)
4 ounces cream cheese, softened
1/2 teaspoon vanilla extract
12 ounces soft caramel candies (like Werther’s Chewy Caramels)
1 tablespoon water (if needed for caramel)
12 ounces dark chocolate melting wafers or chocolate chips
1 tablespoon coconut oil (optional, for smooth coating)
1/2 cup crushed graham crackers or shortbread cookies
Directions
- Prepare the caramel centers. Unwrap the soft caramel candies. If using a block of caramel, cut it into approximately 1/2 inch cubes. Place the caramel pieces on a parchment-lined plate or tray. This is the crucial step: Place the plate of caramel in the freezer for 15-20 minutes until the pieces are firm but not frozen solid. This firming process is the secret to easy handling and perfect flowing centers.
- While the caramel chills, prepare the truffle base. In a large bowl, combine the chocolate cake or brownie crumbs, softened cream cheese, and vanilla extract. Mix with your hands until well combined and a moist, firm dough forms. If the mixture is too dry, add a tiny bit more softened cream cheese, 1 teaspoon at a time.
- Remove the firm caramel pieces from the freezer. Take about a tablespoon of the chocolate cake mixture and flatten it in your palm. Place one chilled caramel piece in the center. Carefully wrap the cake mixture around the caramel, completely enclosing it. Roll gently between your palms to form a smooth ball, ensuring there are no cracks for the caramel to escape. Repeat with the remaining caramel and cake mixture.
- Place the formed truffles back on the parchment-lined plate and refrigerate for at least 30 minutes, or until firm. This helps them hold their shape when dipped.
- Prepare the chocolate coating. In a microwave-safe bowl, melt the dark chocolate melting wafers or chocolate chips with the optional coconut oil in 30-second intervals, stirring well after each, until smooth and fully melted. Be careful not to overheat.
- Dip the chilled truffles. One by one, drop a truffle into the melted chocolate. Use a fork to carefully roll it around until fully coated. Lift the truffle out with the fork, tapping gently against the side of the bowl to remove excess chocolate.
- Immediately sprinkle the top of the truffle with the crushed graham crackers or shortbread cookies. Place the coated truffle back on the parchment-lined plate. Repeat with all remaining truffles.
- Refrigerate the finished truffles for at least 20-30 minutes, or until the chocolate coating is completely set. To enjoy the perfect flowing caramel center, allow the truffles to sit at room temperature for about 15-20 minutes before serving. Store any leftovers in an airtight container in the refrigerator.
Notes
- Allow truffles to sit at room temperature for 15-20 minutes before serving for the best flowing caramel center.