Mastering Sugared Cinnamon Morning Buns with a Crisp Base
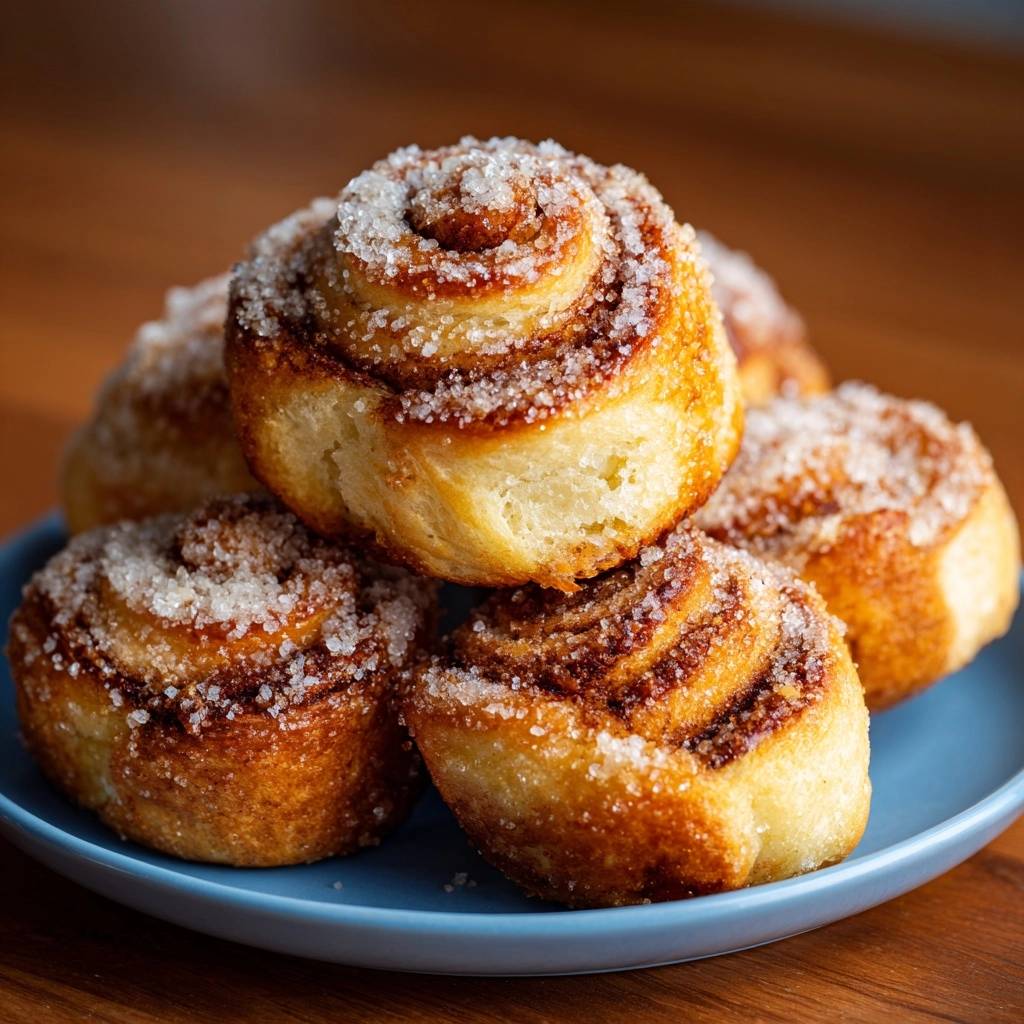
Nothing ruins a slow morning faster than biting into a cinnamon bun that looks gorgeous on top but reveals a gummy, undercooked mess at the bottom. You know the type—the ones where the sugar filling has melted into a syrupy puddle, effectively steaming the dough instead of letting it crisp. It’s a common frustration for home bakers, but it doesn’t have to be your reality.
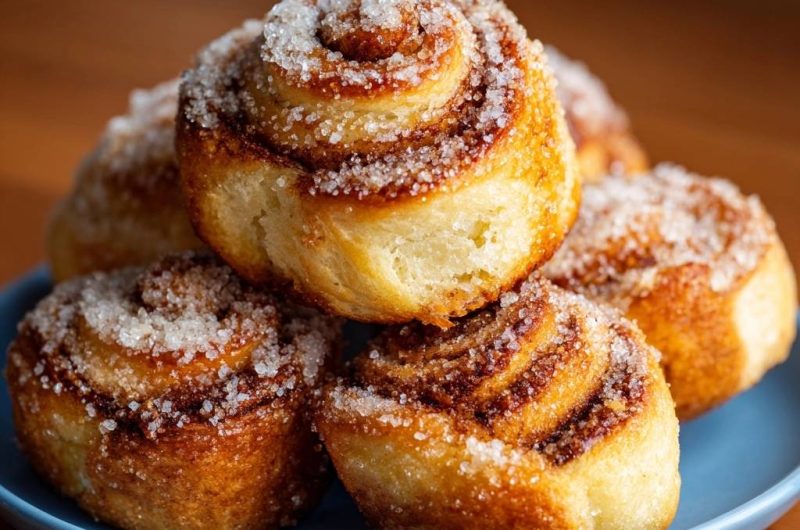
The secret to a world-class Sugared Cinnamon Morning Buns experience lies in the contrast between the shatteringly crisp exterior and the airy, laminated layers inside. Unlike a standard cinnamon roll made with heavy brioche, a true morning bun uses the magic of lamination to create a lighter-than-air texture. When you get that base right, it shatters like a fine pastry, offering a caramelized crunch that balances the soft, spiced interior.
If you struggle with unraveling dough, the same care for structure ensures these cherry crumble muffins bake up perfectly tender.
I’ve found that the real trick isn’t just in the dough, but in how you manage the sugar’s moisture. By using a specific temperature-staggering technique and a dry-sugar barrier on your baking sheet, you can lock in the structure before the butter has a chance to leak. This ensures every single bun in the batch is fully baked, golden, and structurally sound from top to bottom.
The Physics of Lamination and Sugar Caramelization
Puff pastry relies on hundreds of thin layers of cold butter trapped between sheets of dough. When that cold butter hits a hot oven, the water in the butter evaporates instantly, creating steam that lifts the layers. This is what gives you that incredible height and flaky texture that defines a high-end morning bun.
However, sugar is hygroscopic, meaning it attracts and holds onto moisture. In a typical bun, the sugar in the filling turns into a liquid syrup that soaks into the bottom layers of the dough, preventing them from ever getting hot enough to crisp. By placing the buns on small mounds of dry granulated sugar, you create a protective barrier.
This sugar barrier undergoes a “Leidenfrost-adjacent” effect where the heat of the pan caramelizes the sugar mounds into a hard, candy-like crust. This crust acts as a shield, preventing the internal juices from soaking the bottom of the pastry. Instead of a soggy mess, you get a caramelized “foot” that provides a satisfying snap with every bite.
Why Temperature Staggering Prevents Gummy Centers
Starting your oven at 375°F is non-negotiable for this recipe. This initial blast of high heat “sets” the laminated structure of the puff pastry immediately. If the oven is too cool, the butter will simply melt and run out of the dough before the steam has a chance to lift the layers, resulting in a flat, greasy bun.
Once the structure is set after 15 minutes, dropping the temperature to 350°F is the second half of the secret. This lower heat allows the center of the spiral to dehydrate and cook through without burning the sugar on the bottom. It’s the only way to ensure the very middle of the bun is just as flaky as the outside edges.
Essential Components for Sugared Cinnamon Morning Buns
Since this recipe has few ingredients, the quality of your puff pastry is the most important factor. Look for “all-butter” puff pastry in the freezer aisle. Many cheaper brands use oil or shortening, which won’t provide the same rich flavor or the distinct, clean shatter that butter-based dough offers.
You must use unsalted butter for the filling to maintain total control over the flavor profile. Salted butter varies wildly in salt content between brands, and too much salt can interfere with the delicate sweetness of the cinnamon. Granulated sugar is also superior to brown sugar here because it has less moisture, which is vital for achieving that signature morning bun crunch.
Make sure your butter is softened to a spreadable paste, not melted. If you melt the butter, it will leak out of the sides of the dough as you roll it, making a mess and ruining the lamination. You want it just soft enough that it spreads like room-temperature frosting across the delicate dough.
Selecting the Right Cinnamon and Vanilla
For a bold, classic “bakery” flavor, go with Cassia cinnamon. It has that spicy, punchy aroma that stands up well to the high heat of the oven. If you prefer something more subtle and floral, Ceylon cinnamon is a lovely alternative, though you may want to add an extra half-teaspoon to ensure the flavor doesn’t get lost.
The vanilla extract does more than just add flavor; its alcohol content helps create an aromatic steam during the first phase of baking. This steam helps puff up the layers from the inside out. Always use pure vanilla extract rather than imitation for the most complex, rounded sweetness.
Phase One: Preparing the Laminated Dough and Filling
Thaw your puff pastry in the refrigerator overnight rather than on the counter. You want the dough to be pliable but still very cold—ideally around 40°F. If the dough gets too warm, the butter layers will begin to merge with the flour, and you’ll lose the flakiness that makes these buns special.
When you roll out the pastry into your 10×12 inch rectangle, work quickly. If you feel the dough becoming soft or sticky, pop it back in the fridge for ten minutes. Spread your cinnamon-butter paste all the way to the edges so that every single bite, even the very end of the spiral, is packed with flavor.
The tactile feel of the dough should be like cold leather—firm but flexible. If it feels like limp noodles, it’s too warm. Keeping the dough cold ensures that when you cut the log into rounds, the layers stay distinct and don’t get smashed together by the pressure of the knife.
Phase Two: The Anti-Soggy Bottom Assembly Technique
This is where we solve the soggy bottom problem once and for all. Line your baking sheet with parchment paper, then create 12 small mounds of granulated sugar, using about a teaspoon for each. Space them out evenly to allow for plenty of airflow between the buns as they expand.
Place each cut bun directly onto a sugar mound. As the buns bake, the sugar underneath will melt and then harden into a crisp, golden disc. This creates a moisture-proof seal on the bottom of the bun. It’s a professional bakery trick that transforms a standard pastry into something truly extraordinary.
Precision Cutting for Even Heat Distribution
To keep those beautiful layers visible, use a very sharp serrated knife and a gentle sawing motion. Better yet, use a piece of unscented dental floss. Slide the floss under the log, cross it over the top, and pull quickly. This cuts through the dough without compressing the layers, allowing for a much higher rise.
Avoid “tailing,” which happens when the end of the dough strip unravels during baking. To prevent this, tuck the very end of the dough strip underneath the bun as you place it on the sugar mound. The weight of the bun will hold the tail in place, ensuring a perfectly circular, professional look.
Phase Three: The Two-Stage Baking Process
When you slide the tray into the oven at 375°F, you’ll notice the aroma of toasted cinnamon almost immediately. At the 15-minute mark, the buns should look puffed and pale gold. This is the time to rotate the pan to account for any hot spots in your oven and drop the temperature to 350°F.
During the final 10 minutes, the “carry-over” cooking begins. The internal layers are finishing their transformation from raw dough to airy pastry. Look for a deep, lacquered golden-brown color on the tops. This indicates the egg wash has caramelized and the pastry is cooked all the way through to the center.
Don’t be afraid of a little color! A pale morning bun is often an undercooked morning bun. That deep mahogany hue is where the flavor lives. If the tops are browning too fast but the centers feel soft, you can lightly tent the tray with foil for the last five minutes.
Phase Four: The Crystalline Sugar Finish
The moment those buns come out of the oven, the clock is ticking. You need to roll the tops and sides in the remaining granulated sugar while they are still screaming hot. The residual heat from the butter and the egg wash acts like a glue, allowing the sugar crystals to stick and create that iconic sparkling finish.
If you wait until they cool, the sugar will simply slide off. Use a pair of tongs if the buns are too hot to handle, but work quickly. Once coated, move them immediately to a wire cooling rack. This is vital because it allows air to circulate under the buns, preventing steam from softening that perfectly crisp base you worked so hard to create.
Troubleshooting Common Morning Bun Failures
If you see a pool of butter on your baking sheet, your dough was likely too warm when it went into the oven. Next time, try chilling the cut buns on the tray for 15 minutes before baking. This ensures the butter stays solid until the very moment the heat “sets” the flour structure.
Pale sides are usually a result of overcrowding. If the buns are too close together, they will steam each other rather than crisping up. Give them at least two inches of space. If your pastry feels tough or chewy rather than flaky, you might have over-handled the dough while rolling it out, which develops too much gluten.
How to Fix an Underbaked Center
If you pull your buns out and realize the centers are still a bit doughy, don’t panic. You can put them back in a 325°F oven for 5 to 8 minutes. Cover the tops loosely with aluminum foil to prevent the sugar from burning while the gentle heat penetrates the core of the bun to finish the bake.
Equipment Essentials for Professional Results
A heavy-gauge aluminum baking sheet is your best friend here. Thin, dark steel pans absorb heat too quickly and unevenly, which can burn the sugar mounds before the pastry is cooked. Aluminum provides a steady, even heat that encourages a perfect caramelization without scorching.
A wire cooling rack is also mandatory. If you leave the buns on the hot parchment paper, the bottom will continue to cook and eventually become too hard, or worse, the trapped steam will turn the base soft. Elevating them allows the crust to set into a permanent, shatteringly crisp texture.
Make-Ahead Strategies and Storage Logistics
You can prepare the log of dough the night before, wrap it tightly in plastic wrap, and keep it in the fridge. In the morning, simply slice and bake. You can even freeze the raw, cut rounds for up to a month. Just bake them directly from frozen, adding about 5 minutes to the initial 375°F baking stage.
To reheat leftovers, avoid the microwave at all costs—it will turn the sugar into a sticky mess and make the pastry rubbery. Instead, use an air fryer at 300°F for 3 minutes or a toaster oven. This refreshes the crisp base and restores the flakiness of the interior layers perfectly.
Expert Tips for Flavor Customization
Once you’ve mastered the base recipe, you can start playing with flavors. Adding the zest of one orange to the cinnamon-sugar paste creates a bright, citrusy note that cuts through the richness of the butter. A pinch of ground cardamom added to the filling provides a sophisticated, Scandinavian twist.
Avoid adding high-moisture ingredients like fruit purees or jams inside the roll. These will introduce too much liquid and bring back the “soggy bottom” problem we’ve worked so hard to avoid. If you want fruit flavor, try rolling the finished, hot buns in a mixture of sugar and freeze-dried fruit powder instead.
Frequently Asked Questions
Can I use homemade rough-puff pastry for this recipe?
Yes, homemade rough-puff works beautifully. Just ensure you have completed at least four “folds” to create enough layers for a significant rise. Homemade pastry often has a higher butter-to-flour ratio, so you may need to be even more diligent about keeping the dough cold during the rolling and cutting process.
Why did my sugar mounds burn on the bottom?
This usually happens if the baking rack is too low in the oven or if your oven is running hot. Try moving the rack to the center position. You should also check your oven’s calibration with a thermometer; even a 15-degree difference can cause sugar to cross the line from caramelized to burnt before the buns are done.
Can I use brown sugar for the base mounds?
It is much riskier to use brown sugar for the mounds because it contains molasses, which makes it naturally more moist. This moisture can interfere with the “shield” effect and lead to a stickier, softer bottom. For the best crunch, stick with granulated white sugar for the mounds and the final coating.
How do I keep these crisp for more than 4 hours?
The enemy of crisp pastry is humidity. Do not store these in a plastic bag or a sealed plastic container while they are still even slightly warm. Once completely cool, a paper bag is actually better for short-term storage as it allows the pastry to breathe. For longer storage, an airtight container is fine, but you will likely need to briefly toast them to bring back the crunch.
What is the best substitute for the egg wash?
If you don’t want to use an egg, you can brush the tops with heavy cream or whole milk. You won’t get the same deep, lacquered mahogany color or the same level of “stick” for the final sugar coating, but it will still help the pastry brown and provide a nice finish.
Morning Buns
Course: Breakfast/PastryCuisine: AmericanDifficulty: medium12
buns20
minutes25
minutes300
kcal45
MinutesA foolproof recipe for airy, golden-brown cinnamon buns made with puff pastry. By using a parchment-shield method and staggered oven temperatures, these buns avoid the common pitfall of gummy, undercooked bottoms.
Ingredients
1 package (approx. 17 oz) high-quality puff pastry, thawed but chilled
1/2 cup unsalted butter, softened to a spreadable paste
1 cup granulated sugar, divided (3/4 cup for filling/base, 1/4 cup for topping)
2 tablespoons ground cinnamon
1 teaspoon vanilla extract
1/4 teaspoon salt
1 egg + 1 tablespoon water (egg wash)
Directions
- Preheat your oven to 375°F (190°C). This higher starting temperature is the secret to setting the laminated layers of the puff pastry immediately so the butter doesn’t leak out and cause sogginess.
- In a small bowl, mix the softened butter with 1/2 cup of the sugar, the cinnamon, vanilla, and salt until it forms a smooth, thick paste.
- On a lightly floured surface, roll out your puff pastry into a large rectangle (approx. 10×12 inches). Spread the cinnamon butter paste in a thin, even layer all the way to the edges.
- Roll the dough tightly into a log starting from the long edge. Use a very sharp serrated knife or unscented dental floss to cut the log into 12 even rounds.
- To solve the soggy bottom issue, line a large baking sheet with parchment paper. Sprinkle 1/4 cup of granulated sugar in 12 small mounds directly onto the parchment, then place each bun cut-side down onto a sugar mound. This creates a dry, caramelized barrier that yields a crunch rather than a soak.
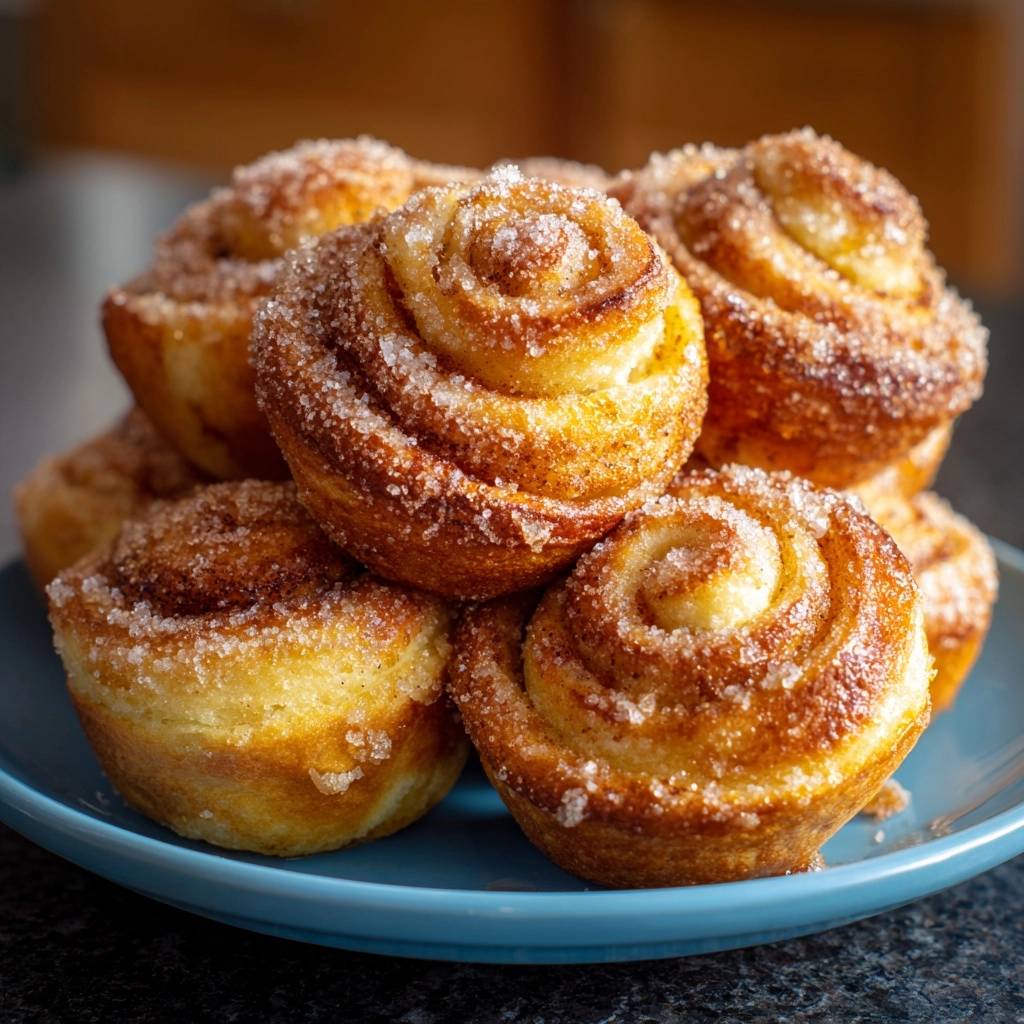
- Lightly brush the tops and sides of the buns with the egg wash. This ensures the deep golden-brown color seen in the image.
- Bake for 15 minutes at 375°F. Rotate the pan and drop the oven temperature to 350°F (175°C) for the final 10 minutes. This staggered heat ensures the flaky center is cooked through without burning the sugar on the bottom.
- Remove from the oven. While the buns are still hot, immediately roll the tops and sides in the remaining 1/4 cup of sugar for that signature sparkling, crystalline finish.
- Transfer to a wire rack immediately. Allowing air to circulate underneath prevents steam from softening the crisp, caramelized base.
Notes
- The secret to success is placing the buns directly onto sugar mounds on the parchment paper to create a caramelized barrier, and reducing the oven temperature mid-bake to ensure the center is fully cooked without burning the exterior.