Classic Key Lime Meringue Pie: Fluffy Meringue, No Weeping!
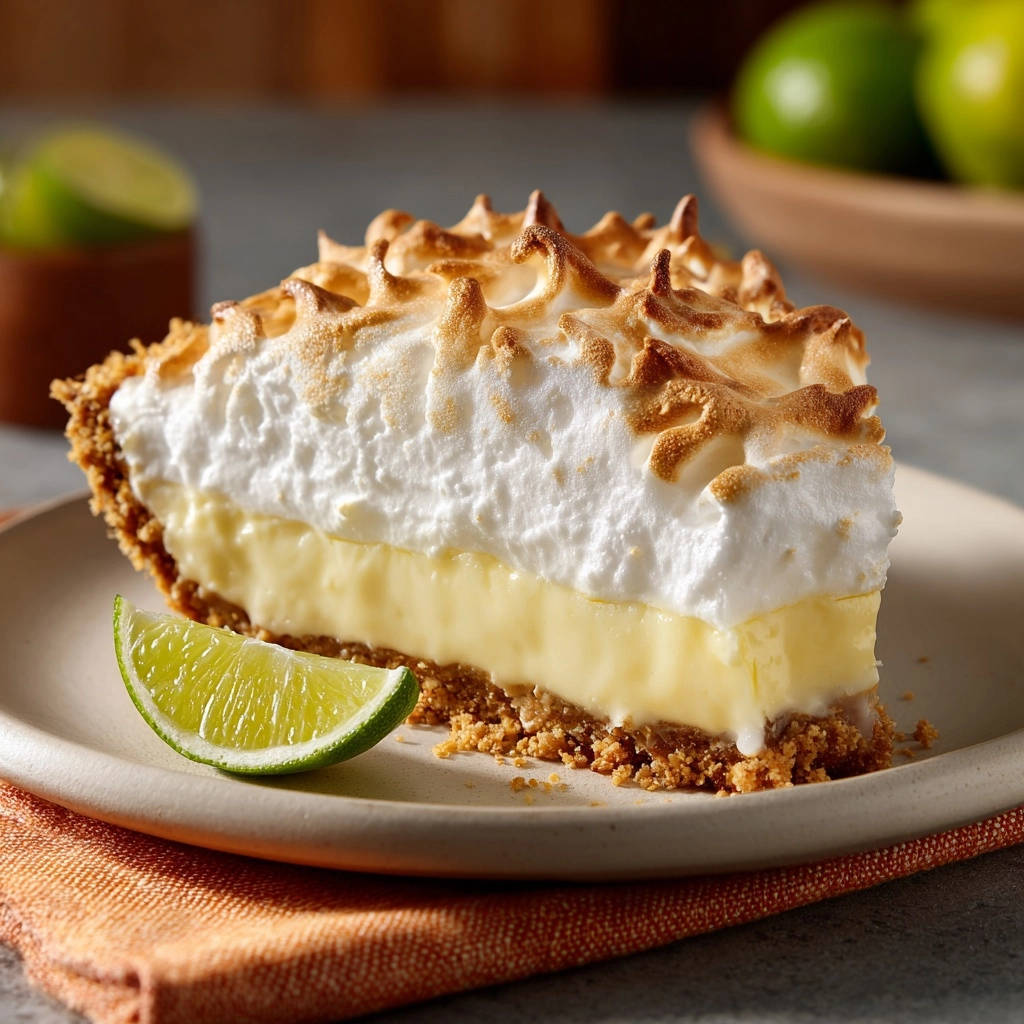
There’s nothing quite like the bright, zesty flavor of a Classic Key Lime Meringue Pie, but achieving that towering, stable meringue often feels like a baking enigma. If you’ve ever battled a watery, sliding meringue, you know the frustration. This recipe unveils the simple, expert trick to a tall, fluffy, and perfectly set meringue that won’t weep, transforming your baking experience.
Why This Classic Key Lime Meringue Pie Belongs in Your Recipe Box
The Meringue Mastery: Say Goodbye to Weeping Woes
The true genius of this recipe lies in its method for a flawless meringue. We tackle the common problem of watery meringue head-on, ensuring yours is beautifully stable and tall every single time.
Discover the technique that keeps your cloud-like meringue perfectly perched atop its zesty filling, free from tears or shrinkage.
A Symphony of Sweet, Tart, and Tangy Flavors
This Classic Key Lime Meringue Pie offers an exquisite balance of intense key lime tang and a delicate, sweet meringue. Each bite delivers a harmonious blend of creamy, zesty filling and airy sweetness.
It’s a delightful dessert that refreshes the palate and leaves a lasting, joyful impression.
Achieving Bakery-Quality Results from Your Home Kitchen
Impress your guests and yourself with a pie that looks and tastes professionally made. This recipe provides clear, actionable steps for a show-stopping dessert.
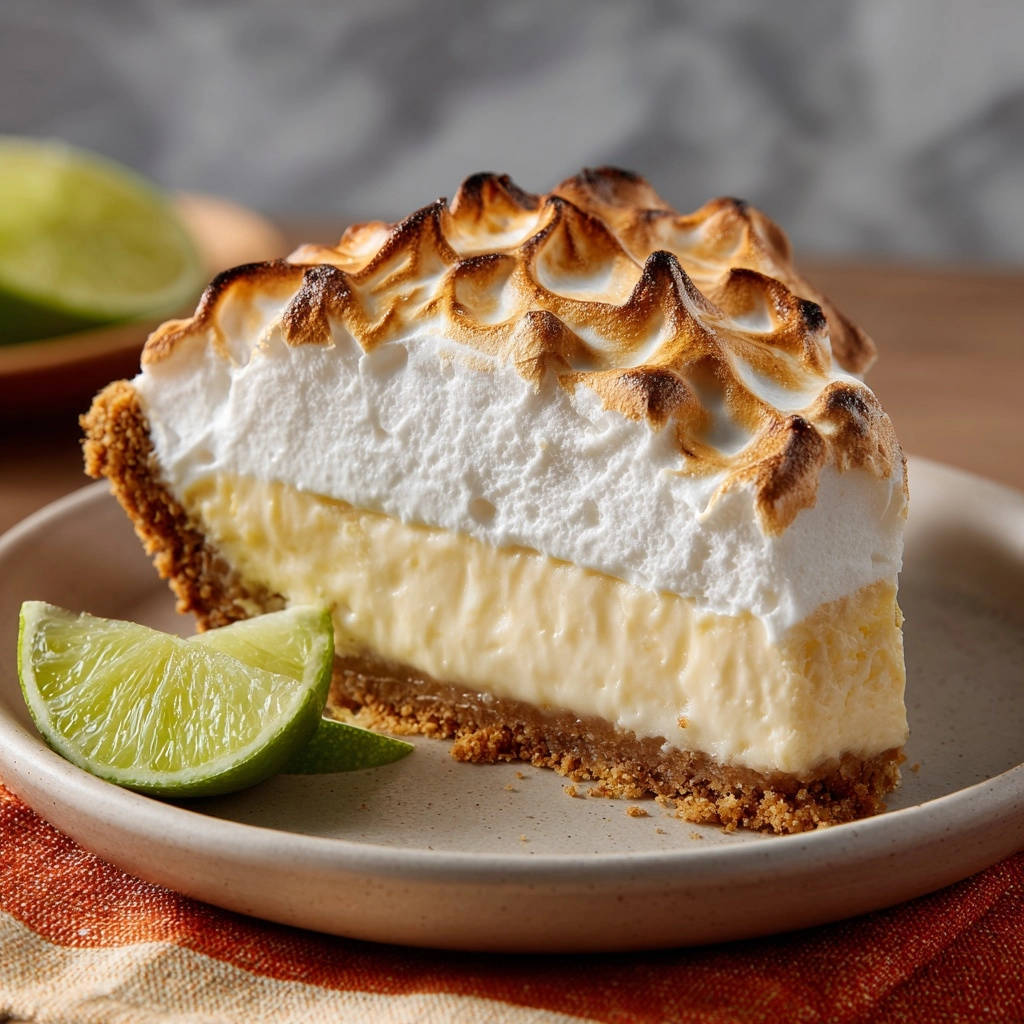
You’ll gain confidence in your baking skills, creating a masterpiece that’s both stunning and incredibly delicious.
Gathering Your Essentials: Ingredients for Classic Key Lime Meringue Pie
For the Golden Graham Cracker Crust
Graham Cracker Crumbs: The foundational base, providing a sweet, buttery crunch and essential texture contrast.
Granulated Sugar: A touch of sweetness that enhances the graham cracker flavor without overpowering it.
Unsalted Butter, Melted: Binds the crumbs together, creating a firm, cohesive crust that bakes to a beautiful golden brown.
The Irresistible Key Lime Filling
Large Egg Yolks: Essential for richness, imparting a beautiful golden hue, and helping the tangy filling set beautifully.
Sweetened Condensed Milk: Provides the signature creamy sweetness and body to the filling, creating a luxurious texture.
Fresh or Bottled Key Lime Juice: The star ingredient for that distinct tangy, aromatic flavor. While fresh is always vibrant, a good quality bottled Key lime juice is a convenient and excellent alternative.
Lime Zest (Optional): Boosts the citrus aroma, adding an extra layer of bright flavor and visual appeal to the filling.
Crafting the Cloud-Like Meringue
Large Egg Whites, at Room Temperature: Crucial for achieving maximum volume and stability when whipped. Cold whites won’t achieve the same fluffy height.
Cream of Tartar: A vital stabilizing agent that helps egg whites whip up faster and maintain their stiff, glossy peaks.
Granulated Sugar: Sweetens the meringue and contributes significantly to its glossy, smooth texture, making it stable and less prone to weeping.
Essential Tools for Your Classic Key Lime Meringue Pie Adventure
Basic Baking Equipment You’ll Need
9-inch Pie Plate: The perfectly sized vessel for your delicious Key lime creation.
Mixing Bowls: Several are needed, including one absolutely spotless bowl dedicated solely to whipping egg whites for the meringue.
Measuring Cups and Spoons: For accurate ingredient proportions, ensuring a balanced and consistent Classic Key Lime Meringue Pie every time.
Rubber Spatula: Ideal for gently folding ingredients and spreading the meringue without deflating its airy structure.
Specialized Tools for Meringue Mastery
Electric Mixer (Handheld or Stand Mixer): Absolutely essential for effortlessly whipping egg whites to the desired volume and stiff peaks for a perfect meringue.
Wire Rack: Critical for proper cooling of the pie, allowing air circulation to prevent a soggy bottom crust and ensuring a stable set.
Your Path to Classic Key Lime Meringue Pie Perfection: A Detailed Guide
- Prepare the Golden Crust:
Preheat your oven to 350°F (175°C). In a medium bowl, combine graham cracker crumbs, 1/4 cup granulated sugar, and melted butter until the mixture is evenly moistened, resembling wet sand.
Press the mixture firmly and evenly into the bottom and up the sides of a 9-inch pie plate. This step creates a sturdy, delicious foundation that will hold your Key lime filling beautifully.
Bake the crust for 10 minutes, then remove it from the oven and let it cool slightly on a wire rack while you prepare the filling.
- Mix the Zesty Key Lime Filling:
Reduce your oven temperature to 325°F (160°C). In a separate, clean bowl, whisk together the large egg yolks, 14-ounce can of sweetened condensed milk, 1/2 cup of Key lime juice, and the optional 1 teaspoon of lime zest until the mixture is smooth and thoroughly combined.
Pour this vibrant and creamy filling into your pre-baked and slightly cooled graham cracker crust. The contrast in textures will be delightful.
- Bake the Filling to Perfection:
Bake the pie for 15 minutes, or until the filling is just set around the edges but still exhibits a slight, delicate jiggle in the center. This slight movement ensures the filling is cooked but retains its creamy texture, preventing over-baking.
Remove the pie immediately from the oven. It is absolutely crucial that the filling remains warm for the next step. This warmth is key to ensuring your meringue adheres perfectly and helps prevent the dreaded weeping.
- Whip the Meringue Foundation:
While the filling is baking, prepare your meringue. Ensure your mixing bowl and beaters are spotlessly clean and completely free of any grease or fat; even a tiny speck can prevent the egg whites from whipping properly to their full volume.
In the impeccably clean bowl, beat the room temperature egg whites on medium speed until they become frothy and light. Add the 1/4 teaspoon of cream of tartar and continue beating to stabilize them further.
- Build the Glossy, Stiff Meringue Peaks:
Gradually add the 1/2 cup of granulated sugar, one tablespoon at a time, while continuously beating the egg whites on high speed. This slow, steady addition allows the sugar to dissolve completely into the whites, which is crucial for a stable and glossy meringue that won’t weep.
Continue beating until the meringue is incredibly glossy, forms stiff peaks (meaning the peaks stand straight up when the beaters are lifted), and the sugar is completely dissolved. To confirm, rub a small amount of meringue between your fingers; it should feel smooth, not grainy.
- The “No Weep” Meringue Application:
Here’s the absolute key to preventing weeping: Immediately and gently spread the prepared meringue evenly over the warm Key lime filling. Working quickly ensures the meringue forms a strong, lasting bond with the warm filling.
Crucially, make sure the meringue touches the crust all around the entire circumference of the pie. This creates an essential seal that traps moisture, effectively preventing the meringue from shrinking away from the edges and weeping during baking.
- The Slow Bake for Golden Perfection:
Return the pie to the 325°F (160°C) oven and bake for 15-20 minutes, or until the meringue is beautifully golden brown on its peaks. This slower, gentler bake helps to gently cook and dry out the meringue slightly, further reinforcing its structure and enhancing its resistance to weeping.
- Cool and Chill for Ultimate Sliceability:
Let the Classic Key Lime Meringue Pie cool completely on a wire rack at room temperature. This vital step allows the filling to firm up fully and gives the meringue time to stabilize its structure.
Once cooled, refrigerate the pie for at least 4 hours, or preferably overnight, before slicing and serving. This thorough chilling period allows all the flavors to meld beautifully and ensures the pie sets perfectly for clean, elegant cuts.
Expert Tips & Tricks for a Flawless Classic Key Lime Meringue Pie
The Warm Filling Advantage: Spreading the meringue over a warm filling helps create an immediate, strong bond between the two layers. This significantly reduces the chances of the meringue separating or weeping, so don’t let your filling cool completely before applying the meringue.
Spotless Bowls are Non-Negotiable: Any trace of grease, fat, or even egg yolk in your mixing bowl or on your beaters will prevent egg whites from whipping into stiff, stable peaks. Always ensure your equipment is impeccably clean and dry for a successful meringue.
Gradual Sugar for Glossy Stability: Adding sugar one tablespoon at a time allows it ample opportunity to fully dissolve into the egg whites. This technique results in a more stable, wonderfully glossy, and less grainy meringue that holds its shape beautifully.
Seal the Deal: Meringue to Crust Contact: Ensure the meringue touches the edges of the pie crust all the way around. This critical “seal” prevents moisture from escaping during baking and helps stop the meringue from shrinking back and weeping around the perimeter.
Patience in Baking the Meringue: A lower, slower bake temperature (like 325°F) gently cooks and dries out the meringue all the way through, rather than just browning the surface. This contributes significantly to its internal stability and excellent resistance to weeping.
The Unsung Hero: Proper Cooling & Chilling: Do not rush these final steps! Cooling completely at room temperature, followed by thorough chilling in the refrigerator, allows both the filling to set firmly and the meringue to stabilize fully, preventing slumping and ensuring perfect, clean slices.
Room Temperature Egg Whites for Meringue: Cold egg whites are less elastic and won’t whip to their full potential volume. For the best results, separate your eggs when they’re cold (easier), then let the whites come to room temperature for at least 30 minutes before whipping.
Troubleshooting Common Classic Key Lime Meringue Pie Challenges
Why Is My Meringue Weeping (Releasing Water)?
Weeping is most commonly caused by underbaking the meringue, not adequately sealing it to the crust, or adding the sugar too quickly. Ensure your meringue is cooked through until slightly dry, that it touches all edges of the crust, and that all sugar is completely dissolved for stability.
My Crust Is Soggy! What Went Wrong?
A soggy graham cracker crust typically means it wasn’t pre-baked long enough to dry out, or it wasn’t cooled properly before the warm filling was added. Always ensure your crust is firm, slightly golden, and has cooled somewhat to prevent steam from making it soft.
Filling Not Setting Firmly Enough?
This can happen if the pie isn’t baked quite long enough for the filling to properly set, or if it’s not chilled sufficiently. Ensure the edges are set with a slight jiggle in the center, then allow for the full recommended refrigeration time, ideally overnight, for a perfectly firm filling.
Meringue Didn’t Get Stiff Peaks?
The most common culprits for a meringue that won’t whip to stiff peaks are grease in the mixing bowl or on the beaters, or using cold egg whites directly from the refrigerator. Always use spotless equipment and ensure your egg whites are at room temperature for optimal volume and stiffness.
Frequently Asked Questions About Classic Key Lime Meringue Pie
Can I Use Bottled Key Lime Juice Instead of Fresh?
Yes, absolutely! While fresh Key lime juice offers an unparalleled brighter, more intense flavor, a good quality bottled Key lime juice works perfectly well in this recipe. It’s often more convenient to find and still delivers that distinct tangy taste.
How Far in Advance Can I Make This Pie?
This Classic Key Lime Meringue Pie is at its absolute best when enjoyed within 1-2 days of making it. The meringue is freshest and most stable shortly after baking, though the pie will still be delicious for a couple of days when properly stored.
What’s the Best Way to Store Leftovers?
Store any leftover Classic Key Lime Meringue Pie in an airtight container in the refrigerator for up to 2-3 days. While the meringue will slowly lose some of its initial crispness over time due to moisture, the flavors remain wonderful.
Can I Freeze Key Lime Meringue Pie?
It is generally not recommended to freeze meringue-topped pies. Upon thawing, the meringue can become disappointingly rubbery or may weep significantly, altering its texture and appearance. This pie is best enjoyed fresh and chilled.
What If I Don’t Have Cream of Tartar?
While cream of tartar is highly recommended for its stabilizing properties, you can omit it if you don’t have any on hand. However, your meringue might be slightly less stable and may require more careful beating to achieve and maintain stiff peaks. A tiny pinch of white vinegar or lemon juice can offer a mild stabilizing effect as an alternative.
Serving Suggestions & Flavor Pairings for Your Key Lime Masterpiece
Serve slices of your homemade Classic Key Lime Meringue Pie chilled for the most refreshing and invigorating experience. For an elegant touch, garnish each slice with additional fresh lime zest or a delicate thin lime slice.
For an extra layer of flavor and texture, consider pairing it with a very light dusting of powdered sugar, a scattering of fresh berries (such as vibrant raspberries or juicy blueberries), or a dollop of unsweetened whipped cream to perfectly balance the sweetness of the meringue.
This iconic dessert is truly the perfect cap to a summer meal, or an ideal treat to bring a burst of sunshine and zesty delight to any special gathering.
For a perfect pairing, try our Swirled Pumpkin Cheesecake Pie: Smooth, Stunning & No Cracks!.
Ready to Impress? Share Your Classic Key Lime Meringue Pie Masterpiece!
With this comprehensive guide and the powerful “no weep” secret now in your baking arsenal, you are exceptionally equipped to create a Classic Key Lime Meringue Pie that will undoubtedly earn rave reviews. The exquisite combination of its intensely zesty filling and the ethereal, cloud-like meringue is truly unparalleled and a testament to your newfound expertise.
Don’t hesitate-step into your kitchen, embrace the pure joy of baking, and prepare to absolutely delight your friends and family with this iconic and utterly irresistible dessert. We eagerly anticipate hearing all about your triumphant baking adventure!
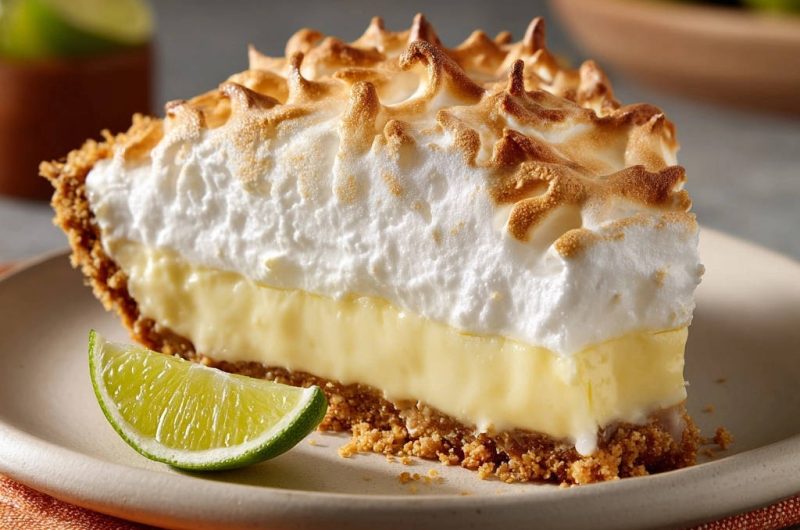
Key Lime Pie
Course: DessertCuisine: AmericanDifficulty: medium8
servings30
minutes45
minutes450
kcal75
minutesElevate your dessert game with this Classic Key Lime Meringue Pie. This recipe shares the simple trick for a tall, fluffy, and perfectly set meringue, complementing a tangy Key lime filling.
Ingredients
For the Crust:
1 1/2 cups graham cracker crumbs
1/4 cup granulated sugar
1/2 cup unsalted butter, melted
For the Filling:
4 large egg yolks
1 14-ounce can sweetened condensed milk
1/2 cup fresh or bottled Key lime juice
1 teaspoon lime zest (optional)
For the Meringue:
4 large egg whites, at room temperature
1/4 teaspoon cream of tartar
1/2 cup granulated sugar
Directions
- Preheat your oven to 350°F (175°C). In a medium bowl, combine graham cracker crumbs, 1/4 cup granulated sugar, and melted butter. Press the mixture evenly into the bottom and up the sides of a 9-inch pie plate. Bake for 10 minutes, then remove from oven and let cool slightly.
- Reduce oven temperature to 325°F (160°C). In a separate bowl, whisk together egg yolks, sweetened condensed milk, Key lime juice, and lime zest (if using) until well combined. Pour the filling into the cooled crust.
- Bake the pie for 15 minutes, or until the filling is just set around the edges but still slightly jiggly in the center. Remove the pie from the oven. This is your chance to get that filling warm for the next step!
- While the filling is baking, prepare the meringue. Ensure your mixing bowl and beaters are spotlessly clean and free of any grease. In the clean bowl, beat the room temperature egg whites on medium speed until they are frothy. Add the cream of tartar and continue beating.
- Gradually add the 1/2 cup of granulated sugar, one tablespoon at a time, while continuing to beat on high speed. Beat until the meringue is glossy, stiff peaks form, and the sugar is completely dissolved. When you rub a small amount of meringue between your fingers, it should feel smooth, not grainy.
- Here’s the key to preventing weeping: Immediately and gently spread the meringue evenly over the warm Key lime filling. Make sure the meringue touches the crust all around the edges of the pie. This creates a seal that helps prevent the meringue from shrinking and weeping.
- Return the pie to the 325°F (160°C) oven and bake for 15-20 minutes, or until the meringue is beautifully golden brown on the peaks. This slower bake helps dry out the meringue slightly, further preventing weeping.
- Let the pie cool completely on a wire rack at room temperature before refrigerating for at least 4 hours, or preferably overnight, before slicing and serving.
Notes
- Spreading meringue over a warm filling helps prevent weeping and shrinking.