Swirled Pumpkin Cheesecake Pie: Smooth, Stunning & No Cracks!
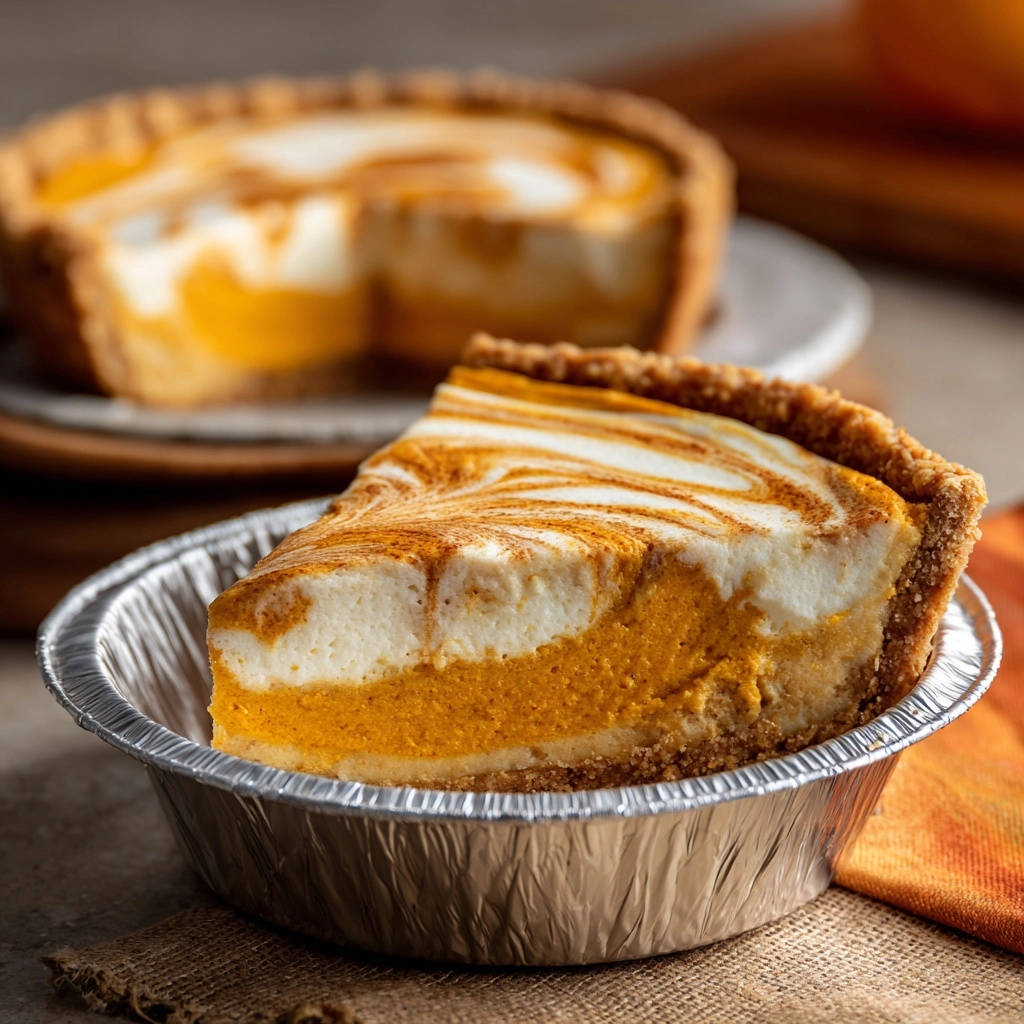
There’s nothing quite like the heartbreak of pulling a perfectly baked cheesecake from the oven only to see a giant crack mar its surface. I’ve been there, and that’s precisely why I’m thrilled to share my go-to recipe for a Swirled Pumpkin Cheesecake Pie that defies the odds, promising a flawlessly smooth, stunning dessert every single time.
This isn’t just another pumpkin cheesecake; it’s a masterpiece of texture and flavor, combining the creamy tang of cheesecake with the warm, spiced notes of pumpkin, all without a single fissure thanks to my perfected crack-prevention techniques.
Crack-Proof Perfection: Your Guide to a Flawless Cheesecake
The Genius of the Water Bath Method
The water bath, or bain-marie, is the secret weapon against cheesecake cracks. It surrounds the pie with a gentle, moist heat during baking.
This consistent environment prevents the edges from baking faster and drying out before the center sets, ensuring an even, delicate texture throughout the entire Swirled Pumpkin Cheesecake Pie.
Slow and Steady Wins the Race: The Crucial Cooling Phase
After baking, the pie isn’t immediately removed from the oven. Instead, the oven is turned off, and the door is propped open slightly.
This gradual cooling process allows the cheesecake to adjust to the temperature change slowly, preventing the sudden shock that often leads to cracks and ensures a stable structure.
Beyond the Technique: The Harmony of Pumpkin and Cream Cheese
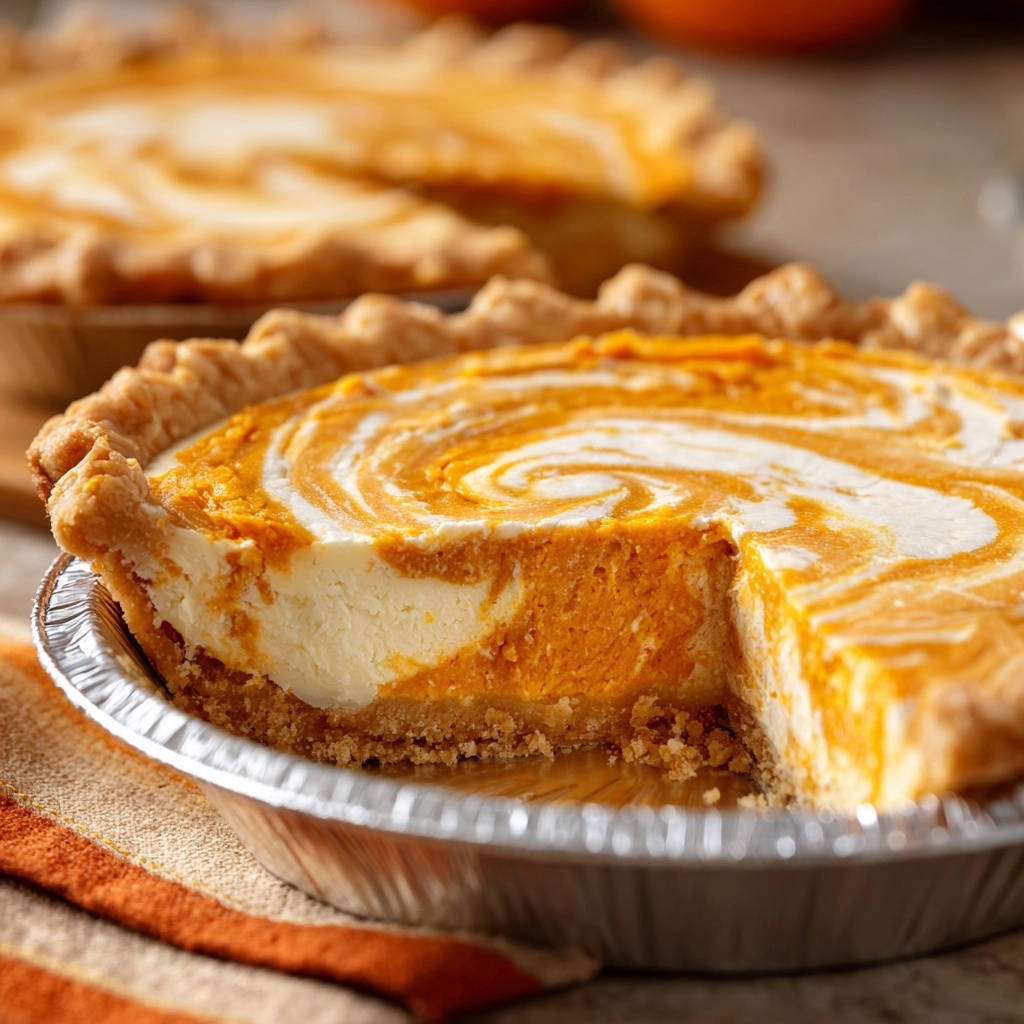
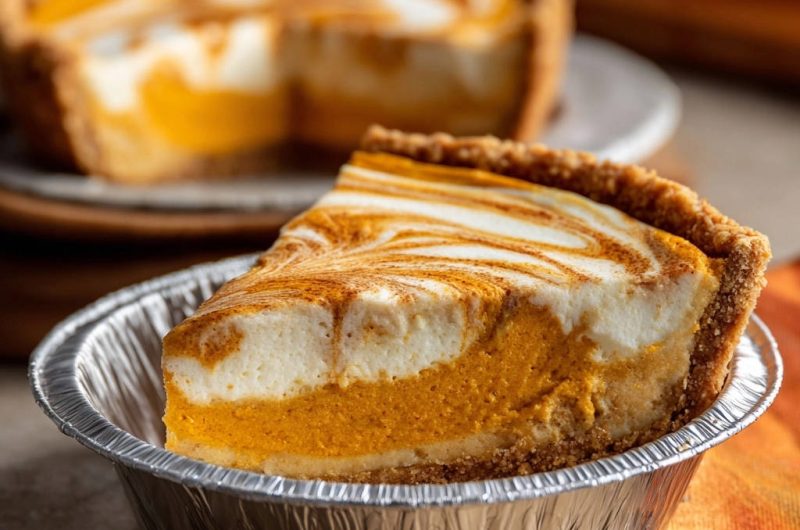
While the techniques ensure structural integrity, the art of the swirl makes this pie truly stunning. The creamy, tangy cheesecake ribbons gracefully through the warm, spiced pumpkin base.
This visual appeal, coupled with the contrasting yet complementary flavors, elevates the Swirled Pumpkin Cheesecake Pie from a simple dessert to an elegant centerpiece.
For a classic take on that silky texture, try this creamy New York cheesecake recipe next.
Gather Your Gear: Essential Tools for Cheesecake Success
Non-Negotiable Baking Equipment
A sturdy 9-inch pie plate is essential for shaping and baking your pie. A larger roasting pan is critical for holding the water bath, ensuring even heat distribution.
Various mixing bowls, both large and medium, will keep your ingredients separate and organized during prep.
Helpful Handheld Utensils
A whisk is perfect for combining ingredients smoothly, especially for the pumpkin filling. A spatula is indispensable for scraping bowls clean and folding in delicate mixtures.
Finally, a small knife or wooden skewer is key for creating the beautiful, marbled swirl effect.
Building Flavor Layers: Essential Ingredients for Your Pie
For the Sturdy Graham Cracker Foundation
Graham cracker crumbs: These form the classic, slightly sweet base that perfectly complements the rich fillings.
Granulated sugar: Adds a touch of sweetness to the crust, enhancing its flavor.
Unsalted butter, melted: Binds the crumbs together, creating a firm, flavorful foundation for the pie.
The Rich, Spiced Pumpkin Heart
Pumpkin puree (15 ounces): Ensures a deep, authentic pumpkin flavor and a creamy texture. Make sure it’s pure pumpkin, not pie filling.
Granulated and light brown sugar: Provide balanced sweetness, with brown sugar adding molasses notes and depth.
Ground cinnamon, ginger, nutmeg, cloves: This classic spice blend creates the warm, inviting aroma and flavor characteristic of pumpkin pie.
Salt: A pinch enhances all the other flavors, making them pop.
Large eggs: Act as a binder, helping the pumpkin filling set properly.
Heavy cream: Adds richness and creates a smoother, more luscious texture in the pumpkin layer.
Crafting the Creamy, Tangy Swirl
Cream cheese, softened (8 ounces): Full-fat cream cheese is crucial for that signature tangy flavor and rich, smooth consistency of the cheesecake swirl. Softened cream cheese ensures a lump-free mixture.
Granulated sugar: Sweetens the cream cheese layer, balancing its tanginess.
Large egg yolk: Adds richness and helps the cream cheese swirl set without making it too firm.
Vanilla extract: A touch of pure vanilla extract brightens the flavors and adds a comforting aroma.
Ingredient Insight: Quality and Temperature Matters
Always opt for fresh, high-quality spices; their potency significantly impacts the pumpkin layer’s overall taste.
Use full-fat cream cheese for the best texture and flavor in your swirl, as low-fat versions can affect consistency.
Ensure all cold ingredients, especially the cream cheese and eggs, are at room temperature before mixing. This promotes smooth incorporation and prevents lumps, which is vital for a creamy Swirled Pumpkin Cheesecake Pie.
From Scratch to Swirl: Your Step-by-Step Baking Guide
Building the Golden Crust Base
Preheat your oven to 350°F (175°C).
In a medium bowl, combine graham cracker crumbs, 1/4 cup granulated sugar, and melted butter until thoroughly mixed.
Press this mixture firmly into the bottom and up the sides of a 9-inch pie plate, ensuring an even, compact layer.
Bake for 8 minutes to set the crust, then remove and allow it to cool slightly while you prepare the fillings. Reduce oven temperature to 325°F (160°C) for the main bake.
Whipping Up the Velvety Pumpkin Filling
In a large bowl, whisk together the pumpkin puree, 1/2 cup granulated sugar, brown sugar, cinnamon, ginger, nutmeg, cloves, and salt until the mixture is smooth and evenly combined.
In a separate small bowl, lightly beat the two large eggs, then gently fold them into the pumpkin mixture along with the heavy cream.
Mix just until combined; overmixing at this stage can lead to a tough filling. Pour this pumpkin filling into your prepared and cooled pie crust.
Preparing the Silky Cream Cheese Swirl
In a clean bowl, use an electric mixer to beat the softened cream cheese with 1/4 cup granulated sugar until the mixture is light and smooth.
Stir in the egg yolk and vanilla extract, mixing just until they are fully incorporated.
As with the pumpkin layer, avoid overmixing to maintain the delicate texture of the cheesecake swirl.
Mastering the Signature Swirl Technique
Carefully dollop spoonfuls of the prepared cream cheese mixture over the pumpkin filling, spacing them out evenly across the surface.
Using a knife or a wooden skewer, gently drag it through the cream cheese dollops and into the pumpkin layer, creating a beautiful marbled effect.
Be careful not to press too hard or scrape the bottom of the pie crust during this process.
The Crack-Prevention Bake: Water Bath Method
Place your pie plate inside a larger roasting pan. This roasting pan will hold the water bath.
Carefully pour hot water into the roasting pan around the pie, ensuring the water level comes about halfway up the sides of the pie plate.
This water bath provides a moist, even heat, preventing the cheesecake from drying out and cracking, which is essential for a smooth top.
Carefully transfer the roasting pan with the pie to your preheated 325°F (160°C) oven.
Monitoring the Bake for Perfect Doneness
Bake for 50-60 minutes, or until the edges of the pie are set and the center jiggles only slightly when gently shaken.
Overbaking can lead to a dry texture and potential cracks, so watch it closely towards the end of the baking time.
The Patient Chill: Cooling for Perfection
Once baked, turn off the oven but leave the pie in the water bath inside the oven.
Prop the oven door open slightly (a wooden spoon works perfectly) for 1 hour. This slow, gradual cooling prevents temperature shock that can cause cracks.
Final Cool Down: Room Temperature Transition
After 1 hour in the oven, carefully remove the pie from the water bath and the roasting pan.
Allow it to cool completely on a wire rack at room temperature for another 1-2 hours. This step continues the gentle cooling process.
The Ultimate Chill: Setting for Slicing
Once completely cooled to room temperature, cover the pie gently with plastic wrap.
Refrigerate for at least 4 hours, or preferably overnight, before slicing and serving. This ensures it’s perfectly set and firm enough to cut cleanly.
Chef’s Touch: Expert Tips for Cheesecake Mastery
Perfectly Softened Cream Cheese: For a lump-free swirl, ensure your cream cheese is at true room temperature. Take it out of the fridge at least an hour before you plan to mix.
Preventing Crust Crumble: Press your graham cracker mixture firmly into the pie plate. A flat-bottomed glass or measuring cup can help achieve a compact, sturdy crust.
The Art of the Gentle Swirl: Don’t overdo the swirling. A few intentional passes with your knife or skewer are enough to create an elegant marbled effect without blending the layers completely.
Monitoring Your Oven: Every oven is different. Consider using an oven thermometer to ensure your oven holds the correct temperature, especially important for cheesecakes.
Know Your Spices: Fresh, potent spices make a huge difference in the pumpkin layer’s flavor. Check the dates on your spice jars for optimal aroma and taste.
Common Conundrums: How to Solve Cheesecake Challenges
My Crust is Too Hard or Too Soft!
If your crust is too hard, you might have over-packed it; next time, press firmly but gently. If it’s too soft, it might not have been baked long enough, or you used too much butter. Ensure proper baking and cooling.
The Swirl Disappeared into the Pumpkin Layer!
This usually happens if the cream cheese mixture was too warm or too thin, or if you swirled too vigorously. Ensure your cream cheese mixture is firm enough and swirl with a light hand.
My Cheesecake Cracked (Even with the Water Bath)!
Cracks can still occur if the pie was overbaked, cooled too quickly, or if the cream cheese was overmixed. Double-check your baking time, ensure the full gradual cooling process, and avoid overbeating the cream cheese.
The Center is Undercooked/Too Soft
If the center remains too jiggly after the recommended baking time, return it to the water bath in the oven for an additional 5-10 minutes. Ensure your oven temperature is accurate and that the water bath is properly set up.
Enjoying and Preserving Your Masterpiece
Elegant Serving Suggestions
Serve your Swirled Pumpkin Cheesecake Pie chilled, perhaps with a dollop of fresh whipped cream and a light dusting of cinnamon or nutmeg.
A drizzle of caramel sauce or a sprinkle of toasted pecans also adds a beautiful finish and extra layer of flavor.
Optimal Storage for Freshness
Once cooled, cover the pie tightly with plastic wrap and store it in the refrigerator. It will stay fresh and delicious for 3-4 days.
If you love the creamy texture here, this caramel pecan crunch cheesecake uses the same make-ahead approach for perfect slices.
Can I Make This Ahead?
Absolutely! This Swirled Pumpkin Cheesecake Pie is an excellent make-ahead dessert. It can be prepared up to 2-3 days in advance and stored in the refrigerator, allowing flavors to deepen and making entertaining effortless.
Burning Questions? We’ve Got Your Answers!
Can I use a different type of crust?
Absolutely! While graham cracker is classic, you could experiment with an Oreo crust for a chocolatey twist, or a shortbread cookie crust for a buttery flavor. Just adjust butter ratios to ensure proper binding. For more traditional cheesecake crust ideas, consider our Classic Cherry Cheesecake recipe, which offers great insights into various bases.
Is canned pumpkin puree acceptable, or should I use fresh?
Canned pumpkin puree is perfectly acceptable and often preferred for its consistent texture and moisture content in baking. Ensure you use pure pumpkin puree, not pumpkin pie filling, which is pre-spiced and sweetened. If you have extra pumpkin puree, you might enjoy making decadent pumpkin pie truffles for another delightful treat.
How can I make this gluten-free?
To make a gluten-free Swirled Pumpkin Cheesecake Pie, simply substitute gluten-free graham cracker crumbs for regular ones. The rest of the ingredients in the filling are naturally gluten-free.
What if I don’t have a roasting pan for the water bath?
If you don’t have a roasting pan, any larger oven-safe dish that can comfortably hold your pie plate and hot water will work. A deep baking dish or even a large cast-iron skillet can be improvised, as long as it forms a seal around the pie plate.
Can I freeze leftover Swirled Pumpkin Cheesecake Pie?
Yes, Swirled Pumpkin Cheesecake Pie freezes beautifully! Wrap individual slices or the whole cooled pie tightly in plastic wrap, then in foil. It can be frozen for up to 1-2 months. Thaw in the refrigerator overnight before serving.
Your Delicious Creation Awaits!
You now possess the knowledge and the secrets to bake a show-stopping Swirled Pumpkin Cheesecake Pie that’s guaranteed to be smooth, stunning, and utterly crack-free. This recipe isn’t just about dessert; it’s about confidence in your kitchen and the joy of sharing a truly exceptional treat.
What’s Next?
Try these delicious pairings:
- Mastering Cheesy Sausage Breakfast Puffs with a Crisp Crust
- S’mores French Toast Stack: Crispy Edges, Melty Core
Don’t wait for a special occasion; make any day a little sweeter. Bake this incredible pie, share it with loved ones, and prepare for rave reviews!
Pumpkin Cheesecake
Course: DessertCuisine: AmericanDifficulty: medium8
servings30
minutes1
hour370
kcal90
minutesDiscover the secret to a perfectly smooth, crack-free Swirled Pumpkin Cheesecake Pie every time. This recipe guides you through creating a rich pumpkin layer marbled with creamy cheesecake, all nestled in a buttery graham cracker crust. Learn the critical steps to prevent cracks for a stunning dessert.
Ingredients
For the Graham Cracker Crust:
1 and 1/2 cups graham cracker crumbs
1/4 cup granulated sugar
1/2 cup unsalted butter, melted
For the Pumpkin Layer:
15 ounces pumpkin puree (about 1 can)
1/2 cup granulated sugar
1/4 cup packed light brown sugar
1 teaspoon ground cinnamon
1/2 teaspoon ground ginger
1/4 teaspoon ground nutmeg
1/4 teaspoon ground cloves
1/4 teaspoon salt
2 large eggs
1/2 cup heavy cream
For the Cream Cheese Swirl:
8 ounces cream cheese, softened
1/4 cup granulated sugar
1 large egg yolk
1 teaspoon vanilla extract
Directions
- Prepare the Crust: Preheat your oven to 350 degrees F (175 degrees C). In a medium bowl, combine the graham cracker crumbs, 1/4 cup granulated sugar, and melted butter. Mix until well combined. Press the mixture firmly into the bottom and up the sides of a 9-inch pie plate. Bake for 8 minutes, then remove from oven and let cool slightly. Reduce oven temperature to 325 degrees F (160 degrees C).
- Make the Pumpkin Layer: In a large bowl, whisk together the pumpkin puree, 1/2 cup granulated sugar, brown sugar, cinnamon, ginger, nutmeg, cloves, and salt until smooth. In a separate small bowl, lightly beat the 2 large eggs, then stir them into the pumpkin mixture along with the heavy cream. Mix just until combined; do not overmix. Pour the pumpkin filling into the cooled crust.
- Prepare the Cream Cheese Swirl: In a clean bowl, beat the softened cream cheese with 1/4 cup granulated sugar until smooth. Stir in the egg yolk and vanilla extract until just combined. Again, do not overmix.
- Create the Swirl: Dollop spoonfuls of the cream cheese mixture over the pumpkin filling. Use a knife or skewer to gently swirl the cream cheese into the pumpkin filling, creating a marbled effect. Be careful not to scrape the crust.
- Bake with Confidence (The Crack-Prevention Secret!): Place your pie plate inside a larger roasting pan. Carefully pour hot water into the roasting pan, ensuring the water comes about halfway up the sides of the pie plate. This water bath is the key to preventing cracks by providing a moist, even heat that stops the cheesecake from drying out and cracking as it bakes and cools. Carefully transfer the roasting pan with the pie to your preheated 325 degree F (160 degree C) oven.
- Bake for 50-60 minutes, or until the edges are set and the center jiggles only slightly when gently shaken.
- The Critical Cooling Step: This is just as important as the water bath! Once baked, turn off the oven but leave the pie in the water bath inside the oven with the oven door propped open slightly (using a wooden spoon works perfectly) for 1 hour. This slow, gradual cooling prevents temperature shock that can cause cracks.
- Final Cool Down: After 1 hour in the oven, carefully remove the pie from the water bath and the roasting pan. Let it cool completely on a wire rack at room temperature for another 1-2 hours.
- Chill: Once completely cooled, cover the pie and refrigerate for at least 4 hours, or preferably overnight, before slicing and serving. This ensures it’s perfectly set and ready to enjoy!
Notes
- Water bath and gradual cooling are crucial for preventing cracks.