Classic Lemon Bars with Perfectly Set Filling
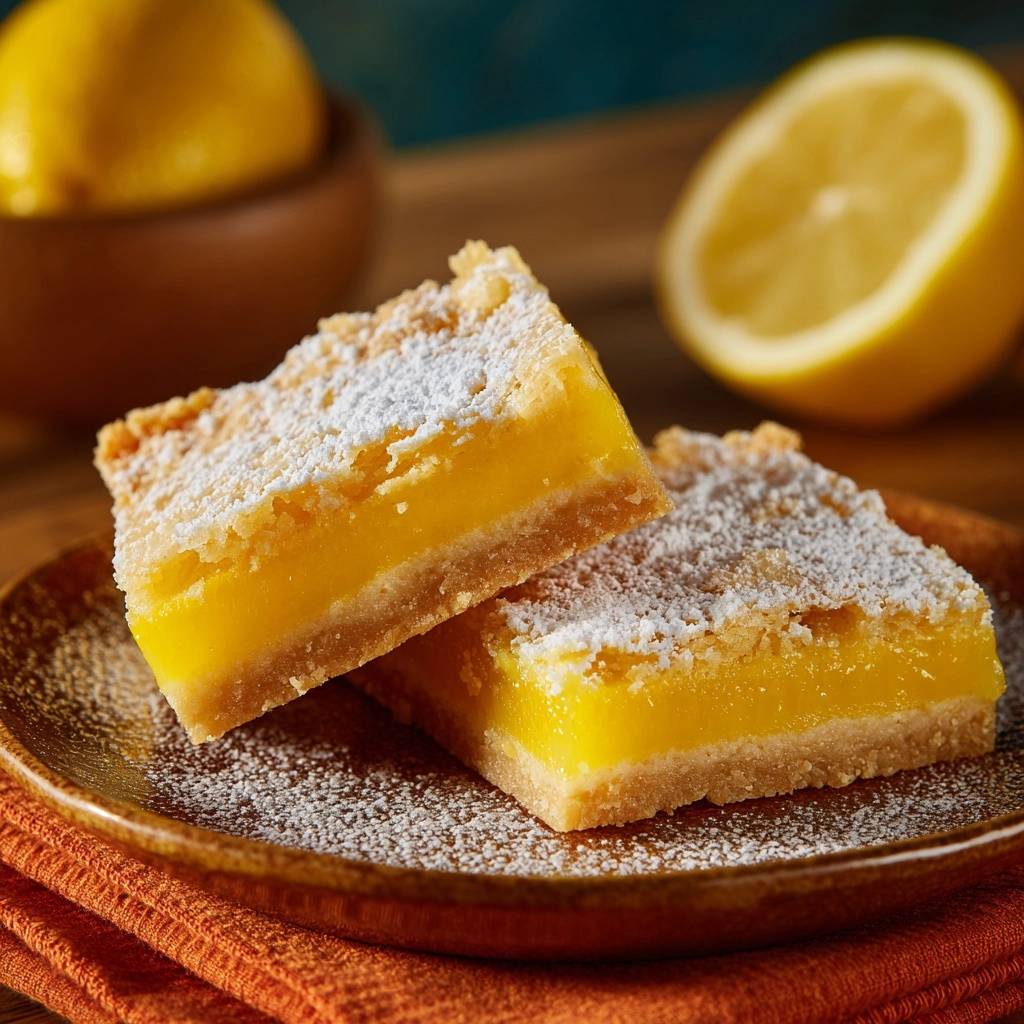
Ever sliced into classic lemon bars only to watch the filling ooze everywhere? You know that heartbreaking moment when they turn into a gooey puddle instead of clean, tangy squares. This recipe fixes it with a cornstarch-thickened filling that sets perfectly, giving you sliceable bars every time.
Therefore, you get that buttery shortbread crust snapping under a vibrant lemon layer that holds its shape. No more runny disasters at potlucks or picnics. These classic lemon bars deliver the bright citrus punch you crave without the mess.
The secret lies in sifting cornstarch and flour into the wet mix, then whisking vigorously. This creates a smooth batter that thickens reliably in the oven. Oh man, the first bite melts with sweet-tart perfection, and they cut like a dream.
Why These Classic Lemon Bars Never Runny
Traditional lemon bars often flop because they rely on eggs alone for structure. However, those custard-style fillings weep or collapse when cut. In addition, bottled juice dulls the flavor, leaving a flat taste.
This version uses a cornstarch and flour combo for firmness without rubberiness. Fresh lemon juice and zest bring intense brightness. You’ll end up with creamy yet sturdy classic lemon bars that impress every time.
Plus, the hot crust jumpstarts the thickening process right away. That means no boiling over or liquid centers. Get ready for foolproof results that beat every other recipe you’ve tried.
Signature Thickening Method Explained
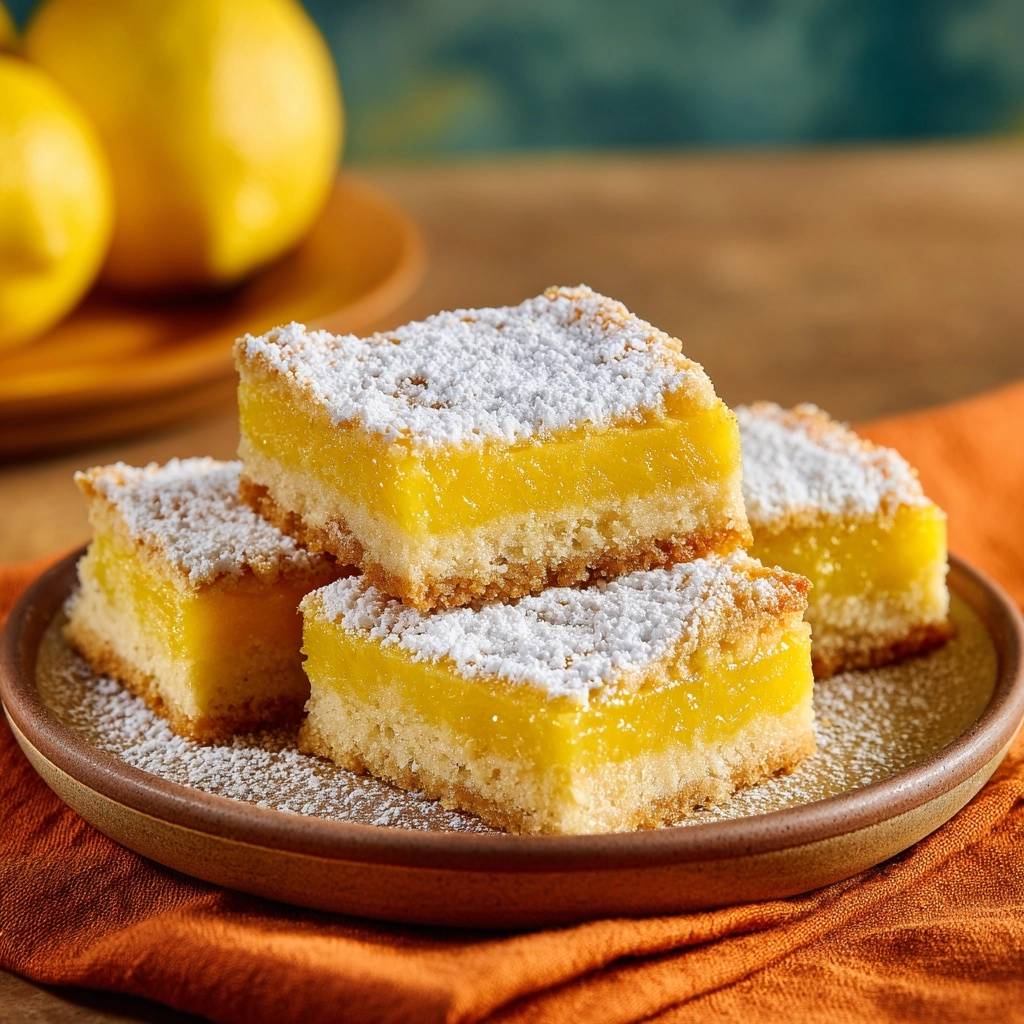
Cornstarch absorbs excess liquid as it heats, swelling to trap moisture without a gummy feel. Unlike eggs alone, which can curdle, this duo gelatinizes perfectly at 350°F. Flour adds extra stability for clean slices.
Whisk it smooth after sifting, and the batter transforms from lumpy to silky. Therefore, it pours evenly over the crust. This method ensures your classic lemon bars set like a dream.
Crust Ingredients for Buttery Base
Start with 1 cup softened unsalted butter for ultimate tenderness in your classic lemon bars crust. It creams beautifully, creating flakes that melt in your mouth. Room-temp butter mixes evenly, so the crust stays crumbly, not tough.
Next, 1/2 cup powdered sugar dissolves instantly for sweetness without graininess. Then, 2 cups all-purpose flour provides structure, while 1/4 teaspoon salt sharpens all the flavors. These ratios fit an 8×8 pan perfectly.
No unsalted butter? Regular works, but cut salt in half. Press it thin for crisp edges that contrast the soft filling. This base holds up under the tangy layer like a pro.
Butter and Sugar Pairing Secrets
Cream butter and powdered sugar until pale and fluffy, about 2 minutes. A food processor speeds it up, but don’t overmix or it toughens. Powdered sugar keeps everything melt-in-mouth smooth.
Therefore, the dough comes together fast. Pat it evenly, and bake for golden perfection. Your classic lemon bars crust will shine.
Filling Components for Tangy Perfection
Two cups granulated sugar balances the tartness in this lemon bars filling recipe. Four large eggs add richness and help set the structure. Fresh juice from about four lemons delivers zing that bottled can’t match.
Zest from those same lemons packs essential oils for aroma. The 1/3 cup cornstarch and 1/4 cup flour prevent runniness. Sift them in to avoid lumps that ruin the texture.
Room-temp eggs whisk smoother, emulsifying everything. This combo yields a vibrant, sturdy filling. Shelf life stays great in the fridge, too.
Lemon Zest vs Juice Impact
Zest carries the fragrant oils for that burst of lemon perfume. Juice provides acidity to activate the thickeners. Four medium lemons give exactly 1/2 cup juice plus plenty of zest.
Pick peak-season ones, firm and heavy. Therefore, your classic lemon bars taste alive and fresh. Grate only the yellow rind to skip bitterness.
Science of Cornstarch in Lemon Bars
Cornstarch granules swell in the oven’s heat, forming a gel that locks in moisture. Flour reinforces it against cracks. Lemon’s low pH aids coagulation for a creamy set.
At 350°F, everything activates without overcooking. Pour on the hot crust, and thickening starts immediately. This beats runny custard or meringue-topped versions hands down.
Watch the center go from jiggly to firm in 20-25 minutes. Classic lemon bars emerge with perfect texture. Science makes it simple and reliable.
Heat Activation Breakdown
Phase 1: Hot crust heats the pour, kickstarting starch swelling. Phase 2: Bake until edges puff and center jiggles lightly. Use a thermometer, aiming for 170°F in the middle.
Don’t skip this; it ensures no cracks or sogginess. Cool fully before chilling. Your bars set flawlessly.
Essential Tools for Lemon Bars Success
Grab an 8×8 metal pan for even heating and crisp crust edges. Glass takes too long and risks sogginess. Parchment with overhang makes lifting a breeze.
A stand mixer or sturdy whisk handles the filling lumps. Microplane zester gets fine zest fast. Budget whisk works fine if you sift well.
Line the pan precisely for no leaks. These tools guarantee pro results. No fancy gear needed.
Pan and Parchment Precision
Metal pans conduct heat fast for golden bottoms. Cut parchment to fit with 2-inch overhangs on two sides. Fold corners neatly to hug the pan.
This prevents sticking and messy removal. Therefore, your classic lemon bars lift cleanly every time.
Step-by-Step: Building Classic Lemon Bars
Phase 1: Preheating and Pan Prep
Preheat to 350°F with the rack in the center. Line your 8×8 metal pan with parchment overhangs. This setup ensures even baking and easy removal.
Press lightly to secure. You’re set for success.
Phase 2: Pressing Golden Crust
Beat softened butter and powdered sugar until creamy, 2 minutes. Mix in flour and salt to form dough. Press evenly into the pan, about 1/4-inch thick.
Bake 20 minutes until lightly golden and fragrant. Let it cool 5 minutes; the heat jumpstarts the filling. Even pressure avoids dense spots.
Phase 3: Whisking Lump-Free Filling
Whisk sugar, eggs, juice, and zest until smooth. Sift in cornstarch and flour, then whisk vigorously 1 minute until dissolved. No lumps means perfect set.
Pour immediately over hot crust. Bubbles may form; that’s normal.
Phase 4: Baking and Chilling Set
Bake 20-25 minutes until edges puff and center jiggles slightly. Cool to room temp, then chill 2 hours minimum. This firms everything for clean cuts.
Lift out, slice, and dust with powdered sugar. Store chilled.
Avoiding Lemon Bars Pitfalls
Underbaking leaves runny filling; overbaking toughens edges. Always chill fully before cutting, or slices smear. Bottled juice flattens flavor, so use fresh.
Skip sifting, and lumps persist. However, vigorous whisking after fixes most issues. Pro tip: If edges brown too fast, tent with foil.
These fixes tie back to the science of thickening. Your classic lemon bars turn out perfect.
Runny Filling Rescue Tactics
If still soft after chilling, fridge it 1 more hour or re-bake 5 minutes at 325°F. Double-check cornstarch measure; too little causes weep. Extra chill absorbs moisture.
Don’t panic; it firms up reliably. Clean slices await.
Flavor Twists on Classic Lemon Bars
Swap lemon for lime for sharper tartness. Add finely chopped basil to the zest for subtle herb notes. Try coconut flour in the crust for tropical vibe.
Berry puree swirled in the filling adds pops of color. For vegan, use egg replacer like aquafaba. Keep the thickener ratio for set.
These tweaks honor the classic lemon bars core. Experiment confidently.
Citrus and Herb Variations
Lime juice needs the same amount; it sets identically. Infuse zest with 1 tsp dried lavender for floral hint. Scale zest up slightly for bolder punch.
Taste batter before pouring. Fresh twists shine.
Pairing Classic Lemon Bars
Serve with hot herbal tea to cut the richness. Fresh raspberries add juicy contrast. A dollop of whipped cream softens the tang.
For a perfect pairing, try our Cinnamon Sugar Date Bars with Gooey Filling.
Iced mint water refreshes alongside. Perfect for picnics, tea parties, or dessert platters. Textures play off each other beautifully.
Chill bars first for best pairing. Guests rave every time.
Storage and Make-Ahead for Lemon Bars
Store in an airtight container in the fridge up to 5 days. They stay firm and flavorful. For freezing, wrap tightly in plastic then foil; good for 3 months.
Thaw overnight in fridge to keep crust crisp. Double the recipe for 9×13 pan; bake times match. Great for gifting in tins.
Make crust ahead and freeze par-baked. Filling mixes quick when needed.
Lemon Bars Troubleshooting Guide
How do I store classic lemon bars and do they freeze well?
Keep them in an airtight container in the fridge for up to 5 days; the chill maintains the perfect set. They freeze beautifully for 3 months, wrapped first in plastic wrap then foil to prevent drying. Thaw in the fridge overnight, and dust with fresh powdered sugar before serving. Avoid room-temp storage over 2 hours to prevent softening.
Why is my lemon bars filling runny and how do I fix it?
Runny filling usually means underbaking or insufficient thickener; the center needs to jiggle lightly but set fully after chilling. Fix by chilling extra 1-2 hours or rebaking at 325°F for 5-7 minutes if still soft. Always measure cornstarch precisely and whisk lumps out, as cornstarch gelatinizes to trap moisture reliably at 350°F.
Can I substitute ingredients in classic lemon bars?
Yes, use lime juice or orange for citrus swaps at the same 1/2 cup volume; adjust zest accordingly for aroma. No fresh lemons? Mix bottled juice with extra zest from dried peels. For gluten-free, swap both flours with 1:1 GF blend, but add 1 tsp xanthan gum for structure. Eggs can become flax eggs (4 tbsp flax + 12 tbsp water) for vegan, keeping thickeners the same.
Why is my crust soggy in lemon bars?
Sogginess happens if you pour filling on a fully cooled crust; the residual heat jumpstarts thickening to seal it. Always bake crust to light golden, cool just 5 minutes, then pour. Parchment prevents bottom moisture buildup too. If it happens, chill longer to firm up, but prevention is key.
How do I get clean slices on classic lemon bars?
Chill fully for 2+ hours so the cornstarch sets solid; warm bars smear easily. Use a sharp, hot knife wiped between cuts for sharp edges. Dip in hot water, dry, and slice slowly. Powdered sugar dusting post-cut hides minor imperfections and adds crunch.
Why did cracks form on my lemon bars?
Cracks come from overbaking, which shrinks the filling as it cools. Pull at 20-25 minutes when edges puff but center jiggles. Cooling slowly at room temp before fridge helps too. If cracked, cover with extra powdered sugar; flavor stays perfect. Oven hotspot? Rotate pan midway.
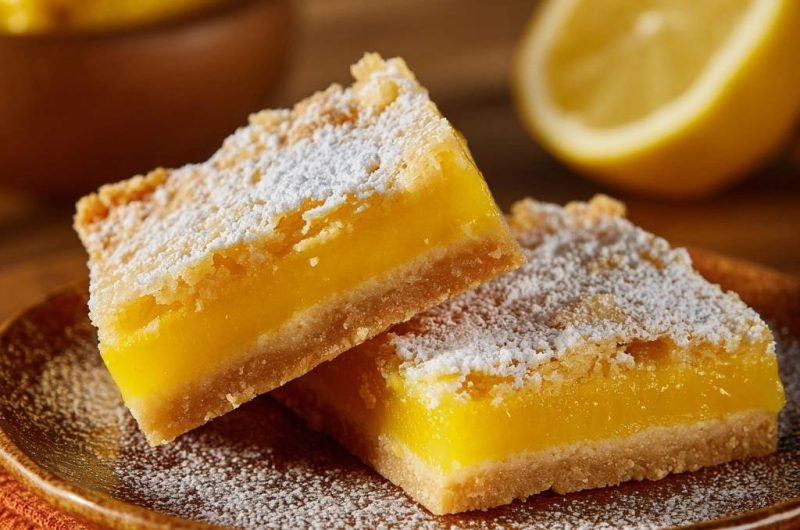
Lemon Bars
Course: DessertCuisine: AmericanDifficulty: medium16
bars20
minutes45
minutes280
kcal180
MinutesSick of lemon bars that collapse into a gooey mess when sliced? This recipe delivers perfect, sliceable bars every time with our simple cornstarch-thickened filling that sets like a dream without any rubbery texture.
Ingredients
Crust:
1 cup unsalted butter, softened
1/2 cup powdered sugar
2 cups all-purpose flour
1/4 teaspoon salt
Filling:
2 cups granulated sugar
4 large eggs
1/2 cup fresh lemon juice (about 4 lemons)
Zest of 4 lemons
1/3 cup cornstarch
1/4 cup all-purpose flour
Powdered sugar for dusting
Directions
- Preheat oven to 350 degrees F. Line an 8×8-inch baking pan with parchment paper, leaving overhang for easy removal.
- For the crust: Beat butter and powdered sugar until creamy. Mix in flour and salt until dough forms. Press evenly into prepared pan. Bake 20 minutes until lightly golden.
- For the filling (the never-runny secret): Whisk sugar, eggs, lemon juice, and zest until smooth. Sift in cornstarch and flour, whisk vigorously until fully dissolved and no lumps remain, this locks in the perfect set without boiling over or staying liquid. Pour over hot crust.
- Bake 20 to 25 minutes until filling is set in center but slightly jiggly, edges puffed. Cool completely in pan, then chill 2 hours to firm up fully.
- Lift out using parchment, cut into bars, dust with powdered sugar. Store in fridge up to 5 days. Slice clean every time!
Notes
- Use fresh lemons for best flavor. Chill for 2 hours to ensure clean slices. Store in fridge up to 5 days.