Mastering Slow-Simmered White Chicken Chili: The Secret to a Thick, Golden Base
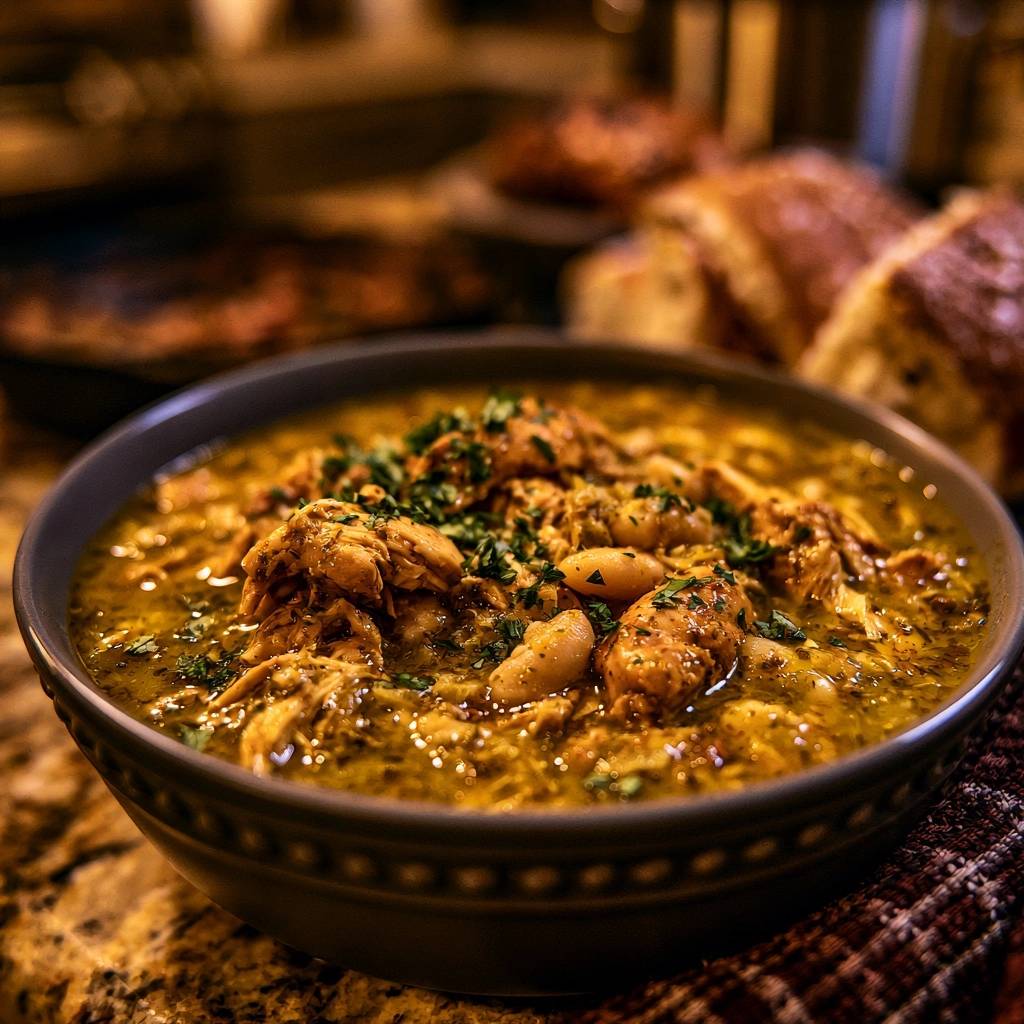
Most home cooks have experienced the disappointment of a white chicken chili that looks more like a pale, watery soup than a hearty meal. You expect a rich, clinging sauce, but you end up with a thin broth where the ingredients just sink to the bottom. This recipe fixes that “watery soup” epidemic by focusing on texture and color development from the very first step.
We’re moving away from the bland, grayish versions often found in slow cookers. Instead, this method produces a vibrant, golden-green hue and a velvety mouthfeel that feels truly indulgent. By spending just 50 minutes on the stove, you’ll achieve a depth of flavor that usually requires four hours of simmering, thanks to a few professional kitchen secrets.
The real magic happens when we stop treating chili like a soup and start treating it like a braise. The secret is the “bean-mash” thickener, which creates a natural emulsion without the need for heavy creams or flour. This ensures every shred of chicken is coated in a savory, spice-laden gravy that stays thick even after you ladle it into your bowl.
The Foundation: Why Thighs and Fond Matter
If you want juicy, tender meat, you have to choose boneless skinless chicken thighs over breasts. Thighs contain more connective tissue and a slightly higher fat content, which means they won’t dry out during the simmer. As the chicken cooks, that connective tissue breaks down, adding a silky body to the liquid that chicken breasts simply can’t provide.
When you sear the chicken, you’re looking for the Maillard reaction. This is the chemical reaction between amino acids and reducing sugars that gives browned food its distinctive flavor. Don’t rush this part! You want a deep, dark crust to form on the meat because that crust eventually dissolves into the broth, creating a complex flavor profile.
As the chicken sears, it leaves behind “fond”—those little brown bits stuck to the bottom of the pot. This fond is a concentrated goldmine of flavor. It acts as the primary color agent for your chili, transforming the broth from a translucent yellow to a rich, opaque gold. Without this step, your chili will lack the savory “oomph” that defines a great meal.
Selecting Your Aromatics and Spices
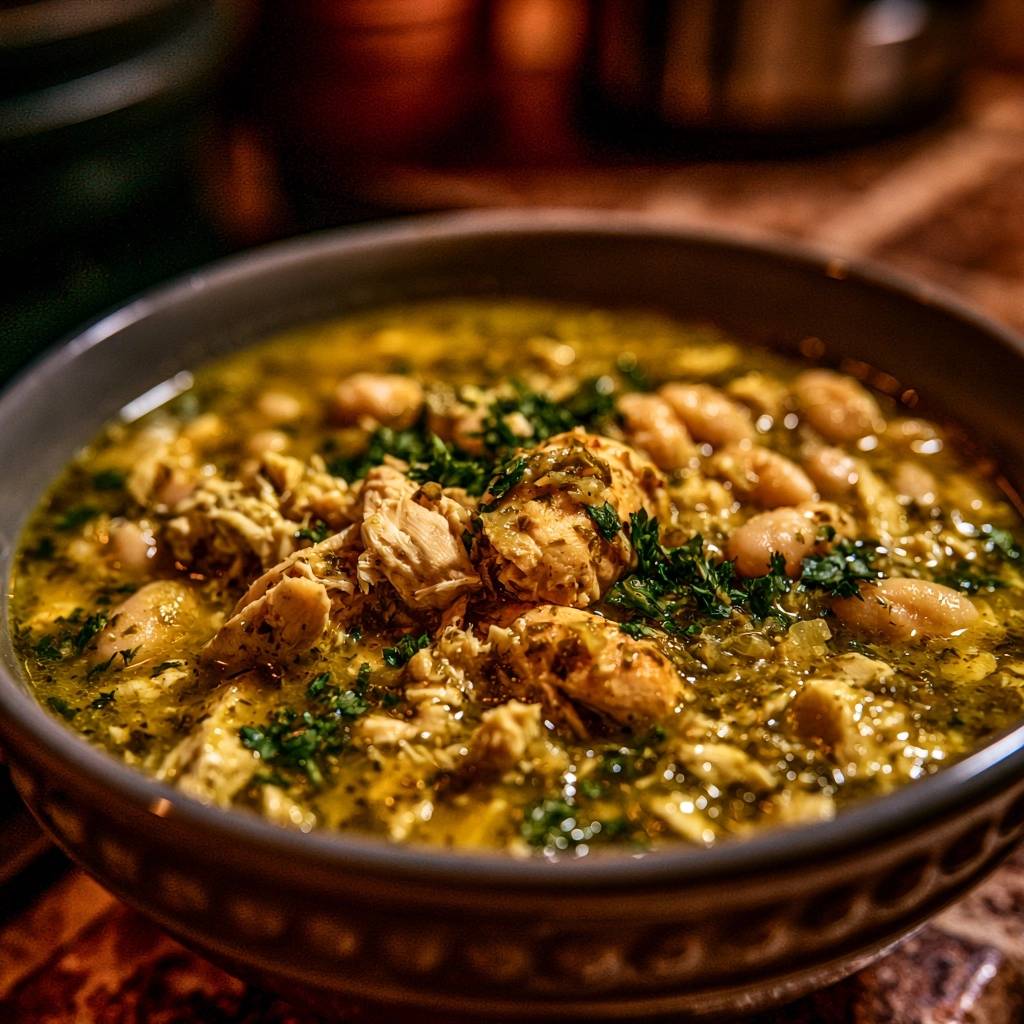
The spice profile here is carefully balanced to provide warmth without overwhelming the palate. While smoked paprika isn’t always traditional in white chili, it’s essential for achieving that beautiful golden color. It adds a subtle earthiness that bridges the gap between the bright green chiles and the savory chicken broth.
Cumin and coriander provide the base notes, offering a nutty, citrusy aroma that fills the kitchen as soon as they hit the hot oil. We use a touch of cayenne pepper for a back-of-the-throat heat that lingers without burning. You can always adjust the cayenne, but don’t skip it entirely, as it cuts through the richness of the beans.
Always reach for fresh garlic cloves rather than the pre-minced stuff in a jar. Fresh garlic has a much sharper, more pungent aromatic profile that stands up to the long simmering process. When you mince it yourself, the oils are fresh, providing a punchy flavor that jarred versions lose during processing.
Essential Components for a Hearty Texture
Cannellini beans are the MVP of this dish because of their incredibly creamy interior and thin skins. They hold their shape well during cooking but break down easily when mashed, making them the perfect natural thickener. If you can’t find cannellini, Great Northern beans are a fantastic substitute with a similar texture.
Quality broth is the backbone of the sauce. I recommend using a low-sodium chicken broth so you have total control over the salt levels. As the chili simmers and reduces, the flavors concentrate; if you start with a high-sodium broth, the final result might end up way too salty. You want to be the one in charge of the seasoning.
Diced green chiles provide the acidic backbone that balances the earthy spices. They offer a mild tang and a pop of color that keeps the dish feeling fresh. Even if you don’t like spicy food, these mild chiles are crucial for the overall flavor structure, providing a necessary brightness to the heavy beans and meat.
The Role of Sourdough and Fresh Herbs
A thick, gravy-like chili demands a sturdy vessel for dipping, and nothing beats crusty sourdough bread. The natural acidity of the sourdough fermentation process cuts right through the creamy bean base. Toast the bread until it’s golden and firm so it can soak up the sauce without falling apart.
Fresh cilantro is used in two distinct stages to maximize its impact. We stir half of it into the pot during the final simmer to infuse the sauce with its herbal, citrusy notes. The heat mellows the cilantro, allowing it to blend into the background of the chili’s flavor profile.
The remaining cilantro is saved for the very end as a garnish. This provides a bright, fresh contrast to the deep, slow-cooked flavors of the chili. That hit of raw herb right before you take a bite wakes up the palate and makes the whole dish feel lighter and more vibrant.
Step-by-Step: Building the Concentrated Flavor Base
Start by heating your olive oil in a heavy-bottomed Dutch oven until it’s shimmering. When you add the seasoned chicken thighs, leave them alone for at least five minutes. You’ll know they’re ready to flip when they release naturally from the bottom of the pot; if they stick, they haven’t formed that flavorful crust yet.
Once the chicken is removed, the onions go in to pick up the leftover fat. Cook them until the edges start to turn a light caramel brown. This is the moment to add your spices. By “toasting” the cumin, oregano, and coriander in the hot oil for 60 seconds, you unlock fat-soluble flavor compounds that boiling water just can’t reach.
You’ll notice the aroma change from raw and sharp to warm and toasted almost instantly. This step is vital for a professional-tasting chili. If you just dump the spices into the broth later, they’ll taste “dusty” rather than integrated. The heat prepares them to fully meld with the liquid once the broth is added.
The Deglazing Technique for Deep Color
Deglazing is the process of adding liquid to a hot pan to loosen the fond. Pour in your chicken broth and immediately start scraping the bottom of the pot with a wooden spoon. You’ll see the liquid transform from a clear, pale broth into a rich, opaque gold as those browned proteins dissolve.
This isn’t just about cleaning the pan; it’s about capturing every bit of flavor you created during the searing process. The green chiles go in now, adding their juices to the mix. The combination of the browned chicken bits and the green chiles creates that signature deep golden-green hue that looks so appetizing in the bowl.
Make sure you’re thorough with your scraping. Those dark spots on the bottom of the pot are where the most intense savory flavors live. Once the bottom of the pot feels smooth under your spoon, you’ve successfully integrated the fond into your flavor base, setting the stage for the beans.
The Bean-Mash Method: Solving the Watery Chili Problem
To get that restaurant-quality thickness without using flour or cornstarch, we use the bean-mash method. Take one full can of your beans and blend them with a half-cup of broth until you have a smooth, thick paste. This paste acts as a natural emulsifier, binding the liquid and fats together into a cohesive sauce.
If you don’t have a blender, don’t worry! You can achieve the same result by mashing the beans thoroughly with a fork in a small bowl. It might take a little more elbow grease, but the goal is to release the starches inside the beans. These starches are what give the chili its velvety, rib-sticking consistency.
Stir this bean paste back into the pot before adding the whole beans and chicken. As the chili simmers, the starch molecules swell and trap the liquid, preventing it from separating. This results in a chili that stays thick and creamy even as it cools, rather than turning back into a thin soup.
Simmering and Shredding for Maximum Surface Area
We simmer the chicken thighs whole to keep them as moist as possible. After about 30 minutes, the meat will be tender enough to fall apart. Remove the thighs to a cutting board and use two forks to shred them into large, chunky pieces. Shredding creates more surface area than cubing, allowing the meat to soak up the sauce.
Once the shredded meat goes back into the pot, leave the lid off for the final ten minutes of simmering. This “uncovered simmer” allows a small amount of moisture to evaporate, further concentrating the flavors. It also gives the starches from the bean mash time to fully set into a thick, gravy-like consistency.
Watch the pot closely during these last few minutes. You’ll see the liquid start to bubble more slowly as it thickens. Give it a stir every now and then to make sure nothing sticks to the bottom. By the time you’re ready to serve, the chili should be thick enough to stand a spoon in.
Troubleshooting Your White Chicken Chili
If you find your chili is a bit too salty, don’t panic. You can add a splash of fresh lime juice at the end; the acidity helps neutralize the perception of salt. Alternatively, adding another half-can of unseasoned beans can help absorb some of the excess saltiness without thinning out the texture too much.
If the chili still feels a bit thin for your liking, simply extend the uncovered simmering time. Every five minutes of reduction will significantly increase the thickness. You can also mash a few more of the whole beans directly against the side of the pot with your spoon to release extra starch on the fly.
For those who find the heat a bit too intense, dairy is your best friend. Stirring in a dollop of Greek yogurt or sour cream right before serving will mellow out the cayenne and green chiles. The fats in the dairy bind to the capsaicin, providing a cooling effect that balances the spice beautifully.
Flavor Variations and Ingredient Swaps
If you want a “Fire-Roasted” version, try swapping the canned green chiles for fresh poblanos that you’ve charred over a gas flame. Peel off the burnt skin, dice the flesh, and add them to the pot. This adds a deep, smoky complexity that pairs perfectly with the shredded chicken.
For a “Dairy-Rich” variation, stir in a block of room-temperature cream cheese during the last five minutes of cooking. Whisk it until it’s completely melted and smooth. This creates an incredibly decadent, white-sauce style chili that is a huge hit at winter gatherings and potlucks.
You can also make a vegetarian-friendly version by omitting the chicken and using extra cans of beans. Use a high-quality vegetable stock and be sure to follow the bean-mash technique. The lack of meat won’t be an issue because the thick, starchy base provides plenty of satisfaction and heartiness.
Make-Ahead Strategy and Storage Logistics
Chili is famous for tasting better the next day. As it sits in the fridge, the spices have more time to penetrate the beans and chicken, and the starches fully hydrate, leading to an even thicker texture. If you’re cooking for a crowd, making it 24 hours in advance is a pro move.
To store leftovers, let the chili cool to room temperature before transferring it to airtight containers. It will stay fresh in the refrigerator for up to four days. When reheating, you might need to add a tiny splash of water or broth, as the beans will continue to soak up liquid while sitting.
This chili freezes beautifully for up to three months. I recommend using heavy-duty freezer bags and laying them flat to save space. To reheat, let the bag thaw in the fridge overnight, then warm it gently on the stove. The beans might get slightly softer after freezing, but the flavor will remain top-notch.
Expert Tips for Professional Results
When you drain your beans, don’t rinse them too aggressively. The slight film of starch left on the beans actually helps with the thickening process. A quick rinse to remove the canning liquid is plenty; you want to keep as much of that natural bean starch as possible for the sauce.
Avoid the “Cold Pot” mistake. Your Dutch oven should be quite hot before you add the oil, and the oil should be shimmering before the chicken hits the pan. If the pot is too cool, the chicken will steam rather than sear, and you’ll miss out on that essential golden fond.
You can easily adjust the “Green Heat” by checking the labels on your canned chiles. Most grocery stores carry both “Mild” and “Hot” versions. If you want a real kick, use one can of each. This gives you the volume of the chiles with a more significant spicy punch.
Finally, give the chili a five-minute resting period off the heat before you serve it. This allows the temperature to stabilize and the starches to fully “lock in” the liquid. It might seem like a small detail, but it makes a huge difference in how the chili coats the back of your spoon.
What to Serve Alongside Your Chili
Beyond the mandatory sourdough, a crisp radish salad is a fantastic side dish. The peppery crunch of raw radishes provides a textural contrast to the soft beans and tender chicken. Toss the radishes with a little lime juice and salt for a simple, refreshing palate cleanser between bites.
If you want something a bit sweeter, a honey-sweetened cornbread is a classic pairing. The sweetness of the corn balances the earthy cumin and the heat from the cayenne. Just make sure to use a recipe that uses butter or oil rather than shortening to keep the dish authentic to these flavors.
Frequently Asked Questions
How do I store leftovers and does this freeze well?
Store your chili in an airtight container in the refrigerator for up to 4 days. It actually tastes better on day two! For long-term storage, this chili freezes exceptionally well for up to 3 months. Use freezer-safe bags and squeeze out the air to prevent freezer burn. Thaw in the refrigerator overnight before reheating on the stove over low heat.
Why is my white chicken chili so thin and how do I fix it?
Chili usually ends up thin if there isn’t enough starch to bind the liquid. The best fix is the bean-mash method: take a half-cup of the beans from the pot, mash them into a paste, and stir them back in. You can also simmer the chili uncovered for an extra 10-15 minutes to allow excess moisture to evaporate, which naturally thickens the sauce.
Can I use chicken breasts instead of thighs?
You can use breasts, but be careful not to overcook them. Breasts lack the fat and connective tissue of thighs, so they can become stringy and dry if simmered too long. If using breasts, reduce the initial simmer time to 20 minutes and shred them as soon as they are opaque throughout to maintain as much moisture as possible.
What can I use if I don’t have cannellini beans?
Great Northern beans are the best substitute as they have a similar size and creamy texture. Navy beans also work well, though they are slightly smaller and may cook a bit faster. In a pinch, you can even use chickpeas, though the texture will be much firmer and the “mash” won’t be quite as smooth.
Is there a way to make this creamier without adding dairy?
Yes! The bean-mash method already provides a lot of creaminess, but you can take it further by mashing two cans of beans instead of one. The extra starch will create a very thick, almost buttery consistency. You can also stir in a little bit of coconut milk for a silky finish that doesn’t taste like coconut once it’s mixed with the spices.
How can I make the chili less spicy for kids?
The heat in this recipe comes primarily from the cayenne pepper and the green chiles. To make a kid-friendly version, omit the cayenne pepper entirely and ensure you are using “Mild” canned green chiles. Serving the chili with a large dollop of sour cream or Greek yogurt will also help neutralize any lingering warmth for sensitive palates.
Slow-Simmered White Chicken Chili
Course: Main CourseCuisine: AmericanDifficulty: easy6
servings15
minutes50
minutes65
Minutes380
kcalAmerican
Ingredients
2 pounds boneless skinless chicken thighs
3 cans (15 ounces each) cannellini beans, drained and rinsed
3 cups low-sodium chicken broth (reduced from 1 quart for a thicker consistency)
2 cans (4 ounces each) diced green chiles
1 large yellow onion, finely diced
4 cloves garlic, minced
1 tablespoon ground cumin
1 teaspoon dried oregano
1/2 teaspoon coriander
1/2 teaspoon cayenne pepper
1/2 teaspoon smoked paprika (for the golden color)
Salt and black pepper to taste
3 tablespoons olive oil
1/2 cup fresh cilantro, finely chopped (for garnish and stirring in)
Crusty sourdough bread for serving
Directions
- Heat 2 tablespoons of olive oil in a large heavy-bottomed pot or Dutch oven over medium-high heat. Season chicken thighs generously with salt, pepper, and the smoked paprika. Sear the chicken until a deep golden-brown crust forms on both sides (about 5-6 minutes per side). Remove chicken and set aside.
- In the same pot, add the remaining tablespoon of oil and the onion. Cook until translucent and starting to brown at the edges, about 6 minutes. Add the garlic, cumin, oregano, coriander, and cayenne, stirring for 60 seconds until the spices are toasted and fragrant.
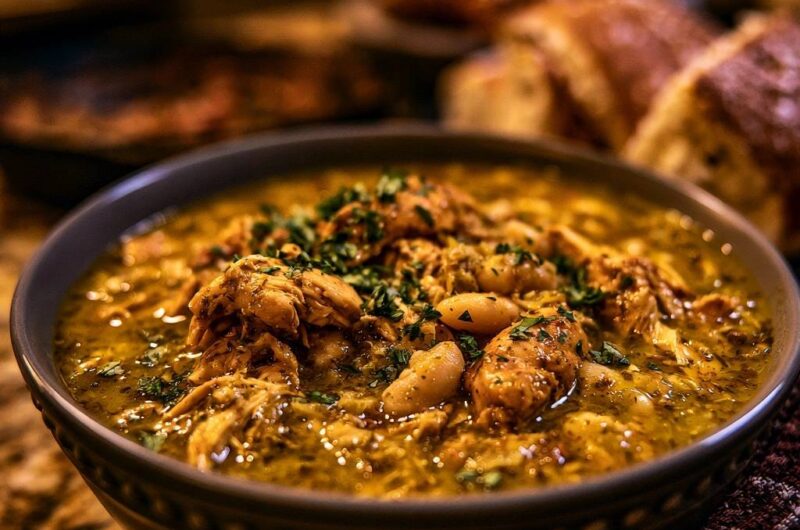
- Pour in the chicken broth and diced green chiles. Use a wooden spoon to scrape the bottom of the pot vigorously to release the “fond” (the browned chicken bits), which provides the dark, rich color seen in the image.
- To solve the watery chili problem: Take 1 full can (approx. 1.5 cups) of the drained beans and 1/2 cup of the broth and blend them together (or mash thoroughly with a fork) until a thick, smooth paste forms. Stir this paste back into the pot.
- Add the remaining whole beans and the seared chicken (and any resting juices) back into the pot. Bring to a boil, then reduce heat to low.
- Cover and simmer for 30-35 minutes. Remove the chicken thighs, shred them into large, chunky pieces with two forks, and stir the meat back into the chili. The chicken is done when it reaches 165°F (74°C) in the thickest part.
- Stir in half of the fresh cilantro. Let the chili simmer uncovered for an additional 5-10 minutes to allow the liquid to reduce and the starches to fully set into a thick gravy.
- Serve hot in deep bowls, topped with the remaining fresh cilantro and a side of toasted crusty bread for dipping.
Notes
- To ensure a thick consistency, the chicken broth is reduced to 3 cups and a portion of the beans is blended into a paste. Searing the chicken with smoked paprika provides the signature golden color.