Classic Magic Bars: Perfectly Structured, No Crumbles!
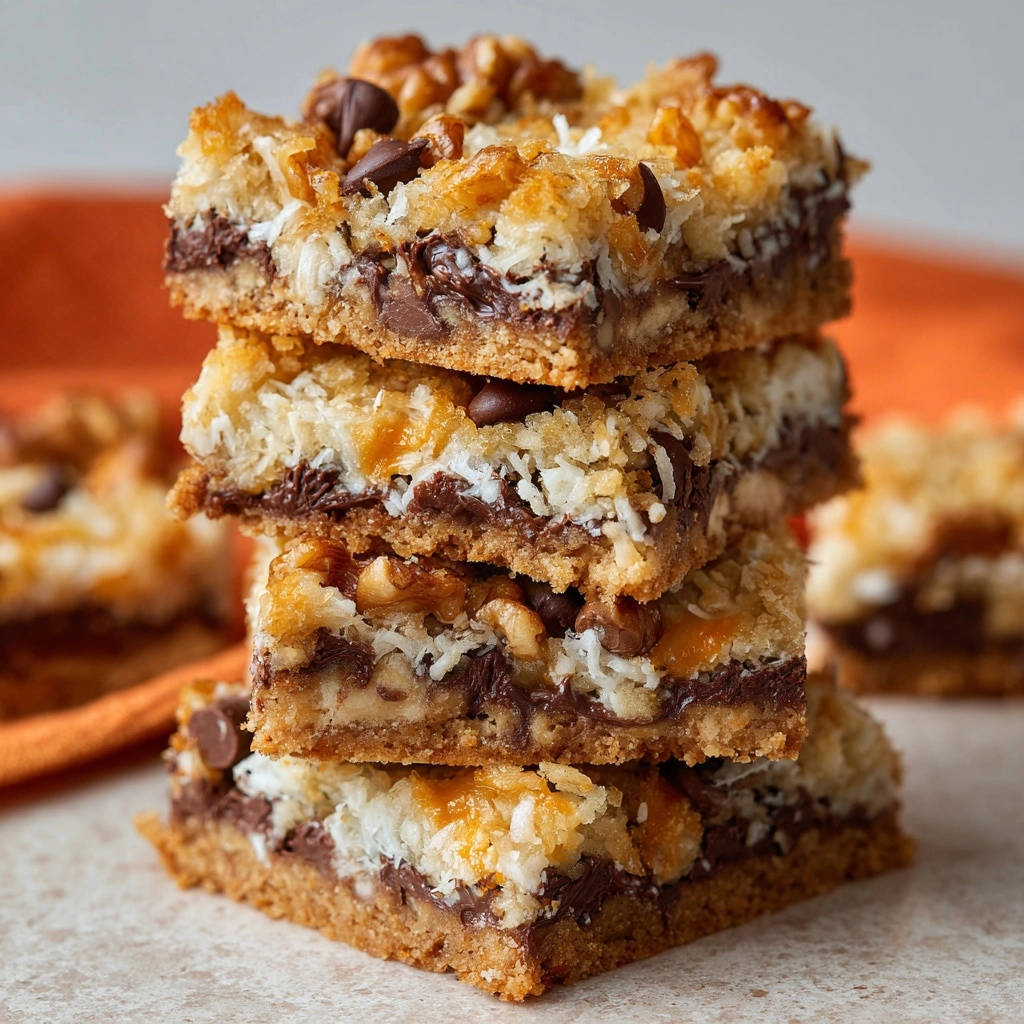
Who hasn’t dreamt of creating perfectly neat, impressive dessert squares, only to end up with a tray of sticky crumbles? I understand that common frustration, which is why I’m excited to share my foolproof method for making Classic Magic Bars that are beautifully structured and impeccably sliceable every single time.
This recipe transforms a beloved treat into an effortless baking triumph, delivering deliciously satisfying results without the usual fuss. Get ready to bake irresistible, no-fail Magic Bars that will impress everyone.
Why This Classic Magic Bars Recipe is Your New Go-To
This isn’t just another recipe for Magic Bars; it’s a meticulously crafted guide designed to solve common baking dilemmas and ensure spectacular results. From its reliable structure to its balanced sweetness, these dessert squares promise pure delight.
The Magic of Flawless Slices, Every Single Time
Achieving clean, intact slices of these gooey bars can feel like a baking myth, but this recipe makes it a reality. My method guarantees perfectly structured bars that hold their shape beautifully, eliminating the frustration of crumbly messes.
The key lies in understanding the critical role of cooling, transforming a soft bake into a firm, sliceable masterpiece with minimal effort.
Effortless Preparation for Stunning Results
Despite their impressive appearance, these Classic Magic Bars are wonderfully simple to prepare. This recipe minimizes complex techniques, allowing even novice bakers to create a professional-looking dessert with confidence.
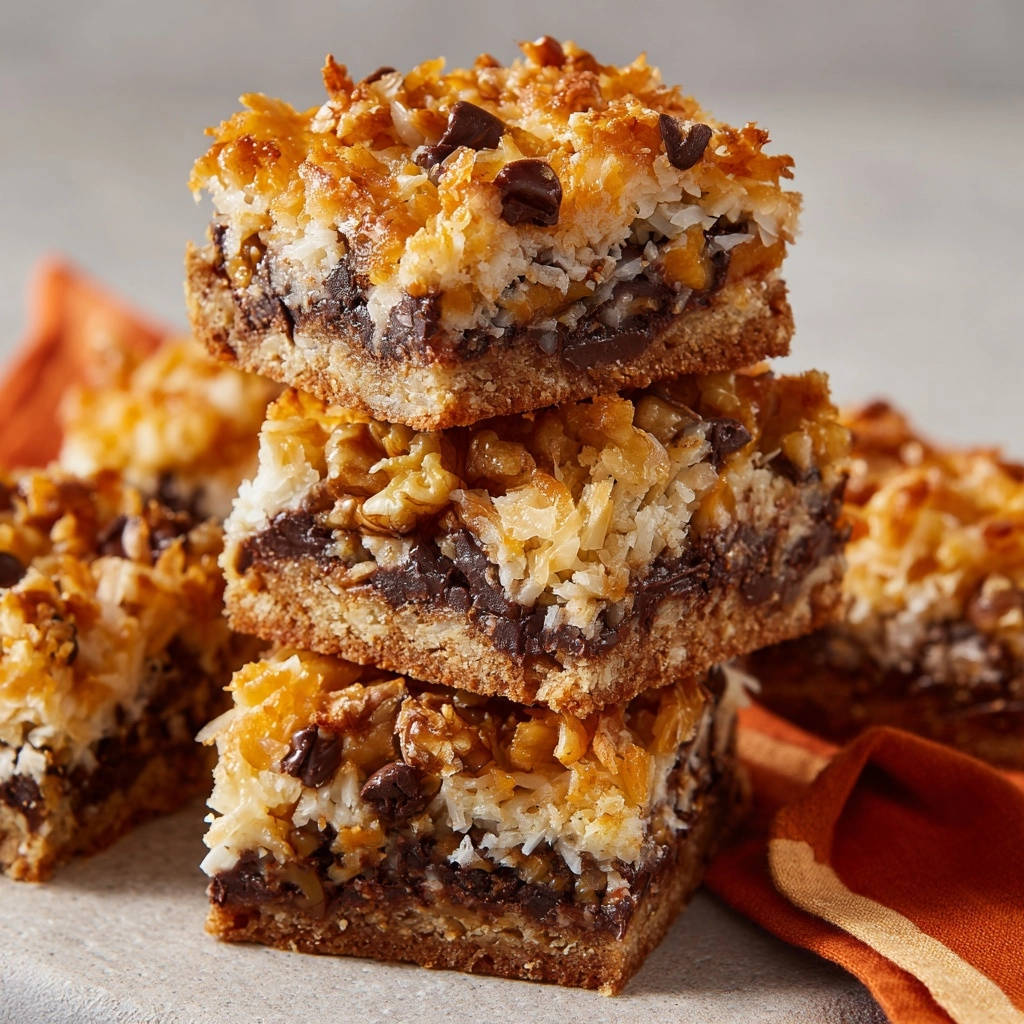
With clear steps and expert tips, you’ll find the process enjoyable and the outcome truly rewarding.
A Beloved Classic Reinvented for Modern Bakers
Magic Bars evoke a delightful sense of nostalgia, reminiscent of childhood treats and comforting flavors. This recipe honors that nostalgic appeal while providing a reliable, updated method for consistent success.
For those who love the layered texture of these bars, the same base technique works beautifully with these creamy lemon coconut bars.
It’s the ideal choice for those seeking to recreate a classic with a guarantee of perfection.
The Sweet Building Blocks: Ingredients for Your Magic Bars
Each ingredient in this recipe plays a vital role, contributing to the irresistible texture and flavor of your Magic Bars. Quality ingredients are the foundation of any exceptional dessert.
For the Irresistible Graham Cracker Crust
Graham Cracker Crumbs: These form the essential base, providing a distinct buttery, slightly spiced flavor. Opt for fine crumbs for a uniform and sturdy foundation.
Unsalted Butter, Melted: Butter binds the crumbs, adding richness and helping the crust achieve its perfect golden crispness. Unsalted butter allows you to control the overall saltiness.
Granulated Sugar (Optional): A touch of sugar enhances the crust’s sweetness and helps it caramelize slightly during baking. Feel free to adjust or omit based on your preference.
Alternatively, consider using digestive biscuits or ginger snap crumbs for a delightful flavor variation in your easy bake recipe.
The “Magic” Binder: Sweetened Condensed Milk
Sweetened Condensed Milk: This is the true “magic” ingredient, transforming from a liquid into a rich, chewy, caramel-like binder during baking. It holds all the layers together, ensuring the structural integrity of your seven-layer bars.
Its unique composition contributes significantly to the characteristic dense and gooey texture that defines these popular dessert squares.
Delectable Toppings: Chocolate, Coconut & Walnuts
Semi-Sweet Chocolate Chips: These melt into pockets of rich chocolate, offering a classic contrast to the sweetness of the condensed milk. High-quality chips ensure a superior flavor.
Shredded Sweetened Coconut: Coconut adds a delightful chewiness and tropical sweetness, toasting beautifully in the oven for an enhanced aroma and flavor.
Chopped Walnuts (or Pecans): Nuts provide a welcome crunch and earthy undertone, balancing the sweetness. Ensure they are freshly chopped for optimal flavor and texture in your condensed milk dessert.
Essential Tools for Your Magic Bar Mastery
Having the right kitchen tools makes the baking process smoother and ensures the best possible outcome for your Classic Magic Bars.
Baking Pan & Parchment Power
9×13 Inch Baking Pan: This standard size is perfect for yielding a generous batch of bars. A light-colored metal pan helps prevent over-browning of the crust.
Parchment Paper: Crucial for a hassle-free experience! Lining the pan with parchment, leaving an overhang on the sides, allows you to effortlessly lift the entire slab of bars out after cooling, ensuring perfectly neat edges.
Mixing Bowls & Utensils
Medium Bowl: Essential for combining your crust ingredients efficiently. A non-slip base can be helpful for stability.
Rubber Spatula or Spoon: For mixing and pressing the crust, ensuring an even and firm base. Your hands work just as well for pressing the crust firmly into place.
Crafting Perfection: Step-by-Step Classic Magic Bars Guide
Follow these detailed instructions to create the ultimate Classic Magic Bars, ensuring every layer is perfect and every slice holds its shape.
- Preheat and Prepare Your Pan:
Begin by preheating your oven to 350°F (175°C). This ensures your oven is at the correct temperature before you start baking.
Line a 9×13 inch baking pan with parchment paper, allowing a generous overhang on the long sides. This parchment paper overhang is a crucial step that will make lifting the cooled bars out of the pan incredibly easy and mess-free.
- Combine Crust Ingredients:
In a medium bowl, combine the graham cracker crumbs, melted unsalted butter, and the optional granulated sugar. Stir these ingredients thoroughly until the crumbs are evenly moistened.
A well-combined mixture is essential for a uniform and flavorful crust that will hold together beautifully.
- Press the Crust Firmly:
Transfer the graham cracker mixture to the prepared baking pan. Using the bottom of a glass, your fingers, or a flat spatula, press the mixture evenly and very firmly into the bottom of the pan.
The firmness of this base is critical; a compact crust prevents crumbling and provides a stable foundation for your delicious layers of these dessert squares.
- First Layer: Chocolate Chips:
Evenly sprinkle the semi-sweet chocolate chips over the firmly pressed graham cracker crust. Aim for full, consistent coverage to ensure chocolatey goodness in every bite.
- Second Layer: Shredded Coconut:
Next, distribute the shredded sweetened coconut uniformly over the chocolate chips. This layer adds a delightful texture and sweet tropical flavor.
- Third Layer: Chopped Walnuts:
Finally, top these layers with the chopped walnuts (or pecans). Spread them evenly to ensure a satisfying crunch throughout the bars.
- The “Magic” Drizzle:
Carefully pour the entire can of sweetened condensed milk evenly over the top of all the layered ingredients. Take your time to ensure the milk coats everything thoroughly.
This sweetened condensed milk is the “magic” binder that will caramelize and meld all the ingredients together during baking, creating the signature chewy texture of Classic Magic Bars.
- Bake Until Golden:
Place the pan in your preheated oven and bake for 25-30 minutes. You’ll know they are done when the edges are visibly golden brown and the coconut topping is lightly toasted to a beautiful golden hue.
The center of the bars should appear set but may still have a slight jiggle. This slight movement is perfectly normal and indicates they will firm up perfectly upon cooling.
- The Critical Cooling Period:
Once your Classic Magic Bars are out of the oven, resist the urge to cut them immediately! This is the absolute key to achieving perfectly structured, non-crumbly bars that slice cleanly.
Allow the bars to cool completely in the pan on a wire rack for at least 2 hours at room temperature. For even better firmness and the cleanest cuts, refrigerate them for an additional 1-2 hours until thoroughly chilled and firm.
This extended cooling time is crucial because it allows the sweetened condensed milk to fully set and bind all the layers into a cohesive unit. Rushing this step is the primary cause of crumbly, messy bars.
If you appreciate the firm texture from chilling, you might enjoy these coconut pecan chocolate magic bars with their crisp crust.
- Lift, Cut, and Serve:
Once your Magic Bars are completely cooled and firm, use the parchment paper overhang to gently lift the entire slab of bars out of the pan. Place the slab onto a clean cutting board.
Using a sharp, heavy-bladed knife, cut the bars into desired squares. For the absolute cleanest cuts, wipe your knife clean with a damp cloth between each slice to remove any sticky residue.
Building the Golden Crust Base
Layering Up the Irresistible Flavors
The Crucial Baking Phase
The Secret to Success: The Cooling & Slicing Ritual
Chef’s Secrets: Elevating Your Classic Magic Bars
Unlock even greater success and flavor with these expert tips, ensuring your Magic Bars are truly extraordinary.
The Power of Proper Cooling for Flawless Slices
Refrigeration isn’t just a suggestion; it’s a game-changer for these condensed milk treats. Chilling your bars for at least an hour in the fridge after they’ve cooled to room temperature sets the sweetened condensed milk completely, giving you neat, non-sticky slices every time.
For best results, cool them in the pan on a wire rack for 2 hours, then transfer to the refrigerator for another 1-2 hours. This two-stage cooling prevents them from becoming too hard while ensuring perfect binding.
Achieving the Perfect Golden Crust
To ensure your graham cracker crust is firm and evenly browned, press it down with consistent, firm pressure across the entire pan. A flat-bottomed glass works wonders for this.
Keep an eye on the crust during the initial baking phase, ensuring it reaches a light golden hue without becoming too dark or brittle. A well-compacted crust provides the best base for your seven-layer bars.
Customizing Your Topping Combinations
While the classic combination is unbeatable, feel free to unleash your creativity! Substitute semi-sweet chocolate chips with milk chocolate, dark chocolate, or even white chocolate for a different flavor profile.
Experiment with different nuts like chopped pecans, almonds, or pistachios. For extra indulgence, add butterscotch chips, toffee bits, mini pretzels for a salty crunch, or dried cranberries for a tart counterpoint.
Clean Cuts Every Time: A Sharp Knife Trick
The secret to beautifully defined squares is a sharp knife and a clean blade. After each cut, wipe your knife with a warm, damp cloth to remove any sticky residue from the condensed milk.
For an even smoother slice, you can briefly run your knife under hot water before each cut, drying it quickly before slicing. This helps melt through the gooey layers, preventing sticking.
Don’t Overbake: A Golden Rule
Overbaking can lead to dry, hard Magic Bars, losing their signature chewy texture. Look for golden brown edges and lightly toasted coconut, with the center appearing mostly set but still having a slight jiggle.
The bars will continue to set as they cool. Trust the jiggle; it’s a sign of a perfectly moist and chewy interior for your easy bake recipe.
Troubleshooting Your Magic Bars: Common Challenges Solved
Even expert bakers encounter challenges. Here are solutions to common Magic Bar mishaps.
Why Are My Bars Crumbly or Fall Apart?
The most common culprit for crumbly bars is insufficient cooling. The sweetened condensed milk needs ample time to set and solidify, acting as the binder for all the layers.
Ensure your graham cracker crust is pressed very firmly into the pan. A loose crust will not provide a stable foundation, contributing to crumbling.
My Bars Are Too Soft or Sticky
This usually indicates that the bars were either underbaked or, more commonly, not chilled long enough. Make sure the center of the bars looks set, and allow them to cool completely, ideally with a period in the refrigerator.
High humidity can sometimes contribute to stickiness. Storing your Classic Magic Bars in an airtight container in the refrigerator helps mitigate this.
The Toppings Sunk to the Bottom!
If your toppings sink, it’s often due to the sweetened condensed milk being poured too heavily or unevenly, causing the lighter ingredients to disperse. It can also happen if the toppings aren’t spread evenly or lightly pressed.
Ensure you sprinkle your toppings evenly and then pour the condensed milk in a thin, consistent stream over the entire surface, covering all the ingredients. A gentle press on the toppings after sprinkling can also help.
Beyond the Bake: Serving, Storing, & Gifting Magic Bars
Maximize the enjoyment and longevity of your delicious Classic Magic Bars with these practical tips.
Creative Ways to Serve Your Classic Magic Bars
These rich dessert squares are fantastic on their own, a perfect ending to any meal or a delightful afternoon treat. For an extra special presentation, serve them slightly warm with a scoop of vanilla bean ice cream.
What to Serve with Magic Bars
These structured magic bars have a rich, nutty base, so pair them with something lighter or fruity to balance the sweetness.
- The tart pomegranate and toasted nuts in this Creamy Pomegranate Nut Rice Pudding offer a cool, creamy contrast to the bars’ crunchy layers.
- For a soft, tender bite alongside the bars’ firm texture, try these Coconut Dream Muffins with their subtle tropical sweetness.
Garnish with a delicate chocolate drizzle, a sprinkle of flaky sea salt to enhance the flavors, or a dusting of confectioners’ sugar for elegance.
Storing Your Sweet Creations for Lasting Freshness
Store your Classic Magic Bars in an airtight container at room temperature for up to 3 days, or in the refrigerator for up to a week. Refrigeration will keep them firmer and extend their freshness.
Always place parchment paper between layers of bars to prevent them from sticking together. This is especially important for preserving the appearance of your no-crumble bars.
Make-Ahead Tips for Easy Entertaining
Magic Bars are an excellent make-ahead dessert, perfect for parties, potlucks, or holiday gatherings. Bake them a day or two in advance, cool completely, slice, and store in an airtight container in the refrigerator.
Bring them to room temperature for about 30 minutes before serving, or serve them chilled for a firmer bite. This ensures a fresh, delicious treat without last-minute stress.
Can You Freeze Magic Bars?
Yes, Classic Magic Bars freeze beautifully for longer storage! Once completely cooled and sliced, arrange them in a single layer on a baking sheet and freeze until firm (about 1-2 hours).
Transfer the frozen bars to an airtight freezer-safe container or bag, separating layers with parchment paper. They can be frozen for up to 3 months. Thaw them in the refrigerator overnight or at room temperature for a few hours before serving.
Your Burning Questions Answered: Classic Magic Bars FAQ
We’ve gathered answers to the most common questions about baking and enjoying these delightful dessert squares.
What Kind of Graham Crackers Are Best for the Crust?
Classic honey graham crackers are traditionally used for their distinct, comforting flavor. However, cinnamon graham crackers can add a warm spice note, or chocolate graham crackers can create an even richer crust for your Magic Bars.
Can I Use Different Nuts or No Nuts at All?
Absolutely! While walnuts and pecans are common, almonds, cashews, or even macadamia nuts make fantastic substitutes. For a nut-free version, simply omit them entirely, or replace them with an equal amount of seeds (like sunflower or pumpkin seeds) or pretzels for crunch.
Is Sweetened Condensed Milk Absolutely Necessary?
Yes, sweetened condensed milk is the irreplaceable core “magic” ingredient in Classic Magic Bars. It provides both the necessary sweetness and the crucial binding power that transforms the individual layers into a cohesive, chewy, and gooey bar. There isn’t a direct substitute that yields the same signature result.
How Do I Know When My Magic Bars Are Done Baking?
Look for the edges to be beautifully golden brown and the shredded coconut on top to be lightly toasted. The center of the bars should appear set, though a slight jiggle is normal and will firm up as they cool. Do not wait for the center to be completely firm in the oven.
Can I Make These Gluten-Free or Vegan?
Yes, you can adapt this recipe! For a gluten-free version, simply substitute gluten-free graham cracker crumbs for the regular ones. For a vegan version, use a plant-based butter substitute, a dairy-free sweetened condensed milk (available in most grocery stores), and ensure your chocolate chips are dairy-free.
What Other Topping Variations Can I Try?
Beyond the classic, the possibilities are endless! Experiment with butterscotch chips, white chocolate chips, peanut butter chips, M&M’s, crushed candy canes for holidays, or dried fruits like cranberries or cherries for different flavors and textures in your sweet treat recipe.
Ready to Create Your Own Classic Magic Bars Magic?
Now that you’re armed with all the secrets and tips, it’s time to bring these incredible Classic Magic Bars to life in your own kitchen. You’ll be amazed at how simple it is to achieve perfectly structured, no-crumble dessert squares that taste as good as they look.
Bake a batch, share the joy, and don’t forget to share your creations with us! We’d love to see your beautiful, flawless Magic Bars.
Magic Bars
Course: DessertCuisine: AmericanDifficulty: easy12
bars15
minutes30
minutes150
kcal45
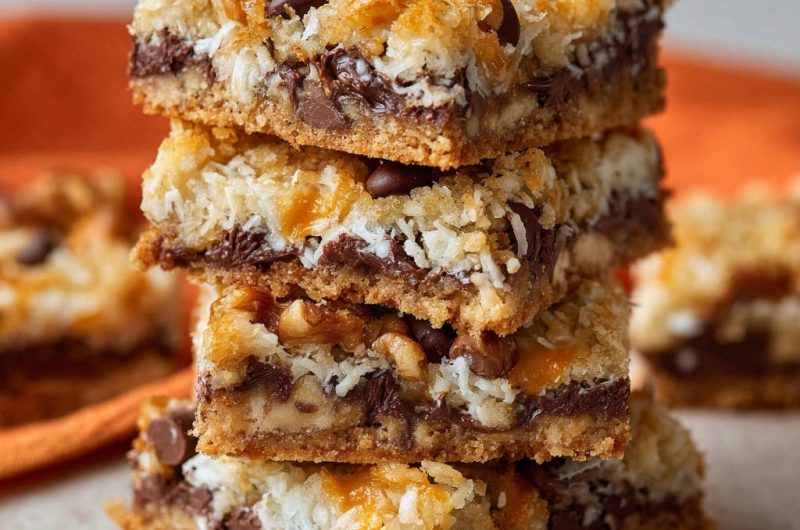
minutesSay goodbye to sticky crumbles and hello to perfectly structured Classic Magic Bars! This recipe reveals the secret to beautifully sliceable bars, featuring a graham cracker crust, sweet condensed milk, chocolate chips, coconut, and walnuts. Enjoy a foolproof way to bake this beloved treat.
Ingredients
1 and 1/2 cups graham cracker crumbs
1/2 cup unsalted butter, melted
1/4 cup granulated sugar (optional, for crust)
1 (14 ounce) can sweetened condensed milk
1 cup semi-sweet chocolate chips
1 cup shredded sweetened coconut
1 cup chopped walnuts (or pecans)
Directions
- Preheat oven to 350°F (175°C). Line a 9×13 inch baking pan with parchment paper, leaving an overhang on the sides for easy lifting.
- In a medium bowl, combine the graham cracker crumbs, melted butter, and optional sugar. Press this mixture evenly and firmly into the bottom of the prepared pan. This forms your solid crust base.
- Evenly sprinkle the chocolate chips over the crust.
- Next, sprinkle the shredded coconut over the chocolate chips.
- Then, top with the chopped walnuts.
- Pour the entire can of sweetened condensed milk evenly over the top of all the layers. Make sure it coats everything as this is the “magic” binder!
- Bake for 25-30 minutes, or until the edges are golden brown and the coconut topping is lightly toasted. The center should appear set, but will still be slightly jiggly.
- Here’s the key to no crumbles: Once out of the oven, resist the urge to cut immediately! Allow the bars to cool completely in the pan on a wire rack for at least 2 hours, or even better, refrigerate them for 1-2 hours until thoroughly chilled and firm. This extended cooling time is crucial for the sweetened condensed milk to fully set and bind all the layers, ensuring clean, intact slices that won’t fall apart when you cut them.
- Once completely cooled and firm, use the parchment paper overhang to lift the entire slab of bars out of the pan. Place on a cutting board and cut into squares using a sharp knife. For the cleanest cuts, wipe your knife clean between each slice.
Notes
- Extended cooling in the pan is crucial for the sweetened condensed milk to fully set, ensuring clean, intact slices.