Mastering Creamy Lemon Coconut Bars with a Crisp Crust
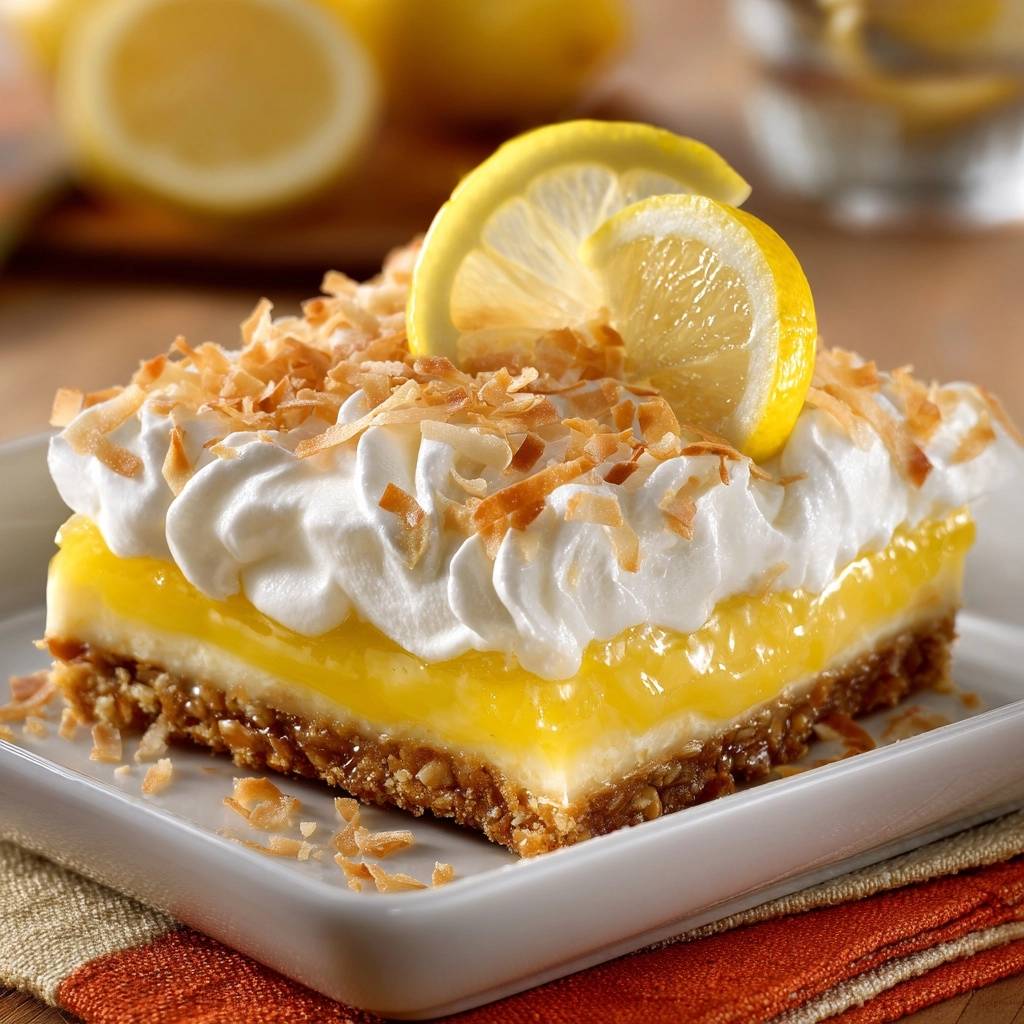
The secret to a world-class dessert bar lies in the dramatic contrast between a shattering, buttery base and a cloud-like topping. Most lemon bars suffer from a fatal flaw: the moisture from the citrus filling eventually seeps into the crust, turning a golden foundation into a soggy, unappealing mess. These Creamy Lemon Coconut Bars solve that structural nightmare by utilizing a sophisticated “Anti-Soggy Bottom” philosophy that protects every layer.
By introducing a double-barrier technique, we ensure the graham cracker base remains remarkably crisp even after hours in the refrigerator. We achieve this by par-baking the crust to set the sugars and then applying a thin, velvety cream cheese sealant. This barrier acts as a waterproof shield, allowing the bright, acidic lemon curd to sit perfectly on top without migrating downward. The result is a dessert that offers a clean snap followed by a silky, tropical finish.
If you’re a fan of citrusy desserts with a firm base, you’ll enjoy these no-bake peachy dream bars for a similar contrast of creamy filling and crisp crust.
The secret is the temperature control of your ingredients. If you spread the cream cheese layer onto a warm crust, the fats will melt and compromise the seal. Patience is your best friend here; letting that base cool completely is what separates a professional-grade pastry from a standard home bake. You’ll notice the toasted coconut in the crust adds a nutty complexity that balances the sharp citrus, creating a flavor profile that feels both nostalgic and elevated.
The Structural Integrity of the Graham Cracker Base
A sturdy base begins with the perfect ratio of graham cracker crumbs to melted butter. When you mix these together with a bit of sugar, you’re looking for a consistency that feels exactly like wet sand. If you squeeze a handful in your palm, it should hold its shape firmly without crumbling or leaking excess oil. This balance ensures the crust is dense enough to support the heavy layers above it.
We bake this base at 350°F because it’s the “sweet spot” for the Maillard reaction. This temperature allows the sugars in the graham crackers and the milk solids in the butter to brown deeply without the risk of burning. This par-baking step dehydrates the crumbs, creating a rigid structure that can withstand the weight of the lemon curd and whipped cream. Without this initial blast of heat, the crust would remain porous and vulnerable to moisture.
Why Toasted Coconut Belongs in the Crust
Toasting your coconut flakes before adding them to the crust isn’t just about flavor; it’s about chemistry. Raw coconut contains a high amount of moisture, which can soften your base from the inside out. By toasting them until they’re golden, you drive off that moisture and release the natural oils. These oils then coat the graham crumbs, providing an additional layer of fat that naturally repels the water found in the lemon curd.
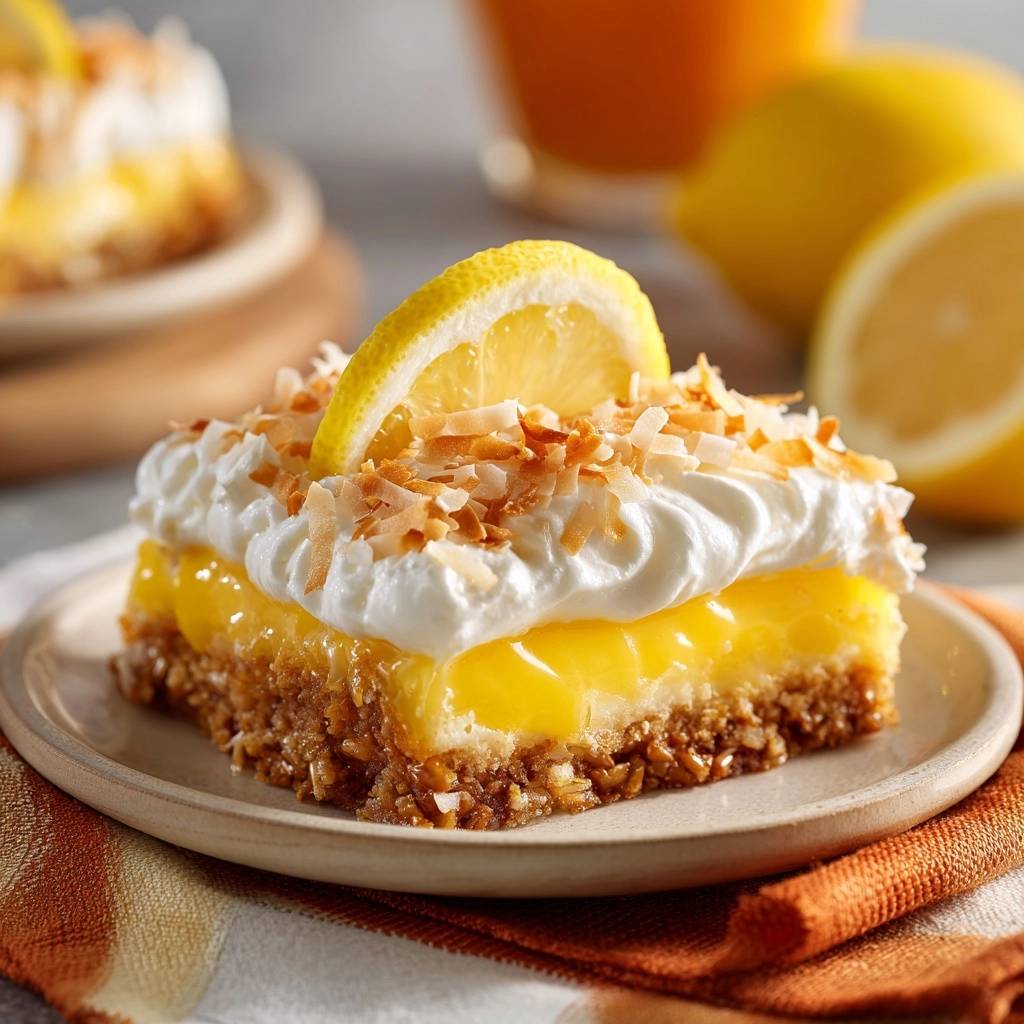
Beyond the science, the aromatic complexity of toasted coconut is unmatched. While raw coconut can sometimes feel one-note and overly sweet, toasted flakes offer a sophisticated nuttiness. This earthy depth provides a necessary anchor for the bright, high-toned acidity of the lemon. It transforms the bars from a simple sweet treat into a multi-dimensional dessert that keeps you coming back for another bite.
Essential Components for Creamy Lemon Coconut Bars
Quality ingredients are the backbone of this recipe, especially when it comes to the cream cheese barrier. You must use full-fat, brick-style cream cheese for the sealant layer. Low-fat or “whipped” versions contain higher water content and stabilizers that will thin out when they hit the sugar, failing to provide the waterproof protection your crust needs. The 8-ounce block provides the exact density required for a clean slice.
For the topping, ensure your heavy whipping cream is ice-cold straight from the fridge. Cold fat globules join together much more easily, which is how you achieve those stable, high-volume peaks. If the cream is even slightly room temperature, it will struggle to hold air, resulting in a flat, runny topping that won’t support the weight of the toasted coconut garnish.
Selecting or Crafting the Perfect Lemon Curd
The lemon curd is the star of the show, and its thickness is paramount. If you’re using store-bought curd, look for a premium brand that lists eggs and butter near the top of the ingredients. A high-quality curd should be thick enough to hold its shape on a spoon. If it’s too runny, the bars will lose their “sliceability,” and the filling will ooze out the sides when you try to serve them.
If you choose to make it from scratch, ensure you cook it until it coats the back of a wooden spoon thickly. The acidity level needs to be punchy enough to cut through the richness of the cream cheese and the heavy cream. A curd that is too sweet will get lost in the other layers, whereas a sharp, tart curd provides that signature citrus zing that defines a great lemon bar.
The Barrier Method: Preventing a Soggy Dessert
The “Waterproof Sealant” technique is the technical heart of this recipe. Think of the cream cheese layer as a primer on a wall. By beating the softened cheese with a touch of powdered sugar and heavy cream, you create a dense, fatty emulsion. When spread over the par-baked crust, it fills in every tiny crevice and pore in the graham cracker surface, making it impossible for the liquid in the curd to soak through.
This method is a game-changer for anyone who likes to prep desserts in advance. Usually, a lemon bar needs to be eaten within hours to enjoy a crisp crust. However, with this barrier in place, the crust stays remarkably crunchy for days. It’s a professional pastry chef trick that ensures the texture remains consistent from the first slice to the last.
The Science of the Cream Cheese Sealant
When you emulsify the powdered sugar into the cream cheese, the fine sugar particles help stabilize the fat. Adding a single tablespoon of heavy cream loosens the mixture just enough so it becomes spreadable without becoming liquid. It’s vital to spread this mixture all the way to the very edges of the pan. If you leave even a small gap, the lemon curd will find its way down the sides and pool under the crust.
This layer doesn’t just provide protection; it adds a cheesecake-like tang that rounds out the dessert. It acts as a flavor bridge between the salty-sweet crust and the tart lemon. Because the cream cheese is dense, it also provides a firm “grip” for the lemon curd, preventing the layers from sliding apart when you take a bite.
Step-by-Step: Constructing the Layers
Precision during assembly is what guarantees those beautiful, distinct layers. After your crust comes out of the oven, you must let it reach room temperature. If you’re in a hurry, you can pop it in the fridge for 20 minutes. Spreading the cream cheese on a hot crust will cause the fat to break, ruining the sealant and potentially making the crust greasy rather than crisp.
Once the barrier is down, stir your lemon curd gently to loosen it before spreading. You want it to be smooth so it glides over the cream cheese without tearing the layer beneath it. Use an offset spatula if you have one; the slight bend in the tool allows you to level the curd perfectly without digging your knuckles into the pan. This creates the flat horizon line needed for the final whipped topping.
Achieving High-Volume Whipped Topping
To get those professional, high-volume peaks, start whipping your cream on medium-low speed. This builds a foundation of small, stable bubbles. Once the cream starts to thicken, increase the speed to medium-high. Adding the powdered sugar and vanilla at the “soft peak” stage helps stabilize the proteins in the cream, ensuring the topping doesn’t weep or deflate over time.
For the best aesthetic, use a piping bag fitted with a large star tip to create mounds of cream across the surface. If you prefer a more rustic look, use a spatula to create deep swirls and “swooshes.” These textures aren’t just for looks; they provide little valleys for the toasted coconut and lemon slices to nestle into, ensuring every bite has a bit of every component.
Troubleshooting Common Layered Bar Issues
If you find your crust is crumbling when you try to slice it, you likely didn’t press the mixture firmly enough into the pan. You really have to pack it down—use the bottom of a flat measuring cup to get it tight and even. Also, ensure you aren’t skimping on the butter, as it acts as the “glue” that holds the crumbs together once it cools and solidifies.
If your lemon curd layer seems to be running or “bleeding” into the cream, it’s usually a temperature issue. The curd must be completely cold before you add the whipped topping. If the curd is even slightly warm, it will melt the air bubbles in the whipped cream, causing it to turn back into liquid. Always give the curd layer at least 30 minutes in the fridge to set before finishing the assembly.
Lastly, if your whipped cream looks grainy, you’ve over-beaten it. The moment the cream holds its shape and the whisk leaves clear tracks, stop. If it does go too far, you can sometimes save it by gently folding in a tablespoon of un-whipped liquid cream to smooth it back out. However, it’s always better to err on the side of caution and finish the last few seconds of whipping by hand.
The Importance of the Four-Hour Chill Cycle
The four-hour chill isn’t a suggestion; it’s a requirement for the thermodynamics of the dish. During this time, the saturated fats in the cream cheese and the butter in the crust fully solidify. This “sets” the dessert into a single, cohesive unit. If you cut into it too early, the layers will be soft, and you’ll end up with a messy pile rather than a clean square.
For those perfect, “Instagram-ready” slices, use a long, sharp knife dipped in hot water and wiped dry between every single cut. The heat from the blade slices through the cold fats like butter, preventing the whipped cream from dragging down into the lemon layer. Using the parchment paper overhang to lift the entire block out of the pan before cutting also gives you the leverage needed for straight, even lines.
Make-Ahead Strategies and Storage Logistics
These bars are the ultimate make-ahead dessert because they actually benefit from a long rest in the fridge. You can easily assemble them the night before your event. To keep the coconut garnish from losing its crunch, you might want to wait and sprinkle the final 1/4 cup of toasted flakes on just before serving, though the “sealant” layer does a great job of keeping the interior crisp.
Store any leftovers in an airtight container in the refrigerator for up to three days. Do not freeze these bars. The delicate emulsion of the lemon curd and the structure of the whipped cream will break during the thawing process, leading to a grainy texture and a watery mess. These are best enjoyed fresh and cold directly from the fridge.
Flavor Variations and Ingredient Swaps
Once you master the “Anti-Soggy” technique, you can play with the flavors. If you aren’t a fan of graham crackers, try using crushed shortbread cookies or even vanilla wafers for the base. The rules remain the same: par-bake the crust and use the cream cheese barrier. You can also swap the lemon curd for a lime or passionfruit curd for a more tropical, “tiki” inspired treat.
For a deeper coconut flavor, you can substitute the vanilla extract in the whipped topping with a half-teaspoon of coconut extract. Just be careful not to overdo it, as coconut extract is very potent and can quickly become soapy. A tiny pinch of sea salt in the crust can also help highlight the buttery notes and provide a sharp contrast to the sweet topping.
Frequently Asked Questions
Can I use low-fat cream cheese for the barrier?
It is highly recommended to stick with full-fat cream cheese. Low-fat versions have a much higher water content and often contain fillers that make the mixture too thin. This extra moisture can actually contribute to a soggy crust, defeating the purpose of the barrier layer. Full-fat cheese provides the necessary density to create a true waterproof seal.
How do I toast coconut flakes without burning them?
Coconut goes from perfectly golden to burnt in a matter of seconds. The safest way is in a dry skillet over medium-low heat. Stir them constantly for about 3-5 minutes. As soon as they smell fragrant and turn a light tan, remove them from the hot pan immediately onto a cold plate. If you leave them in the hot pan, the residual heat will continue to cook them until they’re scorched.
What is the best way to zest lemons for garnish?
A microplane is the best tool for a fine, aromatic zest that melts into the dish. However, for garnish, a channel knife or a vegetable peeler can create beautiful long curls. When zesting, only take the bright yellow outer layer. The white pith underneath is incredibly bitter and will ruin the delicate balance of the sweet and tart layers.
Why did my lemon curd layer bleed into the cream?
This usually happens if the lemon curd hasn’t had enough time to chill and set before the whipped cream is applied. If the curd is still loose or slightly warm, the weight and moisture of the cream will cause the two to mix. Ensure the curd layer is cold to the touch and has spent at least 30 minutes in the refrigerator before you start piping the topping.
How long will the crust stay crisp after assembly?
Thanks to the cream cheese barrier and the par-baking step, the crust will stay remarkably crisp for 24 to 48 hours. After the 48-hour mark, some moisture may eventually find its way through, but it will still be significantly firmer than a traditional lemon bar. For the absolute best texture, serve the bars within 24 hours of assembly.
Lemon Coconut Bars
Course: DessertCuisine: AmericanDifficulty: medium12
servings25
minutes15
minutes340
kcal240
MinutesA layered dessert bar featuring a buttery graham cracker and toasted coconut crust, a protective cream cheese layer to ensure crispness, tangy lemon curd, and a fluffy whipped cream topping.
Ingredients
1.5 cups graham cracker crumbs
3/4 cup toasted sweetened coconut flakes (divided: 1/2 cup for crust, 1/4 cup for topping)
6 tablespoons unsalted butter, melted
1/4 cup granulated sugar
8 ounces cream cheese, softened
1/2 cup powdered sugar
1 tablespoon heavy cream (for the cream cheese layer)
1.5 cups thick lemon curd (store-bought or homemade)
2 cups heavy whipping cream, cold
1/4 cup powdered sugar (for topping)
1 teaspoon vanilla extract
Fresh lemon slices for garnish
Directions
- Preheat your oven to 350°F (175°C). Line an 8×8 inch baking pan with parchment paper, ensuring the paper hangs over the sides for easy removal.
- In a medium bowl, combine graham cracker crumbs, 1/2 cup of the toasted coconut, melted butter, and granulated sugar. Stir until the mixture resembles wet sand.
- Press the mixture firmly and evenly into the bottom of the prepared pan. Bake for 10-12 minutes until the edges are golden brown. Remove from the oven and let the crust cool completely. This step is vital for the “Anti-Soggy” promise.
- In a small bowl, beat the softened cream cheese with 1/2 cup powdered sugar and 1 tablespoon of heavy cream until completely smooth and spreadable.
- Carefully spread the cream cheese mixture over the cooled crust in a thin, even layer. This acts as a waterproof barrier.
- Stir the lemon curd to loosen it, then spread it evenly over the cream cheese layer.
- In a chilled large bowl, whip the 2 cups of heavy cream, 1/4 cup powdered sugar, and vanilla extract until stiff peaks form.
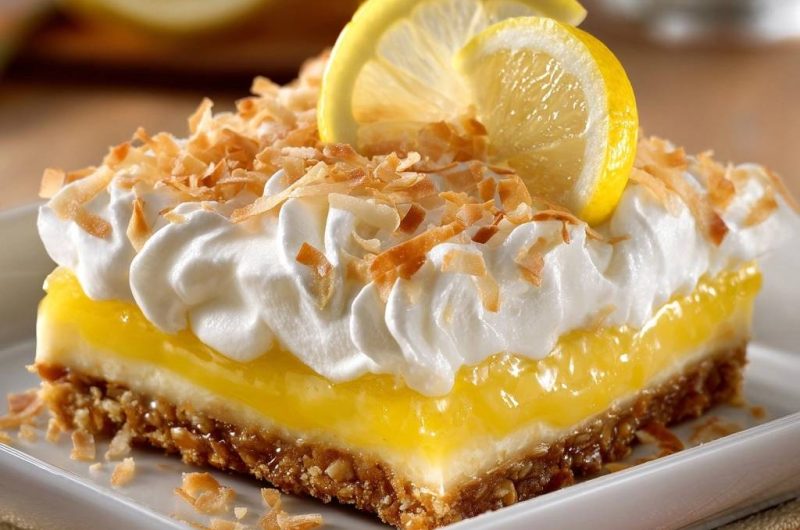
- Using a piping bag with a large star tip (or a spatula for a textured look), apply the whipped cream over the lemon layer to create the high-volume peaks seen in the image.
- Sprinkle the remaining 1/4 cup of toasted coconut flakes over the top and garnish with fresh lemon slices.
- Refrigerate for at least 4 hours (or overnight). This allows the layers to set firmly so they can be sliced into clean, distinct squares. Use the parchment overhang to lift the bars out of the pan before cutting with a warm, dry knife.
Notes
- The cream cheese layer acts as a waterproof barrier to keep the crust crisp. For clean slices, use a warm and dry knife after chilling for at least 4 hours.