Mastering Soft Ginger Molasses Cookies with the Perfect Crackle
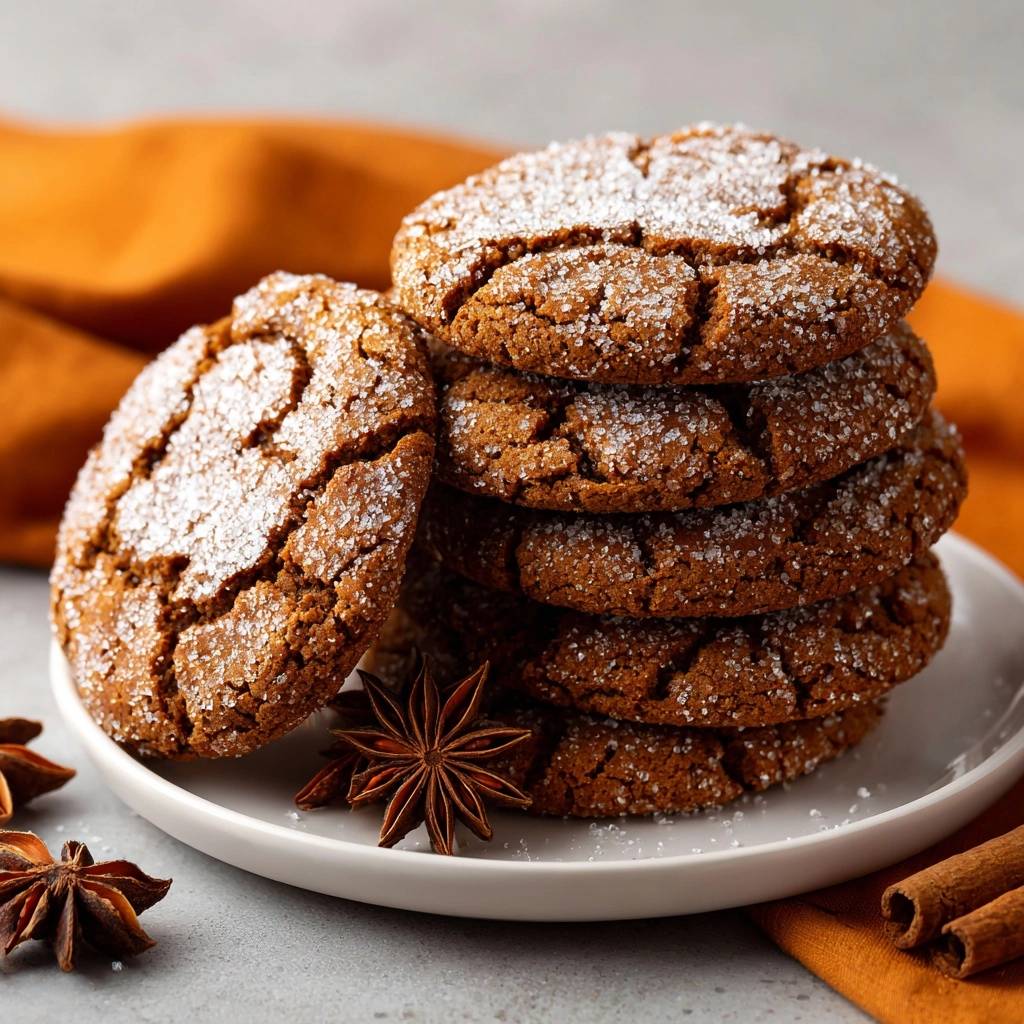
Imagine biting into a cookie that shatters with a crystalline sugar crunch before giving way to a dense, fudgy center. These aren’t those thin, snappy ginger rounds that break your teeth. Instead, these cookies offer a deep, mahogany chew that feels like a warm hug in every bite. The contrast between the sparkling exterior and the soft, spiced interior is what makes this recipe a standout in any kitchen.
Most bakers struggle with the “soggy bottom” syndrome, where the molasses and butter create a greasy mess that sticks to the pan. However, this recipe solves that frustration by using a specific chilling method and a carry-over cooking technique. By controlling the temperature of the fats, we ensure the base sets firmly while the top develops those iconic, deep-set cracks that look like they came straight from a professional bakery.
The secret to that bakery-style finish is all in the timing of the oven pull. You have to resist the urge to wait for the center to look “done.” If the cracks in the middle still look slightly wet when you pull the tray, you’ve hit the sweet spot. This ensures the residual heat from the baking sheet finishes the cooking process without drying out the moisture that makes these cookies so addictive.
The Science of Soft Ginger Molasses Cookies
Molasses and dark brown sugar are the heavy lifters in this recipe because they are naturally hygroscopic. This means they actually pull moisture from the air, which keeps your cookies bendy and soft for days after baking. While granulated sugar provides structure, the molasses adds a complex acidity that reacts beautifully with the baking soda.
When the baking soda hits that acidic molasses, it creates a chemical reaction that releases carbon dioxide. This gas causes the cookies to puff up rapidly in the hot oven. As the surface dries out from the heat, the interior continues to expand, forcing the top to burst open into those beautiful, rustic fissures. Without that specific acidic balance, your cookies would stay flat and smooth.
Furthermore, the Maillard reaction plays a huge role in the flavor profile here. The combination of high sugar content and the proteins in the egg creates a deep browning effect. This doesn’t just change the color to a rich amber; it creates a toasted, caramel-like flavor that pairs perfectly with the sharp bite of the ginger and cloves.
Why Chilling Prevents Greasy Cookie Bases
Chilling the dough is a non-negotiable step because it manages the thermodynamics of the butter. When you put cold dough into a hot oven, the outer edges set before the fat in the center has a chance to fully melt and spread. This prevents the dough from thinning out too much, which is the primary cause of oily, burnt edges and soggy bottoms.
Additionally, chilling allows the flour to fully hydrate. During the rest period, the starches in the flour break down and absorb the moisture from the egg and molasses. This results in a more uniform texture and a deeper flavor development. If you skip the chill, the fat will leak out of the flour structure, leaving you with a greasy puddle instead of a thick, chewy cookie.
Essential Components for Deep Spice Profiles
Quality ingredients make a massive difference when the flavor profile is this focused. You should always reach for unsulphured molasses rather than blackstrap. Unsulphured molasses is made from the first or second boiling of cane sugar, so it stays sweet and mellow. Blackstrap is too bitter and salty for this delicate balance and will overpower the spices.
Temperature matters just as much as the ingredients themselves. Make sure your egg is at room temperature before you start mixing. A cold egg will cause the creamed butter to seize up and break the emulsion. When the ingredients are all at the same temperature, they create a smooth, aerated base that holds the flour in a perfect suspension.
The Role of Dark Brown Sugar vs. Light
Dark brown sugar is essential for this recipe because it contains a higher concentration of molasses than light brown sugar. This extra moisture is what gives the cookie its “bendy” quality. It also contributes to the deep, dark color that makes the white sparkling sugar pop so vividly on the surface. If you use light brown sugar, the cookies will be paler and slightly crispier.
Selecting Spices: Ginger, Cloves, and Star Anise
Ground ginger provides the heat, while cloves add a woody, pungent depth that lingers on the palate. However, the real “chef’s secret” here is the optional pinch of ground star anise. It adds a sophisticated, licorice-like undertone that most people can’t quite identify but absolutely love. It elevates the cookie from a standard holiday treat to something that tastes truly gourmet.
Step-by-Step: Achieving the Iconic Crackle Top
Getting that professional look requires a bit of finesse during the mixing and shaping phases. You aren’t just throwing ingredients together; you are building a structure that will react predictably to the heat of your oven.
Phase 1: Creaming for Structure
Start by creaming your butter and sugars until the mixture looks like pale, wet sand. You want it to be light and fluffy, but be careful not to over-mix. If you beat too much air into the butter, the cookies will rise and fall like a cake, losing that dense, chewy center we want. Stop as soon as the colors are uniform and the texture looks aerated.
Phase 2: Incorporating Dry Aromatics
When you add the flour and spices, do it gradually. I usually add the dry ingredients in two or three batches. This prevents a “flour poof” and ensures you don’t overwork the gluten. As soon as you see no more white streaks of flour, stop the mixer. Overworking the dough at this stage will result in a tough, bready cookie rather than a soft one.
Phase 3: The Rolling and Coating Technique
Roll the chilled dough into 1.25-inch balls, which is roughly the size of a walnut. It is vital to use coarse sparkling sugar or sanding sugar for the coating. Standard granulated sugar tends to melt into the dough during baking. Coarse sugar crystals stay intact, providing a satisfying crunch and a beautiful shimmer that highlights the cracks.
For a perfect pairing, try our Flaky Walnut Rugelach: Crack-Proof Recipe.
Troubleshooting Common Molasses Cookie Failures
Even experienced bakers can run into trouble with molasses-based doughs because they are so sensitive to moisture and heat. If your cookies aren’t turning out right, the issue is usually found in the equipment or the timing.
Preventing the Dreaded Flat Cookie
If your cookies are spreading into flat pancakes, your oven might be too cool, or your baking sheets might be too thin. Use heavy-duty aluminum pans that distribute heat evenly. Also, never place raw dough onto a warm baking sheet from a previous batch. This melts the butter instantly and ruins the structure before the cookie even enters the oven.
Identifying the “Perfectly Underbaked” Center
The window for a perfect molasses cookie is very small. You must pull the tray when the edges are firm to the touch but the cracks in the center still look a bit “wet” or shiny. Therefore, if the cracks look dry and matte, you have already overbaked them. They will firm up significantly as they cool on the hot pan, so trust the process.
Make Ahead Strategies and Storage
These cookies are fantastic for busy schedules because the dough actually improves with age. You can keep the raw dough in the fridge for up to 24 hours, which further deepens the spice notes and ensures an even better crackle on top.
Freezing Dough vs. Baked Cookies
For the best results, freeze the dough in pre-rolled balls. Place the sugar-coated balls on a tray in the freezer for an hour, then toss them into a freezer bag. You can bake them straight from frozen; just add two minutes to the baking time. If you’ve already baked them, store them in an airtight container at room temperature for up to five days.
Expert Tips for Professional Results
- Use a spring-loaded cookie scoop to ensure every ball is exactly the same size. This guarantees they all finish baking at the exact same time.
- Try the “Pan Bang” method. About halfway through baking, gently lift the edge of the baking sheet and let it drop against the oven rack. This creates extra ripples and deeper cracks.
- Parchment paper is mandatory. Greasing the pan with butter or spray adds extra fat to the bottom of the cookie, which encourages spreading and leads to those soggy bottoms we are trying to avoid.
Recommended Equipment for Consistent Batches
A kitchen scale is your best friend for this recipe. Measuring flour by the cup is notoriously inaccurate, and even an extra tablespoon of flour can make these cookies cakey. Additionally, always use a wire cooling rack. If you leave the cookies on a flat surface to cool, steam will trap underneath them, softening the bottom crust you worked so hard to crisp up.
Frequently Asked Questions
Can I substitute blackstrap molasses in this recipe?
No, I highly recommend sticking with unsulphured molasses. Blackstrap molasses is the result of the third boiling of the sugar cane and is extremely concentrated. It has a very bitter, salty, and intense flavor that will overwhelm the ginger and cinnamon. It also lacks the sugar content needed to help the cookies spread and crack properly.
Why did my cookies not crack on top?
There are usually two culprits for a smooth-topped cookie. First, your baking soda might be expired; it needs that chemical “oomph” to create the rise that causes cracking. Second, you might have skipped the chilling step. If the dough is too warm, it spreads before it has a chance to rise and burst through the surface. Ensure your dough is cold and your oven is fully preheated to 350°F.
Can I make these ginger cookies gluten-free?
Yes, you can substitute the all-purpose flour with a high-quality 1:1 gluten-free flour blend. Look for a blend that already includes xanthan gum, as this provides the “stretch” that molasses cookies need to stay chewy. Note that gluten-free versions may not brown as deeply, so rely on the feel of the edges rather than the color to determine when they are done.
How do I keep the cookies soft for a full week?
The best trick is to place a single slice of plain white bread into the airtight container with the cookies. The cookies will actually absorb the moisture from the bread, keeping them incredibly soft while the bread becomes hard as a rock. Just make sure the bread isn’t touching the cookies directly if you are worried about flavor transfer, though plain white bread is usually neutral.
Do I need to flatten the balls before baking?
Definitely not! You should leave them as round balls. The high sugar and butter content, combined with the heat of the oven, will cause them to spread naturally. If you flatten them manually, they will end up too thin and will likely lose that soft, fudgy center that makes this specific recipe so special.
Ginger Molasses Cookies
Course: DessertCuisine: AmericanDifficulty: medium24
cookies15
minutes10
minutes165
kcal60
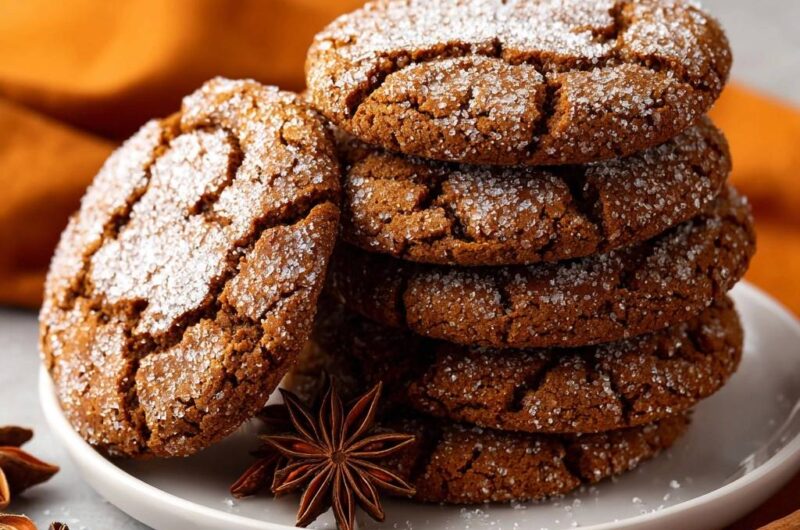
MinutesThese cookies solve the common problem of greasy or hard ginger snaps. By using a specific chilling technique and dark brown sugar, they achieve a soft, chewy center with a distinct crystalline crunch from coarse sparkling sugar.
Ingredients
3/4 cup unsalted butter, softened
1/2 cup granulated sugar
1/2 cup packed dark brown sugar (for deeper color and moisture)
1 large egg, room temperature
1/4 cup unsulphured molasses
2 1/4 cups all-purpose flour
2 teaspoons ground ginger
1 teaspoon ground cinnamon
1/2 teaspoon ground cloves
1/4 teaspoon ground star anise (optional, for visual/flavor pairing)
1/2 teaspoon salt
2 teaspoons baking soda
1/2 cup coarse sparkling sugar or sanding sugar (for rolling)
Directions
- In a large bowl, cream the softened butter, granulated sugar, and dark brown sugar until light and fluffy. Beat in the egg and molasses until fully combined and smooth.
- In a separate bowl, whisk together the flour, ginger, cinnamon, cloves, star anise, salt, and baking soda.
- Gradually add the dry ingredients to the wet mixture until a soft, uniform dough forms.
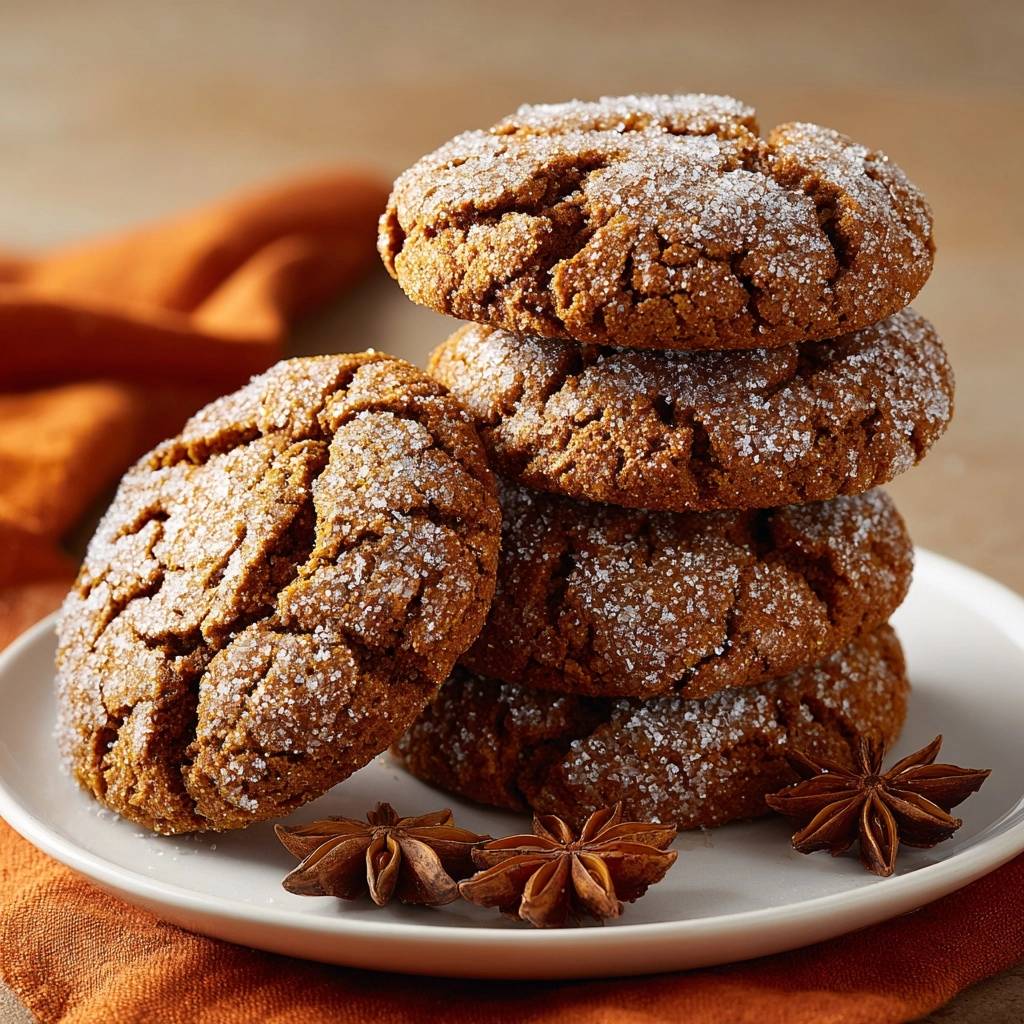
- To solve the soggy bottom issue and ensure the deep cracks seen in the image, you must chill the dough for at least 1 hour (or up to 24 hours). Chilling prevents the fats from spreading too quickly, allowing the surface to dry and crack while the center stays soft.
- Preheat your oven to 350°F (175°C). Line heavy-duty baking sheets with parchment paper or silicone mats.
- Roll the chilled dough into 1.25-inch balls. Roll each ball generously in the coarse sparkling sugar until heavily coated. This provides the distinct crystalline crunch visible in the photo.
- Place balls 2 inches apart on the prepared sheets. Do not flatten them; the oven heat will cause them to spread and crack naturally.
- Bake for 8 to 10 minutes. Remove from the oven when the edges are set and the cracks look slightly “wet” in the center. Overbaking will destroy the soft texture.
- Let the cookies rest on the hot baking sheet for exactly 5 minutes. This carry-over cooking firms up the bottom crust to prevent sogginess without drying out the interior. Transfer to a wire rack to cool completely.
Notes
- Chilling the dough for at least 1 hour is mandatory to prevent spreading and ensure the signature cracked surface. Let cookies rest on the hot sheet for exactly 5 minutes after baking to firm up the bottom crust.