Classic Marble Bundt Cake: Your Foolproof Guide to Perfection
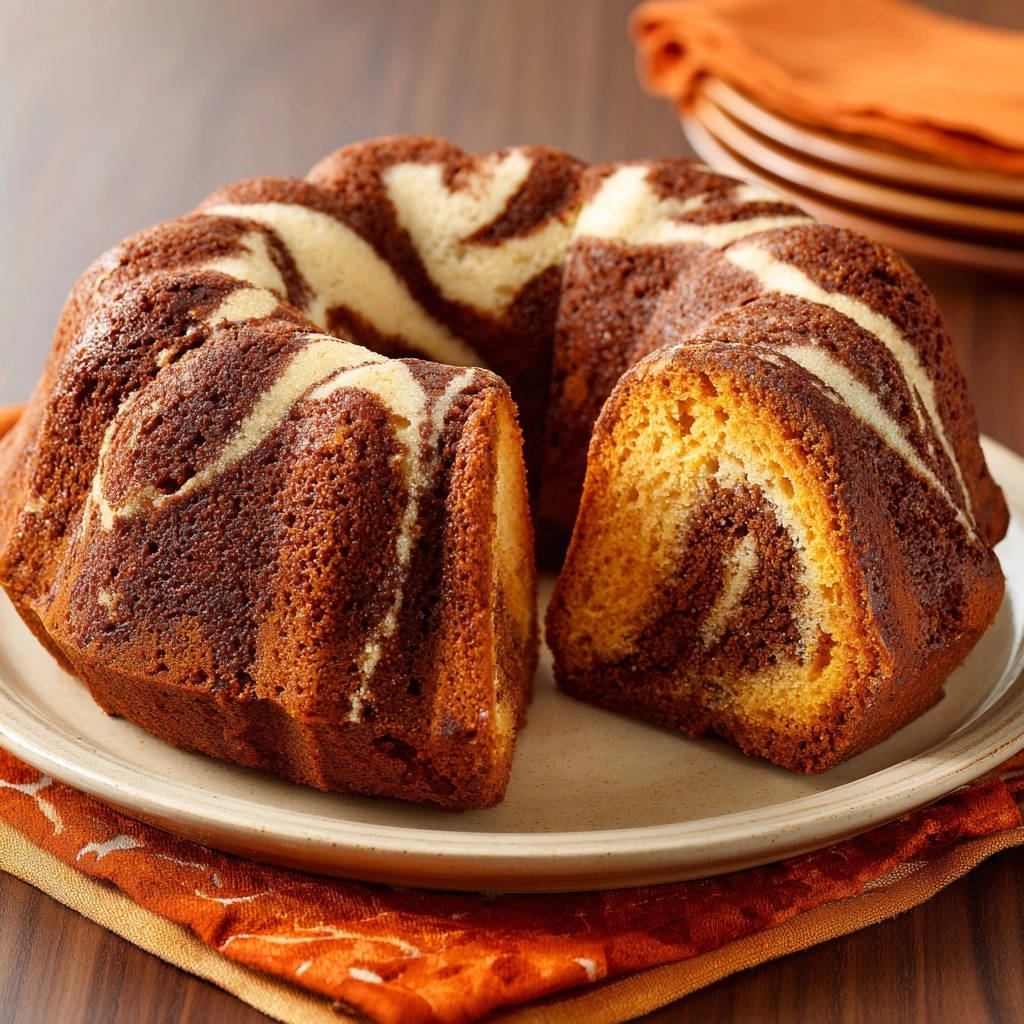
There’s nothing quite like the stunning appearance of a Classic Marble Bundt Cake, but the moment of truth when flipping that pan can be terrifying.
I’ve experienced the heartache of a stuck cake countless times, which is precisely why I perfected this recipe to ensure your gorgeous marble Bundt slides out flawlessly every single time.
Get ready to bake a showstopper that will earn you rave reviews and become your absolute favorite.
Why This Classic Marble Bundt Cake Will Become Your Go-To Recipe
The Secret to a Seamless Release: No More Stuck Cakes!
Our unique pan preparation method is the cornerstone of this Classic Marble Bundt Cake recipe.
It completely eliminates the frustration of a stuck cake, guaranteeing a perfect, effortless release every time you bake.
You can now flip your Bundt pan with absolute confidence, knowing your beautifully sculpted cake will emerge intact.
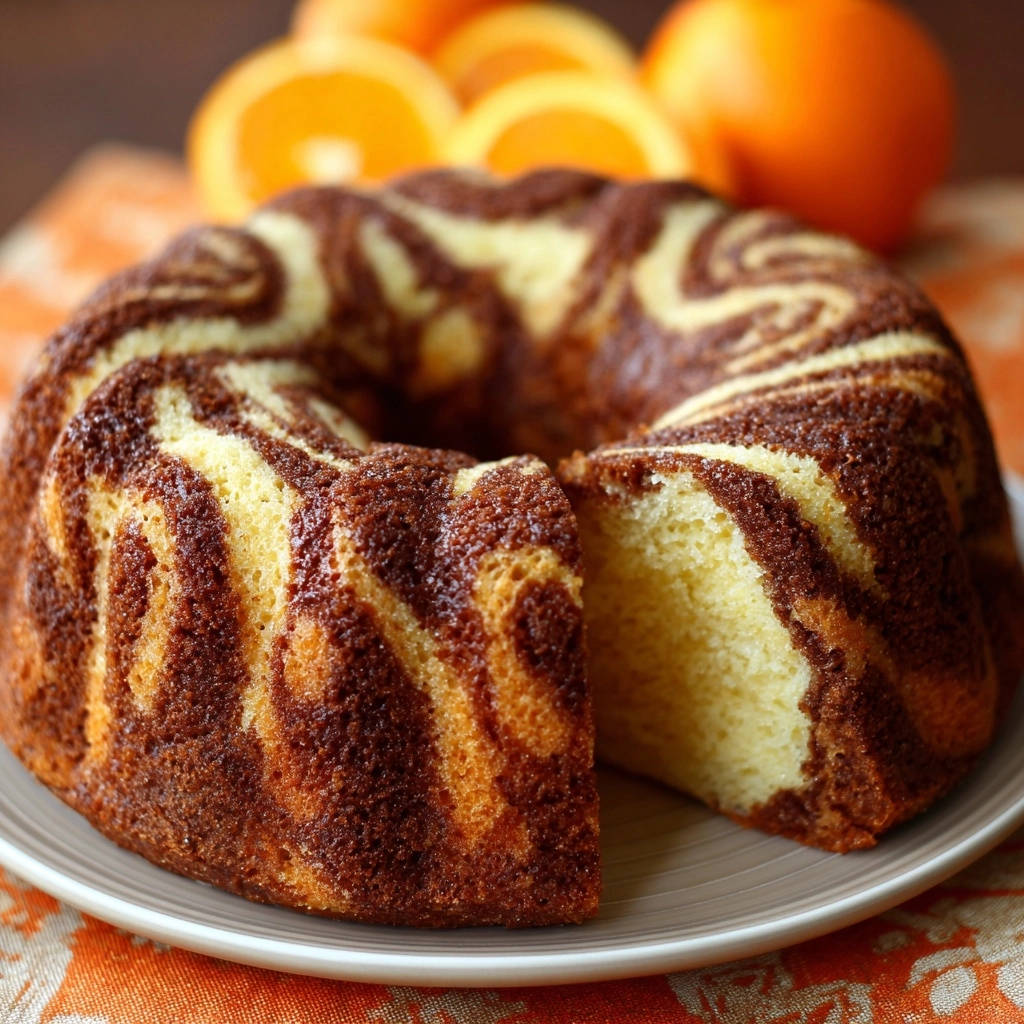
A Symphony of Flavors: Rich Chocolate & Vanilla Swirls
This recipe delivers a harmonious blend of comforting vanilla and deep, rich chocolate flavors.
The visually stunning marble pattern is equally enticing, promising a delightful taste experience even before the first bite.
Effortless Elegance for Any Occasion
The Bundt cake’s distinctive shape naturally lends itself to an elegant presentation.
Despite its simple preparation, this Classic Marble Bundt Cake shines at casual family gatherings, festive holidays, or any special celebration.
Gather Your Essentials: Ingredients for Classic Marble Bundt Cake Success
Pantry Staples: The Building Blocks
All-purpose flour provides the cake’s fundamental structure, ensuring a tender and uniform crumb.
Baking powder is crucial for a light, airy rise, while a touch of salt perfectly balances the cake’s sweetness.
Key Wet Ingredients for Moisture and Flavor
Softened unsalted butter and fine granulated sugar are creamed together to create a light and fluffy base, incorporating air into the batter.
Large eggs add essential richness, structure, and moisture, contributing to the cake’s wonderfully tender texture.
Milk (whole or buttermilk) infuses the cake with vital moisture, enhancing both its texture and overall mouthfeel.
Pure vanilla extract provides a warm, aromatic foundation, completing the cake’s classic flavor profile.
The Swirl Factor: Unsweetened Cocoa Powder
Unsweetened cocoa powder is essential for creating the distinct chocolate portion of your marble batter.
It imparts a deep, authentic cocoa flavor that perfectly complements the sweet vanilla notes.
The Pan Prep Duo: Shortening & Flour (Your Non-Stick Insurance)
Vegetable shortening forms an exceptional non-stick barrier, ensuring your cake slides out cleanly from even the most intricate Bundt pan designs.
A light dusting of all-purpose flour adheres to the shortening, creating a crucial second protective layer that acts as non-stick insurance.
Essential Tools for Your Classic Marble Bundt Cake Journey
The Star: Your Bundt Pan
A 10-12 cup Bundt pan is absolutely essential for achieving the iconic shape of this Classic Marble Bundt Cake.
Opt for a non-stick metal Bundt pan if possible; it ensures even heat distribution and facilitates an easier, more consistent release.
Mixing Mastery: Stand Mixer vs. Hand Mixer
An electric stand mixer simplifies the creaming and mixing processes significantly, making batter preparation effortless.
A reliable hand mixer can achieve equally excellent results, though it requires a bit more active participation.
Beyond the Basics: Whisk, Spatula, & More
A whisk is vital for thoroughly combining your dry ingredients before they are incorporated into the wet batter.
Rubber spatulas are perfect for scraping down the sides of mixing bowls and gently folding ingredients without overworking the batter.
A wire rack is indispensable for cooling the cake properly, allowing air to circulate evenly around all sides to prevent condensation and sogginess.
Baking Bliss: Your Step-by-Step Guide to Classic Marble Bundt Cake Perfection
Preheating Your Oven
Preheat your oven to 350°F (175°C) to ensure it reaches the precise temperature before the cake enters.
A properly preheated oven is crucial for even baking, consistent rise, and the best possible texture.
Mastering the Foolproof Bundt Pan Prep (A Game Changer!)
Generously coat every single crevice, groove, and corner of your 10-12 cup Bundt pan with vegetable shortening.
Then, evenly sprinkle all-purpose flour over the shortening, rotating and tapping the pan to ensure it adheres to all surfaces; invert and tap out any excess.
This meticulous preparation is the undisputed secret to a perfectly released Classic Marble Bundt Cake every time you bake.
Preparing Your Dry Ingredients
In a medium bowl, whisk together the all-purpose flour, baking powder, and salt until they are thoroughly combined.
This step ensures that the leavening agents and salt are evenly distributed throughout the dry mix, promoting a uniform rise.
Creaming Butter & Sugar for an Airy Texture
In a large mixing bowl, cream together the softened unsalted butter and granulated sugar using an electric mixer on medium speed.
Continue mixing for 3-5 minutes, until the mixture becomes wonderfully light, fluffy, and noticeably pale in color, incorporating crucial air for a tender crumb.
Adding Eggs and Vanilla
Add the large eggs one at a time to the creamed mixture, beating well after each individual addition to ensure full incorporation.
Stir in the vanilla extract, blending thoroughly so its warm, aromatic flavor is consistent throughout the batter.
Alternating Wet and Dry: The Batter’s Balance
Gradually add the whisked dry ingredients to the wet mixture, alternating with additions of milk.
For bakers who enjoy this method of alternating dry and wet ingredients, the same technique creates the tender crumb of this chocolate layer cake.
Always begin and end with the dry ingredients, mixing on low speed only until just combined.
Crucially, be careful not to overmix, as this can overdevelop gluten, resulting in a tough or dense cake texture.
The Art of the Marble Swirl
Divide the completed cake batter evenly into two separate bowls.
Into one bowl, sift in the unsweetened cocoa powder and gently mix until just combined, creating your rich chocolate batter.
Spoon alternating dollops of the plain vanilla and chocolate batters into your meticulously prepared Bundt pan.
Use a knife or a skewer to gently swirl the batters together a few times, aiming for a beautiful marble effect without overmixing or blending the colors completely.
Baking to Golden Perfection
Bake the Classic Marble Bundt Cake for 50-60 minutes, or until a wooden skewer inserted into the center comes out perfectly clean.
The cake’s edges should appear golden brown, and the top should spring back slightly when gently touched, indicating it is fully baked.
The Critical Cooling & Flawless Release
Once baked, let the cake cool in the Bundt pan on a wire rack for exactly 10-15 minutes.
This crucial cooling time allows the cake to firm up just enough to release cleanly without crumbling.
After precisely 10-15 minutes, place your wire rack upside down directly over the Bundt pan.
Carefully but confidently invert the cake onto the rack; if the pan was prepped correctly, your Classic Marble Bundt Cake will slide out beautifully.
Allow the cake to cool completely on the wire rack before slicing and serving to ensure it holds its shape and texture perfectly.
Chef’s Secrets: Expert Tips for Your Best Classic Marble Bundt Cake
Ingredient Temperature Matters
Always ensure your butter, eggs, and milk are at room temperature. This allows them to emulsify properly, creating a smoother, more uniform batter and a superior texture for your Classic Marble Bundt Cake.
The Golden Rule of Mixing: Don’t Overmix!
Once you add the flour, mix only until the ingredients are just combined. Overmixing develops gluten, which can lead to a tough, dense cake instead of a delightfully tender one.
Achieving the Perfect Marble Effect
For distinct and beautiful swirls, avoid over-swirling the batters. A few gentle passes with a knife or skewer are typically enough to create lovely, defined marble patterns without completely blending the colors.
Bundt Pan Care & Cleaning
Always hand wash your Bundt pan with warm, soapy water. Dishwashers can degrade the non-stick coating over time, making future cake releases significantly more challenging. Ensure it’s completely dry before storing.
Testing for Doneness Accurately
Beyond the wooden skewer test, gently press the top center of the cake with your fingertip. If it springs back, your Classic Marble Bundt Cake is likely done. If it leaves an indentation, it needs a few more minutes in the oven.
Troubleshooting Your Classic Marble Bundt Cake: Common Questions & Solutions
Why Did My Cake Stick to the Pan?
The most common reason for a stuck cake is insufficient pan preparation. You must generously coat every crevice with shortening and dust thoroughly with flour, tapping out all excess.
Cooling the cake for too long in the pan can also cause it to stick. Adhere strictly to the recommended 10-15 minute cooling time before inverting.
Why Is My Cake Dry or Crumbly?
Overbaking is a frequent culprit for dry cake. Always check for doneness around the minimum bake time. An inaccurate oven temperature can also contribute; consider using an oven thermometer for precision.
Overmixing the batter can also lead to a tough, dry crumb due to overdeveloped gluten. Mix only until ingredients are just combined and no streaks of flour remain.
Why Did My Marble Swirl Disappear?
This typically occurs from over-swirling the batters. Gently swirl with a knife or skewer just a few times to create the marble pattern without fully blending the chocolate and vanilla.
Ensuring both the vanilla and chocolate batters are of similar consistency also helps maintain distinct and beautiful swirls.
Frequently Asked Questions About Your Classic Marble Bundt Cake
Can I Make This Classic Marble Bundt Cake Ahead of Time?
Yes, this Classic Marble Bundt Cake is an excellent option for making ahead. You can bake it up to 2-3 days in advance and store it properly for optimal freshness and flavor.
How Should I Store Leftover Bundt Cake?
Store leftover Classic Marble Bundt Cake at room temperature, ensuring it is tightly wrapped in plastic wrap or placed in an airtight container, for up to 3-4 days. For longer preservation, it can be frozen.
Can I Use Different Flavorings in My Bundt Cake?
Absolutely! While the classic marble is delightful, feel free to experiment. You could incorporate citrus zest into the vanilla batter or add a touch of coffee extract to the chocolate for a unique mocha swirl.
Is There a Gluten-Free Option for This Recipe?
While this recipe traditionally uses all-purpose flour, you can often successfully substitute a 1:1 gluten-free baking flour blend. Please note that the texture may vary slightly, but it’s a popular and viable alternative for many bakers.
Serving Suggestions & Creative Enhancements for Your Classic Marble Bundt Cake
Simple Glazes & Dustings
A simple dusting of powdered sugar or a quick vanilla glaze adds an elegant finish without overpowering the beautiful marble flavors.
Consider a rich chocolate ganache drizzle to amplify the cocoa notes and enhance the visual appeal of your Classic Marble Bundt Cake.
Pairings for a Dessert Table
Serve individual slices with a side of fresh berries or a generous dollop of freshly whipped cream for a refreshing contrast.
A scoop of premium vanilla bean ice cream or a warm fruit compote can elevate this cake into a more decadent dessert experience, perfect for any occasion.
Turning it into a Special Occasion Treat
Decorate your Classic Marble Bundt Cake with edible flowers or delicate chocolate shavings for a sophisticated touch.
This cake makes a fantastic and memorable centerpiece for birthdays, holiday gatherings, or any celebration that calls for a touch of homemade charm and elegance.
Ready to Bake Your Perfect Classic Marble Bundt Cake?
With our foolproof method and detailed guidance, you’re now fully equipped to bake a Classic Marble Bundt Cake that is as beautiful as it is utterly delicious.
Say goodbye to the frustration of stuck cakes and hello to perfectly released, impressive Bundts every single time. Get ready to delight your family and friends!
Share Your Classic Marble Bundt Cake Masterpiece!
We absolutely love seeing your culinary creations! Once your gorgeous Classic Marble Bundt Cake emerges from the oven, snap a stunning picture and share it with us on social media.
Tag us and use #ClassicMarbleBundtCake so we can celebrate your baking success. Happy baking!
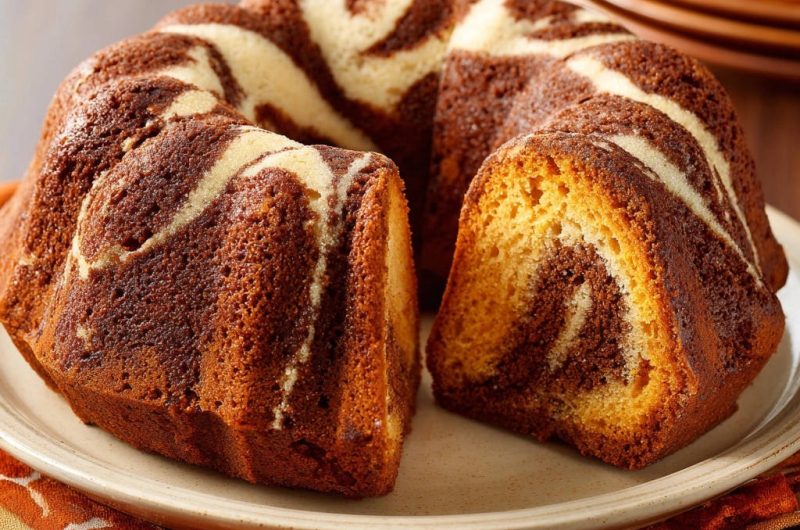
Marble Bundt Cake
Course: DessertCuisine: AmericanDifficulty: medium12
servings20
minutes55
minutes450
kcal75
minutesUncover the secret to a perfectly released, beautifully marbled Classic Bundt Cake every time! This recipe guides you through essential pan prep and cooling techniques to ensure your cake slides out flawlessly. Enjoy a stunning dessert that’s as easy to make as it is impressive.
Ingredients
2 1/2 cups all-purpose flour
1 1/2 teaspoons baking powder
1/2 teaspoon salt
1 cup (2 sticks) unsalted butter, softened
2 cups granulated sugar
4 large eggs
1 cup milk (whole milk or buttermilk for richness)
2 teaspoons vanilla extract
1/4 cup unsweetened cocoa powder
2 tablespoons extra vegetable shortening (for greasing the pan)
2 tablespoons extra all-purpose flour (for dusting the pan)
Directions
- Preheat your oven to 350 degrees F (175 degrees C).
- The Foolproof Pan Prep: This step is crucial for a perfect release! Generously coat the inside of a 10-12 cup Bundt pan with the extra vegetable shortening, making sure to get into every single crevice, groove, and corner. Use your fingers or a pastry brush to really work it in. Then, sprinkle the extra all-purpose flour evenly over the shortening, rotating and tapping the pan to ensure it adheres to all surfaces. Invert the pan and gently tap out any excess flour. Set aside.
- In a medium bowl, whisk together the 2 1/2 cups all-purpose flour, baking powder, and salt.
- In a large mixing bowl, using an electric mixer, cream together the softened butter and granulated sugar on medium speed until light and fluffy, about 3-5 minutes.
- Add the eggs one at a time, beating well after each addition. Stir in the vanilla extract.
- Gradually add the dry ingredients to the wet ingredients, alternating with the milk, beginning and ending with the dry ingredients. Mix on low speed until just combined, being careful not to overmix.
- Divide the batter evenly into two separate bowls. Into one bowl, sift in the unsweetened cocoa powder and mix gently until just combined.
- Spoon alternating dollops of the plain and chocolate batters into your prepared Bundt pan. Use a knife or a skewer to gently swirl the batters together, creating a marble effect. Avoid overmixing the swirl.
- Bake for 50-60 minutes, or until a wooden skewer inserted into the center of the cake comes out clean.
- The Perfect Release: Once baked, let the cake cool in the Bundt pan on a wire rack for exactly 10-15 minutes. This cooling period is essential for the cake to firm up enough to release cleanly. Do not let it cool completely in the pan, or it might stick.
- After 10-15 minutes, place your wire rack upside down over the Bundt pan. Carefully but confidently invert the cake onto the rack. Gently lift the pan. If the pan was prepped correctly, the cake should slide out beautifully. Let the cake cool completely on the wire rack before slicing and serving.
Notes
- The foolproof pan prep and specific cooling time are crucial for a perfect cake release.