Easy Homemade Cinnamon Rolls: Fluffy, Gooey Perfection!
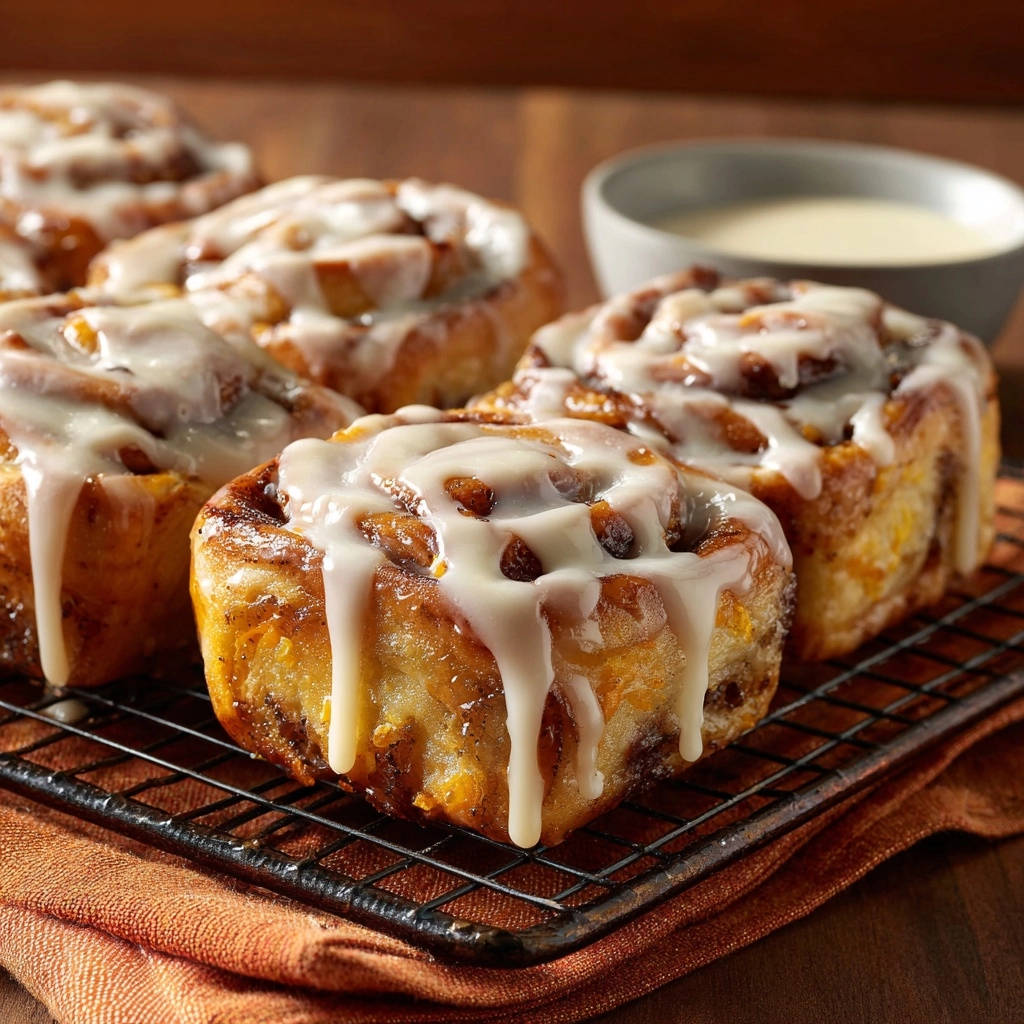
Crafting the perfect cinnamon roll used to be my ultimate baking quest. I longed for those pillowy, tender spirals, but often ended up with dry, disappointing results. However, I discovered the simple techniques that make these Easy Homemade Cinnamon Rolls astonishingly soft, incredibly fluffy, and irresistibly gooey.
This recipe transforms a beloved classic into an approachable kitchen triumph, ensuring every bite is pure bliss. Prepare for your kitchen to be filled with the most comforting aroma imaginable.
Say Goodbye to Dense Rolls: The Secret to Unbeatable Fluffiness
Achieving truly light and airy cinnamon rolls isn’t a mystery; it’s about understanding a few fundamental principles. This recipe focuses on precise techniques that guarantee a melt-in-your-mouth experience every time.
The Magic of Active Yeast: Your Foundation for a Perfect Rise
Proper yeast activation is the cornerstone of a fluffy roll. Our recipe guides you to confirm your yeast is lively and ready to work, ensuring your dough rises beautifully and consistently.
This initial proofing step eliminates guesswork and provides the robust foundation needed for an incredible texture.
Mastering the Knead: Developing Dough for Delightful Texture
Kneading is often overlooked, but it’s essential for developing the gluten structure in your dough. Our method ensures you knead just enough to create a smooth, elastic dough that yields a tender crumb.
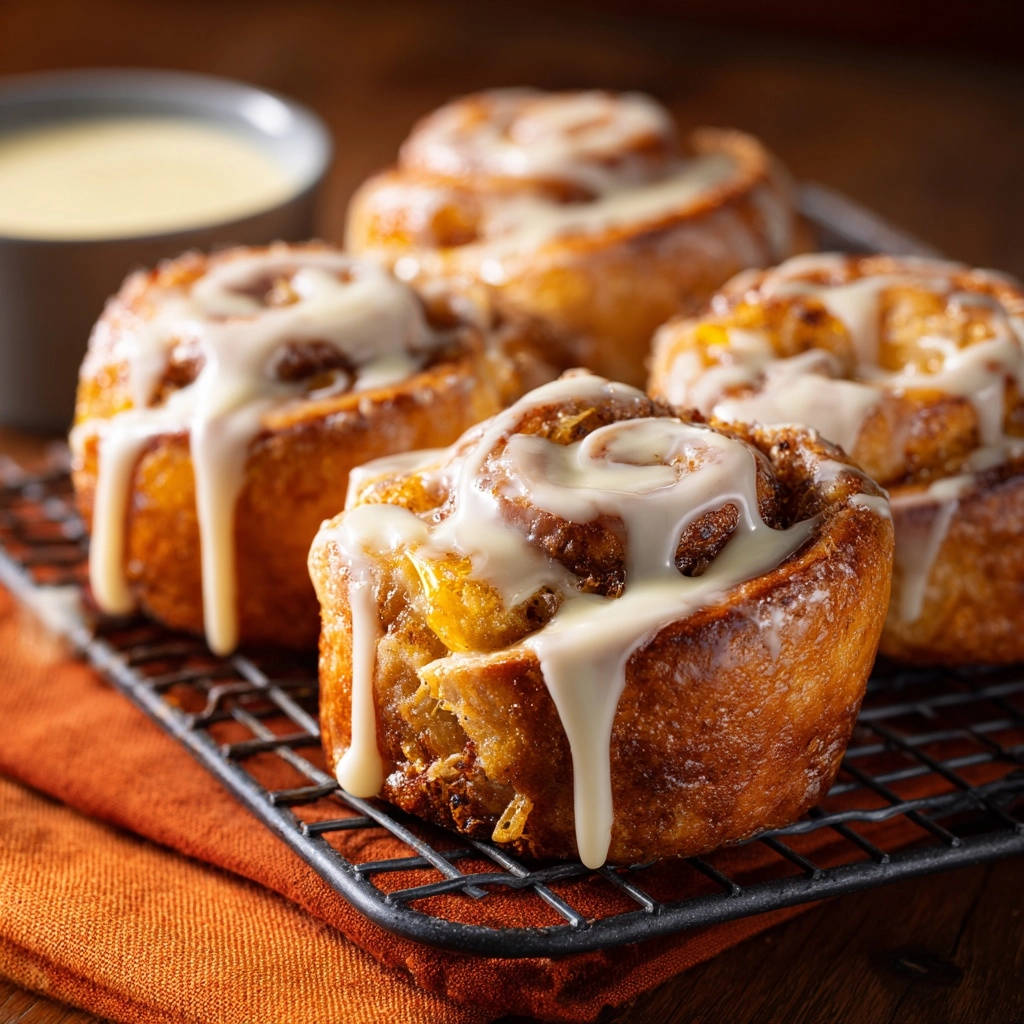
This critical process allows the dough to capture and hold air, resulting in that desirable light and airy finish.
Double the Rise, Double the Tender Goodness
This recipe emphasizes two distinct rising periods for a reason. The first rise builds flavor and initial volume, while the second rise, performed after shaping, ensures each roll achieves maximum puffiness and an incredibly tender, delicate texture.
Both rises are vital steps in creating the ultimate soft and airy homemade sweet rolls.
The Gooey Filling & Sweet Vanilla Drizzle: A Symphony of Flavor
Beyond the dough, the rich cinnamon-sugar filling and a decadent vanilla drizzle elevate these rolls. The perfect balance of softened butter, brown sugar, and aromatic cinnamon creates that signature gooey center.
The simple yet luscious cream cheese-like icing, crafted with powdered sugar, butter, and vanilla, adds a final layer of sweetness and moisture that truly completes these delightful treats.
Warm Pairings for Your Cinnamon Rolls
These cinnamon rolls shine with their soft, gooey center, and these two recipes share that same comforting, doughy appeal.
- For another pillowy breakfast treat with a crunchy top, try these Sweet Crumb Topped Buns — the buttery crumb topping contrasts nicely with the cinnamon roll’s sticky glaze.
- If you want a savory counterpoint, the creamy mushroom gravy in Southern Biscuits and Mushroom Gravy pairs perfectly alongside the sweet, spiced rolls for a balanced brunch spread.
- 1 cup warm milk (105 to 115°F)
- 2 ¼ teaspoons active dry yeast (one packet)
- ¼ cup granulated sugar (divided)
- ½ cup unsalted butter, melted and cooled
- 1 large egg
- 1 teaspoon salt
- 3 ½ to 4 cups all-purpose flour
- ½ cup unsalted butter, softened
- 1 cup packed light brown sugar
- 2 tablespoons ground cinnamon
- 2 cups powdered sugar
- 4 tablespoons unsalted butter, softened
- 1 teaspoon vanilla extract
- 3 to 4 tablespoons milk
Large Mixing Bowls: Essential for activating yeast, mixing the dough, and allowing for proper rising.
Rolling Pin: Crucial for achieving an evenly thin, rectangular dough sheet, vital for uniform rolls.
9×13 Inch Baking Pan: The standard size for baking a dozen fluffy cinnamon rolls, allowing them to proof and bake together beautifully.
Sharp Knife or Dental Floss: For clean, precise cuts that prevent squishing your perfectly rolled dough log.
Stand Mixer (Optional): While not strictly necessary, a stand mixer with a dough hook can significantly simplify and shorten the kneading process.
Measuring Cups and Spoons: Accuracy is key in baking, ensuring precise ingredient proportions for optimal results.
- Step 1: Activate the Yeast for Max Fluff
In a large mixing bowl, combine the warm milk and 1 tablespoon of granulated sugar. Sprinkle the active dry yeast over the top. Stir gently, then let it sit for 5 to 10 minutes until it becomes foamy.
This foam is your visual cue that the yeast is active and ready to make your rolls rise beautifully and become incredibly light.
- Step 2: Build Your Dough
Add the remaining granulated sugar, cooled melted butter, large egg, and salt to your active yeast mixture. Mix these wet ingredients thoroughly until well combined.
Gradually incorporate 3 ½ cups of the all-purpose flour, mixing until a shaggy, somewhat sticky dough forms. This initial mixing prepares the dough for the crucial kneading step.
- Step 3: Knead for Perfect Texture
Turn the shaggy dough out onto a lightly floured surface. Knead the dough for 5 to 7 minutes, adding small amounts of the remaining flour only if the dough is excessively sticky.
The dough should transform into a smooth, elastic ball that springs back gently when poked. This kneading process is vital for developing gluten, which creates a light, airy, and tender crumb in your finished rolls.
- Step 4: First Rise (The Foundation of Fluff)
Place the kneaded dough into a lightly greased bowl, turning it once to ensure the entire surface is coated. Cover the bowl securely with plastic wrap or a clean kitchen towel.
Allow the dough to rise in a warm, draft-free place for 1 to 1 ½ hours, or until it has visibly doubled in size. A warm, turned-off oven with just the light on is an ideal environment for this foundational rise.
- Step 5: Prepare Filling and Roll Out Dough
While your dough is undergoing its first rise, prepare the irresistible filling. In a small bowl, cream together the softened unsalted butter, packed light brown sugar, and ground cinnamon until they are thoroughly combined and spreadable.
Once the dough has doubled, gently punch it down to release the air. Turn the dough out onto a lightly floured surface and roll it into a large rectangle, approximately 12×18 inches.
- Step 6: Spread and Roll for Uniform Swirls
Evenly spread the cinnamon-sugar filling over the entire surface of the dough rectangle, being sure to leave a small, clean border on one of the long edges.
Starting from the opposite long edge, carefully and tightly roll the dough into a firm log. A tight roll is crucial for preventing gaps within the rolls and achieving those beautiful, uniform gooey cinnamon buns swirls.
- Step 7: Cut and Second Rise (The Final Puff)
Using a very sharp knife or a length of unflavored dental floss, cut the dough log into 12 even slices. Arrange these rolls in a greased 9×13 inch baking pan, leaving a little space between each to allow for expansion.
Cover the pan again with plastic wrap or a clean towel and let the rolls rise in a warm place for another 30 to 45 minutes, or until they look noticeably puffy and have nearly doubled in size. This second rise is absolutely essential for the ultimate light and tender finish.
- Step 8: Bake to Golden Perfection
Preheat your oven to 375°F (190°C). Carefully place the pan of risen cinnamon rolls into the preheated oven.
Bake for 20 to 25 minutes, or until the tops are beautifully golden brown and the rolls are cooked through. If you notice them browning too quickly, you can loosely tent the pan with aluminum foil.
- Step 9: Make the Drizzly Icing
While your freshly baked rolls cool slightly, prepare the decadent vanilla icing. In a medium bowl, beat together the powdered sugar, softened unsalted butter, vanilla extract, and 3 tablespoons of milk until the mixture is smooth and creamy.
Add more milk, a teaspoon at a time, until the icing reaches your desired drizzly consistency. You want it to flow easily over the warm rolls.
- Step 10: Frost and Serve Immediately
Generously drizzle the warm Easy Homemade Cinnamon Rolls with the freshly prepared icing. The warmth of the rolls will allow the icing to slightly melt and seep into every crevice.
Serve immediately to experience that guaranteed fluffy, gooey goodness at its absolute peak. These are truly best enjoyed fresh from the oven!
For a perfect pairing, try our Mastering the Golden Cherry Cobbler: The Anti-Soggy Method.
Measure Flour Correctly: Always spoon your flour into the measuring cup and level it off with a straight edge. Scooping directly can compact the flour, leading to too much being added and resulting in dense rolls.
Don’t Overmix the Dough: Once the flour is just incorporated and a shaggy dough forms, stop mixing before kneading. Overmixing can overdevelop gluten, which may lead to tough, rather than tender, rolls.
Use Unflavored Dental Floss for Cutting: For perfectly clean, squish-free slices, slide a piece of unflavored dental floss under the dough log. Cross the ends over the top of the log and pull firmly to cut through.
Don’t Overbake: Cinnamon rolls are best when they are just barely golden on top. They will continue to cook slightly from residual heat as they cool, so err on the side of pulling them out a minute early if you’re unsure.
Warm Oven Trick for Rising: If your kitchen is cool, turn your oven on to its lowest setting (or just the light) for 1-2 minutes, then turn it off. Place the covered dough inside; the residual warmth creates a perfect proofing environment.
Dairy-Free Milk Options: Almond milk or oat milk can be successfully used in place of dairy milk for both the dough and icing. Be aware that the final texture might be slightly altered, but still delicious.
Gluten-Free Flour Blend: While this recipe is developed for traditional all-purpose flour, you can attempt a 1:1 gluten-free baking blend. Results may vary in texture and rise, so a little experimentation may be needed.
For the Dough:
1 cup warm milk (105 to 115°F)
2 and 1/4 teaspoons active dry yeast (one packet)
1/4 cup granulated sugar
1/2 cup unsalted butter, melted and cooled
1 large egg
1 teaspoon salt
3 and 1/2 to 4 cups all purpose flour
For the Filling:
1/2 cup unsalted butter, softened
1 cup packed light brown sugar
2 tablespoons ground cinnamon
For the Icing:
2 cups powdered sugar
4 tablespoons unsalted butter, softened
1 teaspoon vanilla extract
3 to 4 tablespoons milk
- Activate the Yeast for Max Fluff: In a large mixing bowl, combine the warm milk and 1 tablespoon of the granulated sugar. Sprinkle the active dry yeast over the top. Stir gently and let it sit for 5 to 10 minutes until it becomes foamy. This foam indicates your yeast is active and ready to make your rolls rise beautifully.
- Build Your Dough: Add the remaining granulated sugar, melted and cooled butter, egg, and salt to the yeast mixture. Mix well. Gradually add 3 and 1/2 cups of the flour, mixing until a shaggy dough forms.
- Knead for Perfect Texture: Turn the dough out onto a lightly floured surface. Knead for 5 to 7 minutes, adding small amounts of the remaining flour only if the dough is too sticky. The dough should become smooth, elastic, and spring back when poked. This kneading is key to developing the gluten for a light, airy texture.
- First Rise (The Foundation of Fluff): Place the kneaded dough in a lightly greased bowl, turning once to coat. Cover the bowl with plastic wrap or a clean kitchen towel. Let it rise in a warm, draft-free place for 1 to 1 and a half hours, or until it has doubled in size. A warm oven (turned off, with just the light on) is a perfect spot!
- Prepare Filling and Roll Out: While the dough rises, prepare the filling. In a small bowl, cream together the softened butter, brown sugar, and cinnamon until well combined. Once the dough has risen, gently punch it down. Turn it out onto a lightly floured surface and roll it into a large rectangle, approximately 12×18 inches.
- Spread and Roll: Evenly spread the cinnamon filling over the entire surface of the dough, leaving a small border on one of the long edges. Starting from the opposite long edge, carefully roll the dough into a tight log. This tight roll prevents gaps and helps maintain a uniform, fluffy swirl.
- Cut and Second Rise (The Final Puff): Using a sharp knife or unflavored dental floss, cut the log into 12 even slices. Arrange the rolls in a greased 9×13 inch baking pan, leaving a little space between each. Cover the pan again and let the rolls rise in a warm place for another 30 to 45 minutes, or until they look noticeably puffy and have nearly doubled in size. This second rise is crucial for that ultimate light, tender finish.
- Bake to Golden Perfection: Preheat your oven to 375°F (190°C). Bake the cinnamon rolls for 20 to 25 minutes, or until they are golden brown on top and cooked through. If they start to brown too quickly, you can loosely tent them with foil.
- Make the Icing: While the rolls cool slightly, prepare the icing. In a medium bowl, beat together the powdered sugar, softened butter, vanilla extract, and 3 tablespoons of milk until smooth. Add more milk, a teaspoon at a time, until the icing reaches your desired drizzly consistency.
- Frost and Serve: Drizzle the warm cinnamon rolls generously with the prepared icing. Serve immediately and enjoy that guaranteed fluffy goodness!
Essential Ingredients for Your Cinnamon Roll Adventure
High-quality ingredients are the starting point for exceptional results. Here’s a breakdown of what you’ll need and why each component matters for your batch of Easy Homemade Cinnamon Rolls.
For the Irresistible Dough: Building the Soft Base
Warm milk awakens the yeast, while butter and egg add crucial richness and tenderness. All-purpose flour provides the necessary structure, allowing the dough to develop elasticity for that perfect, fluffy texture.
Crafting the Classic Cinnamon-Sugar Filling
Softened butter acts as the binder, allowing the rich brown sugar and pungent ground cinnamon to meld into a sweet, aromatic paste. This combination creates the signature gooey layer that caramelizes beautifully during baking.
Whipped to Perfection: The Sweet Vanilla Drizzle
Powdered sugar forms the delicate base for this quick icing, while softened butter adds creaminess. A touch of vanilla extract infuses a comforting aroma, and milk brings it all together to a perfectly drizzly consistency.
Tools of the Trade: What You’ll Need
Having the right equipment ensures a smooth and enjoyable baking process. Gather these essential tools before you begin.
Your Path to Perfectly Baked Cinnamon Rolls: A Guided Process
Follow these steps closely, incorporating the expert tips, and you’ll be enjoying the best Easy Homemade Cinnamon Rolls in no time. Each phase is designed for success.
Phase 1: Bringing Your Dough to Life
Phase 2: Filling, Shaping, and the Second Rise
Phase 3: Baking and Frosting Your Masterpiece
Chef’s Secrets: Elevate Your Easy Homemade Cinnamon Rolls Game
Unlock even greater success with these expert tips and tricks, designed to make your Easy Homemade Cinnamon Rolls truly unforgettable.
Pro Tips for a Flawless Bake
Ingredient Swaps for Dietary Needs (Optional)
Troubleshooting Your Cinnamon Rolls: Solving Common Baking Hurdles
Even experienced bakers encounter challenges. Here are solutions to common issues you might face when making Easy Homemade Cinnamon Rolls.
Why Are My Rolls Dense?
Density often stems from inactive yeast, insufficient kneading, or over-mixing the dough. Ensure your yeast is foamy before adding other ingredients, and knead until the dough is smooth and elastic.
Also, make sure you’re not adding too much flour during kneading; a slightly sticky dough is often ideal.
My Rolls Aren’t Rising Enough!
This is usually due to inactive yeast, a cold rising environment, or old flour. Verify yeast activity at the start, ensure your rising spot is consistently warm and draft-free, and always check your flour’s expiration date for freshness.
Help! My Filling Melted Out!
If your delectable filling oozes out during baking, it’s often because the butter in the filling was too soft to begin with, or the dough wasn’t rolled tightly enough into a log. Ensure the filling butter is just softened (not melted) and roll the log as tight as possible to keep everything contained.
The Icing is Too Thick/Thin!
The consistency of your cream cheese frosting-like icing is easily adjustable. If it’s too thick to drizzle, add more milk (or a splash of water) a teaspoon at a time until it reaches your desired flow. If it’s too thin, simply beat in a little more powdered sugar until it thickens up perfectly.
Enjoying Your Creation: Serving, Storing, and Making Ahead
Discover the best ways to savor your Easy Homemade Cinnamon Rolls, keep them fresh, and even prepare them in advance for ultimate convenience.
Perfect Pairing: How to Serve Your Warm Rolls
These Easy Homemade Cinnamon Rolls are unequivocally best served warm, fresh from the oven, with the vanilla icing generously drizzled over them. The warmth helps the icing melt into a luscious glaze.
For a perfect pairing, try our The Ultimate Golden Raspberry Crumble: Achieving a Crisp, Anti-Soggy Texture.
They are a delightful accompaniment to your morning coffee, a show-stopping addition to a special brunch, or a comforting dessert that truly feels like a hug in a bite.
Storing Leftovers: Keeping Them Fresh
Store any leftover cinnamon rolls in an airtight container at room temperature for up to 2-3 days to maintain their freshness. While delicious cold, they are truly magical when gently warmed.
For best results, a quick zap in the microwave for 15-30 seconds will restore their fluffy, gooey texture before serving again.
Can I Make Them Ahead? Overnight Options Explored
Absolutely! You can prepare the rolls up to the second rise. Once they are cut and arranged in the baking pan, cover the pan tightly with plastic wrap and refrigerate overnight (for up to 12 hours).
In the morning, remove them from the fridge and let them come to room temperature for 30-60 minutes before baking as directed. This makes for a fantastic, stress-free breakfast or brunch!
Frequently Asked Questions About Homemade Cinnamon Rolls
Here are answers to some common queries about baking these delightful yeast dough recipe rolls.
Can I use instant yeast instead of active dry yeast?
Yes, you can. If using instant yeast, you can typically mix it directly with the dry ingredients without activating it first. However, for guaranteed fluffiness and to visually confirm yeast vitality, following the activation step with active dry yeast as outlined is recommended.
What if I don’t have warm milk for the yeast?
Warm water can certainly be used as a substitute for warm milk to activate the yeast. Keep in mind that milk adds a noticeable richness and contributes to a softer, more tender dough that water alone won’t provide.
Can I freeze unbaked cinnamon rolls?
You absolutely can! After the second rise and cutting, place the unbaked rolls in the greased baking pan and freeze until they are completely solid. Once frozen, transfer them to a freezer-safe bag for convenient storage, where they will keep well for up to 4-6 weeks.
To bake from frozen, thaw them overnight in the refrigerator, then allow them to come to room temperature for at least 60 minutes before baking according to the recipe instructions.
How long do these cinnamon rolls last?
When stored properly in an airtight container at room temperature, these homemade sweet rolls are best enjoyed within 2-3 days for optimal freshness and texture. For longer storage, freezing (either baked or unbaked) as described above is an excellent option.
Can I make these dairy-free?
Yes, with a few straightforward substitutions! Use a non-dairy milk (such as almond milk or oat milk) for both the dough and the icing. Also, substitute dairy butter with a good quality plant-based butter alternative for both the dough and filling.
The texture may vary slightly from the traditional version, but your dairy-free Easy Homemade Cinnamon Rolls will still be incredibly delicious.
Ready to Impress? Share Your Easy Homemade Cinnamon Rolls Masterpiece!
Now that you’re armed with all the insider tips and a meticulously guided process, you’re perfectly equipped to bake the most incredible Easy Homemade Cinnamon Rolls your family and friends have ever tasted. Say goodbye to dense, dry pastries and prepare for guaranteed fluffy, gooey perfection!
We encourage you to embark on this delightful baking journey and share your creations with us! And if you’re looking for more comforting and delicious treats, be sure to explore our recipe for cinnamon sugar pull-apart rolls for another fantastic baked good.
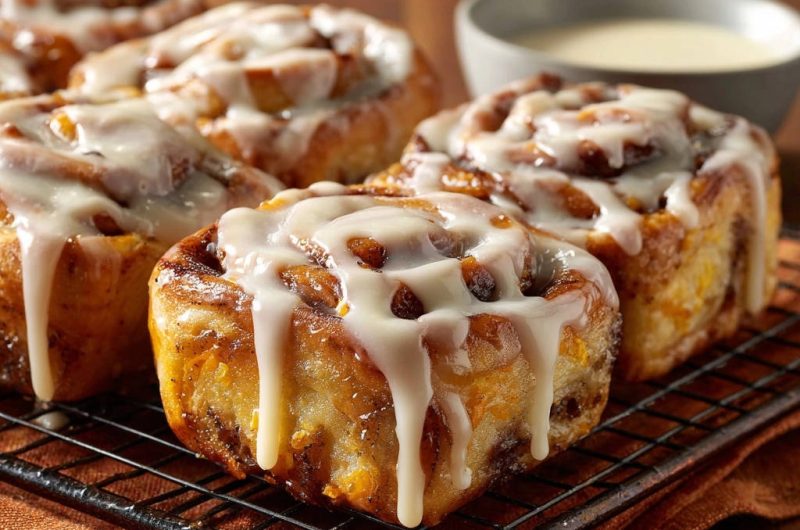
Cinnamon Rolls
Course: BakingCuisine: AmericanDifficulty: medium12
rolls45
minutes25
minutes150
kcal180
minutesDiscover the secret to perfectly soft, fluffy, and gooey cinnamon rolls every time. This recipe transforms ordinary Sunday mornings into something special with wonderfully light, homemade treats. Say goodbye to dense rolls and hello to guaranteed deliciousness!
Ingredients
Directions
Notes
- Ensure your yeast is active for max fluffiness. A warm oven (turned off, light on) is a perfect spot for rising.