Crispy Chicken Cutlets with Gravy: The No-Soggy Secret!
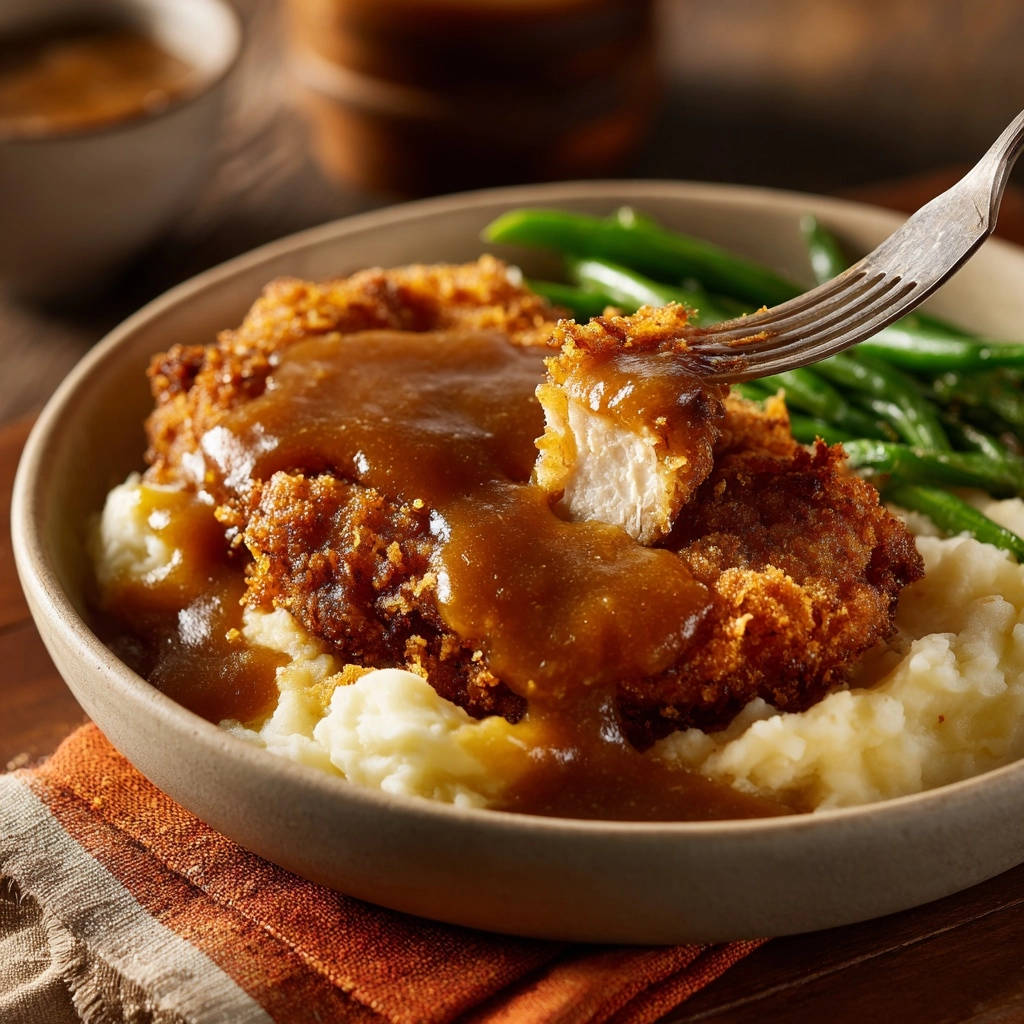
You know that moment: you’ve just crafted a beautiful, golden-brown chicken cutlet, only to watch its perfect crispness surrender under a spoonful of warm gravy. I’ve been there too, endlessly frustrated by the soggy breading dilemma when serving classic
Crispy Chicken Cutlets with Gravy
. My simple, game-changing trick ensures that satisfying crunch remains intact, transforming this beloved comfort food into a reliably perfect weeknight meal.Why This Recipe is Your New Weeknight Hero
The “No-Soggy” Difference: Crispy Every Time
The problem of soggy breading under gravy is a common kitchen heartache. This recipe directly tackles that challenge with a crucial, yet simple, post-frying technique.
By allowing air to circulate around the cooked cutlets, we prevent steam from accumulating. This means your breading stays wonderfully crisp, even when generously covered in savory gravy.
Perfect for Busy Evenings: Deliciously Achievable
Crafting a comforting, hearty meal doesn’t have to be an all-day affair. This Crispy Chicken Cutlets with Gravy recipe is designed for efficiency without compromising on flavor.
It’s a complete meal solution, making it ideal for those busy weeknights when you still want to serve something truly satisfying and homemade for the family.
A Comfort Food Classic, Reimagined for Modern Kitchens
Crispy chicken and velvety gravy evoke a sense of home and nostalgia. This recipe honors that tradition while introducing modern, reliable methods.
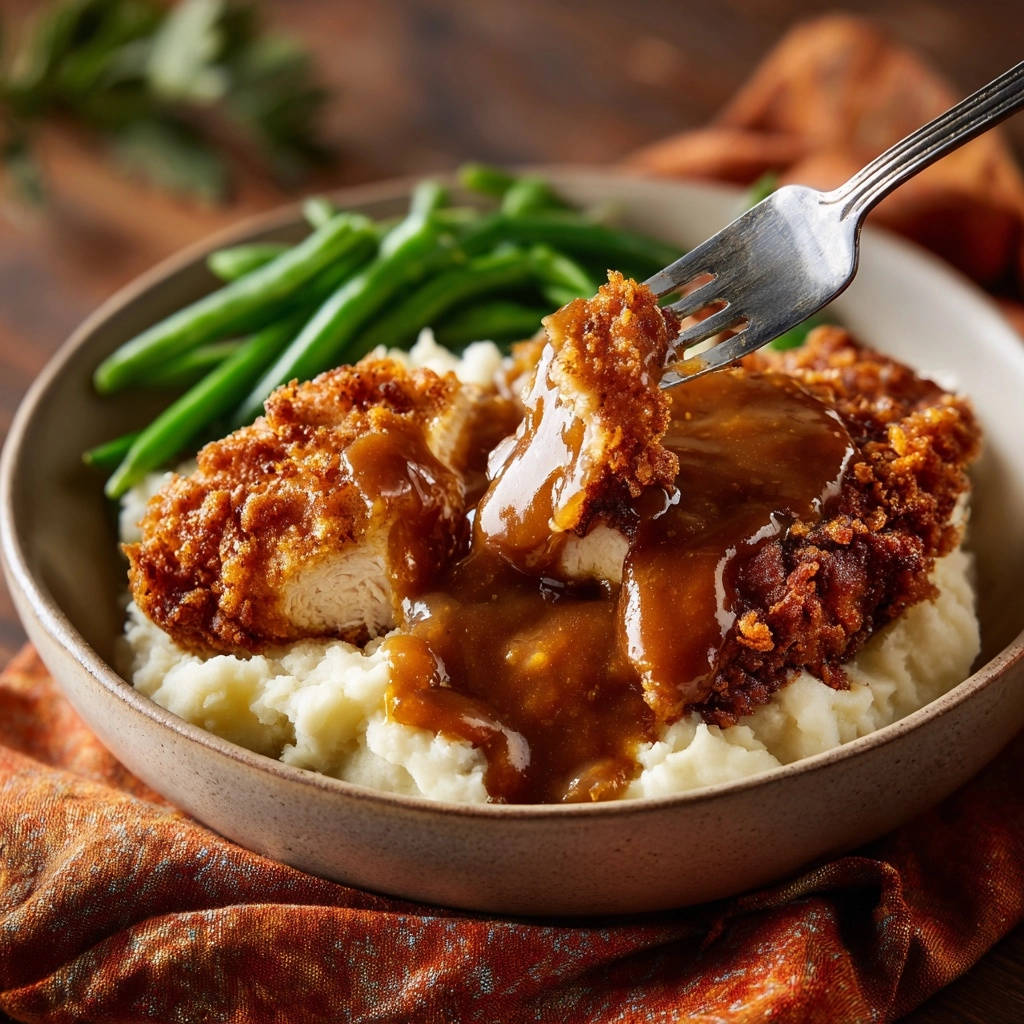
You’ll achieve restaurant-quality results in your own kitchen, complete with perfectly tender mashed potatoes and vibrant green beans, elevating a timeless favorite.
Gathering Your Culinary Tools for Success
Kitchen Essentials for Perfectly Even Cutlets
A meat mallet or heavy rolling pin is indispensable for this recipe. Pounding chicken breasts to an even 1/2-inch thickness is critical.
This ensures uniform cooking, preventing thinner parts from overcooking while thicker sections remain undercooked, leading to an even, golden crust.
Skillet Savvy: Choosing the Right Pan for Frying
A large, heavy-bottomed skillet, such as cast iron or a quality non-stick pan, is ideal for frying. It distributes heat evenly and maintains a consistent oil temperature.
Ensure your pan is large enough to accommodate one or two cutlets without overcrowding, which helps maintain oil temperature and crispness.
The Secret to Crispy Draining: The Indispensable Wire Rack
This is the game-changer for non-soggy Crispy Chicken Cutlets with Gravy. A wire rack set over a baking sheet is absolutely essential.
It allows air to circulate around the entire fried cutlet, preventing steam from softening the breading as they rest. This simple tool is key to maintaining that perfect crunch.
The Core Ingredients: What You’ll Need for Flavorful Crispy Chicken Cutlets with Gravy
For the Golden Chicken Cutlets
Boneless, skinless chicken breasts are pounded thin, creating tender, quick-cooking cutlets. This thinness allows for maximum surface area for the crispy coating.
A classic breading station of all-purpose flour, beaten eggs, and Panko breadcrumbs forms the foundation. Panko is crucial for its superior crispiness compared to regular breadcrumbs.
Proper seasoning of both the chicken and the breadcrumbs ensures flavor penetrates every bite.
Crafting Creamy Mashed Potatoes
Yukon Gold potatoes are selected for their naturally creamy texture and buttery flavor, making them ideal for mashing.
Warm milk and unsalted butter are added for richness and smoothness. Using warm milk helps the potatoes absorb liquids more readily without cooling them down.
Fresh & Vibrant Green Beans
Fresh green beans, trimmed and cooked to a tender-crisp texture, provide a vibrant counterpoint to the richer components.
A simple seasoning of olive oil, salt, and pepper enhances their natural sweetness and crispness.
For a perfect pairing, try our Crispy Panko Chicken Tenders: Juicy, Shatteringly Crisp Recipe.
Building the Rich, Velvety Gravy
A classic roux, made from unsalted butter and all-purpose flour, forms the base of the gravy, ensuring a smooth, lump-free consistency.
Chicken broth provides the liquid and savory depth. Onion powder and garlic powder infuse the gravy with aromatic, comforting flavors that complement the chicken beautifully.
Step-by-Step: Mastering Your Crispy Chicken Cutlets with Gravy Perfection
Preparing the Chicken for Ultimate Crispy
Place each chicken breast between two pieces of plastic wrap. Using a meat mallet, pound them to an even 1/2-inch thickness.
This uniform thickness is essential for even cooking and ensuring every part of the cutlet gets perfectly crispy.
Season both sides generously with salt and black pepper to build flavor from the inside out.
The Art of the Breading Station
Set up three shallow dishes in a row: one for flour, one for beaten eggs, and one for Panko breadcrumbs.
Thoroughly mix the remaining salt and pepper into the Panko; this adds flavor directly to the crispy coating. Dredge each cutlet first in flour, shaking off any excess.
Next, dip it into the beaten eggs, ensuring complete coverage. Finally, press firmly into the seasoned Panko, making sure the breadcrumbs adhere completely to all surfaces for a consistent, satisfying crust.
Frying for Golden Perfection
Heat vegetable oil in a large skillet over medium-high heat until it shimmers. This indicates the oil is hot enough for frying.
Carefully place one or two breaded chicken cutlets into the hot oil, ensuring not to overcrowd the pan. Overcrowding drops the oil temperature, leading to greasy, less crispy results.
Fry for 3 to 4 minutes per side, or until the cutlets are beautifully golden brown and cooked through. An internal temperature of 165 degrees F ensures they are safe to eat.
The Crucial “No-Soggy” Step: Post-Fry Resting
As each cutlet finishes frying, immediately transfer it to a wire rack set over a baking sheet lined with paper towels.
This is the secret weapon against soggy breading. The wire rack allows air to circulate around the entire cutlet, preventing steam from accumulating and making the crust soft.
Let them rest here while you prepare the remaining components of your meal, ensuring maximum crispness until serving.
While They Rest: Creamy Mashed Potatoes
Place quartered Yukon Gold potatoes in a large pot and cover with cold water, adding a pinch of salt. Bring to a boil, then reduce heat and simmer until very tender, about 15-20 minutes.
Drain the potatoes exceptionally well, then return them to the hot pot. Add warm milk and unsalted butter.
Mash until smooth and creamy, seasoning with salt and pepper to taste. Keep them warm until ready to serve.
Tender-Crisp Green Beans on the Side
While the potatoes cook, heat olive oil in a separate skillet over medium heat. Add the trimmed fresh green beans.
Cook for 5-7 minutes, stirring occasionally, until they are tender-crisp. Season with salt and pepper.
For the crispiest results, try the same double-coating method in this ultra crispy chicken tenders recipe.
Whisking Up the Perfect Gravy
In the same skillet used for the chicken (or a clean saucepan), melt 2 tablespoons of butter over medium heat. Whisk in 2 tablespoons of all-purpose flour to create a roux, cooking for 1 minute while stirring constantly.
Gradually whisk in the chicken broth until the mixture is smooth and lump-free. Bring to a simmer, whisking frequently, until the gravy thickens to your desired consistency.
Stir in onion powder, garlic powder, and season with salt and pepper to taste, adjusting to your preference for a rich, savory sauce.
Assembling Your Comfort Food Masterpiece
To serve, place a generous spoonful of creamy mashed potatoes on each plate. Top with one of your perfectly crispy chicken cutlets.
Spoon a portion of the warm gravy directly over the cutlet and mashed potatoes. Serve immediately with the tender-crisp green beans on the side.
Now, enjoy that amazing, non-soggy crunch you’ve worked so hard to achieve!
Pro Tips & Chef’s Secrets for Next-Level Flavor
Achieving Uniform Cutlets Every Time
For truly uniform chicken cutlets, place each chicken breast between two sheets of parchment paper or inside a large resealable plastic bag before pounding.
This prevents sticking and tearing, allowing you to achieve consistent 1/2-inch thickness across the entire cutlet. Uniform thickness ensures even cooking and a perfectly consistent crunch.
Flavor Boosters for Your Breading
Elevate your breading by mixing in extra seasonings with the Panko. Consider adding 1/4 cup grated Parmesan cheese for a savory, nutty note.
Dried herbs like thyme, rosemary, or a pinch of smoked paprika can also add incredible depth and aroma to your crispy coating.
Gravy Hacks for Extra Richness
After frying the chicken, deglaze the pan with a splash of chicken broth or even a little water before making your roux. Those browned bits stuck to the bottom are pure flavor gold for your gravy.
For an even creamier, richer gravy, stir in a tablespoon of heavy cream or a pat of butter at the very end, just before serving.
Temperature Control: The Key to Perfect Frying
Maintaining the correct oil temperature is vital for crispy, non-greasy chicken. Too low, and the chicken absorbs oil, becoming soggy; too high, and the breading burns before the chicken cooks through.
Aim for around 350-375°F (175-190°C). If you don’t have a thermometer, a test crumb of Panko should sizzle immediately but not burn instantly, indicating the oil is ready.
Troubleshooting Your Crispy Chicken Cutlets (and Sides!)
“Why Isn’t My Chicken Crispy?”
The most common culprits for non-crispy chicken are overcrowding the pan, insufficient oil, or skipping the crucial wire rack step after frying.
Always fry in batches if necessary, ensuring each cutlet has enough space. Use enough oil to come at least halfway up the cutlet. And absolutely, always, transfer fried cutlets to a wire rack for air circulation.
“My Gravy is Too Thin/Too Thick!”
If your gravy is too thin, create a small slurry by whisking 1 tablespoon of flour or cornstarch with 2 tablespoons of cold water. Gradually whisk this into the simmering gravy until it thickens.
If your gravy becomes too thick, simply whisk in a splash more chicken broth or even warm water until it reaches your desired velvety consistency.
“How to Keep My Potatoes Smooth, Not Gummy?”
The key to fluffy, not gummy, mashed potatoes is thorough draining. Ensure every drop of water is removed after boiling.
What to Serve with Crispy Chicken Cutlets
These chicken cutlets with gravy are rich and savory, so you want sides that can soak up that extra sauce and add some cool or creamy contrast.
- For a cool, tangy counterpoint to the hot gravy, the Loaded Creamy Potato Salad brings a creamy texture and sharp bite that balances the meal.
- If you prefer a hot, buttery side, the Crispy-Topped Mashed Potatoes offer a soft interior and a golden, crunchy crust that pairs perfectly with the chicken’s crispy coating.
Avoid over-mashing; mash only until smooth, then stop. Always use warm milk and soft butter, as cold additions can cause the starches to seize up and result in a gluey texture.
Storage, Make-Ahead & Reheating for Easy Enjoyment
Storing Leftover Crispy Cutlets
For best results, store leftover cooked chicken cutlets and gravy separately in airtight containers in the refrigerator for up to 3-4 days.
The gravy can also be frozen for up to 3 months. Chicken cutlets can be frozen after frying for up to 1 month, although their crispness may be slightly reduced upon reheating from frozen.
Can You Make Them Ahead? Tips for Prep
You can prep several components of this Crispy Chicken Cutlets with Gravy meal in advance. Pound the chicken breasts and store them seasoned in the fridge.
You can also set up your breading station components (flour, eggs, seasoned Panko) ahead of time. The gravy base can be made and refrigerated, then gently reheated and adjusted with broth before serving.
Best Ways to Reheat Without Losing Crispness
To best preserve the crispness of your chicken cutlets, reheat them in a preheated oven at 375°F (190°C) for 10-15 minutes, or in an air fryer at 350°F (175°C) for 5-8 minutes, until heated through.
Avoid the microwave, as it will inevitably lead to soggy breading. Reheat gravy gently on the stovetop, whisking occasionally, adding a splash of broth if it’s too thick.
Serving Suggestions: What Pairs Best with This Classic Dish?
Beyond the Basics: Creative Side Dishes
While mashed potatoes and green beans are classic, this crispy chicken cutlets with gravy dish pairs beautifully with other sides too. Consider roasted asparagus, glazed carrots, or a fresh garden salad with a light vinaigrette.
A fluffy rice pilaf or even a simple side of buttered noodles can also complement the rich flavors and soak up the delicious gravy.
Beverages to Complement Your Meal
For a perfect pairing with the savory Crispy Chicken Cutlets with Gravy, consider a crisp, unoaked sparkling grape juice.
Non-alcoholic options like unsweetened iced tea with a lemon wedge, or a refreshing sparkling water with cucumber and mint, also cut through the richness beautifully.
Crispy Chicken Cutlets with Gravy: Your Top Questions Answered
Can I Use Chicken Thighs Instead of Breasts?
Absolutely! Chicken thighs can be used, offering a richer flavor and often a juicier texture due to higher fat content. You’ll still want to pound them to an even thickness for uniform cooking.
Cooking times may vary slightly; ensure they reach an internal temperature of 175°F (80°C) for optimal tenderness in thighs.
Is There a Gluten-Free Option for the Breading?
Yes, you can easily make this recipe gluten-free. Simply substitute all-purpose flour with a gluten-free all-purpose flour blend (one containing xanthan gum works best).
For the breading, use gluten-free Panko breadcrumbs, which are widely available and provide excellent crispness.
How Can I Make the Gravy Vegetarian?
To make the gravy vegetarian, simply substitute the chicken broth with a high-quality vegetable broth. Ensure that your butter and any other added ingredients are also vegetarian-friendly.
The roux base and seasonings remain the same, providing a rich and flavorful meat-free gravy option.
Can I Bake the Cutlets Instead of Frying?
While frying offers the absolute crispiest result, baking is a viable alternative. Preheat your oven to 400°F (200°C).
Place breaded cutlets on a wire rack set over a baking sheet (still crucial for air circulation!) and bake for 15-20 minutes, flipping halfway, until golden and cooked through. A light spray of oil on both sides before baking can enhance crispness.
Ready to Impress? Share Your Culinary Creation!
You now hold the secret to mastering truly Crispy Chicken Cutlets with Gravy, a dish that will undoubtedly become a treasured staple in your home. Say goodbye to soggy breading and hello to consistent, satisfying crunch with every bite.
Don’t wait to bring this ultimate comfort food to your table. Try this recipe tonight, savor the delicious results, and share your culinary creations with us! We can’t wait to hear how this amazing, no-soggy chicken cutlet recipe transforms your weeknight meals.
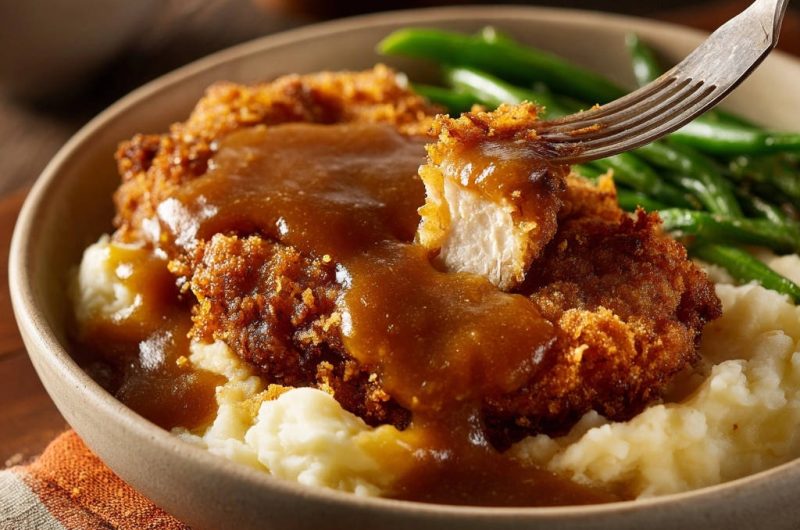
Crispy Chicken Cutlets
Course: Main CourseCuisine: AmericanDifficulty: medium4
servings30
minutes45
minutes950
kcal75
minutesNever suffer from soggy chicken cutlets again! This recipe reveals a simple trick to keep your golden, crispy chicken perfectly crunchy, even when smothered in delicious warm gravy. Paired with creamy mashed potatoes and tender green beans, it’s a satisfying and easy weeknight meal.
Ingredients
2 boneless, skinless chicken breasts (about 1.5 pounds total)
1 cup all-purpose flour
2 large eggs, beaten
2 cups Panko breadcrumbs
1 teaspoon salt, divided
1/2 teaspoon black pepper, divided
3 tablespoons vegetable oil (or other neutral oil), for frying
For the Mashed Potatoes:
2 pounds Yukon Gold potatoes, peeled and quartered
1/2 cup warm milk
4 tablespoons unsalted butter
Salt and pepper to taste
For the Green Beans:
1 pound fresh green beans, trimmed
1 tablespoon olive oil
Salt and pepper to taste
For the Gravy:
2 tablespoons unsalted butter
2 tablespoons all-purpose flour
2 cups chicken broth
1/2 teaspoon onion powder
1/4 teaspoon garlic powder
Salt and black pepper to taste
Directions
- Prepare Chicken Cutlets: Place each chicken breast between two pieces of plastic wrap. Using a meat mallet or heavy rolling pin, pound chicken to an even 1/2 inch thickness. Season both sides with 1/2 teaspoon salt and 1/4 teaspoon black pepper.
- Set Up Breading Station: Prepare three shallow dishes. In the first, add the 1 cup all-purpose flour. In the second, add the beaten eggs. In the third, add the Panko breadcrumbs, along with the remaining 1/2 teaspoon salt and 1/4 teaspoon black pepper, mixing well.
- Bread the Chicken: Dredge each chicken cutlet first in the flour, shaking off excess. Then dip in the beaten eggs, ensuring full coverage. Finally, press firmly into the Panko breadcrumbs, making sure the breadcrumbs adhere completely to all sides.
- Fry the Chicken: Heat the vegetable oil in a large skillet over medium-high heat. Once the oil shimmers, carefully place one or two breaded chicken cutlets in the skillet, ensuring not to overcrowd. Fry for 3 to 4 minutes per side, or until golden brown and cooked through (internal temperature 165 degrees F).
- Achieve Crispy Breading: As each cutlet finishes frying, transfer it directly to a wire rack set over a baking sheet lined with paper towels. This crucial step allows air to circulate around the entire cutlet, preventing steam from accumulating and making the breading soggy. Let them rest here while you prepare the rest of the meal.
- Make Mashed Potatoes: Place quartered potatoes in a large pot and cover with cold water by one inch. Add a pinch of salt. Bring to a boil, then reduce heat and simmer until very tender, about 15-20 minutes. Drain well. Return potatoes to the hot pot. Add warm milk and butter. Mash until smooth and creamy. Season with salt and pepper to taste. Keep warm.
- Cook Green Beans: While potatoes cook, heat olive oil in a separate skillet over medium heat. Add trimmed green beans and cook for 5-7 minutes, stirring occasionally, until tender-crisp. Season with salt and pepper.
- Prepare Gravy: In the same skillet used for the chicken (or a clean saucepan), melt 2 tablespoons butter over medium heat. Whisk in 2 tablespoons all-purpose flour and cook for 1 minute, stirring constantly, to create a roux. Gradually whisk in the chicken broth until smooth. Bring to a simmer, whisking frequently, until gravy thickens to your desired consistency. Stir in onion powder, garlic powder, and season with salt and pepper to taste.
- Serve: Place a generous spoonful of mashed potatoes on each plate. Top with a crispy chicken cutlet. Spoon a portion of the warm gravy directly over the cutlet and mashed potatoes. Serve immediately with the green beans on the side. Enjoy that amazing, non-soggy crunch!
Notes
- The key to crispy cutlets is transferring them to a wire rack after frying to prevent steam buildup.