Mastering the Savory Sausage and Potato Skillet
We’ve all been there. You’re craving a hearty, one-pan meal, but you end up with a pile of mushy, steamed potatoes that lack any sort of bite. It’s the ultimate kitchen heartbreak when the moisture from the onions and meat turns your golden dreams into a soft, soggy mess.
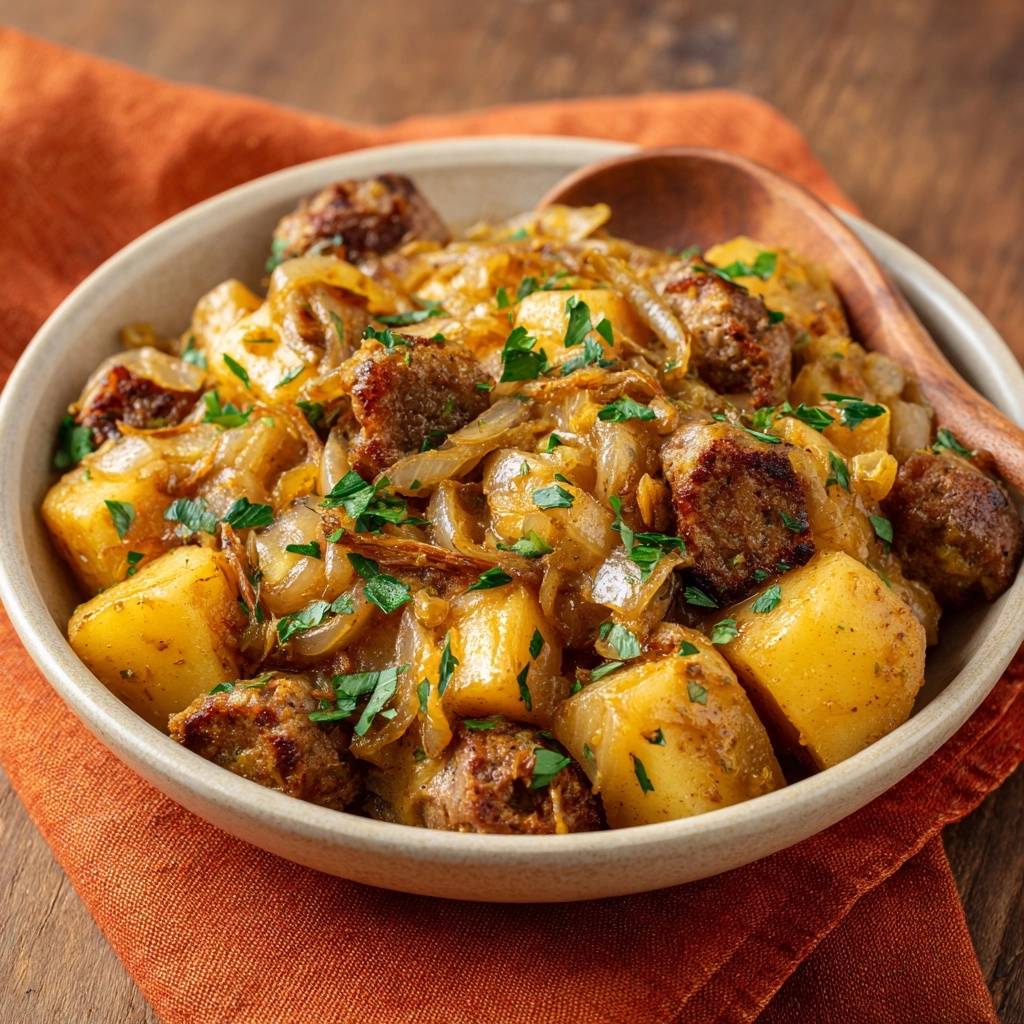
This Savory Sausage and Potato Skillet is the solution to that common frustration. By focusing on a specific searing sequence and moisture management, you’ll achieve that elusive “shatter-crisp” exterior while keeping the inside of the potato light and fluffy. It’s about controlling the environment in your pan to let the ingredients shine.
If you enjoy the deep gold from caramelizing onions, try this bratwurst with sauerkraut and onions for another savory skillet meal.
The secret to this success lies in the starch. Most people toss potatoes straight into the pan, but we’re going to strip away that surface starch first. This simple step, combined with high-heat management, ensures your dinner has the texture of a high-end bistro side dish rather than a cafeteria hash.
The Science of the Anti-Soggy Potato Secret
To understand why potatoes get gummy, we have to look at their chemistry. Potatoes are packed with starch, specifically amylose and amylopectin. When these starches meet heat and moisture, they gelatinize, which is great for mashed potatoes but terrible for a crispy skillet fry.
Surface starch is the primary culprit behind sticking and sogginess. When you soak your cubed Yukon Golds in cold water, you’re physically washing away the excess starch that would otherwise turn into a sticky “glue” in the pan. This allows the dry heat of the oil to interact directly with the potato skin, creating a crisp seal.
Furthermore, we have to respect the Leidenfrost effect. When a potato hits a hot, oiled surface, the remaining moisture should instantly turn to steam, lifting the potato slightly and preventing it from bonding to the metal. If your pan isn’t hot enough or the potatoes are wet, they’ll simply stew in their own juices, leading to that dreaded mushy texture.
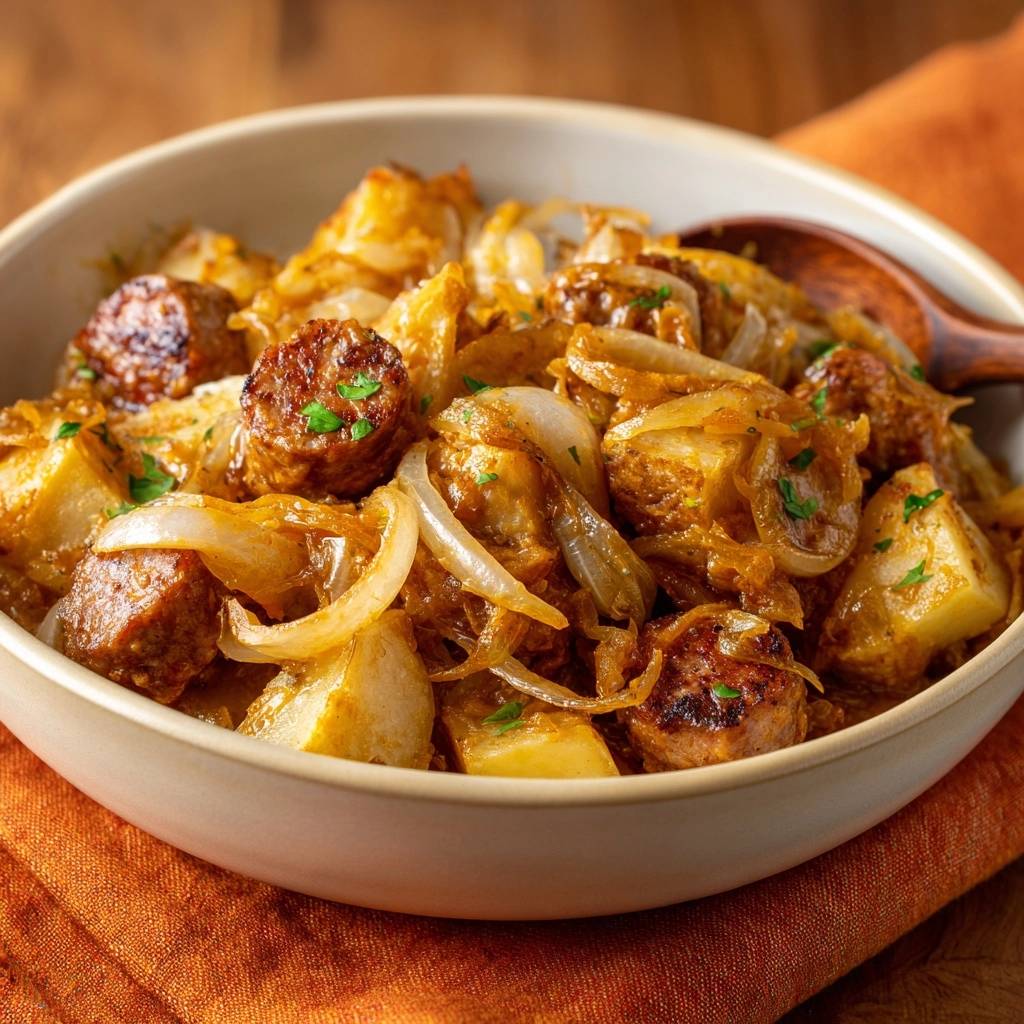
Essential Components for the Savory Sausage and Potato Skillet
Quality ingredients are the foundation of any great skillet meal. For the sausage, I recommend a high-quality bulk Italian or breakfast sausage. Look for a good fat-to-lean ratio; you want enough fat to help fry the potatoes later, but not so much that the dish becomes greasy.
Yukon Gold potatoes are the “Goldilocks” choice here. They sit right in the middle of the waxy-to-starchy spectrum. They hold their shape better than a Russet but have a creamier, more luxurious interior than a red potato. They are the secret weapon for a perfect sear.
Yellow onions are your best friend for caramelization. They contain more natural sugars than white onions, which means they’ll turn jammy and sweet when they hit the pan. Finally, a splash of broth is essential for deglazing, as it picks up all the savory bits stuck to the bottom of the skillet.
Selecting the Right Fat for High-Heat Searing
While butter tastes amazing, its smoke point is too low for the initial potato sear. Olive oil is our go-to here because it offers a beautiful flavor profile while standing up to the medium-high heat required to build a crust. It provides a clean finish without the risk of burning that you’d get with unclarified butter.
If you want an even higher smoke point, you could use avocado oil, but you’ll lose some of that Mediterranean depth. Stick with a good quality olive oil, and just keep an eye on your heat levels to ensure it doesn’t reach the flash point where it starts to smoke excessively.
The Role of Smoked Paprika and Garlic Powder
Timing is everything when it comes to dry spices. If you add garlic powder and smoked paprika at the beginning, the high heat of the searing phase will scorch them. Burnt paprika becomes incredibly bitter, ruining the entire flavor profile of the skillet.
We add these spices during the final “toss” phase. This allows the residual heat and the small amount of moisture from the onion reduction to bloom the spices without burning them. You get the full, smoky aroma and the punch of garlic without any of the acrid aftertaste.
Step-by-Step: Achieving the Perfect Skillet Sear
Achieving the perfect texture isn’t difficult, but it does require a bit of patience. You can’t rush the Maillard reaction—that beautiful chemical process that turns proteins and sugars brown and delicious. Follow these phases closely for the best results.
Phase 1: Starch Removal and Thermal Preparation
Start by soaking your cubed potatoes in a bowl of cold water for at least five minutes. You’ll notice the water gets cloudy; that’s the starch leaving the building. After soaking, the most important step is to pat them bone-dry with paper towels.
Any moisture left on the surface of the potato will immediately turn to steam when it hits the oil. Steam is the enemy of the sear. If the potatoes are even slightly damp, they will steam each other in the pan, and you’ll lose that golden crust before you even start.
Phase 2: The Initial Potato Crust Development
Heat your oil until it shimmers, then add the potatoes. The “Single Layer Rule” is non-negotiable here. If you crowd the pan, the temperature drops instantly, and the potatoes will release moisture that can’t escape, leading to—you guessed it—sogginess.
Now comes the hard part: don’t touch them. Let them sit undisturbed for about 6 minutes. You want them to develop a hard, golden sear. If you try to flip them too early and they stick, they aren’t ready. They’ll naturally release from the pan once that crust has formed.
Phase 3: Developing the Sausage Fond
Once the potatoes are crisp and removed from the pan, it’s time for the sausage. Break the bulk sausage into rustic, irregular chunks. These craggy edges create more surface area, which means more opportunities for browning and crispy bits.
As the sausage browns, it will leave behind a brown film on the bottom of the pan called “fond.” This is concentrated flavor. You aren’t just looking for the meat to be cooked through; you want deep brown, crispy edges that will provide a textural contrast to the onions.
Phase 4: Deglazing and Onion Caramelization
Add your sliced onions and pour in the broth. The liquid will bubble and hiss, lifting that flavorful fond off the bottom of the pan and coating the onions in it. This is where the magic happens, as the onions absorb all that meaty goodness.
Lower the heat and let the onions cook until they are soft and jammy. You’re looking for a deep golden color and a sweet, savory aroma. This reduction acts as a “sauce” that will eventually bind the potatoes and sausage together in a cohesive, flavorful bite.
Avoiding Common Skillet Cooking Mistakes
If your potatoes are sticking to the pan, don’t panic and don’t force them. Sticking usually means the crust hasn’t fully formed yet. Give them another minute or two, and they should lift easily with a spatula once the sear is complete.
Heat management is also key. If you notice the pan getting too dark or smelling like it’s about to burn, turn the heat down slightly. Every stove is different, and “medium-high” on one burner might be “searing hot” on another. Trust your nose and your eyes over the dial.
Never, ever cover the pan with a lid during this process. A lid traps steam, which will immediately soften the crispy potato skins you worked so hard to create. If you need the potatoes to cook faster, cut them into smaller cubes rather than reaching for a cover.
Flavor Variations and Regional Swaps
This recipe is a fantastic canvas for different flavors. For a Mediterranean twist, add some sliced bell peppers with the onions and swap the smoked paprika for dried oregano and a squeeze of fresh lemon juice at the end.
If you like a spicy kick, use hot Italian sausage and add a teaspoon of red pepper flakes during the deglazing phase. The heat will infuse into the onions and provide a nice slow burn that cuts through the richness of the potatoes.
You can also experiment with other root vegetables. Swapping half of the potatoes for parsnips or carrots adds a lovely earthy sweetness. Just make sure to cut them into similar sizes so everything cooks at the same rate in the skillet.
Optimal Tools for One-Pan Success
A heavy-bottomed vessel is essential for this dish. Cast iron is the gold standard because it retains heat incredibly well, ensuring the pan temperature doesn’t plummet when you add the cold potatoes. It also develops a natural non-stick surface over time.
Stainless steel is another great option, though it requires a bit more oil to prevent sticking. It’s excellent for developing a deep fond, which makes for a more flavorful onion reduction. Avoid thin, cheap aluminum pans, as they create hot spots that will burn your food in some places while leaving it raw in others.
Non-stick pans are actually a disadvantage here. While they make cleanup easy, they don’t allow for the same level of browning or fond development. To get that restaurant-quality sear, you need the “grip” of a metal surface that allows the Maillard reaction to do its work.
What to Serve with Your Savory Sausage and Potato Skillet
Since this dish is quite rich and savory, it pairs beautifully with something acidic. A bright arugula salad tossed in a simple lemon vinaigrette provides a peppery crunch that cleanses the palate between bites of sausage and potato.
Quick-pickled red onions are another fantastic addition. The sharp vinegar and slight crunch of the onions cut right through the fat of the sausage. You can make these in ten minutes while the potatoes are soaking, and they add a beautiful pop of color to the plate.
For a green vegetable side, try blanched green beans or roasted broccolini. You want something with a bit of “snap” to contrast the soft, jammy onions and the fluffy interior of the potatoes. Keep the seasoning simple so it doesn’t compete with the skillet.
Make Ahead, Storage, and Reheating Instructions
If you have leftovers, store them in an airtight container in the refrigerator for up to three days. However, be aware that the potatoes will lose their crispness as they sit. The moisture from the onions will eventually migrate into the potato crust.
The microwave is the enemy of this dish. It will turn your potatoes into rubber. Instead, reheat the mixture in an air fryer at 350°F for about 5 minutes, or toss it back into a hot skillet with a tiny bit of oil. This will help re-crisp the edges and revive the textures.
I don’t recommend freezing this specific dish. Potatoes tend to get grainy and mealy when frozen and thawed, especially after they’ve been fried. This is a meal that is truly at its peak the moment it comes out of the skillet, so try to enjoy it fresh!
Expert Troubleshooting and Technical FAQ
Why are my potatoes still hard in the middle?
This usually happens if your heat was too high. The outside browned and crisped before the heat had a chance to penetrate the center of the potato cube. Next time, try cutting the potatoes into slightly smaller 1-inch cubes, or lower the heat just a touch during the initial sear phase to give them more time to soften.
Can I use Russet potatoes instead of Yukon Gold?
You can, but be careful. Russets are very starchy and have a tendency to fall apart or turn “mealy” in a skillet. If you use them, you must double the soaking time to ten minutes and be extra gentle when tossing them. Yukon Golds are much more forgiving for this specific cooking method.
How do I prevent the garlic powder from tasting burnt?
The trick is to add the garlic powder at the very end, during the last 2-3 minutes of cooking. By this point, the broth has mostly evaporated, and the heat is being used just to marry the flavors. Adding it too early to a dry, hot pan is a guaranteed way to get that bitter, burnt garlic taste.
What is the best way to slice onions for maximum jamminess?
Slice your onions “pole to pole” (from the root to the stem) rather than across the middle. Slicing with the grain of the onion fibers helps them hold their shape during the long caramelization process. They will soften and become jammy without completely disintegrating into a mushy paste.
Is it possible to make this in a slow cooker?
Technically, yes, but I wouldn’t recommend it. A slow cooker is a moist-heat environment, which is the exact opposite of what we want for this dish. You would lose 100% of the crispy texture and the deep, seared flavor of the sausage. This recipe is all about the “Anti-Soggy” goal, which requires the dry heat of a skillet.
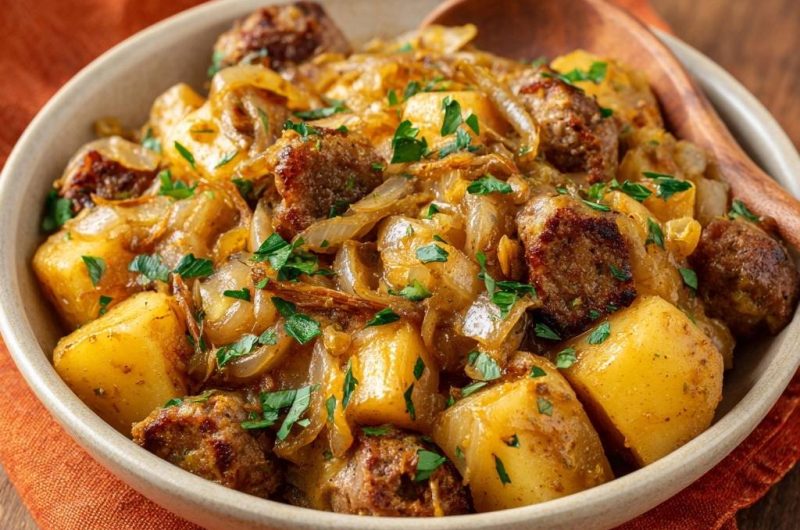
Sausage and Potato Skillet
Course: Main CourseCuisine: AmericanDifficulty: easy4
servings15
minutes30
minutes450
kcal45
MinutesA hearty one-pan meal that solves the problem of mushy potatoes through a specific searing and starch-removal technique. Combined with browned Italian sausage and jammy caramelized onions, this dish offers a perfect balance of textures.
Ingredients
1 pound bulk Italian sausage or breakfast sausage (broken into rustic chunks)
1.5 pounds Yukon Gold potatoes, peeled and cut into 1-inch cubes
2 large yellow onions, thinly sliced
3 tablespoons olive oil
1/2 cup beef or chicken broth (for deglazing)
1 teaspoon garlic powder
1 teaspoon smoked paprika
Salt and black pepper to taste
Fresh parsley, chopped for garnish
Directions
- The secret to avoiding soggy potatoes is removing surface starch. Place your cubed potatoes in a bowl of cold water for 5 minutes, then drain and pat them completely dry with a paper towel. Moisture is the enemy of a crisp crust.
- Heat 2 tablespoons of olive oil in a large heavy skillet over medium-high heat. Add the potatoes in a single layer. Do not crowd the pan. Let them sit undisturbed for 5 to 6 minutes to develop a hard sear.
- Once the potatoes are golden and crusty on one side, toss them and cook for another 5-7 minutes until tender. Remove the potatoes from the skillet and set them aside on a plate. This prevents them from steaming while you cook the other ingredients.
- In the same skillet, add the remaining tablespoon of oil. Add the sausage in small, rustic chunks rather than slices. Brown the sausage thoroughly until deep brown and crispy on the edges.
- Add the sliced onions to the skillet with the sausage. Lower the heat to medium. Pour in the broth to deglaze the flavorful brown bits (fond) from the bottom of the pan. Cook, stirring occasionally, until the onions are soft, jammy, and deeply caramelized. Cook until no pink remains and it reaches 160°F (71°C).
- Add the potatoes back into the skillet. Season with garlic powder, smoked paprika, salt, and pepper.
- Toss everything together for 2-3 minutes over high heat. This allows the potatoes to absorb the savory onion reduction and re-crisp the edges.
- Garnish heavily with fresh parsley and serve immediately while the textures are at their peak.
Notes
- The key to success is ensuring the potatoes are bone-dry before hitting the oil and not crowding the pan during the initial sear.