Crispy Fried Cheese Curds: Gooey Perfection, No Mess!

That familiar craving for perfectly Crispy Fried Cheese Curds can be intense, yet making them at home often feels like a gamble against greasy coatings and runaway cheese. After my own culinary adventures and missteps, I’ve finally perfected a foolproof method that locks in that incredible, gooey stretch every single time, delivering a truly special treat without the usual fuss.
Beyond the Basics: What Makes Our Crispy Curds Stand Out?
The Double-Coat Advantage: Your Shield Against Leakage
Our recipe leverages a double-coating technique that creates an incredibly secure and crispy exterior. This robust barrier is crucial for preventing the delicious cheese from melting out prematurely during frying.
It ensures each curd maintains its shape, trapping the gooey center perfectly inside until the very first bite.
The Freezer Secret: Preventing Premature Meltdown
We employ a two-stage freezing process that is absolutely critical. Chilling the curds initially, and then again after breading, ensures they are rock-solid before hitting the hot oil.
This method drastically reduces the risk of explosions and guarantees the cheese melts into a luxuriously gooey consistency, rather than becoming overcooked or escaping its crispy shell.
The Right Temperature, Every Time: Crispy, Not Greasy
Precise oil temperature control is the unsung hero of truly crispy, non-greasy fried foods. This recipe emphasizes maintaining an optimal frying temperature, which is key to achieving that desirable golden-brown exterior and preventing oil absorption.
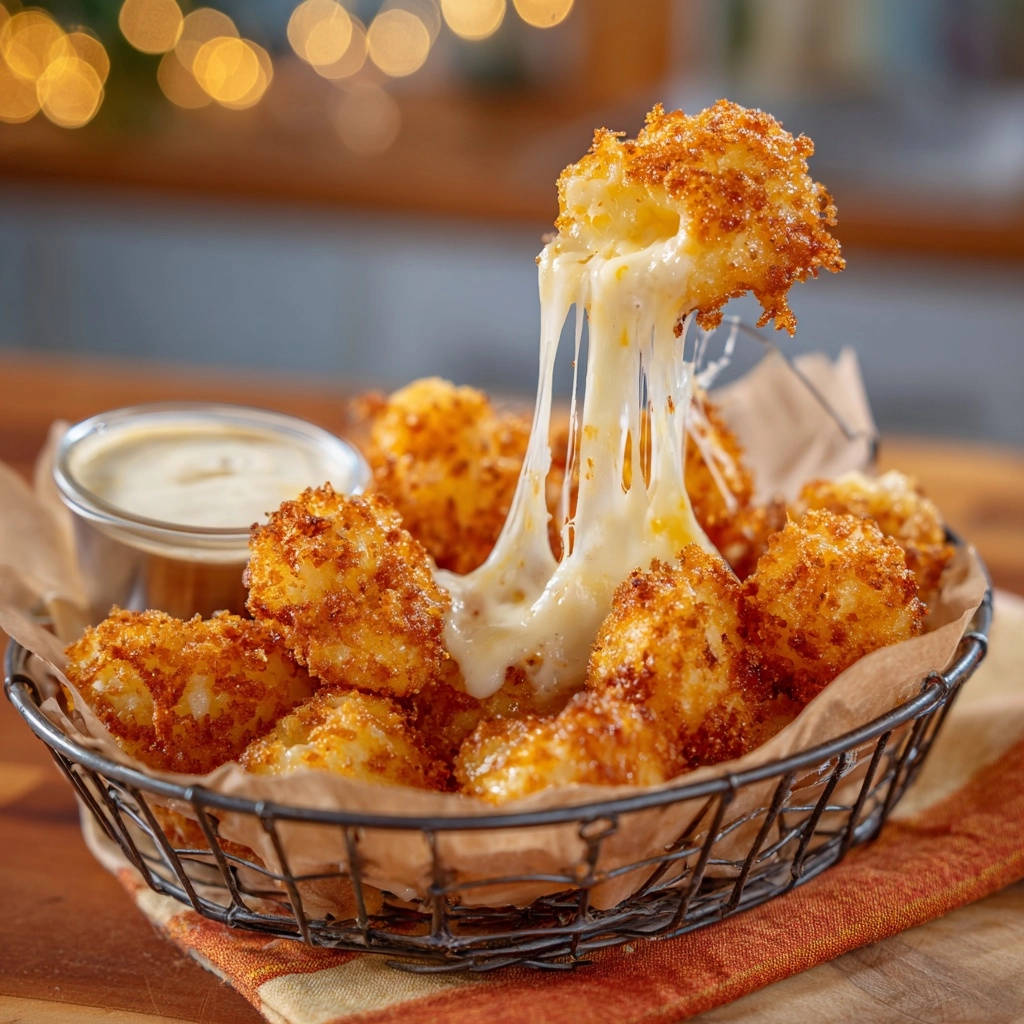
It ensures your Crispy Fried Cheese Curds are light, crunchy, and never heavy.
Gather Your Gooey Goodness: The Essential Ingredients
The Star: Fresh Cheese Curds
Opt for fresh, cold cheese curds whenever possible. Their natural springiness and mild flavor are the foundation of authentic, delicious fried cheese snacks.
Starting with cold curds is also vital for successful chilling and preventing premature melting.
The Crispy Foundation: Flour, Panko, and Egg
This classic breading trio works in harmony to create the ultimate crispy crust. All-purpose flour provides the initial dry layer, helping the egg adhere.
Beaten eggs act as the binder, ensuring the panko breadcrumbs stick firmly. Panko breadcrumbs, with their larger, flakier texture, are superior for achieving exceptional crispiness compared to regular breadcrumbs.
Flavor Boosters: Salt and Pepper
Simple seasonings like salt and pepper are distributed throughout the flour and panko layers. This ensures every bite of your golden fried curds is seasoned from the inside out, enhancing the natural cheesy flavor.
The Frying Medium: Choosing the Right Oil
Vegetable oil or canola oil are excellent choices for deep frying. They both have a high smoke point and a neutral flavor, allowing the cheese curds’ taste to shine through without imparting unwanted notes.
Maintaining a consistent oil temperature is easier with these stable frying oils.
If you love that light, crunchy texture, these sugared fried cheese balls use the same technique for a sweet twist.
Your Essential Kitchen Toolkit for Crispy Perfection
For Prep & Breading
Having the right tools makes the breading process seamless and efficient. You’ll need a couple of baking sheets, ideally lined with parchment paper, to hold your curds during the crucial chilling phases.
Several shallow dishes are indispensable for setting up your organized breading station, and plenty of paper towels will be needed for blotting excess moisture from the curds.
For Frying Safely and Effectively
Safety and precision are paramount when deep frying. A heavy-bottomed pot or Dutch oven ensures even heat distribution and reduces the risk of oil splatters.
A deep-fry thermometer is non-negotiable for accurately monitoring and maintaining the ideal oil temperature. Finally, a slotted spoon or spider allows for safe handling and removal of the hot, delicious curds from the oil.
Your Path to Crispy Fried Cheese Curds Perfection: A Detailed Guide
- Prepare Your Curds for Success:
Blot the cheese curds thoroughly with paper towels to remove any excess moisture. This is a critical initial step for ensuring a truly crispy crust and preventing steam from breaking through the coating, which can lead to soggy results.
Place the dried curds on a baking sheet lined with parchment paper and put them in the freezer for at least 30 minutes. This initial chill helps the cheese stay firm during the breading process, making them easier to handle and preventing premature melting.
- Mastering the Breading Station Setup:
In three separate shallow dishes, create your organized breading station. The first dish should contain the all-purpose flour seasoned with 1/2 teaspoon salt and 1/4 teaspoon pepper. The second dish is for the beaten eggs, lightly whisked.
The third dish holds the panko breadcrumbs, seasoned with the remaining 1/2 teaspoon salt and 1/4 teaspoon pepper. This clear separation streamlines the coating process, making it efficient and mess-free, crucial for the double-dredge.
- The Double-Dredge Defense:
Working in small batches, take the chilled cheese curds. First, dredge each curd in the seasoned flour, shaking off any excess. Next, dip it completely into the beaten egg, allowing any extra to drip off. Finally, roll it thoroughly in the panko breadcrumbs, pressing gently to ensure a thick, even coating.
Now, repeat this entire process (flour, egg, panko) for a second time on each curd. This robust double coating is your ultimate shield against cheese leakage and guarantees an extra crispy exterior for your Crispy Fried Cheese Curds.
Place the double-coated curds back on the parchment-lined baking sheet, ensuring they don’t touch to prevent sticking.
- The Critical Second Chill:
Once all curds are double-coated, return the baking sheet to the freezer for another 15-20 minutes. This crucial second chill firms up the breading, allowing it to adhere perfectly, and ensures the cheese is very cold before it hits the hot oil, further preventing explosions and ensuring a magnificently gooey interior.
- Achieving Optimal Frying Temperature:
In a large, heavy-bottomed pot or Dutch oven, heat 4 cups of vegetable or canola oil over medium-high heat. Use a candy or deep-fry thermometer to monitor the temperature accurately, aiming for a precise 350-360 degrees Fahrenheit (175-180 degrees Celsius).
For those who love the crispy crunch of fried cheese, you’ll find the same satisfying texture in these golden cheese bites.
Maintaining the correct oil temperature is paramount; it’s the key to achieving a consistently crispy coating and preventing the curds from either exploding due to excessive heat or becoming greasy from oil that’s too cool.
- Frying in Batches for Golden Results:
Carefully lower a small batch of 6-8 curds into the hot oil. Do not overcrowd the pot, as this will significantly drop the oil temperature and lead to undercooked, greasy, soggy curds, and potential leakage of the molten cheese.
Fry for 2-3 minutes, turning occasionally with your slotted spoon or spider, until they are beautifully golden brown and uniformly crispy on all sides. This brief cooking time is perfect for the gooey centers.
- Draining and Seasoning for Maximum Flavor:
Use a slotted spoon or spider to remove the fried curds from the oil and transfer them immediately to a plate lined with paper towels to drain any excess oil. Sprinkling with a pinch of extra salt immediately after frying will enhance their flavor even further, as the salt adheres best to the hot surface.
Serve your Crispy Fried Cheese Curds hot with your favorite dipping sauce, like classic ranch or a zesty garlic aioli, for the ultimate treat.
Chef’s Secrets: Elevate Your Crispy Curds Game
Don’t Skip the Drying: Thoroughly blotting the curds removes surface moisture, which is key to preventing a soggy crust and promoting maximum crispiness. Think of it as creating a blank canvas for your breading to truly adhere.
Embrace the Double Chill: The two freezing steps are non-negotiable for success. They ensure the cheese remains solid long enough for the coating to set and crisp, preventing leaks and guaranteeing that signature gooey interior.
Monitor Oil Temperature Closely: Invest in a good thermometer. Too low, and your curds will be greasy; too high, and the coating burns before the cheese melts perfectly. Consistency is key for golden, evenly cooked results.
Never Overcrowd the Pot: Frying in small batches is crucial. Overcrowding drastically drops the oil temperature, leading to undercooked, soggy, and potentially leaky curds. Patience pays off here for perfect homemade cheese delights.
Season Immediately After Frying: A final pinch of salt right when they come out of the hot oil will adhere best and boost the overall flavor profile. Don’t underestimate this small step for an extra pop of taste.
Get Creative with Dipping Sauces: While ranch and garlic aioli are classics, consider sriracha mayo, marinara, or even a sweet chili sauce to offer variety and enhance the experience. The right sauce can truly complement your Crispy Fried Cheese Curds.
Troubleshooting Your Crispy Fried Cheese Curds
Problem: Curds Exploding or Leaking Cheese
Solution: This is almost always due to insufficient chilling or incorrect oil temperature. Ensure your curds are very cold from the double-freeze and your oil is consistently within the 350-360°F range. A complete, thick double-coat is also essential to act as a barrier.
Problem: Soggy or Greasy Coating
Solution: The oil temperature is likely too low, causing the coating to absorb oil rather than crisp up. It could also be from overcrowding the pot, which drops the oil temperature significantly. Ensure your oil is hot enough and always fry in small batches.
What to Serve With Fried Cheese Curds
These crispy, gooey cheese curds are already a snack on their own, but if you want to turn them into a full meal, a savory-sweet duo works perfectly.
- Stack the cheese curds inside a Ultimate Pulled Chicken Sandwich for a salty, crunchy contrast against tender shredded chicken.
- Balance the richness with a dessert like
Get the full recipe in your inbox in seconds – perfect for shopping and cooking.

Fried Cheese Curds
Course: AppetizerCuisine: AmericanDifficulty: medium4
servings1
hour25
minutes550
kcal85
minutesTired of greasy, leaky fried cheese curds? This recipe guarantees perfectly crispy, golden-brown curds with a wonderfully gooey, stretchy center every single time. Key steps like double-coating and freezing ensure a foolproof, delicious result without the mess.
Ingredients
1 pound fresh cheese curds, ideally cold
1 cup all purpose flour
2 large eggs, beaten
1 1/2 cups plain panko breadcrumbs
1 teaspoon salt
1/2 teaspoon black pepper
4 cups vegetable oil or canola oil, for frying
Dipping sauce (like ranch or garlic aioli) if desired
Directions
- Prepare the Curds: Blot the cheese curds thoroughly with paper towels to remove any excess moisture. This is a critical step for a good crust. Place the dried curds on a baking sheet lined with parchment paper and put them in the freezer for at least 30 minutes. This helps the cheese stay firm during frying and prevents premature melting and leakage.
- Set Up Breading Station: In three separate shallow dishes: place the flour seasoned with 1/2 teaspoon salt and 1/4 teaspoon pepper in the first, the beaten eggs in the second, and the panko breadcrumbs seasoned with the remaining 1/2 teaspoon salt and 1/4 teaspoon pepper in the third.
- Double Coat for Protection: Working in small batches, take the chilled cheese curds. First, dredge each curd in the seasoned flour, shaking off any excess. Next, dip it completely into the beaten egg. Finally, roll it thoroughly in the panko breadcrumbs, pressing gently to ensure a thick, even coating. Repeat this entire process (flour, egg, panko) for a second time on each curd. This double coating is your ultimate shield against cheese leakage! Place the breaded curds back on the parchment lined baking sheet.
- Chill Again: Once all curds are double-coated, return the baking sheet to the freezer for another 15-20 minutes. This firms up the coating and ensures the cheese is very cold before hitting the hot oil.
- Heat the Oil: In a large, heavy-bottomed pot or Dutch oven, heat the vegetable oil over medium-high heat until it reaches 350-360 degrees Fahrenheit (175-180 degrees Celsius). Use a candy or deep fry thermometer to monitor the temperature accurately. Maintaining the correct temperature is key to crispiness and preventing exploding curds.
- Fry in Batches: Carefully lower a small batch of 6-8 curds into the hot oil. Do not overcrowd the pot, as this will drop the oil temperature and lead to greasy, soggy curds and potential leakage. Fry for 2-3 minutes, turning occasionally, until golden brown and crispy.
- Drain and Serve: Use a slotted spoon or spider to remove the fried curds from the oil and transfer them to a plate lined with paper towels to drain excess oil. Sprinkle with a pinch of extra salt immediately if desired. Serve hot with your favorite dipping sauce.
Notes
- The double coating and two chilling steps are crucial for preventing cheese leakage and achieving optimal crispiness.