Crispy Fried Chicken Thighs: Juicy Inside, Shatteringly Crisp Outside
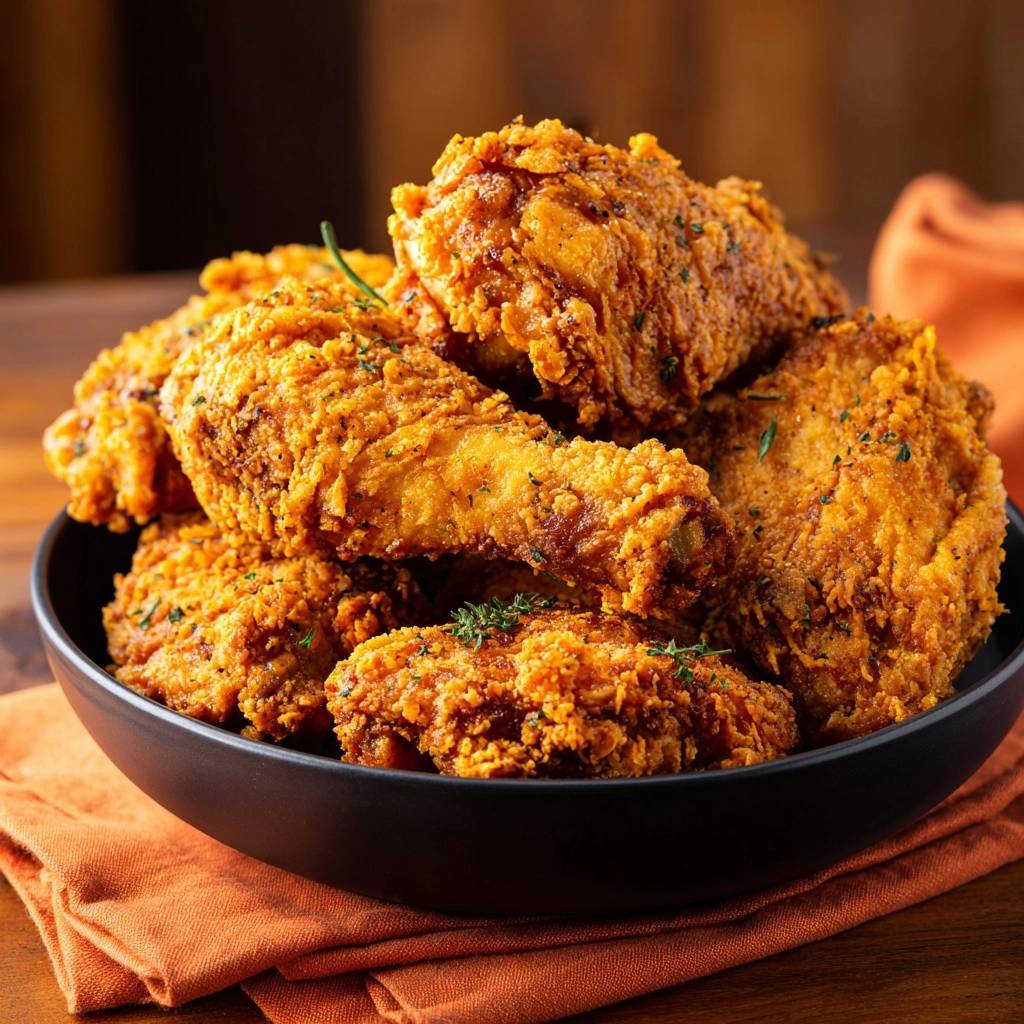
Picture this: you bite into fried chicken thighs expecting that perfect crunch, but nope, it’s dry and tough inside. Frustrating, right? This recipe fixes that mess with a simple buttermilk soak that locks in all the juices.
Buttermilk’s acidity tenderizes the meat without turning it mushy. Therefore, you get shatteringly crisp skin every time. Plus, the double-dredge builds a craggy coating that stays put.
Here’s the pro tip: let the coated chicken rest on a wire rack for 10 minutes. That sets the starch for unbeatable crunch. You’ll nail juicy, crispy fried chicken thighs on your first try. Prep takes 15 minutes plus 1 hour soak; cooking’s 20 minutes. Serves 4. High in protein at about 40g per serving, around 600 calories each.
Why Buttermilk Transforms Crispy Fried Chicken Thighs
Role of Acidity in Tenderizing Bone-In Thighs
Buttermilk’s lactic acid gently breaks down proteins in the chicken thighs. This tenderizes them perfectly during the soak. You avoid mushiness because it works slowly over 1 hour or overnight.
Compare that to plain milk, which lacks punch. Yogurt works too, but buttermilk’s thinner for even coverage. In addition, the low pH helps retain juices under high frying heat. Short soak gives subtle tenderness; overnight amps it up big time.
Building the Moisture Barrier for Never-Dry Results
Buttermilk clings to the skin and reacts with flour for killer adhesion. Unlike a brine, it creates a thick barrier that seals in moisture. Therefore, your crispy fried chicken thighs stay juicy no matter how long they fry.
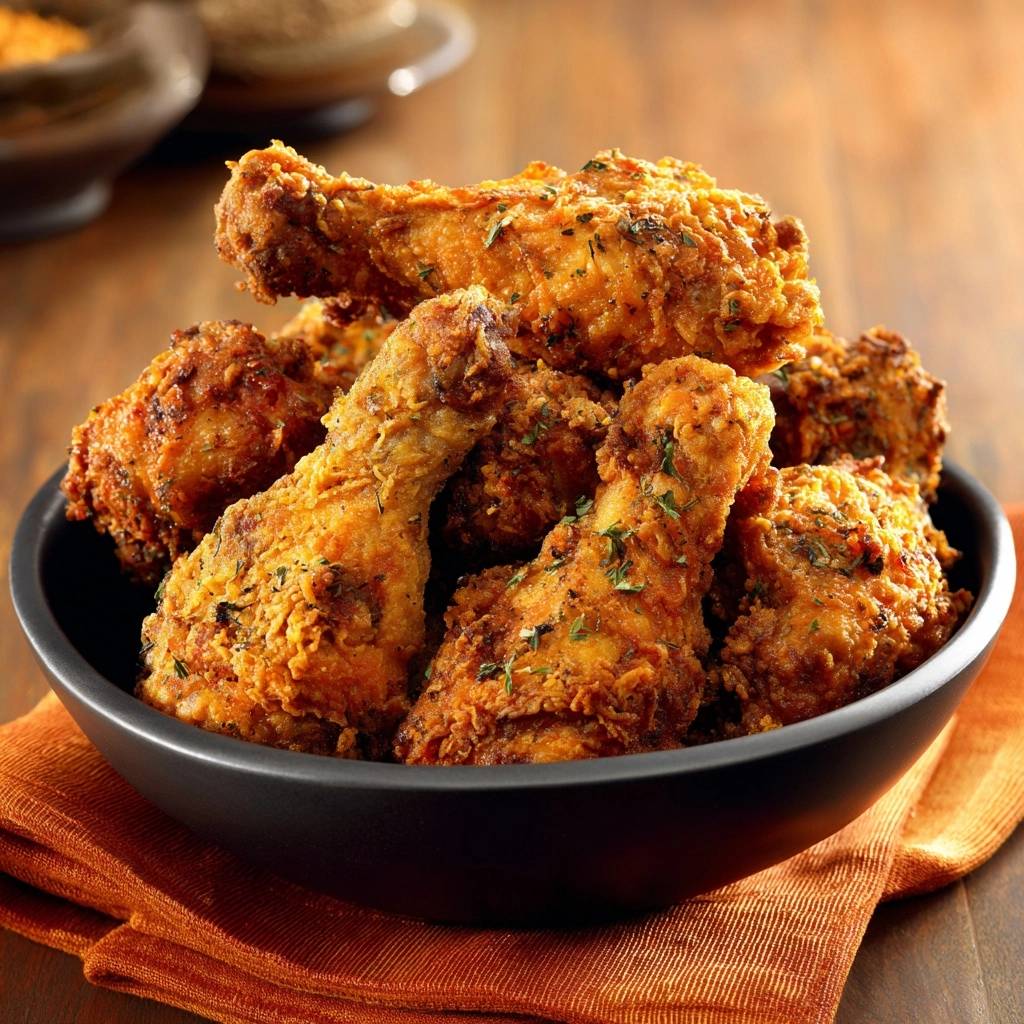
The double-dip method adds buttermilk residue. This boosts texture through tiny crags. Science backs it: better steam escape means crisper results.
Essential Components for Perfect Crispy Fried Chicken Thighs
Bone-In Skin-On Thighs: Why They Outshine Breasts
Bone-in, skin-on thighs pack more fat than breasts. That fat bastes the meat during frying, preventing dryness. Dark meat’s collagen melts into tenderness too.
Grab fresh thighs around 6-8 ounces each. Frozen works if thawed fully first. However, fresh gives superior crisp skin.
Seasoned Flour Blend Breakdown for Bold Flavor Crust
Paprika brings smokiness and red hue to your crispy fried chicken thighs. Garlic and onion powders add savory depth. One tablespoon each packs bold flavor without overpowering.
Salt and pepper at one teaspoon balance it. Cayenne’s optional for heat; start low if you’re spice-shy. Tweak cayenne up for fire.
Oil Selection and Fry Setup Essentials
Vegetable oil stays neutral and handles 350F heat steadily. Pour in 2 inches for full submersion. A thermometer keeps temps even, dodging dry chicken.
Fresh parsley or thyme garnish lifts flavors at the end. Snip it fine for pretty scatter.
Science of Shatteringly Crisp Breading on Chicken Thighs
Double-Dredge Technique for Craggy, Adherent Coating
Start with buttermilk, then flour. Dip back in buttermilk, then flour again. This wet-dry-wet-dry builds nooks where oil crisps up fast.
For a sweet and savory twist on this same crispy technique, try these chicken and waffles.
Buttermilk residue speeds Maillard browning for golden crusts. Rest the pieces 10 minutes after; starch gels and sets firm. Press flour hard for thick, craggy bits that shatter on bite.
Oil Temperature Control Prevents Soggy or Burnt Thighs
Hold oil at 350F for even browning. Too low steams the breading soggy; too high burns outside before inside cooks. Fry in batches to avoid temp drops.
Probe for 165F internal doneness. That ensures safety and juiciness every time.
Mastering the Fry: Phased Approach to Crispy Chicken Thighs
Phase 1: Buttermilk Soak for Locked-In Juiciness
Pat thighs dry first, then submerge in 2 cups buttermilk. Cover and fridge for 1 hour minimum. Overnight deepens flavor and tenderness.
Look for slightly tacky skin when ready. This soak’s your juice insurance.
Phase 2: Precision Dredging and Rest for Crunch
Let excess buttermilk drip off each thigh. Dredge firmly in the 2-cup flour blend. Double-dip if you crave extra crunch.
Rest on a wire rack 10 minutes. This prevents breading from sliding off in the oil. Fry in small batches for your skillet size.
Phase 3: Controlled Frying to Golden Perfection
Heat oil to 350F in cast-iron or Dutch oven. Fry 6-8 minutes per side till golden. Flip gently with tongs.
Drain on paper towels right away. Serve hot so crispness peaks. Check color: deep gold means done.
Equipment Choices That Elevate Crispy Fried Chicken Thighs
Cast-Iron Skillet vs Dutch Oven for Heat Retention
Cast-iron holds steady heat at 350F thanks to thermal mass. Go for a 12-inch skillet for 4-6 thighs. Dutch oven works for bigger batches.
Clip-on thermometer beats instant-read for constant monitoring. Wire racks drain oil and crisp bottoms during rest.
Tools to Avoid Overcooking or Uneven Crisp
Long tongs flip without splashing hot oil. Layered paper towels soak grease fast. Splatter screen cuts mess.
Budget tongs do fine; splurge on a good thermometer. These keep your crispy fried chicken thighs perfect.
Avoiding Pitfalls in Crispy Fried Chicken Thighs
Fixing Undercooked Centers or Pale Breading
Cold oil drops temp, leaving centers raw. Overcrowding steams instead of fries. Always preheat fully and batch small.
If pale, fry 1-2 more minutes. Probe centers early to catch issues.
Preventing Grease-Heavy or Falling-Off Coating
Skip the rest, and breading slips. Press flour well and rest 10 minutes. Skin-on is key for hold.
Reuse oil twice max. Fresh oil each time tastes cleaner.
Flavor Twists on Classic Crispy Fried Chicken Thighs
Spice Level Adjustments and Herb Infusions
Ramp cayenne to 2 teaspoons for heat lovers. Swap regular paprika for smoked. Add thyme to the soak for earthy vibes.
Mix lemon zest into flour for bright zing. These tweaks keep it exciting.
If you love the zesty lemon trick in the flour here, you will get the same satisfying crunch from these crispy fried chicken drumsticks.
Gluten-Free or Heat-Free Adaptations
Swap all-purpose flour for rice flour or a gluten-free blend. It crisps similarly without gluten. Skip cayenne entirely for mild.
Almond flour adds nuttiness but watch for quicker browning.
Ideal Pairings for Your Crispy Fried Chicken Thighs
Crisp Slaws and Pickle Sides for Balance
Vinegar-based slaw cuts richness with tang. Dill pickles add crunch contrast. Cornbread soaks up juices perfectly.
What to Serve with Your Fried Chicken
Crispy fried chicken thighs pair nicely with a few extras that add contrasting textures or soak up any extra flavor. Here are two solid options:
- Bake a batch of Garlic Herb Cheddar Biscuits — the buttermilk and cheese cut through the richness of the chicken, and the cold-grate method gives them a tall, flaky rise.
- For something lighter with the same crunch, Crispy Zucchini Fritters bring a vegetable-forward contrast and a golden crust that mirrors the chicken’s texture without weighing things down.
For creamy coleslaw, shred cabbage, mix with mayo, vinegar, and celery seed. Chill it first.
Make-Ahead Storage for Weeknight Wins
Fridge leftovers in airtight container up to 3 days. Freeze up to 2 months in zip bags. Reheat in 375F oven 10-15 minutes for crisp revival.
Skip microwave; it sogs the breading. Oven’s your friend here.
Troubleshooting Crispy Fried Chicken Thighs
Why Is My Breading Not Sticking?
Too much buttermilk or no rest causes slips. Pat drier next time and press flour hard. Mid-process, add a quick flour pat-down before frying.
How to Rescue Overcooked Dry Thighs?
Slice thin and serve with sauce for moisture. Prevention beats cure: watch temps closely. Buttermilk soak saves most dryness upfront.
Best Oil Temp if No Thermometer?
Sprinkle flour in oil; steady bubbles mean 350F. Rapid sizzle without smoke is right. Adjust heat as needed.
Scaling for Smaller Batches?
Halve soak and flour for 4 thighs. Fry time stays 6-8 minutes per side. Keep oil depth same.
Vegetarian Swap for Chicken Thighs?
Cauliflower florets or thick tofu slabs mimic texture. Soak same, fry 4-6 minutes. Cut times short; they cook faster.
FAQ
How do I store leftover crispy fried chicken thighs?
Keep them in an airtight container in the fridge for up to 3 days. They freeze well for 2 months; wrap individually to prevent sticking. Reheat in a 375F oven on a wire rack for 10-15 minutes to restore crispiness. Avoid microwaving, as it makes the breading soggy. Pro tip: room temp thaw before oven reheating for even results.
Why is my fried chicken dry inside?
Dryness hits without the buttermilk soak, which tenderizes and seals juices. Short soaks or high oil temps cook meat too fast. Always soak 1 hour minimum, hold 350F oil, and check 165F internal. Bone-in thighs help too, with their fat protection. If it happens, slice thin and dip in gravy.
Can I substitute buttermilk in crispy fried chicken thighs?
Mix 2 cups milk with 2 tablespoons lemon juice or vinegar; let sit 10 minutes to curdle. Plain yogurt thinned with milk works great too. These mimic acidity for tenderness and adhesion. Don’t skip acid; water alone won’t tenderize or crisp properly.
Why isn’t my breading crispy on the chicken thighs?
Low oil temp or overcrowding steams it soft. Rest coated chicken 10 minutes to set starch, and fry at exact 350F in batches. Double-dredge creates crags for max crunch. Drain well on wire rack, not stacked plates.
How long does the buttermilk soak need to be?
One hour minimum tenderizes enough for juicy results. Overnight in the fridge boosts flavor and moisture lock-in without over-tenderizing. Pat dry before dredging; tacky skin signals readiness. Busy? Prep morning for dinner perfection.
Can I make crispy fried chicken thighs gluten-free?
Yes, use a 1:1 gluten-free flour blend or straight rice flour for similar crunch. It fries lighter, so double-dredge firmly. Almond flour blend adds flavor but browns faster; watch closely. Seasoning stays the same for bold taste.
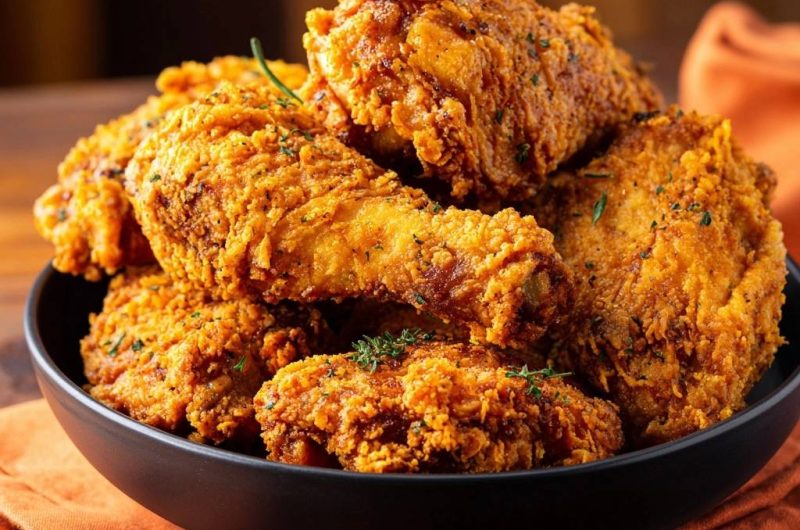
Crispy Fried Chicken Thighs
Course: Main CourseCuisine: AmericanDifficulty: medium8
servings1
hour30
minutes550
kcal90
MinutesSick of fried chicken thats crispy outside but bone-dry inside? This foolproof recipe uses a tangy buttermilk soak to lock in juices while delivering shatteringly crisp breading every single time. Home cooks rejoice: no more disappointment!
Ingredients
8 chicken thighs, bone-in skin-on
2 cups buttermilk
2 cups all-purpose flour
1 tablespoon paprika
1 tablespoon garlic powder
1 tablespoon onion powder
1 teaspoon salt
1 teaspoon black pepper
1 teaspoon cayenne pepper (optional for heat)
Vegetable oil for frying
Fresh parsley or thyme for garnish
Directions
- Pat chicken thighs dry with paper towels. In a large bowl, submerge chicken in buttermilk. Cover and refrigerate for 1 hour (or up to overnight). This key step tenderizes the meat and creates a moisture barrier that prevents drying out during frying, guaranteeing juicy results.
- In a shallow dish, whisk together flour, paprika, garlic powder, onion powder, salt, black pepper, and cayenne.
- Remove chicken from buttermilk, letting excess drip off. Dredge each piece in the seasoned flour mixture, pressing firmly to create thick, craggy coating. For extra crisp, dip back in buttermilk then flour again. Let coated chicken rest on a wire rack for 10 minutes; this sets the breading for ultimate crunch.
- Heat 2 inches of vegetable oil in a large cast-iron skillet or Dutch oven to 350F (use a thermometer to maintain even heat and avoid dry, overcooked chicken).
- Fry chicken in batches, 6-8 minutes per side, until golden brown and internal temp reaches 165F. Dont overcrowd; this ensures even cooking without steaming. Drain on paper towels.
- Garnish with fresh parsley or thyme. Serve hot for peak crispiness. Enjoy juicy, never-dry perfection!
Notes
- For extra crisp, double-dip in buttermilk and flour. Use a thermometer to maintain oil at 350F for best results. Let coated chicken rest 10 minutes before frying.