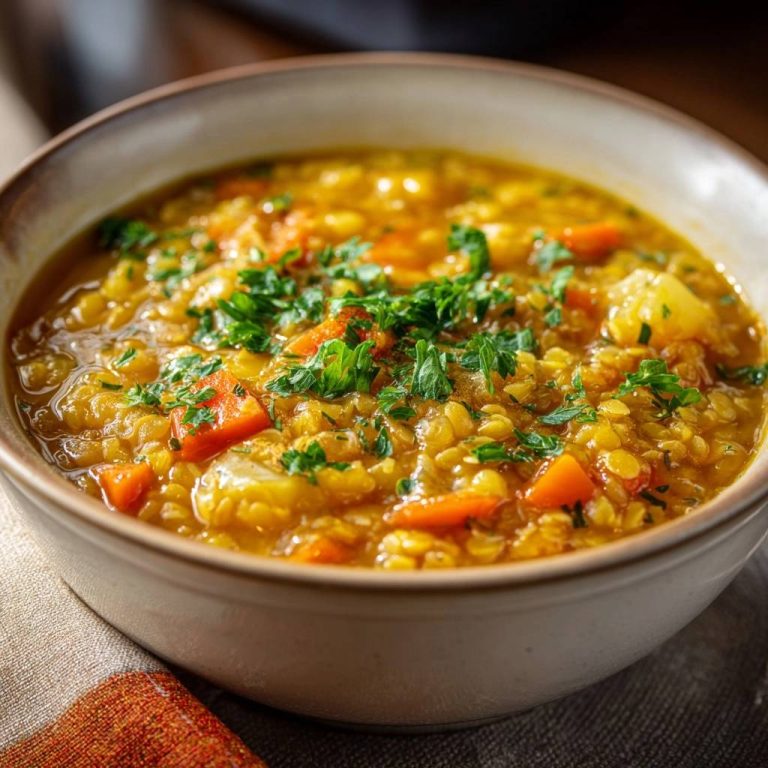
Mastering Garlic Herb Cheddar Biscuits with the Cold-Grate Method
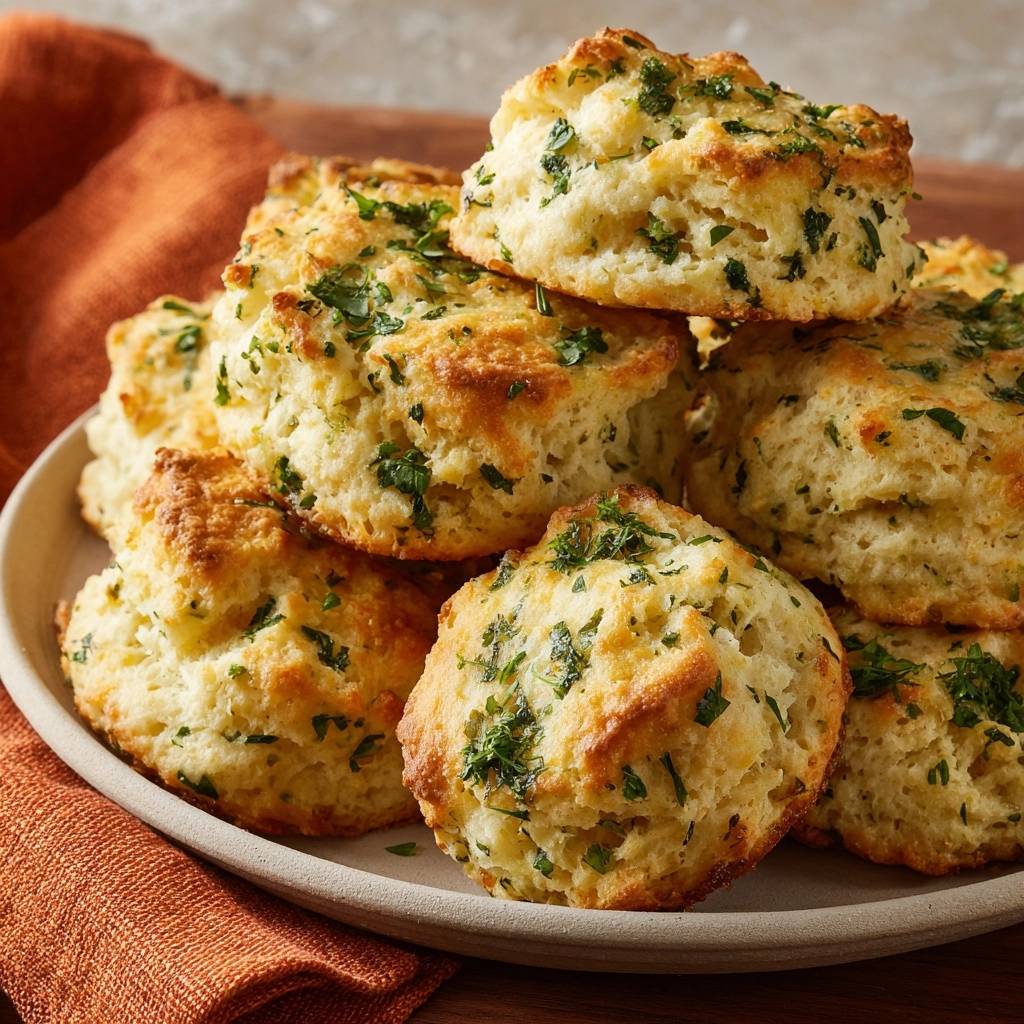
Imagine pulling a tray from the oven where every biscuit boasts a craggy, golden-brown mountain range of crispy peaks. As you break one open, a cloud of steam escapes, revealing a tender, airy center laced with melted sharp cheddar and bright flecks of fresh parsley. These aren’t those heavy, leaden pucks that often plague home kitchens; these are light, structural masterpieces with a distinct, toasted crunch on the bottom.
The “Anti-Soggy Bottom” philosophy is the heartbeat of this recipe. Many drop biscuits fail because the butter melts too quickly, creating a greasy puddle that soaks the base before it can crisp up. By focusing on extreme temperature control and specific handling, we ensure the fats stay suspended in the dough until the very moment they hit the intense heat of the oven. This creates a biscuit that stands tall and stays dry on the bottom while remaining incredibly moist inside.
The secret to this bakery-style lift is the frozen butter grating technique. While most recipes suggest “cutting in” cold butter with a pastry cutter, grating frozen butter creates uniform, tiny shards that distribute perfectly without overworking the flour. This precision ensures that every single bite has the perfect ratio of flake to fluff. You’ll notice the difference the moment you take that first buttery, garlic-infused bite.
The Science of Lift: Why Frozen Butter Matters
Baking is essentially a series of thermodynamic reactions, and biscuits are the perfect example of this in action. When you use frozen butter shreds, you’re placing solid pockets of fat into the flour. As the biscuits enter a hot 425°F oven, that frozen water content in the butter rapidly converts to steam. This sudden expansion of gas forces the dough upward, creating those sought-after vertical layers and a light, airy crumb.
If you use room-temperature or even slightly chilled butter, the fat begins to coat the flour molecules too thoroughly. This inhibits the formation of steam pockets and instead leads to a dough that spreads outward rather than upward. The result is a dense, heavy biscuit that feels more like a flat scone. By grating the butter while it’s frozen solid, you maintain the integrity of the fat until the heat can do its job.
Furthermore, the “shredding” technique is far superior to the traditional “cutting in” method for drop biscuits. It requires much less physical handling of the dough. Since your hands stay away from the butter, you don’t risk the warmth of your palms melting the fat. This keeps the dough temperature low and the final texture incredibly flaky.
The same cold-grate method that keeps these biscuits light also works beautifully for this creamy roasted cauliflower gratin.
Essential Components for Garlic Herb Cheddar Biscuits
Success starts with the right flour. All-purpose flour is the gold standard here because it has a moderate protein content. This provides enough structure to hold the heavy cheddar and buttermilk without making the biscuit tough like bread flour would. It strikes that perfect balance between a delicate crumb and a sturdy exterior.
Baking powder acts as your primary chemical leavener, and its freshness is absolutely non-negotiable. If your tin has been sitting in the pantry for over six months, it’s time to replace it. Since we want a dramatic rise in a short window of time, the baking powder needs to be at full potency to react with the acidic buttermilk and the high heat.
Garlic and onion powders provide a savory backbone that permeates the entire biscuit. Unlike fresh garlic, which can sometimes leave “hot spots” or bitter burnt bits on the surface, the powdered versions distribute evenly through the dry mix. This ensures a consistent, umami-rich flavor in every single mouthful.
Selecting the Right Sharp Cheddar
When it comes to cheese, the sharper, the better. An aged, sharp cheddar has a lower moisture content and a more intense flavor profile that doesn’t get lost during the bake. It provides a punchy contrast to the buttery dough that mild cheddar simply can’t match.
If you enjoy the cheesy, savory notes in these biscuits, you might like this loaded cheesy hashbrown casserole for another side dish option.
Avoid the temptation to buy pre-shredded bags at the grocery store. Those products are coated in cellulose and other anti-caking agents to keep the shreds from sticking together in the bag. Unfortunately, those same agents prevent the cheese from melting smoothly into the dough and can leave you with a gritty, unpleasant texture.
Fresh Parsley vs. Dried Herbs
Fresh parsley is essential for both the vibrant green color and the clean, peppery aroma. While dried herbs have concentrated oils, they lack the moisture and “pop” that fresh herbs provide. Fresh parsley interacts beautifully with the dough, softening just enough during the bake to release its flavor without becoming brittle.
We use a “divided” strategy for the herbs to maximize the sensory experience. Half of the parsley goes into the dough to provide internal flavor, while the other half is whisked into the final butter glaze. This ensures the biscuits look as good as they taste, with bright green flecks decorating the golden crust.
The Cold-Grate Technique: A Step-by-Step Guide
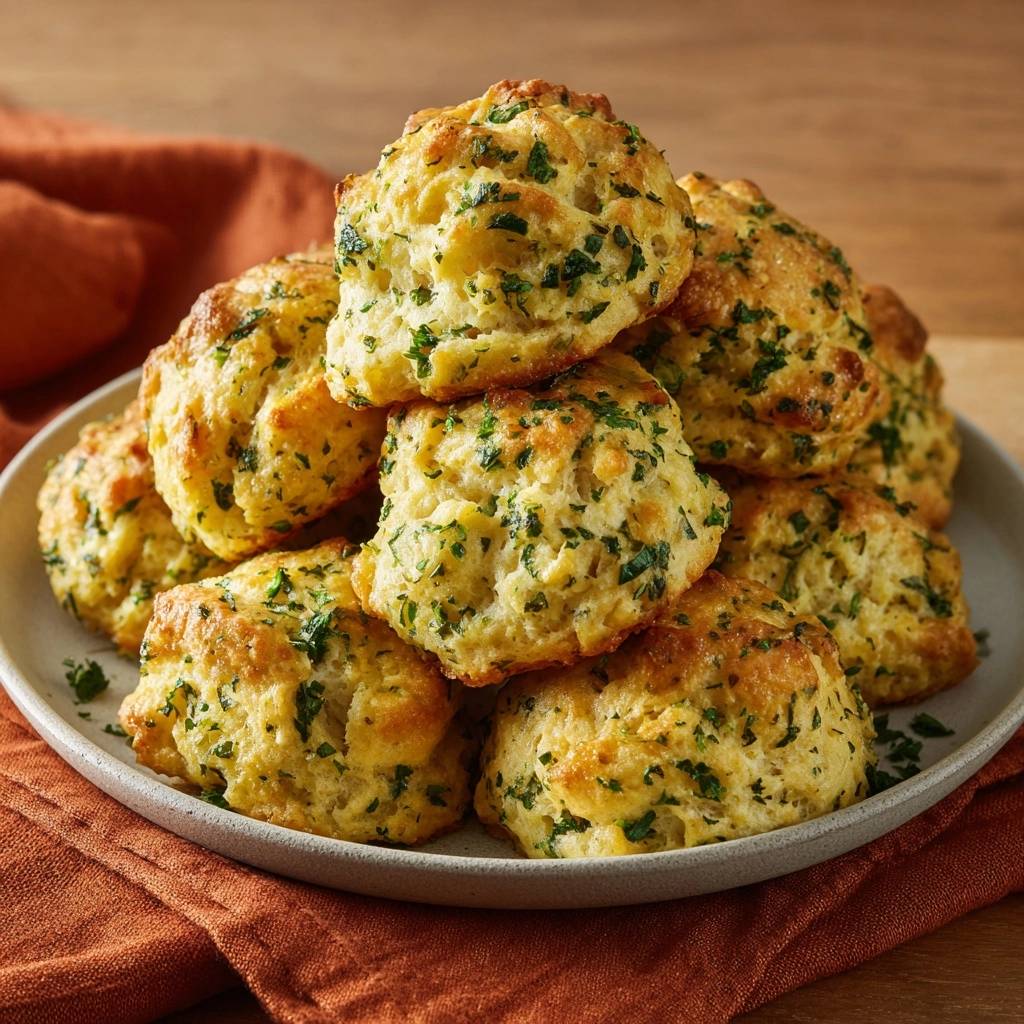
The transition from a bowl of ingredients to a “shaggy dough” is the most critical part of the process. You aren’t looking for a smooth, cohesive ball of dough like you would for pizza or bread. Instead, you want a mixture that looks slightly messy and irregular. This lack of uniformity is exactly what creates the craggy, delicious texture of a drop biscuit.
A properly hydrated dough should look moist but not wet. You should see small clumps of flour-coated butter and cheese held together by the buttermilk. If the dough looks too smooth, you’ve likely overmixed it. If it’s falling apart into dry sand, it needs a tiny splash more buttermilk to bring it together.
Phase 1: Aerating the Dry Base
Start by whisking your flour, baking powder, and spices thoroughly. This isn’t just about mixing; it’s about aerating the flour to keep the biscuits light. Whisking ensures the garlic and onion powders are perfectly distributed so you don’t end up with one biscuit that’s bland and another that’s overwhelming.
If you have a kitchen scale, measure your flour by weight (312 grams for 2.5 cups). Volume measurements with measuring cups can vary wildly depending on how packed the flour is. Too much flour is the number one cause of dry, crumbly biscuits that choke you as you eat them.
Phase 2: The Frozen Butter Hack
Pro tip: Put your stick of butter in the freezer for at least two hours before you start. Use the large holes of a box grater and work quickly. As the butter shreds fall into the flour, stop every few seconds to toss them with a fork. This coats each individual shred in flour, preventing them from clumping back together into a giant mass.
Phase 3: Hydration and Folding
When you add the buttermilk, use a gentle folding motion with a spatula. Think of it like folding egg whites into a cake batter. You want to incorporate the liquid without activating the gluten in the flour. Stop the moment you no longer see large pockets of dry flour; a few small streaks are perfectly fine and actually help ensure a tender crumb.
Achieving the Signature Craggy Texture
The beauty of a drop biscuit lies in its “craggy” aesthetic. Unlike cut biscuits, which have smooth sides and flat tops, drop biscuits are full of irregular nooks and crannies. These irregularities are vital because they create more surface area for the oven’s heat to hit, resulting in more “crunch points.”
When you scoop the dough onto the sheet, don’t try to smooth it out. Those jagged edges will brown beautifully and become the crispest parts of the biscuit. These little valleys also act as perfect reservoirs for the garlic-herb butter glaze you’ll brush on later, catching the melted fat and holding it in place.
Preventing the Soggy Bottom: Heat and Surface Tips
To ensure a toasted, structural base, the type of baking surface matters. A heavy-duty aluminum baking sheet is ideal because it conducts heat evenly. While silicone mats are great for cookies, parchment paper is often better for biscuits as it allows for a slightly crispier bottom by not insulating the dough quite as much.
The high heat of 425°F is your best friend. This temperature is high enough to set the bottom of the biscuit almost instantly. This “searing” effect creates a barrier that prevents the melting butter from soaking into the parchment paper, ensuring your biscuit has a distinct, golden-brown crust on the bottom that can support its own weight.
The Finishing Glaze: Infusing Garlic and Herbs
The “Immediate Glaze” rule is the final step to perfection. You must have your melted butter, garlic salt, and remaining parsley ready to go the second the tray leaves the oven. Brushing the biscuits while they are screaming hot is essential for flavor penetration.
When the biscuits are at their peak temperature, the outer crust is still porous. The hot butter soaks into the first few layers, while the heat “sets” the fresh parsley so it stays bright green rather than wilting. The garlic salt dissolves into the butter, ensuring a perfectly seasoned finish that hits your tongue the moment you take a bite.
Troubleshooting Common Biscuit Failures
Even with a great recipe, things can go sideways in the kitchen. Understanding the “why” behind a failure helps you master the craft. Most biscuit issues stem from temperature or handling, both of which are easy to fix once you know what to look for.
Why My Biscuits Didn’t Rise
If your biscuits stayed flat, the first suspect is your baking powder. Check the expiration date! If the powder is fresh, the next likely culprit is warm butter. If the butter shreds melted into the flour before the tray hit the oven, you lost your steam power. Finally, make sure your oven is fully preheated; putting biscuits into a lukewarm oven is a recipe for a flat bake.
Correcting a Heavy or “Bready” Interior
A “bready” or tough texture is almost always caused by over-mixing. The more you stir the dough, the more you develop gluten. Gluten is great for chewy sourdough, but it’s the enemy of a flaky biscuit. Use a light hand and stop mixing the very second the dough holds together. Remember: ugly, shaggy dough makes beautiful, tender biscuits.
Optimal Pairings for Savory Cheddar Biscuits
These biscuits are incredibly versatile and shine alongside hearty, comforting meals. They are the natural companion to a thick beef stew or a creamy chicken pot pie filling. The sharp cheddar and garlic profile cuts through rich, savory gravies perfectly, making them an ideal “sopping” tool for the bottom of the bowl.
Complementary Dishes to Try
These garlic herb cheddar biscuits are great with creamy dips or saucy meat dishes.
- For a creamy, no-watery dip that matches the cheesy richness of the biscuits, try this Spinach Artichoke Dip.
- The sweet and sticky glaze of these Sticky BBQ Meatballs complements the savory herb biscuits nicely.
For a morning treat, try splitting them open and topping them with a poached egg and a spoonful of hollandaise sauce. The garlic and herb notes complement the creamy yolk beautifully. They also work wonderfully served next to a simple roasted chicken, where the herbs in the biscuit echo the seasoning on the bird.
Storage, Reheating, and Make-Ahead Strategies
Biscuits are undoubtedly best fresh from the oven, but you can plan ahead. You can scoop the raw dough mounds onto a tray and freeze them until solid. Once frozen, transfer them to a zip-top bag. When you’re ready for a fresh biscuit, just bake them straight from the freezer, adding 2-3 minutes to the total bake time.
If you have leftovers, store them in an airtight container at room temperature for up to two days. To reheat, avoid the microwave, which can make the crust chewy and tough. Instead, pop them back into a 350°F oven for about 5-8 minutes. This will revive the crispy exterior and melt the cheese inside without drying out the crumb.
Expert Tips for Customizing the Flavor Profile
Once you master the base recipe, feel free to experiment with minor tweaks. If you like a bit of heat, add a half-teaspoon of cayenne pepper or some smoked paprika to the dry ingredients. The paprika adds a beautiful sunset hue to the dough and a subtle woodsy flavor that pairs well with the cheddar.
You can also swap the parsley for fresh chives or even finely minced rosemary for a more earthy, floral aroma. If you want an even deeper color on top, sprinkle a little extra shredded cheddar over the mounds right before they go into the oven. This creates “cheese lace” edges that are incredibly crispy and flavorful.
How should I store leftover biscuits so they don’t get hard?
Store your biscuits in an airtight container or a sealed gallon-sized bag once they have cooled completely to room temperature. They will stay fresh on the counter for about 2 days. If you want to keep them longer, they freeze beautifully for up to 3 months. Just make sure to wrap them tightly in foil before placing them in a freezer bag to prevent freezer burn.
Why did my biscuits turn out dry and crumbly?
The most common reason for dry biscuits is using too much flour. If you scoop your measuring cup directly into the flour bag, you are likely packing it down and using up to 25% more than the recipe calls for. Always spoon the flour into the cup and level it off with a knife, or better yet, use a kitchen scale. Additionally, ensure you aren’t over-baking them; once the tops are golden, get them out of the oven!
Can I use a different type of cheese?
Absolutely! While sharp cheddar is the classic choice, you can substitute it with Pepper Jack for a spicy kick, Gruyère for a nutty and sophisticated flavor, or even Smoked Gouda. Just ensure you are grating the cheese yourself from a block to avoid the anti-clumping additives found in pre-shredded varieties, which can affect the moisture balance of the dough.
What can I use if I don’t have buttermilk?
If you don’t have buttermilk on hand, you can make a quick substitute by adding 1 tablespoon of lemon juice or white vinegar to a liquid measuring cup and then filling it to the 1-cup line with whole milk. Let it sit for about 5 to 10 minutes until it looks slightly curdled. This acidity is crucial because it reacts with the baking powder to create the lift and tenderize the gluten.
Why are my biscuits dark on the bottom but raw in the middle?
This usually happens if your oven rack is too low or if your oven runs hot. Try moving the rack to the middle position to ensure even airflow. If you are using a dark-colored baking sheet, those tend to absorb more heat and brown the bottoms faster than light-colored aluminum pans. You can also try doubling up your baking sheets (nesting one inside the other) to provide an extra layer of insulation for the biscuit bottoms.
Can I make these biscuits smaller for a party?
Yes, you can definitely make “mini” versions of these. Use a smaller scoop (about 1-2 tablespoons of dough) and reduce the baking time to 10-12 minutes. Keep a close eye on them, as smaller biscuits can dry out quickly. They make excellent appetizers or “sliders” when split and filled with a little honey or a slice of smoked turkey.

Garlic Herb Cheddar Biscuits
Course: Side DishCuisine: AmericanDifficulty: easy10
biscuits15
minutes15
minutes245
kcal30
MinutesThese savory drop biscuits feature sharp cheddar cheese and fresh parsley, utilizing a cold-grating butter technique to create flaky, light textures with a golden, garlic-butter finish.
Ingredients
2 ½ cups all-purpose flour
1 tablespoon baking powder
1 teaspoon garlic powder
1 teaspoon onion powder
½ teaspoon salt
½ cup (1 stick) unsalted butter, frozen
1 ½ cups sharp cheddar cheese, shredded
½ cup fresh parsley, finely chopped (divided)
1 cup cold buttermilk
3 tablespoons melted butter (for topping)
½ teaspoon garlic salt (for topping)
Directions
- Preheat and Prep: Preheat your oven to 425°F (218°C). Line a large baking sheet with parchment paper or a silicone baking mat.
- Mix Dry Ingredients: In a large bowl, whisk together the flour, baking powder, garlic powder, onion powder, and salt.
- The Butter Hack: Use the large holes of a box grater to grate the frozen butter directly into the flour mixture. Grating the butter while frozen ensures tiny, cold pockets of fat that steam up in the oven, creating lift and a flaky texture instead of melting into a greasy puddle.
- Incorporate Mix-ins: Gently toss the butter shreds with the flour using a fork until coated. Fold in the shredded cheddar cheese and half of the chopped parsley.
- Hydrate: Pour in the cold buttermilk. Stir with a wooden spoon or spatula just until the flour is moistened and a shaggy dough forms. Do not overmix, or the biscuits will become tough and lose their craggy texture.
- Scoop: Use a large cookie scoop or a 1/3 cup measuring cup to drop mounds of dough onto the prepared baking sheet, spaced 2 inches apart. This “drop” method creates the craggy, golden peaks shown in the image.
- Bake: Bake for 14 to 16 minutes, or until the tops are deeply golden brown and the edges are crisp.
- The Finish: While the biscuits are baking, whisk together the melted butter, the remaining fresh parsley, and the garlic salt.
- Glaze: Immediately upon removing the biscuits from the oven, brush the garlic-herb butter generously over the hot tops. The heat will set the herbs and allow the butter to soak into the nooks and crannies. Serve warm.
Notes
- Keep the butter frozen until the moment of grating to ensure maximum lift. Do not overmix the dough to maintain a light, craggy texture.