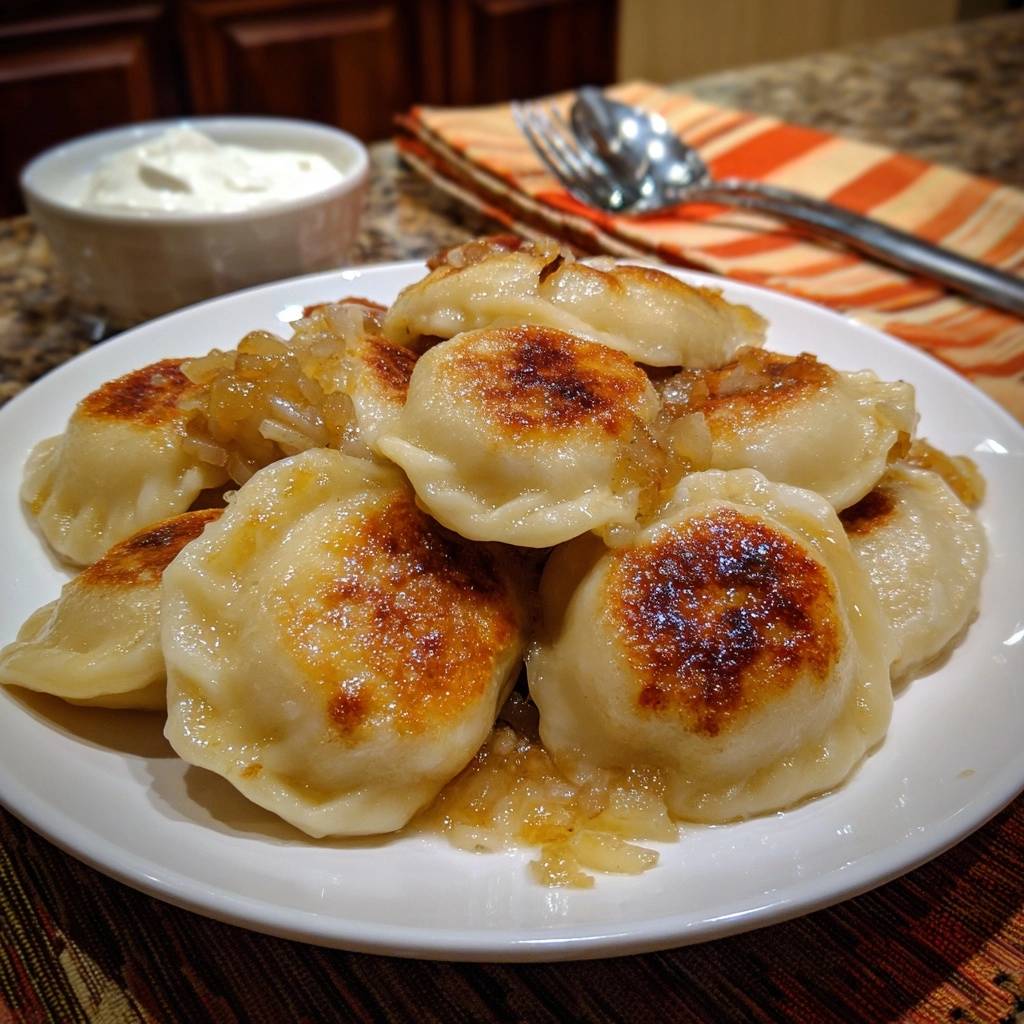
Crispy Pierogi with Caramelized Onions
Why This Pan-Fry Transforms Frozen Pierogi
Oh man, nothing worse than soggy pierogi that turn to mush after boiling. You know the drill: they fall apart, release watery filling, and leave you disappointed. But these Crispy Pierogi with Caramelized Onions fix that fast with a simple pan-fry method. No boiling needed, just shatteringly crisp outsides and tender insides in under 20 minutes.
Here’s why it works so well. The frozen pierogi start cold, so they release steam slowly as you sear them undisturbed. This evaporates excess moisture right away. In addition, the butter creates a barrier that locks in flavor without sogginess. You’ll get that perfect bite every time.
The real secret? That initial 4-5 minute sear on medium heat. It builds a golden crust through the Maillard reaction before you flip. Suddenly, your weeknight dinner rivals street food. Trust me, these Crispy Pierogi with Caramelized Onions will have you craving seconds.
Key Ingredients for Crispy Pierogi with Caramelized Onions
You need just a handful of basics for these Crispy Pierogi with Caramelized Onions. Frozen pierogi keep things convenient and control moisture better than fresh ones. Yellow onions bring natural sweetness when caramelized. Butter handles the browning, while salt, pepper, and sour cream balance it all.
Grab 12-16 frozen pierogi for four servings. Use high-fat butter if you can; it foams nicely for crisp results. Thinly slice two large onions evenly so they cook uniformly. Sour cream adds cool creaminess that cuts the richness perfectly.
Substitutions work too. Try ghee instead of butter for a nutty twist without dairy issues. However, stick to full-fat sour cream; low-fat versions don’t cling as well.
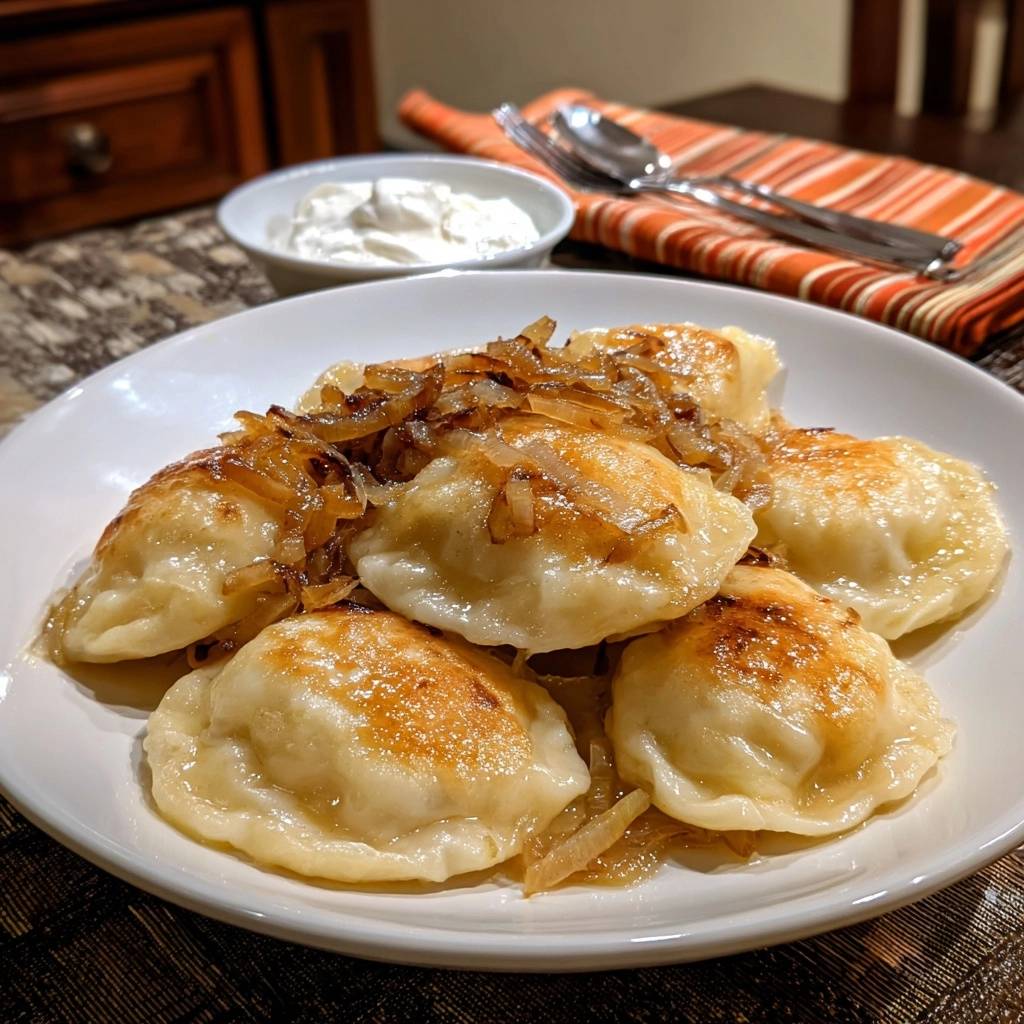
Frozen Pierogi: Potato vs Cheese Filling Choices
Potato filling holds its shape best during the sear, staying firm and crisp. Cheese adds gooey creaminess that melts inside. Both shine in Crispy Pierogi with Caramelized Onions, but potato edges out for structure.
A 12-16 count package serves four generously. Don’t thaw them first; that releases water and leads to sogginess. Keep them frozen straight from the bag for pro results.
Onions and Butter: Caramelization Foundations
Yellow onions caramelize sweeter than reds, developing deep flavor over low heat. Slice them thin, about 1/8-inch, for even cooking. This ensures glossy, jam-like results without raw bits.
Four tablespoons of butter, divided, provide milk solids for nutty browning. It prevents greasiness when used right. Therefore, measure precisely to nail the balance.
Science of Crisp Exteriors in Pierogi
The magic in Crispy Pierogi with Caramelized Onions comes from the Maillard reaction. That’s when amino acids and sugars brown at medium heat, creating that golden crust. Undisturbed searing first dries the frozen exterior, evaporating moisture like a steak sear.
Traditional boiling adds water, making everything limp. Here, you skip that. Instead, covering later traps steam to tenderize fillings gently. It’s like poaching inside a crisp shell.
Think of it as a two-zone cook: dry sear outside, steam inside. This balance delivers tender, flavorful bites. No fancy gear required, just timing.
Moisture Evaporation During Initial Sear
Medium heat conducts evenly into the frozen dough over 4-5 minutes. This pulls out surface moisture, forming a dry base for crispiness. You’ll see steam rise, then bottoms turn deeply golden.
Physics favors this: frozen starts cold, so heat penetrates slowly without boiling. Patience here prevents chewiness.
Steam and Caramelization Balance
Covered on medium-low, internal steam poaches fillings softly for 5-7 minutes. Uncover to medium heat, and onion sugars break down into glossy sweetness. Pierogi crisp further.
Temperature shifts control it all. Low prevents burning; higher finishes the job.
Equipment Essentials for Perfect Crispy Pierogi
A 10-12 inch non-stick skillet shines here. It heats evenly and releases pierogi without sticking. The size fits a single layer of 12-16 pieces perfectly.
Butter foams as a natural release agent, so no oil spray needed. Cast iron works too, but watch for hotspots. Preheat properly either way.
That’s it; no special tools. Your basic kitchen setup delivers Crispy Pierogi with Caramelized Onions every time.
Step-by-Step: Mastering Crispy Pierogi with Caramelized Onions
Follow these five phases exactly for foolproof results. Timings and sensory cues guide you. Work in batches if your pan’s small to avoid steaming instead of crisping.
Phase 1: Initial Butter Melt and Pan Prep
Heat your non-stick skillet over medium. Add 2 tablespoons butter; let it melt and foam for 1 minute. Swirl to coat evenly. This barrier stops sticking from the start in your Crispy Pierogi with Caramelized Onions.
Phase 2: Undisturbed Frozen Pierogi Sear
Place frozen pierogi in a single layer. Cook 4-5 minutes without touching. Look for deep golden bottoms and crisp edges. This sear evaporates moisture for zero sogginess.
Phase 3: Flip, Add Onions, and Cover Steam
Add remaining 2 tablespoons butter. Flip pierogi gently, then scatter sliced onions around. Season with 1/2 teaspoon salt and 1/4 teaspoon pepper. Cover on medium-low for 5-7 minutes until onions soften and pierogi tenderize inside.
For a perfect pairing, try our Classic Caramel Cheesecake: Flawless, Crack-Free Perfection.
Phase 4: Uncover for Glossy Caramelized Onions
Uncover, bump to medium heat. Stir onions 4-5 minutes until golden and sweet-smelling. Pierogi crisp on the second side naturally. Pull off heat when glossy.
Phase 5: Plating with Sour Cream
Serve hot with onions piled on top. Add 1 cup sour cream on the side for dipping. That crisp-tender contrast with creamy coolness seals the deal.
Avoiding Soggy Pierogi Pitfalls
Soggy pierogi happen from common errors like overcrowding or early flipping. Overlap steals crisp air space, steaming everything. Flip too soon, and moisture stays trapped.
High heat burns onions before they sweeten. Thawed pierogi leak water. This method fixes it all for Crispy Pierogi with Caramelized Onions. Stick to single layer and timings.
Pro tip: If onions char, lower heat next time. Patience wins.
Overcrowding and Heat Control Errors
Always single layer; batches prevent steaming. Use medium-low for onions to soften without char. Medium for crisping avoids toughness.
Timing Fixes for Even Crispiness
Wait for deep gold before flipping. Uncover only after 5-7 covered minutes. These cues ensure even results across all pierogi.
Flavor Twists on Crispy Pierogi with Caramelized Onions
Swap potato for mushroom pierogi; they pair great with onions. Add minced garlic to onions in phase 3 for punch. Fresh thyme leaves boost earthiness too.
Try sauerkraut filling for Polish flair; drain well first. For vegan, use plant-based pierogi, ghee, and cashew sour cream. Method stays the same.
Cheese fans, mix in grated cheddar to potato ones pre-fry. Endless fun without losing crisp.
Ideal Pairings for Crispy Pierogi with Caramelized Onions
Balance the richness with a crisp green salad tossed in vinaigrette. Braised cabbage adds tangy comfort. Pickled beets bring bright acidity.
Serve family-style on a big platter. Herbal tea cuts through perfectly. Keeps it light and satisfying.
Prep Ahead and Freezing Crispy Pierogi
Carmelize onions up to 2 days early; store airtight in fridge. Reheat gently to revive gloss. Cooked pierogi freeze well up to 1 month on a tray, then bag.
Refry from frozen using the same method; add 1-2 extra minutes. Perfect for weeknight batches. Airtight storage keeps crispness intact.
Pierogi Heritage and Modern Crispy Twist
Pierogi hail from Polish and Ukrainian roots as hearty filled dumplings. Traditionally boiled or steamed for festivals. Pan-frying evolved in street food scenes for portability.
Carmelized onions pair classically, adding luxury sweetness. This no-boil twist modernizes it. Families love the upgrade; it’s comfort with crunch.
Today, frozen versions make it everyday food. Yet the crisp method honors that crispy street-food vibe.
Troubleshooting Crispy Pierogi with Caramelized Onions
Why are my pierogi sticking?
Usually from insufficient butter foam or low heat start. Ensure full 1-minute melt and swirl. Non-stick pans help, but clean ones prevent residue issues too.
Why aren’t my onions sweet and caramelized?
They need low, slow heat longer. Medium-low covered first softens; stir uncovered patiently. Yellow onions shine here; taste for jam-like depth before serving.
Why are my pierogi greasy?
Too much butter or high heat traps it. Use exact amounts and blot excess if needed. Drain on paper towels post-cook for lighter bites.
Why is the filling dry?
Not enough covered steam time. Extend to 7 minutes on medium-low. Frozen holds moisture well, so this poaches perfectly inside.
Can I scale this for 2 people?
Halve to 6-8 pierogi and 1 onion. Same pan, timings adjust slightly shorter. Still single layer for crisp results.
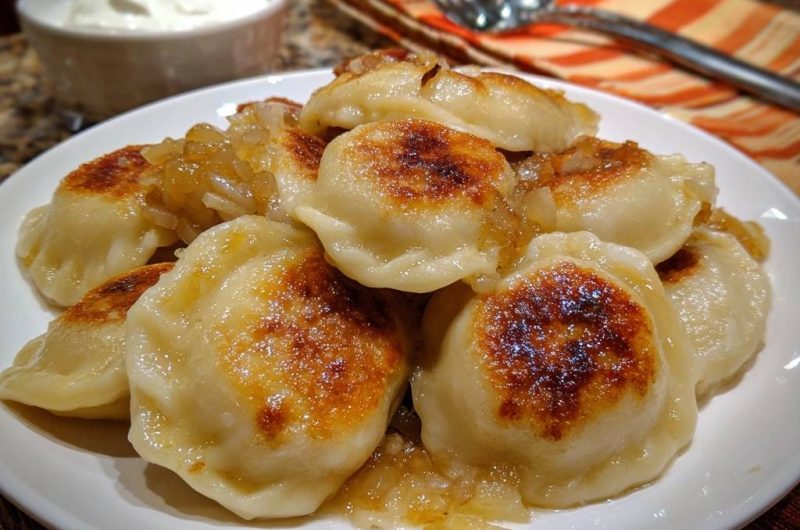
Crispy Pierogi
Course: Main CourseCuisine: Eastern EuropeanDifficulty: easy4
servings10
minutes20
minutes450
kcal30
MinutesTired of limp, watery pierogi? This dead-simple pan-fry method locks in tender filling with shatteringly crisp exteriors every time, no boiling required. Paired with sweet caramelized onions and cool sour cream for comfort food perfection.
Ingredients
12-16 frozen pierogi (potato or cheese filling)
2 large yellow onions, thinly sliced
4 tablespoons butter, divided
1/2 teaspoon salt
1/4 teaspoon black pepper
1 cup sour cream, for serving
Directions
- Heat a large non-stick skillet over medium heat. Add 2 tablespoons butter and let it melt and foam, about 1 minute. Swirl to coat the pan evenly this creates the foolproof barrier that prevents sticking and sogginess from the start.
- Add frozen pierogi in a single layer (work in batches if needed). Cook undisturbed for 4-5 minutes until bottoms are deeply golden and crisp. Do not flip yet this undisturbed sear evaporates excess moisture for zero sogginess.
- Add remaining 2 tablespoons butter to the pan. Gently flip pierogi, then scatter sliced onions around them. Sprinkle with salt and pepper. Reduce heat to medium-low, cover, and cook 5-7 minutes until onions soften and pierogi are steamed tender inside.
- Uncover, increase heat to medium, and stir onions frequently for 4-5 minutes until deeply caramelized and glossy. Pierogi will crisp further on the flip side. Remove from heat when onions are sweet and golden.
- Serve hot pierogi topped with caramelized onions, with sour cream on the side for dipping. Enjoy the perfect crisp-tender bite!
Notes
- Use potato or cheese filled frozen pierogi. Work in batches if your skillet is small to avoid overcrowding.