Mastering the Creamy Chicken and Biscuit Casserole
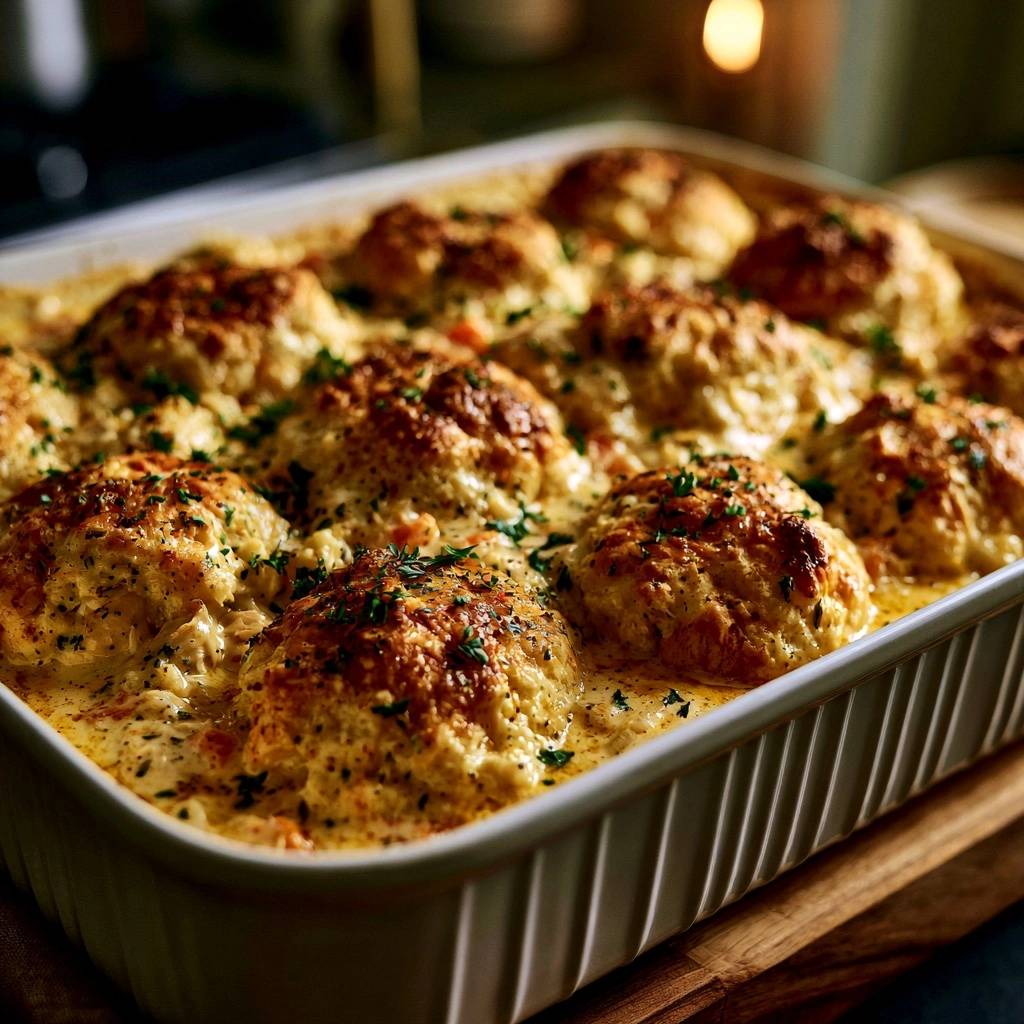
We’ve all been there. You pull a bubbling, golden-brown casserole out of the oven, smelling of thyme and melted butter, only to scoop into a nightmare of raw, gummy dough. That “soggy bottom” is the ultimate heartbreak of the chicken and biscuit world. It happens when the cold biscuit dough sits on top of a lukewarm sauce, soaking up liquid like a sponge before the oven can even start the baking process.
This recipe changes the game by treating the casserole like a science project rather than a dump-and-bake meal. We’re aiming for a velvety, rich chicken base topped with biscuits that boast a shatteringly crisp exterior and a light, airy center. It’s the ultimate comfort food, but with the technical precision needed to ensure every bite is perfect.
The secret to this success isn’t just the ingredients; it’s the temperature-staggering technique. By pre-heating the filling and creating a physical barrier with cheese, we ensure the biscuits “sear” on the bottom the moment they hit the pan. You’ll never have to worry about doughy centers again.
The Anatomy of a Non-Soggy Casserole
To understand why casseroles fail, you have to look at the physics of moisture migration. When you place raw dough onto a liquid base, the moisture naturally wants to move into the dry flour. If the filling is cold, the dough sits there absorbing water for ten minutes while the oven preheats the glass dish. By the time the heat kicks in, the bottom of your biscuit is already a paste.
Our “Anti-Soggy Bottom” philosophy relies on two main pillars: thermal energy and a hydrophobic barrier. We want the filling to be screaming hot before the biscuits ever touch it. This immediate heat causes the leavening agents in the dough to react instantly, pushing the biscuit upward and setting the bottom crust before it can drink up the sauce.
In addition to heat, we use a layer of shredded cheddar as a shield. Since oil and water don’t mix, the melting fat from the cheese creates a temporary waterproof seal. This keeps the heavy cream in the sauce and the flour in the biscuits exactly where they belong.
Why Pre-Heating the Filling is Mandatory
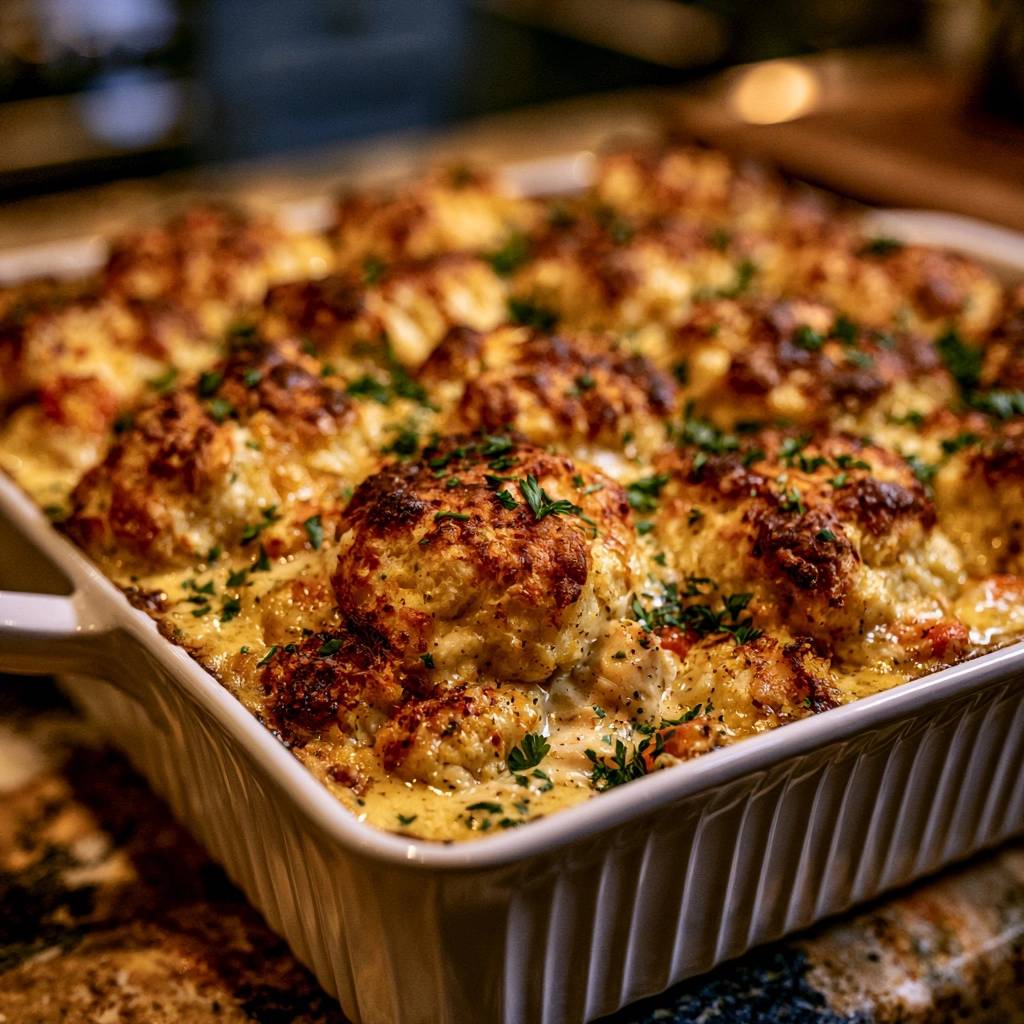
Starting with a bubbling hot filling is the single most important step in this process. When the sauce is already at 200 degrees Fahrenheit, it acts like a hot griddle for the biscuit dough. You’ll actually hear a slight sizzle when you drop the dough onto the hot surface.
This thermal jumpstart ensures that the “oven spring”—that beautiful rise in the dough—happens immediately. If you skip this, the biscuits will likely stay flat and dense. You’re looking for the edges of the sauce to be vigorously bubbling before you even open that biscuit tin.
The Role of the Cheddar Cheese Barrier
Think of the cheese as a protective raincoat for your biscuits. As the cheddar melts, it releases oils that coat the bottom of the dough. This fat-based layer prevents the steam from the chicken broth and heavy cream from turning the biscuit into a dumpling.
Beyond the science, this layer adds a massive punch of flavor. The cheese that touches the hot filling becomes slightly caramelized, creating a savory “frico” edge around the base of each biscuit. It’s a texture and flavor win-win.
Essential Components for the Creamy Filling
The filling needs to be thick enough to support the weight of the biscuits but creamy enough to feel like a luxury. I always recommend using a rotisserie chicken for this. The meat is already seasoned and tender, and the mix of white and dark meat provides a much better mouthfeel than boiled chicken breasts.
Using frozen peas and carrots is another strategic choice. Fresh carrots take too long to soften in a 35-minute bake, and canned vegetables often turn to mush. Frozen veggies hit the sweet spot, maintaining their bright color and a slight “snap” even after their time in the oven.
Don’t forget the herbs. Dried thyme is a powerhouse here because it stands up well to long heat. However, we save the fresh parsley for the very end to provide a burst of color and a clean, grassy finish that cuts through the richness of the dairy.
Selecting the Right Condensed Soup Base
While some purists prefer a homemade roux, a high-quality condensed cream of chicken soup provides a specific gelatinous stability. This viscosity is crucial for holding the chicken and vegetables in suspension. It prevents the sauce from breaking or becoming watery under the high heat of the oven.
If you’re worried about salt, look for a low-sodium version. This allows you to control the seasoning yourself with the garlic powder and black pepper. The soup acts as the “glue” that keeps the heavy cream and sour cream from separating during the bake.
Dairy Ratios: Sour Cream vs. Heavy Cream
Balance is everything in a dish this heavy. If we used only heavy cream, the casserole would feel greasy and one-note. By adding sour cream, we introduce a necessary acidity that brightens the entire flavor profile.
The sour cream also adds a pleasant tang that mimics a traditional buttermilk biscuit. It works with the heavy cream to create a sauce that is thick, opaque, and clings perfectly to the shredded chicken without being cloying.
Vegetable Selection and Moisture Content
One common mistake is thawing the frozen vegetables before adding them to the bowl. Don’t do it! Adding them frozen helps regulate the temperature of the sauce as you mix it, and they will cook perfectly during the pre-heating and final bake stages.
If you use fresh vegetables, you’ll need to sauté them in butter first. Otherwise, they’ll release too much water into the sauce as they cook, which—you guessed it—leads right back to that soggy biscuit problem we’re trying to avoid.
Step-by-Step: Building the Perfect Casserole
Success starts with a homogenous sauce. When you whisk your soup, creams, and spices, make sure there are no lumps of sour cream left. You want a smooth, pale-gold liquid that smells strongly of garlic and thyme before you fold in your solids.
Once the chicken and vegetables are in, spread them into your 9×13 dish with a spatula. You want an even surface so the heat distributes consistently. If one side is deeper than the other, the biscuits in the deep end won’t cook at the same rate as the ones in the shallow end.
The initial bake is your “safety zone.” Set your timer for 12 minutes and wait for those bubbles. You aren’t just warming it up; you’re creating a volcanic base that will launch those biscuits into flaky perfection.
Preparing the High-Viscosity Sauce Base
When whisking the base, I like to add the spices directly to the liquids first. This ensures the paprika and pepper don’t clump up on a piece of chicken. You want every single bite of this casserole to have the same seasoned punch.
If the mixture feels too thick to whisk, add a tablespoon of chicken broth at a time. It should be the consistency of a thick pancake batter. Remember, it will thin out slightly as the frozen vegetables release their juices in the oven.
The Initial Bake: Setting the Temperature
We use a 400-degree oven because we need high, dry heat. This isn’t a slow-cooker meal. The high temperature is what creates the steam inside the biscuit layers, forcing them to puff up and separate into those beautiful, flaky sheets.
When you pull the dish out after the first 12-15 minutes, the sauce should be dark and bubbling around the edges. This is the signal that the thermal mass is high enough to support the dough. Work quickly once the dish is out so the filling doesn’t cool down.
Biscuit Placement and Airflow Strategy
Instead of leaving the jumbo biscuits whole, I highly recommend cutting them into quarters. This creates more surface area for the heat to hit, which means more crispy edges for you. It also makes the dish much easier to serve.
Leave small gaps between the biscuit pieces. If you crowd them into a solid sheet of dough, the steam from the filling gets trapped underneath. Those gaps act like little chimneys, letting the moisture escape so the biscuits stay dry and crisp.
Achieving the Golden Brown Finish
The final 20 minutes are where the magic happens. You’re looking for a deep, honey-gold color on the biscuits. If they look pale, they aren’t done. A pale biscuit is a doughy biscuit. Don’t be afraid of a little color; that’s where the flavor lives.
The cheese on top will bubble and brown, and the butter glaze will soak into the top layers of the dough. This creates a contrast between the soft, sauce-soaked bottom of the biscuit and the crunchy, buttery top. It’s a texture profile that keeps you coming back for more.
The Butter and Parsley Glaze Technique
Brushing the tops with melted butter isn’t just for flavor. The fat in the butter helps conduct heat more efficiently than the air in the oven. This accelerates the Maillard reaction, giving you that professional, bakery-style finish.
Adding the parsley to the butter before brushing ensures the herbs stick to the biscuits rather than just falling off. It also lightly toasts the parsley, releasing its aromatic oils into the crust of the bread.
Tenting Strategies to Prevent Burning
Every oven has its own personality. If you notice the cheese is getting too dark but the biscuits still look a bit “squishy” in the center, don’t panic. Just lay a piece of aluminum foil loosely over the top of the dish.
This “tenting” reflects the direct radiant heat away from the surface while allowing the ambient heat to continue cooking the dough through. Just make sure the foil isn’t touching the cheese, or it will pull that beautiful crust right off when you remove it.
Troubleshooting Common Casserole Issues
If you scoop into the dish and the sauce seems a bit thin, the most likely culprit is the “rush.” This casserole needs a 10-minute rest on the counter. During this time, the starches in the sauce begin to cross-link as the temperature drops slightly, creating that thick, gravy-like consistency.
Another common issue is the biscuits browning on top but staying raw in the very center. This usually happens if the biscuits were placed too close together or if the filling wasn’t hot enough when they were added. If this happens, lower the oven to 350 and give it another 10 minutes under a foil tent.
Fixing a Runny Sauce After Baking
If the sauce is still runny after the rest period, you can actually use the biscuits to your advantage. Break one apart and stir the fluffy interior into the sauce. The cooked dough will act as a natural thickener, absorbing the excess liquid and turning it into a rich porridge.
In the future, ensure you aren’t over-measuring the chicken broth. It’s tempting to add more for a “saucy” dish, but the frozen vegetables and chicken will contribute their own moisture as they bake.
What to Do if Biscuits Stay Raw
If you’ve already taken the dish out and realized the biscuits are raw, don’t put it back in at 400. The tops will burn before the centers cook. Drop the heat to 325, cover tightly with foil, and bake for an additional 15 minutes. This low-and-slow approach will steam the centers of the biscuits without ruining the tops.
Make-Ahead and Storage Protocols
This is a fantastic meal-prep dish, but you have to be smart about it. You can mix the chicken, soup, and vegetables up to two days in advance. Store the filling in an airtight container in the fridge, but do not put the biscuits on top until you are ready to bake.
When you’re ready for dinner, just pour the cold filling into your baking dish and follow the pre-heating instructions. It might take an extra 5 minutes to get the cold filling bubbling, but the results will be just as fresh as if you’d made it all from scratch that day.
Reheating Without Losing the Crunch
Please, I beg you, stay away from the microwave for leftovers. The microwave will turn your beautiful biscuits into rubbery pucks. Instead, use a toaster oven or an air fryer set to 350 degrees.
Cover the dish with foil for the first 5 minutes to warm the chicken, then remove the foil for the last 3 minutes to crisp the biscuit back up. It will taste almost as good as the first night. If using an air fryer, 3-4 minutes at 360 degrees usually does the trick perfectly.
Freezing the Filling vs. The Whole Dish
You can freeze the creamy chicken base for up to three months. I recommend freezing it in a heavy-duty freezer bag pressed flat to save space. When you want to eat, thaw it in the fridge overnight and then proceed with the recipe as normal.
I do not recommend freezing the fully assembled dish with the biscuits. The dough will lose its structural integrity and the sauce may separate during the long thawing process. Fresh biscuits are always the way to go.
Expert Tips for Flavor Enhancements
If you want to take this to a dinner-party level, try swapping the sharp cheddar for Gruyère. Gruyère has a nutty, sophisticated melt that pairs beautifully with the thyme. You could also add a handful of sautéed leeks to the filling for a subtle onion sweetness.
For a bit of heat, add a dash of hot sauce or a pinch of cayenne pepper to the cream base. It won’t make the dish “spicy,” but it will provide a back-of-the-throat warmth that makes the creamy sauce feel even more comforting.
Incorporating Aromatics and Herbs
While the recipe calls for garlic powder for ease, you can certainly use fresh minced garlic. Sauté it in the melted butter for 30 seconds before whisking it into the sauce. This gives a more pungent, earthy garlic flavor.
If you have fresh rosemary or sage in the garden, chop them finely and add them to the biscuit butter. These “woody” herbs are the natural best friends of chicken and cream, and they’ll make your kitchen smell like a professional bistro.
Alternative Cheese Profiles
Don’t feel limited to cheddar. A smoked gouda can add a wonderful campfire depth to the dish, while a sharp white cheddar keeps things looking classic but tasting punchy. Just ensure whatever cheese you pick has a high fat content so it maintains that moisture barrier.
Avoid using the pre-shredded cheese in the green cans or the very finely “feather shredded” bags. These often have too much potato starch coating them, which can interfere with the melting process and make your sauce feel gritty.
Frequently Asked Questions
Can I use homemade biscuit dough instead of refrigerated?
Yes, you absolutely can. However, make sure you roll your dough to at least 1/2 inch thickness. Homemade dough often has more moisture than canned versions, so you may need to increase the final bake time by 5 minutes. Ensure your homemade dough is kept very cold until the moment it hits the hot filling.
Why is my sauce separating or looking oily?
This usually happens if the casserole is overheated or if the dairy is boiled too vigorously for too long. The proteins in the sour cream can “curdle” if they hit extreme heat without enough starch to stabilize them. Using the condensed soup as a base usually prevents this, but make sure you aren’t leaving the dish in the oven significantly longer than the recipe calls for.
Can I add potatoes to the filling?
You can, but be careful. Potatoes are very starchy and will soak up a lot of the sauce, potentially making the dish dry. If you want to add them, use small-diced, pre-cooked (boiled) potatoes. Do not add raw potatoes to the mix, as they will not soften in time and will release too much water into the sauce.
How do I double the recipe for a crowd?
When doubling, do not just pile everything into a deeper dish. The ratio of surface area to volume is key for the biscuits to cook. Instead, use two separate 9×13 inch pans. This ensures that the filling in both pans heats evenly and that every guest gets plenty of crispy biscuit topping.
How long will leftovers stay fresh in the fridge?
If stored in an airtight container, this casserole will stay delicious for 3 to 4 days. The biscuits will naturally soften as they sit in the fridge, which is why using the oven or air fryer to reheat them is so important for reviving that original texture.
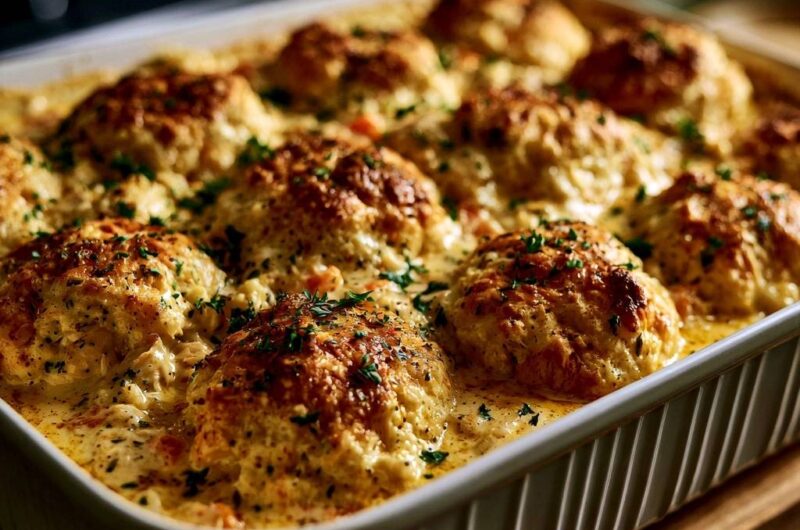
Creamy Chicken and Biscuit Casserole
Course: Main CourseCuisine: AmericanDifficulty: easy8
servings15
minutes35
minutes50
Minutes440
kcalAmerican
Ingredients
1 pound cooked shredded chicken (rotisserie works best)
1 can (10.5 oz) condensed cream of chicken soup
1/2 cup heavy cream
1/2 cup chicken broth
1/2 cup sour cream
2 cups frozen mixed peas and carrots
1 teaspoon garlic powder
1 teaspoon dried thyme
1/2 teaspoon black pepper
1/2 teaspoon paprika
1 can (16.3 oz) refrigerated jumbo flaky biscuits (8 count)
1.5 cups shredded sharp cheddar cheese, divided
2 tablespoons melted butter
1 tablespoon chopped fresh parsley
Directions
- Preheat your oven to 400 degrees F.
- In a large bowl, whisk together the cream of chicken soup, heavy cream, chicken broth, sour cream, garlic powder, thyme, pepper, and paprika until smooth.
- Fold in the shredded chicken and frozen vegetables. Pour the mixture into a 9×13 inch baking dish and spread it into an even layer.
- Place the baking dish in the oven for 12-15 minutes without the biscuits. Heating the filling until it is bubbling hot is the secret to setting the biscuit base quickly so it does not absorb too much liquid.
- Remove the dish from the oven. Sprinkle 1 cup of the shredded cheddar cheese evenly over the entire surface of the hot filling. This creates a fat-based barrier that prevents the dough from sinking into the sauce.
- Open the biscuit tin and cut each of the 8 biscuits into halves or quarters (or leave whole for a more rustic look as pictured). Arrange them on top of the cheese layer, leaving small gaps between them to allow steam to escape.
- Brush the tops of the biscuits generously with melted butter and sprinkle with the remaining 1/2 cup of cheese and the fresh parsley.
- Return the dish to the oven and bake for 18 to 22 minutes. If the tops brown too quickly, tent loosely with foil, but ensure the biscuits are deep golden brown and firm to the touch to guarantee the centers are cooked. The chicken is done when it reaches 165°F (74°C) in the thickest part.
- Let the casserole sit for 10 minutes before serving. This rest period is crucial for the sauce to emulsify and thicken around the base of the biscuits.
Notes
- Heating the filling before adding the biscuits and creating a cheese barrier are the two essential steps to prevent a soggy bottom. Let the dish rest for 10 minutes after baking to allow the sauce to thicken properly.