Classic Caramel Cheesecake: Flawless, Crack-Free Perfection
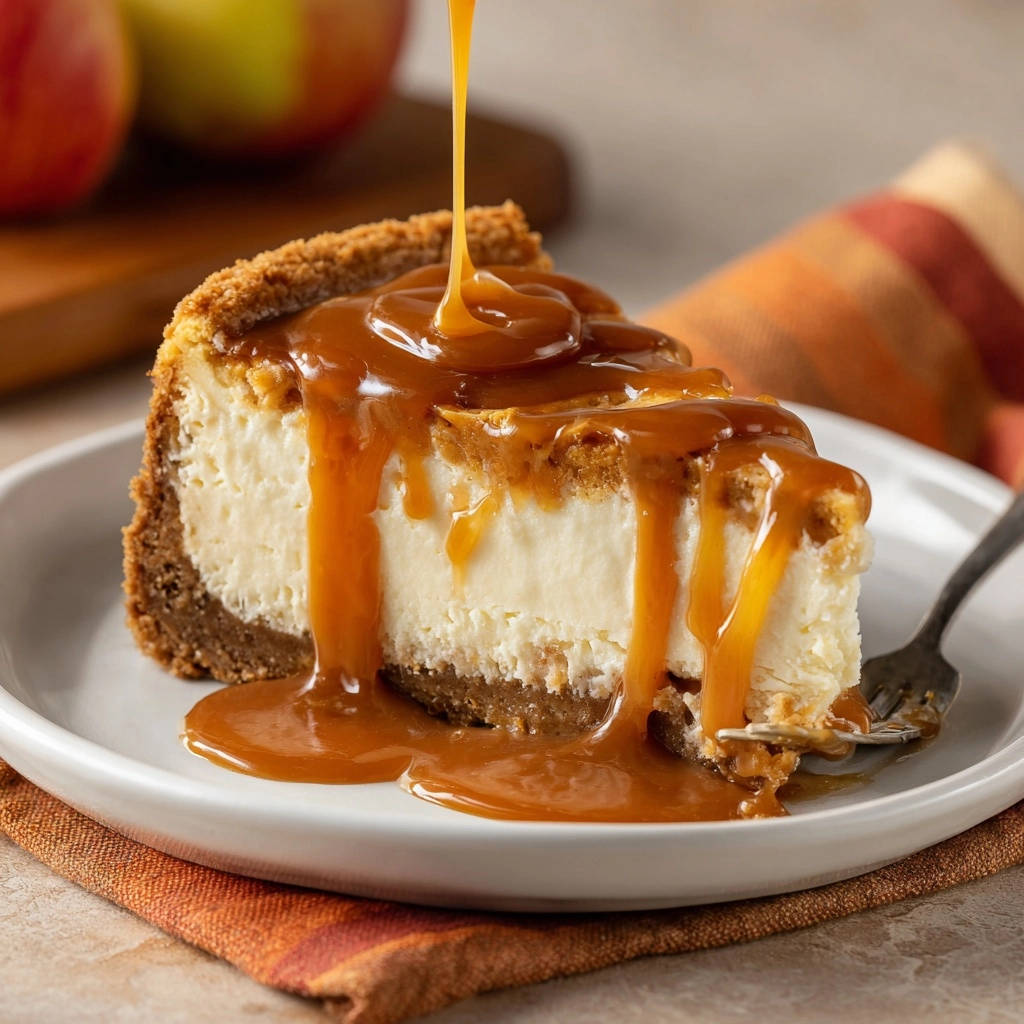
I know the feeling: the pure joy of pulling a beautiful cheesecake from the oven, only to watch disheartening cracks appear as it cools. That struggle inspired me to perfect this Classic Caramel Cheesecake recipe, which guarantees a gorgeously smooth, pristine top every single time.
This isn’t just another recipe; it’s a meticulously crafted guide that reveals the true secrets to bakery-quality results, giving you a luscious, crack-free caramel cheesecake that will impress everyone.
Unlock the Secret to a Perfectly Smooth Classic Caramel Cheesecake
Tired of frustrating cracks ruining your beautiful cheesecakes? This Classic Caramel Cheesecake recipe is your ultimate solution, providing simple yet critical steps to achieve that coveted flawless top every single time.
Beyond its stunning appearance, this recipe delivers an incredibly creamy texture and rich flavor, elevating a classic dessert to new heights of indulgence. Prepare yourself for stress-free baking and the immense satisfaction of serving a truly impeccable caramel cheesecake.
Mastering this technique means you can confidently create a show-stopping dessert, earning rave reviews and cementing your reputation as a home baking superstar.
Gather Your Indulgences: Essential Ingredients for Our Classic Caramel Cheesecake
For the Irresistible Graham Cracker Crust
- 1 1/2 cups graham cracker crumbs
- 1/4 cup granulated sugar
- 1/2 teaspoon ground cinnamon (optional)
- 6 tablespoons unsalted butter, melted
The buttery graham cracker base offers a delightful crunch, providing the perfect counterpoint to the creamy filling. Using quality, fresh crumbs ensures the best flavor and texture.
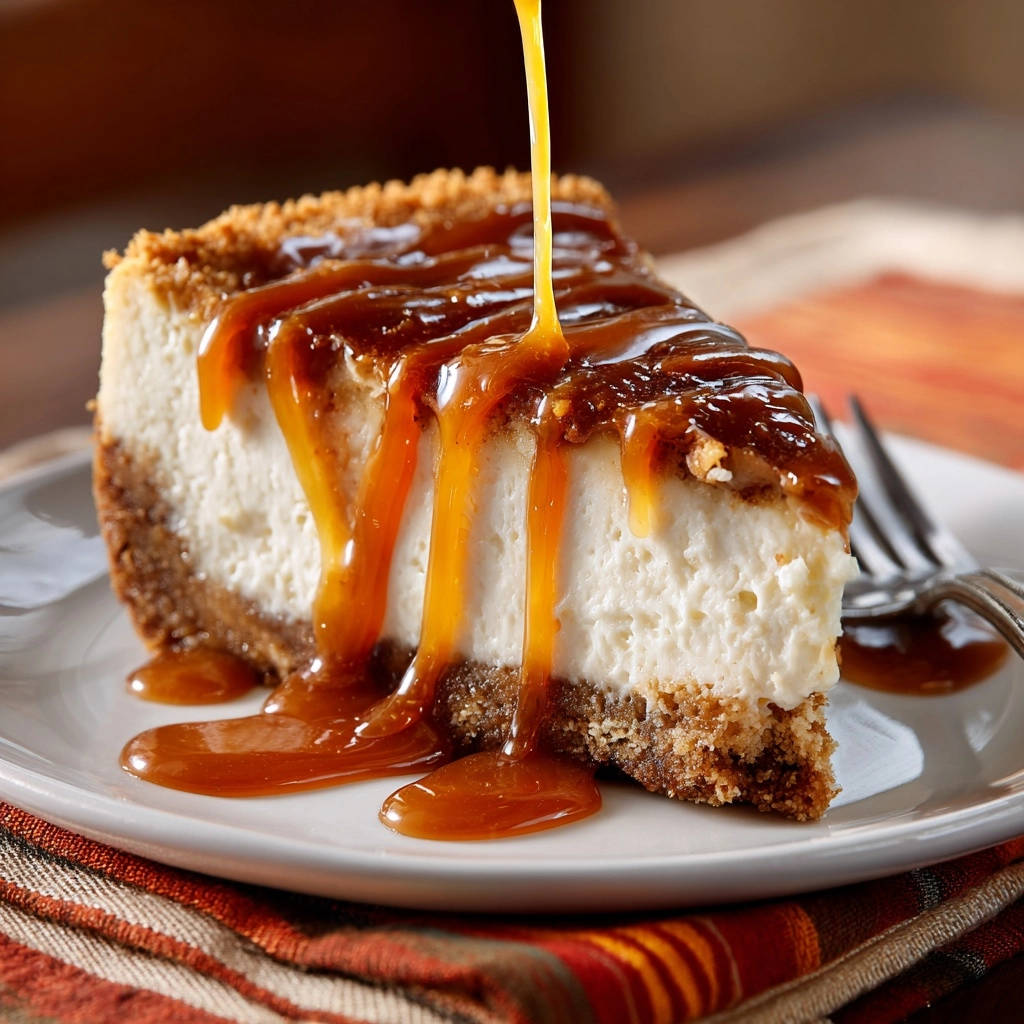
The Dreamy Cream Cheese Filling Core
- 32 ounces cream cheese, softened to room temperature
- 1 1/2 cups granulated sugar
- 1/4 cup all-purpose flour
- 1 teaspoon vanilla extract
- 1 cup sour cream, full fat, at room temperature
- 4 large eggs, at room temperature
Softened cream cheese and full-fat sour cream are vital for the luscious, smooth texture; always ensure they are at room temperature for seamless blending. A subtle touch of flour acts as our secret stabilizer, preventing cracks without altering the decadent taste of this creamy caramel dessert.
The Silken Caramel Topping
- 1 cup caramel sauce
A generous layer of rich caramel sauce crowns this masterpiece, adding a sweet, buttery finish that elevates every bite. Choose a high-quality, deeply flavored caramel for the ultimate experience.
Your Cheesecake Toolkit: Must-Have Equipment for Success
- 9-inch Springform Pan:
Crucial for easy release and beautifully sculpted sides, ensuring your Classic Caramel Cheesecake looks as good as it tastes.
- Heavy-Duty Aluminum Foil:
Essential for creating a watertight seal around your springform pan for the critical water bath.
- Electric Mixer (Handheld or Stand):
Necessary for achieving that silky-smooth cream cheese filling without overworking the batter.
- Large Mixing Bowls:
For combining crust ingredients and the generous volume of the cheesecake filling.
- Roasting Pan:
A large pan is needed to hold the springform pan and create the moist environment of the water bath.
- Wire Rack:
For cooling the baked cheesecake gradually and evenly, a vital step in crack prevention.
- Measuring Cups and Spoons:
Accuracy is key in baking, ensuring perfect proportions for your Classic Caramel Cheesecake.
- Thin Knife or Offset Spatula:
For neatly releasing the cheesecake from the pan and spreading the caramel topping.
Crafting Perfection: A Step-by-Step Guide to Your Classic Caramel Cheesecake
- Preheat Oven & Prepare Pan for Water Bath:
Set your oven to 350°F (175°C). Carefully wrap the outside of your 9-inch springform pan with heavy-duty aluminum foil, covering the bottom and sides completely. This creates a watertight seal, which is absolutely essential for the water bath method for your Classic Caramel Cheesecake.
- Construct the Graham Cracker Crust:
In a medium bowl, combine graham cracker crumbs, sugar, and optional cinnamon. Pour in the melted butter and mix until all crumbs are evenly moistened. Press this mixture firmly and evenly into the bottom of the prepared springform pan. Bake for 10 minutes, then remove and set aside. Reduce oven temperature to 325°F (160°C) for the cheesecake filling.
- Begin the Creamy Filling: Beat Cream Cheese:
In a large bowl, using an electric mixer on medium speed, beat the softened cream cheese until it is completely smooth and creamy, about 2-3 minutes. This initial beating ensures a lump-free base for your Classic Caramel Cheesecake. Remember to scrape down the sides of the bowl frequently.
- Sweeten and Stabilize: Add Sugar and Flour:
Gradually add the granulated sugar to the cream cheese, beating until well combined. Then, mix in the all-purpose flour until just incorporated. This small amount of flour is a crucial secret, helping to stabilize the custard and prevent cracks without impacting the luxurious texture or flavor.
- Infuse Flavor: Incorporate Vanilla and Sour Cream:
Next, beat in the vanilla extract until just combined. Follow with the full-fat sour cream, mixing on low speed until the mixture is smooth and fully integrated. Ensure these are also at room temperature for the best consistency.
- Gentle Egg Incorporation (The “No Overmix” Rule):
Add the large eggs one at a time, beating on low speed only until each egg is just incorporated. This is another critical step to prevent cracks: Do not overmix the eggs! Overmixing introduces too much air, which expands during baking and then contracts during cooling, leading to unsightly cracks in your Classic Caramel Cheesecake. Scrape down the bowl after each addition.
- Assemble the Cheesecake:
Carefully pour the prepared cheesecake batter over the pre-baked graham cracker crust in the springform pan. Gently tap the pan on the counter a few times to release any large air bubbles.
- Prepare the Water Bath:
Place the foil-wrapped springform pan into a larger roasting pan. Carefully pour hot water into the roasting pan until it reaches about halfway up the sides of the springform pan. This water bath creates a moist, even cooking environment, which is vital for preventing the edges of the Classic Caramel Cheesecake from drying out and cracking.
- Bake to Perfection:
Carefully transfer the roasting pan with the cheesecake to the preheated 325°F (160°C) oven. Bake for 60-75 minutes, or until the edges are set and lightly golden, but the center still has a slight jiggle (about 2-3 inches in diameter). Trust the jiggle; it indicates perfect doneness.
- The Golden Rule of Cooling: Slow Oven Cool-Down:
The ultimate secret to a crack-free Classic Caramel Cheesecake lies in the cooling process! Once baked, turn off the oven but leave the cheesecake inside with the oven door ajar for 1 hour. This slow, gradual cooling prevents sudden temperature changes that can shock the cheesecake and cause cracks.
- Continue Cooling & Unwrapping:
After 1 hour in the oven, remove the cheesecake from the oven and carefully lift it out of the water bath. Remove the aluminum foil. Let it cool completely on a wire rack at room temperature for another 1-2 hours.
- Chill for Optimal Texture and Flavor:
Once completely cooled to room temperature, cover the cheesecake with plastic wrap and refrigerate for at least 6 hours, or preferably overnight. This crucial chilling period allows the Classic Caramel Cheesecake to fully set, developing its ideal creamy texture and rich flavor.
- Serve with Decadent Caramel Topping:
To serve, carefully run a thin knife around the edge of the pan before releasing the springform. Slice into generous portions and top each piece liberally with your favorite caramel sauce. Enjoy your flawless Classic Caramel Cheesecake!
For a perfect pairing, try our Mastering the Glazed Blueberry Lemon Bundt Cake.
Chef’s Secrets for Your Flawless Classic Caramel Cheesecake
Room Temperature Ingredients are Non-Negotiable: Always ensure cream cheese, sour cream, and eggs are at room temperature. This allows them to combine smoothly, creating a uniform, lump-free batter that bakes evenly and contributes to the signature creamy texture of a Classic Caramel Cheesecake.
The Flour Advantage in Crack Prevention: The small amount of all-purpose flour isn’t just for texture; it plays a vital role in stabilizing the cream cheese custard. It helps prevent the filling from expanding too rapidly and contracting dramatically during cooling, effectively minimizing the risk of cracks.
Mastering the Water Bath Technique: A water bath (Bain-marie) is your best friend for a perfectly baked cheesecake. It provides a moist, gentle, and even heat that prevents the edges from drying out and baking faster than the center, promoting a creamy texture from edge to edge and significantly reducing cracking.
Do NOT Overmix the Eggs – The Golden Rule: This cannot be stressed enough. Once the eggs are added, mix on the lowest speed possible, just until they disappear into the batter. Overmixing incorporates too much air, which will puff up the cheesecake in the oven and then collapse, causing cracks.
The Art of Gradual Cooling is Key: After baking, resist the urge to pull your cheesecake straight from the oven. The slow, gradual cooling inside the warm, turned-off oven (with the door ajar) is crucial. This gentle temperature transition prevents the sudden contraction that often leads to surface cracks.
Patience Pays Off: Chilling Time is Non-Negotiable: A properly chilled Classic Caramel Cheesecake for at least 6 hours (preferably overnight) allows the texture to fully set and the flavors to meld beautifully. Rushing this step results in a less firm, less flavorful slice.
Pre-Baking Your Crust Matters: While some recipes skip it, pre-baking the graham cracker crust for a short period ensures it’s set and slightly crispy before the filling is added. This prevents a soggy bottom and provides a better structural contrast to the creamy filling.
Serving, Storing & Making Ahead: Enjoying Your Classic Caramel Cheesecake
Perfect Presentation and Serving Ideas
While a generous drizzle of caramel sauce is classic, elevate your Classic Caramel Cheesecake with a sprinkle of sea salt flakes for a sophisticated sweet-and-salty contrast. A dollop of fresh whipped cream or a scattering of toasted pecans or walnuts also makes for an exquisite presentation. For a fruitier note, a small side of sliced apples or pears complements the rich caramel beautifully.
If you enjoy this custard-like texture, you’ll appreciate the same tender crumb in a glazed lemon blueberry loaf.
Optimal Storage for Freshness
Store your Classic Caramel Cheesecake tightly covered with plastic wrap in the refrigerator for up to 4-5 days. For longer storage, cheesecake freezes exceptionally well. Wrap individual slices or the entire cheesecake (once fully chilled) tightly in plastic wrap, then again in aluminum foil. It can be frozen for up to 2-3 months. Thaw overnight in the refrigerator before serving.
Can You Make This Caramel Cheesecake Ahead?
Absolutely! This Classic Caramel Cheesecake is an ideal make-ahead dessert, perfect for entertaining. You can bake the cheesecake entirely up to 2-3 days in advance, allowing it to chill thoroughly in the refrigerator. The caramel topping can be made a day or two ahead and stored separately, then warmed gently and drizzled just before serving. This approach reduces stress and ensures a perfectly set, flavorful dessert. For another impressive classic, consider making a decadent Classic Cherry Cheesecake next!
Troubleshooting Your Classic Caramel Cheesecake: Common Issues & Solutions
“My Cheesecake Cracked! What Went Wrong?”
Cracks are typically caused by overmixing the eggs, which incorporates too much air, or by a sudden temperature change during cooling. Ensure you mix eggs gently and use the recommended gradual cooling method inside the oven. A water bath is also critical for even baking.
“My Classic Caramel Cheesecake is Soggy/Dense.”
A soggy crust can result from not pre-baking or from the water bath leaking. Ensure your pan is tightly wrapped in foil. A dense filling often comes from overmixing the cream cheese or adding ingredients that are not at room temperature. Ensure ingredients are soft and combine them gently.
“The Filling is Lumpy.”
Lumps almost always stem from cream cheese that wasn’t sufficiently softened or beaten smooth before other ingredients were added. Ensure your cream cheese is at true room temperature and beat it thoroughly for several minutes until velvety smooth before proceeding with the recipe.
“It’s Undercooked/Overcooked.”
Undercooked cheesecake will be too wobbly throughout, while overcooked will be firm with a very large crack. Look for set edges and a slight 2-3 inch jiggle in the center. Oven temperatures can vary, so an oven thermometer can be helpful. Trust the visual cues over strict timing.
Classic Caramel Cheesecake FAQs: Your Questions Answered
Can I use store-bought caramel sauce?
Yes, absolutely! While homemade caramel is delicious, a high-quality store-bought caramel sauce works perfectly for the topping of this Classic Caramel Cheesecake. Choose one with a rich, buttery flavor for the best results.
How do I know when my Classic Caramel Cheesecake is perfectly set?
Your Classic Caramel Cheesecake is perfectly set when the edges appear firm and slightly golden, but the center (about 2-3 inches in diameter) still has a slight, almost custardy jiggle. It will continue to set as it cools and chills.
Can I make individual mini caramel cheesecakes?
Yes, you can! This recipe adapts beautifully to mini cheesecakes. Line a muffin tin with cupcake liners, press the crust into each, and fill. Baking time will be significantly reduced, likely 20-30 minutes, so keep a close eye on them.
What if I don’t have a springform pan for my Classic Caramel Cheesecake?
While a springform pan is ideal for easy release and presentation, you can use a regular 9-inch round cake pan. Line the bottom and sides with parchment paper, leaving an overhang to lift the cheesecake out once cooled. However, it won’t be as easy to achieve a perfectly smooth side without a springform.
Can I substitute light cream cheese or low-fat sour cream?
For the best texture and flavor in your Classic Caramel Cheesecake, full-fat cream cheese and sour cream are highly recommended. Low-fat alternatives contain more water, which can lead to a less creamy, denser texture and potentially a greater risk of cracking. It’s best to stick to the full-fat versions for this indulgent dessert.
Ready to Impress? Share Your Classic Caramel Cheesecake Masterpiece!
You’re now equipped with all the knowledge and secret tips to bake a truly flawless Classic Caramel Cheesecake – one that boasts a perfect, crack-free top and an irresistibly creamy filling. This isn’t just a dessert; it’s a showstopper, a conversation starter, and a true testament to the joy of baking.
Don’t let the fear of cracks hold you back any longer! Dive into your kitchen, follow these detailed steps, and prepare to be amazed by the bakery-quality results you can achieve right at home. We’d love to see your stunning Classic Caramel Cheesecake creations! Share your photos and tag us on social media.
Looking for more decadent dessert ideas? Explore delightful options like an Almond Caramel Layer Cake for your next baking adventure!
What to Serve with Your Cheesecake
After a slice of that caramel cheesecake, here are two breakfast-style recipes that use similar creamy, sweet flavors for a different meal.
- For a morning treat with the same warm cinnamon notes, try these Golden Cinnamon French Toast Rolls that stay crisp on the outside.
- If you want a fruitier option with a soft, fluffy texture, the Fluffy Blueberry Pancakes pair well with a drizzle of maple syrup.
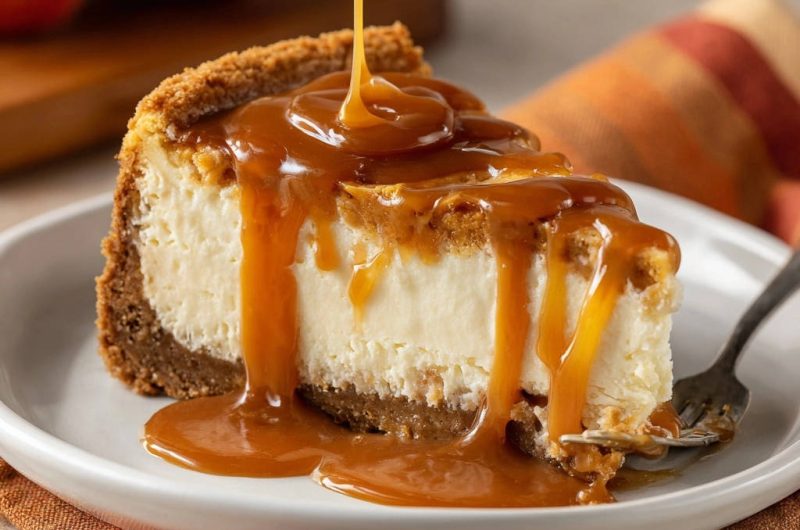
Caramel Cheesecake
Course: DessertCuisine: AmericanDifficulty: medium12
servings30
minutes1
hour15
minutes550
kcal105
minutesUnlock the secret to a perfectly smooth, crack-free Classic Caramel Cheesecake with this foolproof recipe. Featuring a buttery graham cracker crust, rich cream cheese filling, and a luscious caramel topping, this dessert is designed for bakery-quality results right from your kitchen.
Ingredients
For the Crust:
1 1/2 cups graham cracker crumbs
1/4 cup granulated sugar
1/2 teaspoon ground cinnamon (optional)
6 tablespoons unsalted butter, melted
For the Filling:
32 ounces cream cheese, softened to room temperature
1 1/2 cups granulated sugar
1/4 cup all-purpose flour
1 teaspoon vanilla extract
1 cup sour cream, full fat, at room temperature
4 large eggs, at room temperature
For the Topping:
1 cup caramel sauce
Directions
- Preheat your oven to 350 degrees F (175 C). Wrap the outside of a 9-inch springform pan with heavy-duty aluminum foil, covering the bottom and sides completely to create a watertight seal for the water bath.
- Prepare the crust: In a medium bowl, combine graham cracker crumbs, sugar, and cinnamon (if using). Pour in the melted butter and mix until all crumbs are moistened. Press the mixture firmly into the bottom of the prepared springform pan. Bake for 10 minutes, then remove from oven and set aside. Reduce oven temperature to 325 degrees F (160 C).
- Prepare the filling: In a large bowl, using an electric mixer on medium speed, beat the softened cream cheese until smooth and creamy, about 2-3 minutes. Scrape down the sides of the bowl.
- Gradually add the sugar to the cream cheese, beating until well combined, then mix in the flour until just incorporated. This small amount of flour helps prevent cracks by stabilizing the custard.
- Beat in the vanilla extract, then the sour cream, mixing until smooth.
- Add the eggs one at a time, beating on low speed just until each egg is incorporated. Crucially, do not overmix the eggs! Overmixing incorporates too much air, which expands during baking and contracts during cooling, leading to cracks. Scrape down the bowl after each addition.
- Pour the cheesecake batter over the pre-baked crust in the springform pan.
- Place the foil-wrapped springform pan into a larger roasting pan. Carefully pour hot water into the roasting pan until it reaches about halfway up the sides of the springform pan. This water bath creates a moist, even cooking environment, preventing the edges from drying out and cracking.
- Carefully transfer the roasting pan with the cheesecake to the preheated 325 degrees F (160 C) oven. Bake for 60-75 minutes, or until the edges are set and lightly golden, but the center still has a slight jiggle (about 2-3 inches in diameter).
- The secret to no cracks lies in the cooling! Turn off the oven, but leave the cheesecake inside with the oven door ajar for 1 hour. This slow, gradual cooling prevents sudden temperature changes that can cause cracks.
- After 1 hour, remove the cheesecake from the oven and carefully lift it out of the water bath. Remove the aluminum foil. Let it cool completely on a wire rack at room temperature for another 1-2 hours.
- Once completely cooled, cover the cheesecake with plastic wrap and refrigerate for at least 6 hours, or preferably overnight, for best texture and flavor.
- To serve, carefully run a thin knife around the edge of the pan before releasing the springform. Slice and generously top each piece with caramel sauce.
Notes
- The key to a crack-free cheesecake is the water bath during baking and slow, gradual cooling in the oven. Do not overmix the eggs.