Decadent Chocolate Cherry Layer Cake: Fluffy Layers Every Time
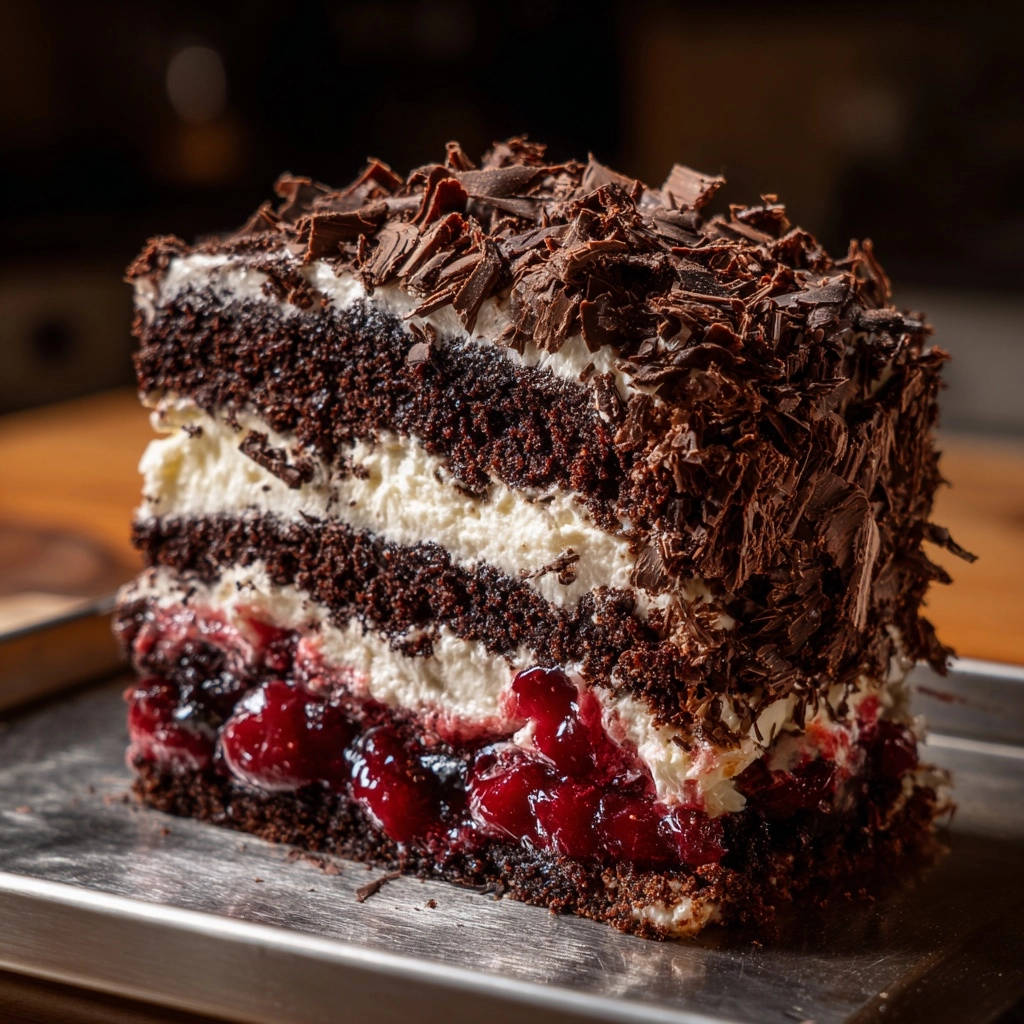
For years, my chocolate cakes often turned out dense, a common frustration for home bakers. Discovering the secret to truly light, airy layers transformed my baking, especially for an intricate showstopper like this Decadent Chocolate Cherry Layer Cake.
This recipe isn’t just about combining ingredients; it’s about a simple technique that guarantees a perfectly tender crumb and rich flavor, making every slice a pure delight.
Unlock the Fluff: The Simple Secret to Light, Airy Cake Layers
The single most impactful step for achieving incredibly fluffy cake layers lies in how you incorporate the hot liquid.
By gradually adding hot water or hot brewed coffee to the batter, you effectively “bloom” the cocoa powder. This process intensifies the chocolate flavor, unlocking its full depth and richness.
More importantly, it thins the batter to the ideal consistency, ensuring a moist and exceptionally tender crumb that is never dense or dry.
This simple addition makes all the difference, creating a cake that melts in your mouth with every bite.
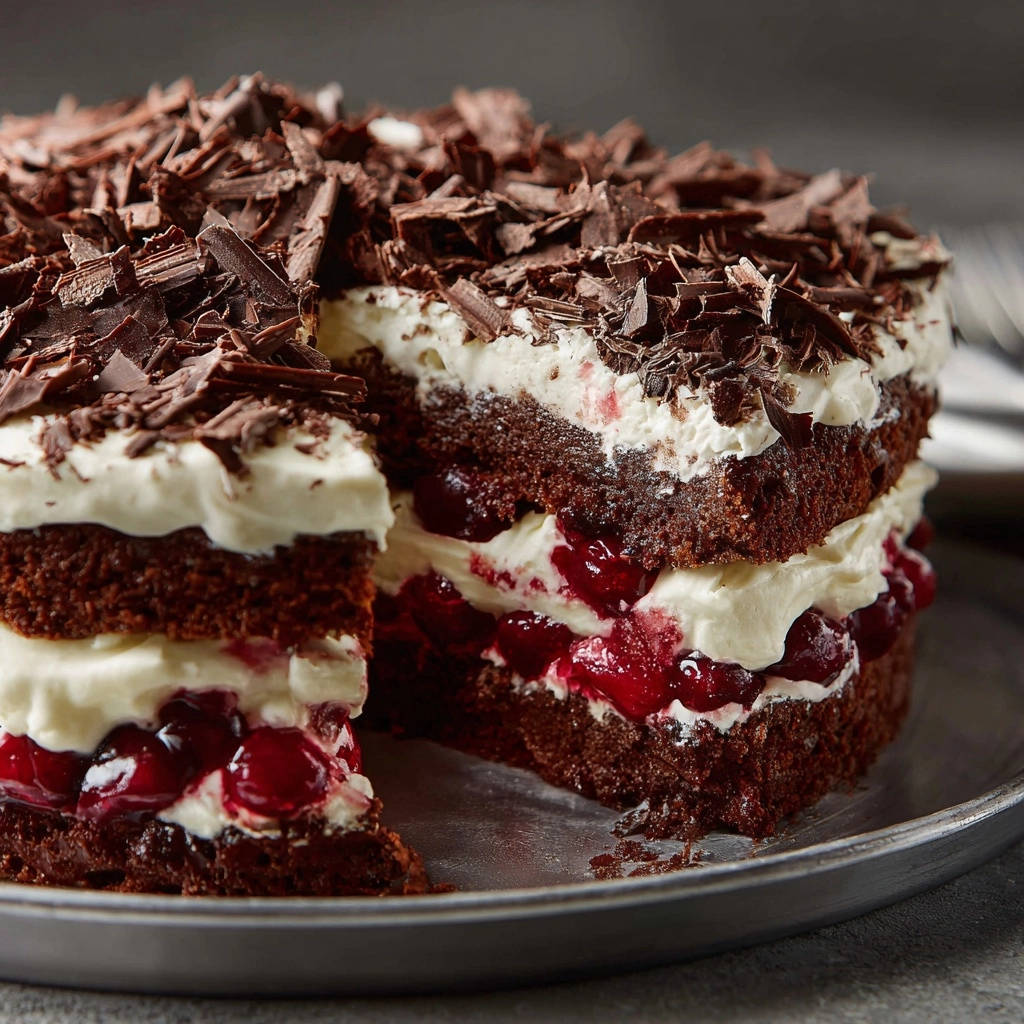
The Flavor Foundation: Essential Ingredients for Your Masterpiece
Crafting a truly exceptional cake begins with understanding the role each ingredient plays.
Quality ingredients are the backbone of flavor and texture, ensuring your final product is nothing short of spectacular.
Core Cake Components
All-purpose flour, granulated sugar, cocoa powder: These form the structural and flavor base. Accurate measurement is crucial for proper balance.
Baking soda and baking powder: These leavening agents work together, reacting with the acidic buttermilk and heat to create the cake’s signature lift and airy texture.
Buttermilk (or milk + vinegar), vegetable oil, eggs, vanilla extract: These wet ingredients contribute moisture, richness, and binding. Buttermilk adds a subtle tang that enhances the chocolate.
Hot water or hot brewed coffee: This is the secret ingredient that transforms the cocoa, deepening its flavor and ensuring a remarkably tender, fluffy crumb.
Bursting Berry Bliss: Cherry Filling Essentials
Pitted fresh or frozen cherries: Either type works perfectly, bringing vibrant fruitiness and a lovely tart contrast to the rich chocolate.
Granulated sugar: Balances the tartness of the cherries, creating a sweet and fruity compote.
Cornstarch and water: Whisked into a slurry, cornstarch acts as a thickening agent, giving the cherry filling its perfect, spreadable consistency.
Lemon juice: A splash of lemon juice brightens the cherry flavor, preventing it from tasting flat and adding a delightful zing.
Cloud-Like Perfection: Whipped Cream Frosting Must-Haves
Heavy cream: The foundation of our light and ethereal frosting. Its high fat content allows it to whip up into stable, billowy peaks.
Powdered sugar: Sweetens the cream and helps stabilize it without adding grittiness, ensuring a silky-smooth texture.
Vanilla extract: Enhances the cream’s natural sweetness with its warm, aromatic notes, completing the classic flavor profile.
Finishing Touch: Garnish Glamour
Dark chocolate bar: For elegant shavings, this adds not just beauty but also another layer of intense chocolate flavor and texture contrast to the cake.
Your Baking Journey: Crafting the Decadent Chocolate Cherry Layer Cake
Embark on this delightful baking adventure with confidence, following each step to create your own masterpiece.
Preparing for Success: Oven & Pans
- Preheat Oven & Prepare Pans:
Preheat your oven to 350 degrees Fahrenheit (175 degrees Celsius). This ensures a consistent baking temperature from the start.
Thoroughly grease and flour two 8-inch round cake pans or line them with parchment paper. This critical step prevents sticking and ensures easy release of your beautiful cake layers.
Mixing the Magic: Cake Batter Assembly
- Combine Dry Ingredients:
In a large bowl, whisk together the all-purpose flour, granulated sugar, cocoa powder, baking soda, baking powder, and salt.
Whisking these dry ingredients thoroughly ensures they are evenly distributed, leading to a consistent rise and flavor in your cake.
- Whisk Wet Ingredients:
In a separate medium bowl, whisk together the buttermilk, vegetable oil, large eggs, and vanilla extract until well combined.
These ingredients provide moisture and richness, forming the liquid base for your batter.
- Integrate Wet into Dry:
Pour the wet ingredients into the dry ingredients. Mix on low speed with an electric mixer or by hand until they are just combined.
It’s crucial not to overmix at this stage; overmixing develops gluten, which can lead to a tough cake.
- The Fluffy Secret Step: Incorporate Hot Liquid:
Gradually add the hot water or hot coffee to the cake batter while mixing on low speed until the batter is smooth and thin.
This is the secret for truly fluffy layers; it blooms the cocoa, enhancing its flavor and creating a more tender, moist crumb.
- Baking the Layers:
Divide the thin batter evenly between the prepared cake pans.
Bake for 30 to 35 minutes, or until a wooden skewer inserted into the center of a cake layer comes out clean, indicating it’s fully cooked.
- Cooling to Perfection:
Let the cakes cool in their pans for 10 minutes. This allows them to firm up slightly, preventing breakage when inverted.
After 10 minutes, carefully invert them onto a wire rack to cool completely. Fully cooled layers are essential for successful assembly and prevent frosting from melting.
Creating the Luscious Cherry Filling
- Cook Cherries & Sugar:
In a medium saucepan, combine the pitted cherries and granulated sugar.
Bring the mixture to a simmer over medium heat, stirring occasionally, until the cherries release their juices.
- Thicken with Cornstarch Slurry:
In a small bowl, whisk together the cornstarch and water until it forms a smooth slurry with no lumps.
Pour this slurry into the simmering cherries, stirring constantly for about 1 to 2 minutes until the mixture thickens to a spoonable consistency.
- Finish & Cool Filling:
Stir in the lemon juice, which brightens the cherry flavor and adds a touch of acidity.
Remove from heat and let the cherry filling cool completely before using. A warm filling will melt the whipped cream.
Whipping Up the Dreamy Frosting
- Chill for Success: Cream, Bowl & Whisk:
For the most stable whipped cream, ensure your heavy cream, mixing bowl, and whisk attachment are very cold.
You can chill them in the freezer for 15 minutes prior to whipping for best results.
- Whip Cream to Soft Peaks:
Pour the very cold heavy cream into the chilled bowl. Beat on medium-high speed until soft peaks begin to form.
The cream will start to thicken and hold its shape slightly at this stage.
- Sweeten & Flavor:
Gradually add the powdered sugar and vanilla extract to the whipped cream, continuing to beat on medium-high speed.
Beat until stiff peaks form, meaning the cream holds its shape firmly when the whisk is lifted. Be careful not to overbeat, or it will turn grainy.
Assembling Your Showstopper Cake
- Layer One: Cake, Filling & Frosting:
Place one completely cooled cake layer on your chosen serving plate or cake stand.
Evenly spread about half of the cooled cherry filling over the cake layer, leaving a small border around the edge to contain the filling.
Carefully spread a generous layer of whipped cream over the cherry filling, creating a smooth, even surface.
- Layer Two: Repeat & Cover:
Gently place the second cooled cake layer on top of the frosted cherry layer.
Repeat by spreading the remaining cherry filling, followed by another generous layer of whipped cream over the top.
Use the remaining whipped cream to frost the sides of the cake, creating a beautiful, fluffy exterior.
- Garnish with Chocolate Shavings:
For elegant chocolate shavings, use a vegetable peeler or a sharp knife to carefully shave curls from the dark chocolate bar.
Sprinkle these generously over the top and sides of the cake for a stunning finish and added flavor.
- Chill for Stability:
Chill the assembled cake for at least 30 minutes before slicing and serving. This allows the layers, filling, and frosting to set, making for cleaner cuts and a more stable cake.
Baking Brilliance: Expert Tips for Your Decadent Chocolate Cherry Layer Cake
Elevate your baking experience with these valuable insights, ensuring your Decadent Chocolate Cherry Layer Cake is perfect every time.
Perfectly Pitted Cherries: Fresh cherries are wonderful, but pitting them can be time-consuming. A cherry pitter makes this task quick and easy.
If using frozen cherries, there’s no need to thaw them completely before cooking; they will break down nicely as they simmer.
Measuring Cocoa Accurately: For the best chocolate flavor and cake texture, always spoon cocoa powder lightly into your measuring cup and then level it off.
Packing it in or scooping directly can result in too much cocoa, leading to a dry cake.
The Art of Not Overmixing: Overmixing cake batter is a common pitfall that develops gluten, making your cake tough and chewy instead of tender.
Mix only until the ingredients are just combined, and no streaks of dry flour remain. Lumps are okay and will bake out.
Temperature Matters for Whipped Cream: The colder your heavy cream, bowl, and whisk, the faster and more stable your whipped cream will be.
Warm cream simply won’t whip to the same volume or hold its shape as well.
Mastering the Chocolate Shavings: For beautiful, delicate chocolate curls, use a high-quality dark chocolate bar.
Ensure the chocolate is at room temperature for easy shaving with a vegetable peeler or the edge of a sharp knife.
Patience with Cooling: It’s tempting to rush, but ensuring your cake layers and cherry filling are completely cooled is paramount.
Warm components will melt the whipped cream, leading to a messy and unstable cake.
Troubleshooting Your Decadent Chocolate Cherry Layer Cake: Solutions for Common Challenges
Even experienced bakers encounter hiccups. Here are solutions for common issues you might face with your Decadent Chocolate Cherry Layer Cake.
Cake Layers Too Dense or Dry?
This often points to overmixing the batter, which develops gluten and results in a tough texture. Ensure you mix only until just combined.
Another culprit might be not adding the hot water or coffee, which is crucial for blooming the cocoa and achieving that moist, tender crumb.
Whipped Cream Not Holding Shape?
The primary reason for unstable whipped cream is insufficient chilling. Ensure your heavy cream, bowl, and whisk are all very cold before you start whipping.
You might also be under-whipping (not enough aeration) or over-whipping (turning it into butter). Stop when stiff peaks form, but before it looks curdled.
Cherry Filling Too Runny or Stiff?
If your filling is too runny, it likely didn’t simmer long enough after adding the cornstarch slurry, or you needed a bit more cornstarch.
If it’s too stiff, you might have added too much cornstarch or over-simmered it. You can try loosening a stiff filling with a tablespoon or two of water or cherry juice.
Crumbly Cake When Slicing?
A crumbly cake often means it wasn’t fully cooled or chilled before slicing. The cake needs time to set its structure, especially when filled and frosted.
Always use a long, sharp, serrated knife, and wipe the blade clean between each slice for the neatest cuts.
Beyond the Bake: Serving & Storage Wisdom
Once your beautiful Decadent Chocolate Cherry Layer Cake is complete, knowing how to serve and store it properly ensures maximum enjoyment.
Perfect Presentation: Serving Suggestions
For the best flavor and texture, serve your Decadent Chocolate Cherry Layer Cake chilled. This enhances the refreshing qualities of the cherry filling and keeps the whipped cream stable.
Present each slice on its own plate, perhaps with an extra fresh cherry or a light dusting of cocoa powder for an elegant touch.
Keeping Your Cake Fresh: Storage Tips
Because of the whipped cream frosting and fresh cherry filling, this cake must be stored in the refrigerator.
Keep it covered loosely with plastic wrap or in an airtight cake carrier to prevent it from drying out or absorbing refrigerator odors.
The cake is best enjoyed within 3-4 days of baking, but the flavors truly meld after chilling for a few hours.
Can You Make it Ahead? Planning Your Bake
Absolutely! The cake layers can be baked a day in advance, cooled completely, and then wrapped tightly in plastic wrap before storing at room temperature or in the freezer.
The cherry filling can also be made a day or two ahead and stored in an airtight container in the refrigerator. Assemble the cake just a few hours before serving for the freshest whipped cream.
Your Questions Answered: Decadent Chocolate Cherry Layer Cake FAQs
Here are some common questions to help you master this incredible cake.
Can I use frozen cherries for the filling?
Yes, absolutely! Frozen pitted cherries work wonderfully for the filling and require no thawing before you start simmering them.
What if I don’t have buttermilk?
No buttermilk? No problem! You can easily make a substitute. For 1 cup of buttermilk, add 1 tablespoon of white vinegar or lemon juice to a measuring cup, then fill the rest of the cup with milk. Let it sit for 5-10 minutes until it slightly curdles before using.
Can I make this Decadent Chocolate Cherry Layer Cake gluten-free?
While this recipe hasn’t been specifically tested with gluten-free flour, you can typically substitute a 1:1 gluten-free all-purpose flour blend.
Be aware that the texture might vary slightly, and adding a touch more liquid might be needed to achieve the correct batter consistency.
How far in advance can I make this cake?
The assembled Decadent Chocolate Cherry Layer Cake is best enjoyed within 3-4 days when stored properly in the refrigerator.
As mentioned, you can bake layers and make the cherry filling up to 2 days ahead, assembling closer to serving time for optimal freshness.
What’s the best way to transport the cake?
For stable transport, ensure the cake is thoroughly chilled, ideally for at least 2 hours, before moving it.
Use a sturdy cake carrier with a secure lid, and keep it on a flat surface in your vehicle. For longer distances, an insulated bag with ice packs can help maintain its cool temperature.
Ready to Impress? Share Your Decadent Chocolate Cherry Layer Cake Masterpiece!
Now that you’re equipped with all the secrets to fluffy layers and vibrant flavors, it’s time to create your own showstopping Decadent Chocolate Cherry Layer Cake.
This recipe is more than just a dessert; it’s an experience, guaranteed to delight your family and friends. Don’t stop at just one indulgent creation! For another luscious cake experience, why not try our Almond Caramel Layer Cake?
For a perfect pairing, try our Fluffy Coconut Cherry Cake: Perfectly Moist, Every Bite.
We can’t wait to see your culinary triumphs! Share your baking journey and finished cakes with us in the comments below, or tag us on social media.
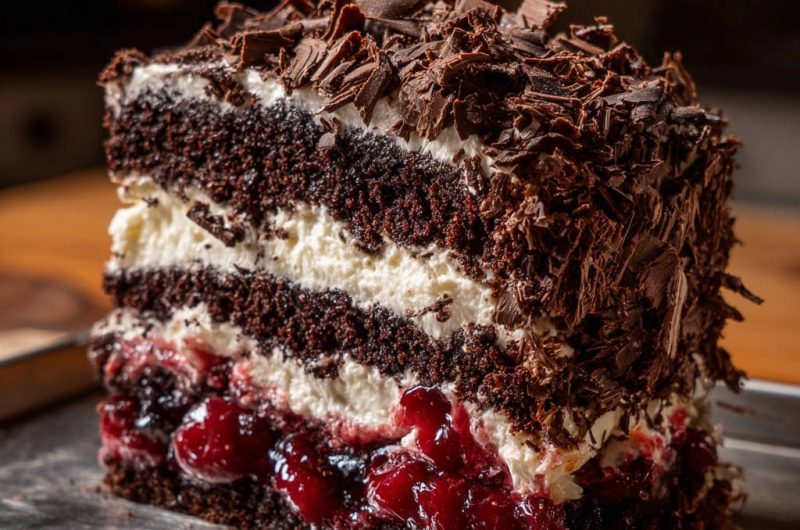
Chocolate Cherry Layer Cake
Course: DessertCuisine: AmericanDifficulty: medium1
cake (12 servings)1
hour35
minutes450
kcal120
minutesDiscover the simple trick for light, airy chocolate cake layers in this show-stopping dessert. Layered with luscious cherry filling and fluffy whipped cream, this Decadent Chocolate Cherry Layer Cake is sure to impress.
Ingredients
For the Chocolate Cake Layers:
2 cups all-purpose flour
1 3/4 cups granulated sugar
3/4 cup unsweetened cocoa powder
2 teaspoons baking soda
1 teaspoon baking powder
1 teaspoon salt
1 cup buttermilk (or 1 cup milk plus 1 tablespoon white vinegar)
1/2 cup vegetable oil
2 large eggs
1 teaspoon vanilla extract
1 cup hot water or hot brewed coffee
For the Cherry Filling:
2 cups pitted fresh or frozen cherries
1/2 cup granulated sugar
2 tablespoons cornstarch
1/4 cup water
1 teaspoon lemon juice
For the Whipped Cream Frosting:
3 cups heavy cream, very cold
3/4 cup powdered sugar
1 teaspoon vanilla extract
For Garnish:
4 ounces dark chocolate bar, for shavings
Directions
- Preheat your oven to 350 degrees Fahrenheit (175 degrees Celsius). Grease and flour two 8-inch round cake pans or line with parchment paper.
- In a large bowl, whisk together the flour, granulated sugar, cocoa powder, baking soda, baking powder, and salt.
- In a separate medium bowl, whisk together the buttermilk, vegetable oil, eggs, and vanilla extract.
- Pour the wet ingredients into the dry ingredients and mix on low speed with an electric mixer or by hand until just combined. Do not overmix.
- Here’s the secret for truly fluffy layers: Gradually add the hot water or hot coffee to the cake batter while mixing on low speed until the batter is smooth and thin. This step blooms the cocoa, enhancing its flavor and creating a more tender, moist crumb.
- Divide the batter evenly between the prepared cake pans. Bake for 30 to 35 minutes, or until a wooden skewer inserted into the center comes out clean.
- Let the cakes cool in the pans for 10 minutes before inverting them onto a wire rack to cool completely.
- While cakes cool, prepare the cherry filling. In a medium saucepan, combine cherries and granulated sugar. Bring to a simmer over medium heat.
- In a small bowl, whisk together cornstarch and water until smooth. Pour into the simmering cherries, stirring constantly until the mixture thickens, about 1 to 2 minutes. Stir in lemon juice. Remove from heat and let cool completely.
- For the whipped cream frosting, ensure your heavy cream, bowl, and whisk attachment are very cold (you can chill them in the freezer for 15 minutes). Pour the cold heavy cream into the chilled bowl.
- Beat on medium-high speed until soft peaks form. Gradually add the powdered sugar and vanilla extract, continuing to beat until stiff peaks form. Be careful not to overbeat, or it will turn grainy.
- To assemble the cake, place one cooled cake layer on a serving plate. Spread about half of the cherry filling over the cake layer, leaving a small border around the edge.
- Spread a generous layer of whipped cream over the cherry filling.
- Carefully place the second cake layer on top. Repeat with the remaining cherry filling and then another layer of whipped cream.
- Use the remaining whipped cream to frost the top and sides of the cake.
- For the chocolate shavings, use a vegetable peeler or a sharp knife to shave curls from the dark chocolate bar. Sprinkle these generously over the top and sides of the cake.
- Chill the cake for at least 30 minutes before slicing and serving. Enjoy your perfectly fluffy, show stopping cake!
Notes
- The secret to fluffy layers is gradually adding hot water or coffee to the batter, which blooms the cocoa and creates a more tender crumb.