Perfectly Cooked Chicken Breast: Your Juiciest Ever!
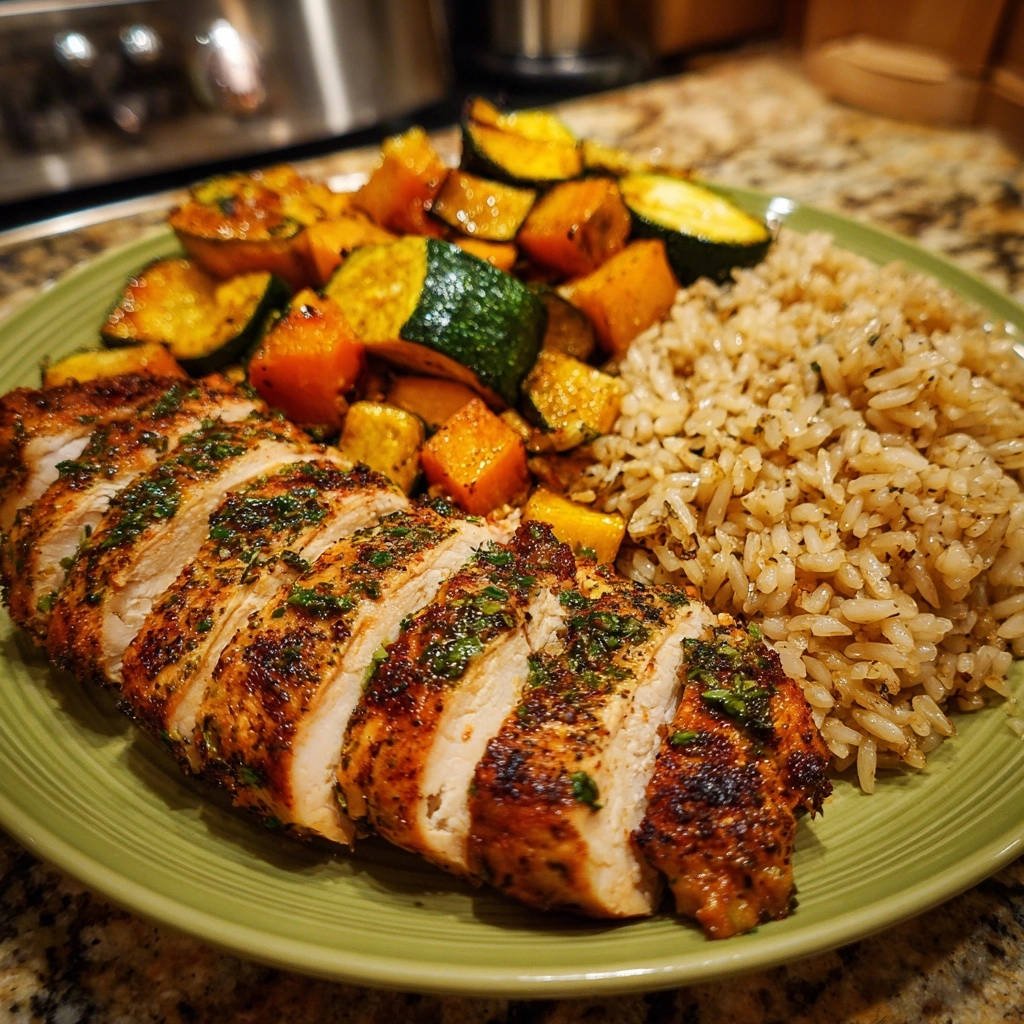
For years, I struggled with dry, uninspiring chicken breasts. It seemed impossible to achieve that perfect balance of tender and juicy without overcooking. But through countless kitchen experiments, I finally cracked the code to consistently deliver a truly Perfectly Cooked Chicken Breast.
This simple method transforms an everyday protein into a succulent, flavorful centerpiece, guaranteed to become your new go-to. Prepare to say goodbye to bland, rubbery chicken forever!
Why This Perfectly Cooked Chicken Breast Recipe is a Game-Changer
This isn’t just another chicken recipe; it’s a foundation for consistently delicious meals. We’re focusing on technique that ensures unparalleled results every time.
Consistently Juicy, Never Dry Results
The core promise of this method is undeniable juiciness. We utilize specific searing and resting techniques that lock in moisture, preventing that common dry, chewy texture.
Every bite of this perfectly cooked chicken breast will be tender and moist, leaving you wondering how you ever managed without these tips.
Simple Method, Big Flavor
Despite its impressive results, the preparation is incredibly straightforward. A handful of common pantry spices combine to create a deeply flavorful crust.
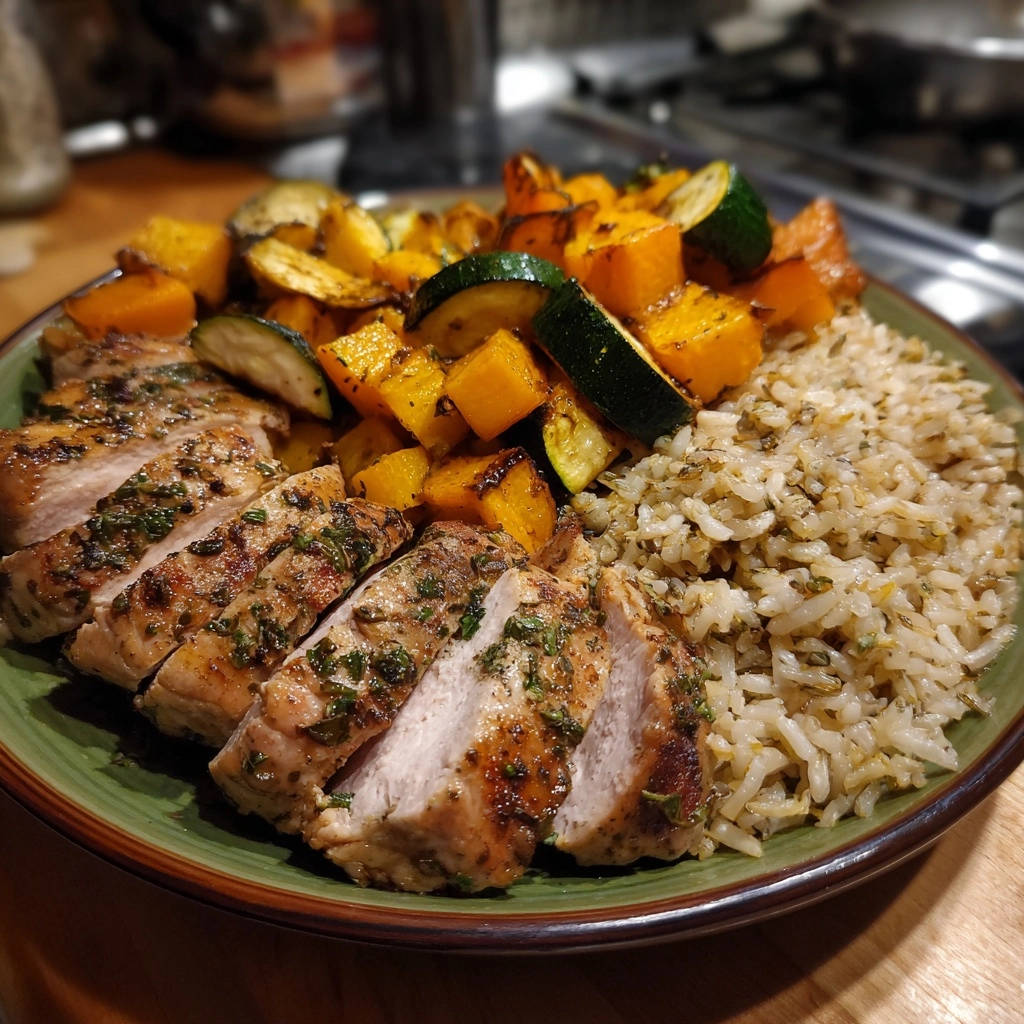
You’ll achieve maximum taste with minimal fuss, making this ideal for both weeknight dinners and special occasions.
Versatility for Every Meal
A perfectly cooked chicken breast is a blank canvas. It seamlessly fits into virtually any meal plan, from simple protein and veggie plates to salads, sandwiches, or grain bowls.
This recipe provides a reliable base you can adapt to countless dietary needs and flavor profiles.
Essential Kitchen Tools for Perfectly Cooked Chicken Breast Success
While the process is simple, having the right tools on hand can make all the difference in achieving consistently excellent results.
Must-Have Equipment
Large Skillet: Essential for a proper sear without overcrowding your chicken. A cast-iron skillet is ideal for even heat distribution.
Meat Thermometer: Your secret weapon for perfectly cooked, never-dry chicken. This eliminates guesswork and guarantees food safety and optimal texture.
Cutting Board & Aluminum Foil: Crucial for the resting process. The foil creates a loose tent to keep heat in while juices redistribute.
The Simple Ingredients Behind Perfectly Cooked Chicken Breast Perfection
Quality ingredients are the starting point for any great dish, and this perfectly cooked chicken breast recipe is no exception.
The Star: Boneless, Skinless Chicken Breast
Choose boneless, skinless chicken breasts that are similar in thickness, ideally around 6-8 ounces each. This ensures they cook evenly and reach doneness at the same time.
Look for fresh, plump chicken breasts from a reputable source for the best flavor and texture.
Crafting the Flavorful Seasoning Blend
Our simple seasoning blend elevates the natural taste of the chicken without overpowering it. It forms a delicious crust during searing.
Paprika adds a vibrant color and subtle sweetness, while garlic powder and dried parsley infuse aromatic depth.
Salt and black pepper are fundamental, enhancing all the other flavors and aiding in crust formation.
Adding Vibrant Veggies for a Complete Meal
The accompanying vegetables provide a delightful contrast in texture and flavor, turning your chicken into a balanced, satisfying meal.
Zucchini and butternut squash offer a naturally sweet and earthy complement to the savory chicken.
Dried thyme beautifully ties the vegetable flavors together, adding an aromatic touch to the roasted goodness.
Mastering the Method: Step-by-Step Perfectly Cooked Chicken Breast
Follow these steps closely to ensure your perfectly cooked chicken breast is juicy, flavorful, and wonderfully tender.
- Prepare the Chicken:
Pat the chicken breasts thoroughly dry with paper towels. This crucial step ensures a superior sear and prevents steaming, which can lead to a less flavorful crust.
In a small bowl, combine the paprika, garlic powder, dried parsley, black pepper, and salt. Sprinkle this mixture generously over both sides of the chicken, pressing lightly to adhere the seasoning.
- Sear the Chicken to Golden Perfection:
Heat 1 tablespoon of olive oil in a large skillet over medium-high heat until it shimmers. The oil should be hot enough to sizzle immediately when a tiny drop of water is flicked in.
Carefully place the seasoned chicken breasts in the hot skillet. Sear for 5-7 minutes per side, or until a beautiful golden-brown crust forms. Resist the urge to move the chicken too much during this phase to allow the crust to develop properly.
Ensure the internal temperature reaches 165 degrees Fahrenheit (74°C) when checked with a meat thermometer at the thickest part. This is the gold standard for food safety and optimal juiciness.
- Rest the Chicken: The Non-Negotiable Step:
Once cooked, immediately remove the chicken breasts from the skillet and transfer them to a clean cutting board.
Loosely tent them with aluminum foil. This step is critical! Let the chicken rest for at least 5-10 minutes. This allows the internal juices to redistribute throughout the meat, resulting in incredibly juicy and tender chicken.
- Prepare the Vegetables:
While the chicken rests, toss the diced zucchini and butternut squash with 1 tablespoon of olive oil, dried thyme, salt, and pepper in a medium bowl.
- Cook the Vegetables:
In the same skillet used for the chicken (or a separate pan for convenience), add the seasoned vegetables. Cook over medium heat, stirring occasionally, for 10-15 minutes, or until tender and slightly caramelized.
- Serve Your Perfectly Cooked Chicken Breast:
Slice the rested chicken breasts against the grain into thick pieces. This cutting technique helps maintain tenderness by shortening the muscle fibers.
Serve immediately alongside the roasted vegetables and cooked brown rice for a complete and satisfying meal. You could also pair it with something like crispy baked asparagus for a quick and healthy side.
Chef’s Secrets: Elevating Your Perfectly Cooked Chicken Breast
Unlock the true potential of your chicken with these expert insights. These tips are the difference between good and truly great.
The Power of Patting Dry
Don’t underestimate the importance of patting your chicken thoroughly dry with paper towels. Excess moisture on the surface prevents a proper sear, leading to steamed, rather than crispy, chicken. A dry surface is key for that beautiful golden crust.
Achieving the Golden Sear
Allow your skillet to get sufficiently hot before adding the chicken. A shimmering oil indicates readiness for a strong sear. Once the chicken is in, resist the urge to move it constantly; this allows it to develop that beautiful golden-brown crust and deep flavor.
Why Resting is Non-Negotiable
The resting period is perhaps the single most important step for juicy chicken. As meat cooks, its juices are pushed to the center. Resting allows the muscle fibers to relax and reabsorb these juices, ensuring every bite is moist and flavorful. Cutting too soon will result in dry chicken as the precious juices escape onto your cutting board.
Don’t Overcrowd the Pan
If cooking more than two chicken breasts, consider cooking them in batches. Overcrowding the skillet significantly lowers the pan’s temperature and steams the chicken instead of searing it, leading to less desirable texture and color.
Internal Temperature Matters Most
While cooking times are a good guide, the only way to guarantee perfectly cooked (and safe) chicken is by using a meat thermometer. Always aim for 165°F (74°C) at the thickest part for optimal safety and juiciness.
Perfectly Cooked Chicken Breast Troubleshooting: Common Issues & Solutions
Even seasoned cooks encounter challenges. Here’s how to tackle common issues when making perfectly cooked chicken breast.
“My Chicken is Dry!”
This is often due to overcooking or skipping the crucial resting step. Ensure you’re cooking to precisely 165°F (74°C) using a meat thermometer, and always allow the chicken to rest for at least 5-10 minutes after cooking. Trust the thermometer, not just the clock!
“No Golden Crust?”
A lack of a beautiful crust can be caused by not patting the chicken dry enough, a skillet that isn’t hot enough, or overcrowding the pan. Make sure your chicken is bone-dry, your oil is shimmering, and cook in batches if necessary to maintain pan temperature.
“Seasoning Won’t Stick?”
Ensure your chicken breasts are completely dry before applying seasoning. The natural surface moisture, combined with pressing the seasoning gently, should help it adhere well. A light drizzle of olive oil before seasoning can also aid adhesion.
Beyond the Plate: Creative Ways to Enjoy Perfectly Cooked Chicken Breast
Once you’ve mastered the perfectly cooked chicken breast, the culinary possibilities are endless!
Delicious Serving Suggestions
While delicious with roasted vegetables and brown rice, your perfectly cooked chicken breast also pairs wonderfully with quinoa, a fresh garden salad, or creamy mashed potatoes. For a fun twist, try slicing it for a homemade pan-seared chicken rice bowl.
Consider a squeeze of fresh lemon juice or a sprinkle of fresh herbs like cilantro or dill for an extra pop of flavor right before serving. It also makes an incredible base for ultimate pulled chicken sandwiches!
Perfect for Meal Prep
This recipe is ideal for meal prepping! Cook a larger batch of chicken and vegetables at the beginning of the week. Slice the chicken and portion it out for quick, healthy, and delicious lunches or dinners throughout your busy week.
Storing & Reheating Your Perfectly Cooked Chicken Breast Masterpiece
Proper storage and reheating ensure your delicious chicken stays juicy for future meals.
Refrigerator Storage Tips
Store leftover perfectly cooked chicken breast in an airtight container in the refrigerator for up to 3-4 days. Ensure it has cooled completely before storing to prevent condensation.
Freezing for Future Meals
For longer storage, freeze individual portions of cooked and sliced chicken breast in freezer-safe bags or containers for up to 2-3 months. Thaw overnight in the refrigerator before reheating for the best texture.
Reheating for Retained Juiciness
To reheat, gently warm the chicken in a skillet over low-medium heat with a splash of broth or water, covered, until just heated through. This gentle steam prevents drying. Avoid high heat or prolonged reheating, which can quickly turn tender chicken dry. The microwave can also be used on a lower power setting for short bursts, stopping to check frequently.
Your Perfectly Cooked Chicken Breast Questions Answered
Let’s address some common queries about preparing this staple protein.
Can I use bone-in chicken breasts?
While this recipe is optimized for boneless, skinless breasts for faster and more even cooking, you can use bone-in. However, cooking times will be longer, and you’ll need to monitor the internal temperature carefully for doneness. The searing and resting principles still apply for juicy results.
What if I don’t have a meat thermometer?
While highly recommended for precision and food safety, if you don’t have a thermometer, you can test doneness by slicing into the thickest part. The juices should run clear, and the meat should be opaque white throughout. However, this method can lead to dry chicken if you cut too early, letting juices escape.
Can I use different seasonings?
Absolutely! The beauty of perfectly cooked chicken breast is its versatility. Feel free to experiment with your favorite spice blends, dried herbs like Italian seasoning or rosemary, or even a simple lemon pepper seasoning. Just ensure the chicken is well-coated for maximum flavor infusion.
Is brining necessary for juicy chicken?
While brining can certainly enhance juiciness and flavor, it’s not strictly necessary for this recipe. Our method, relying on careful searing and the crucial resting step, delivers incredibly juicy chicken without the extra brining time. It’s a simpler, quicker path to perfectly tender results.
Ready to Master Perfectly Cooked Chicken Breast? Your Culinary Journey Begins!
You now have all the tools, techniques, and insider knowledge to consistently create the most tender, juicy, and flavorful perfectly cooked chicken breast. Say goodbye to dry, bland meals and hello to a culinary staple that will revolutionize your weeknight dinners and meal prep.
Give this simple yet effective method a try tonight, and prepare to be amazed by the results. Don’t forget to share your perfectly cooked chicken breast triumphs with us in the comments below!
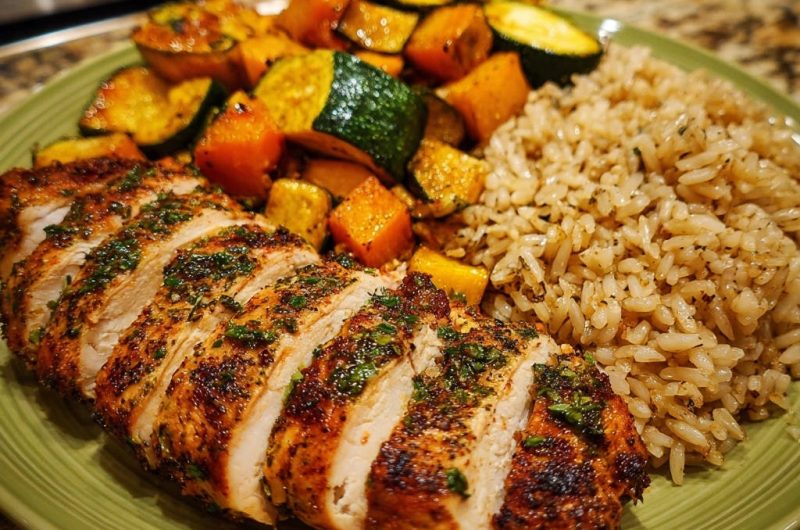
Chicken Breast
Course: Main CourseCuisine: AmericanDifficulty: easy2
servings15
minutes20
minutes650
kcal45
minutesTired of dry chicken? Discover the secret to consistently juicy, flavorful chicken breasts with this foolproof method. Paired with tender roasted vegetables and brown rice, this simple recipe guarantees perfectly moist results every time.
Ingredients
2 boneless, skinless chicken breasts (about 6-8 ounces each)
1 tablespoon olive oil
1 teaspoon paprika
1/2 teaspoon garlic powder
1/2 teaspoon dried parsley
1/4 teaspoon black pepper
1/2 teaspoon salt
1 small zucchini, diced
1 cup butternut squash, peeled and diced
1 tablespoon olive oil (for vegetables)
1/2 teaspoon dried thyme
Salt and pepper to taste
2 cups cooked brown rice
Directions
- Prepare the Chicken: Pat the chicken breasts thoroughly dry with paper towels. This is a key step for a good sear. In a small bowl, combine the paprika, garlic powder, dried parsley, black pepper, and salt. Sprinkle this seasoning mixture generously over both sides of the chicken breasts.
- Sear the Chicken: Heat 1 tablespoon of olive oil in a large skillet over medium-high heat until shimmering. Carefully place the seasoned chicken breasts in the hot skillet. Sear for 5-7 minutes per side, or until a beautiful golden-brown crust forms and the internal temperature reaches 165 degrees Fahrenheit when checked with a meat thermometer at the thickest part. Avoid moving the chicken too much during searing to allow the crust to develop.
- Rest the Chicken: Once cooked, immediately remove the chicken breasts from the skillet and place them on a cutting board. Loosely tent them with aluminum foil. This step is critical! Let the chicken rest for at least 5-10 minutes. This allows the juices to redistribute throughout the meat, resulting in incredibly juicy chicken.
- Prepare the Vegetables: While the chicken rests, toss the diced zucchini and butternut squash with 1 tablespoon of olive oil, dried thyme, salt, and pepper in a medium bowl.
- Cook the Vegetables: In the same skillet (or a separate pan), add the seasoned vegetables. Cook over medium heat, stirring occasionally, for 10-15 minutes, or until tender and slightly caramelized.
- Serve: Slice the rested chicken breasts against the grain into thick pieces. Serve immediately alongside the roasted vegetables and cooked brown rice.
Notes
- Resting the chicken for 5-10 minutes after cooking is critical for incredibly juicy results.