Easy Layered Taco Dip: Perfectly Scoopable, Never Watery
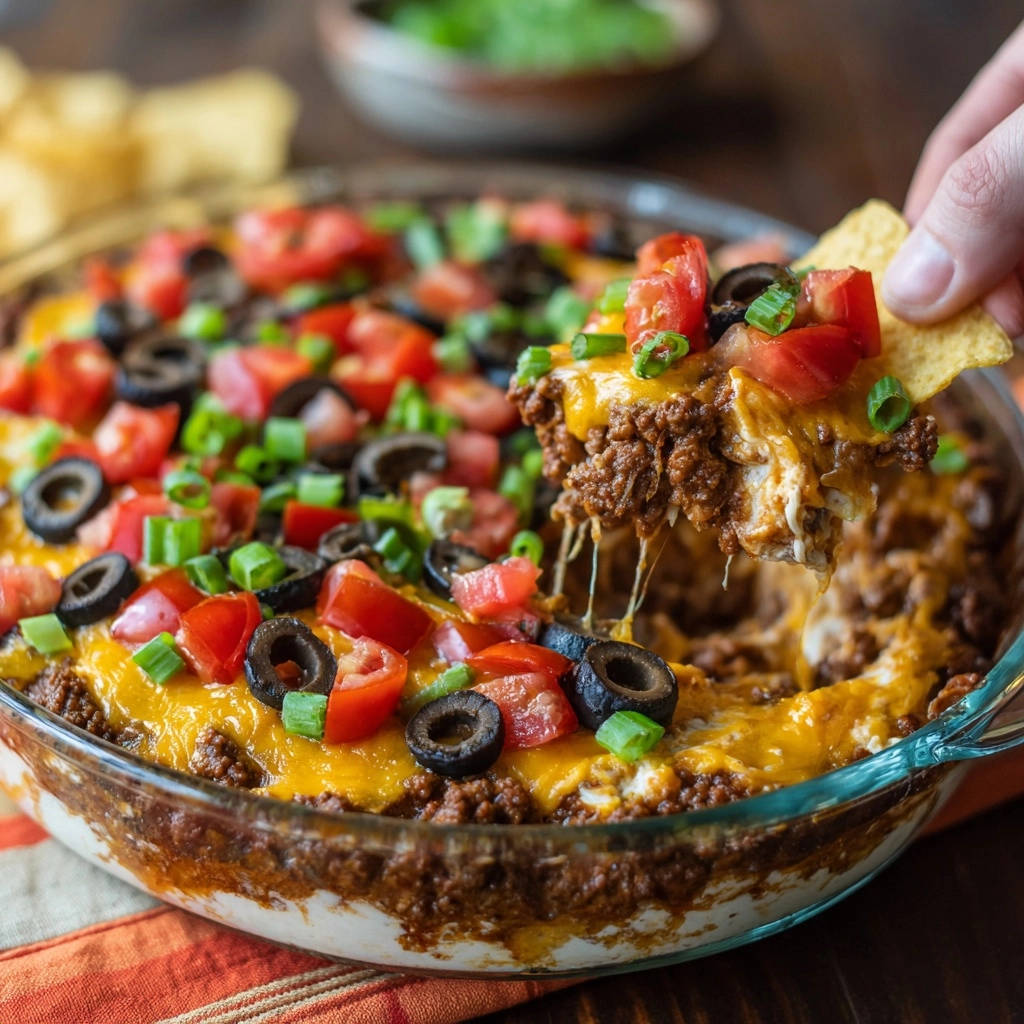
As a seasoned host and recipe creator, few things are as disheartening as a beautiful layered dip that turns into a watery mess, leaving everyone struggling to get a decent scoop. I’ve been there, and that’s precisely why I perfected this Easy Layered Taco Dip recipe. It’s designed to banish soggy bottoms forever, ensuring every single layer holds its vibrant texture and flavor until the very last chip.
This isn’t just another taco dip; it’s a testament to smart technique, delivering a reliable, perfectly scoopable party dip that guests will rave about.
The Secret Weapon: What Makes This Easy Layered Taco Dip Unbeatable?
Many layered dips fall short, but this recipe stands out due to a few critical, yet simple, techniques. We tackle common pitfalls head-on, ensuring your dip is a showstopper, not a soggy disappointment.
No More Watery Woes: The Drainage Difference
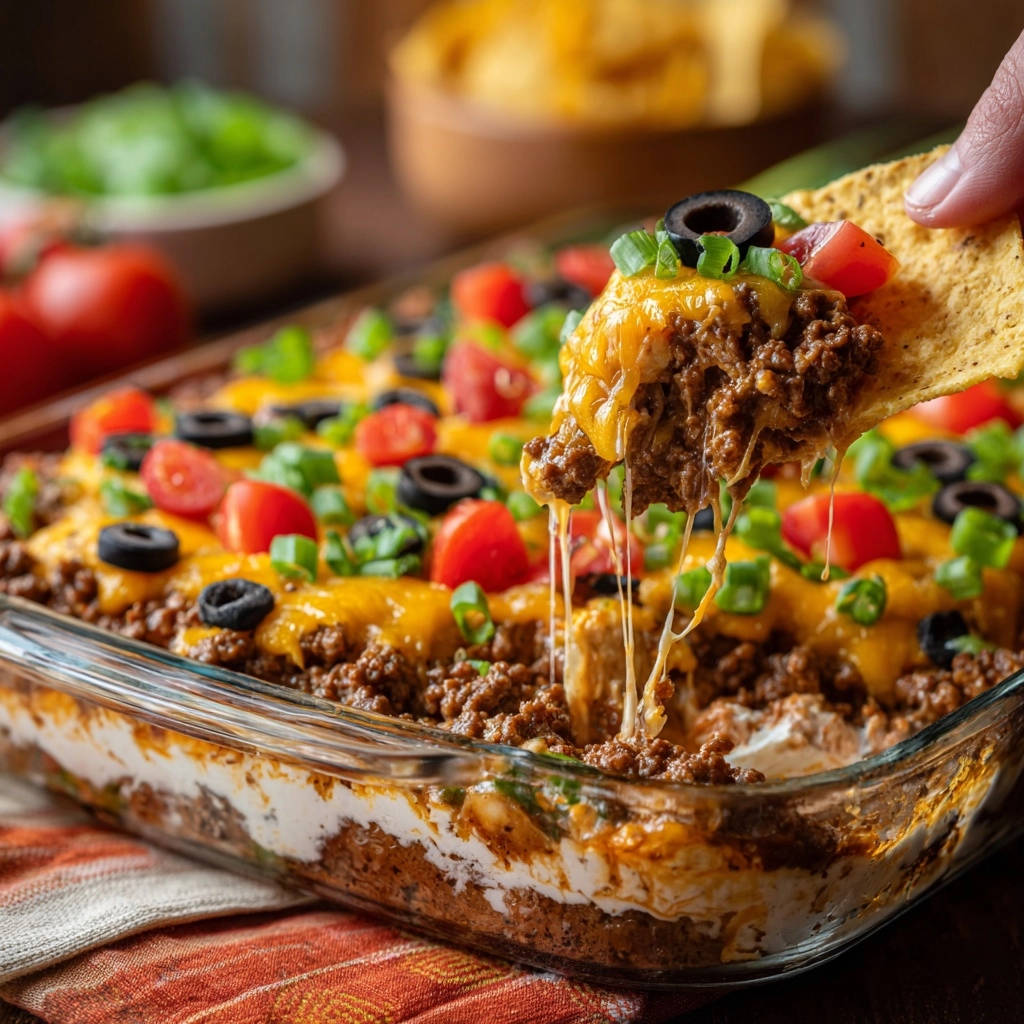
The number one culprit for a watery dip is undrained meat. Our method emphasizes thoroughly draining all grease and liquid from the cooked ground beef. This simple step is absolutely critical, preventing moisture from seeping into the creamy layers below and creating a perfectly stable base.
Building a Solid Foundation: Your Cream Cheese Base
This recipe starts with a robust, creamy spread of softened cream cheese and sour cream. This layer is firm enough to act as an impenetrable barrier, supporting the hearty beef and cheese above without caving or absorbing excess moisture.
Freshness That Lasts: Topping After the Bake
Adding fresh, high-moisture ingredients like diced tomatoes and chopped green onions after baking is a game-changer. This preserves their crisp texture and vibrant color, ensuring they don’t wilt or release water into the warm dip, which can quickly lead to sogginess.
A Crowd-Pleaser, Effortlessly Delivered
Despite its superior results, this Easy Layered Taco Dip remains incredibly simple to prepare. It’s a fantastic choice for gatherings, potlucks, or game nights, offering maximum flavor and visual appeal with minimal fuss.
Your Shopping List: Ingredients for an Irresistible Dip
Gathering high-quality ingredients is the first step to a truly delicious Easy Layered Taco Dip. Each component plays a vital role in building flavor and texture.
The Savory Stars: Ground Beef & Taco Seasoning
1 lb Lean Ground Beef: Opt for lean beef to minimize excess fat. This makes the crucial draining step easier and more effective, ensuring a cleaner flavor profile.
1 Packet (1 oz) Taco Seasoning: A quality taco seasoning blend provides a quick and balanced flavor. It infuses the beef with authentic Tex-Mex spices without needing individual measurements.
Creamy Dream Team: Base Layer Essentials
8 oz Cream Cheese, softened: Softened cream cheese is non-negotiable for a smooth, lump-free base. It creates that essential sturdy and creamy foundation.
1/2 cup Sour Cream: Sour cream adds tang and lightness to the cream cheese layer. It ensures the base is spreadable and perfectly balances the richness.
1/2 tsp Garlic Powder: A hint of garlic powder enhances the savory depth of the creamy base. It complements the taco seasoning beautifully.
1/4 tsp Salt: Just a touch of salt is needed to season the cream cheese mixture. It brings out all the other flavors.
Fresh & Crunchy: The Vibrant Toppings
2 cups Shredded Cheddar Cheese: Freshly shredded cheddar melts beautifully and provides a classic sharp, cheesy layer. Pre-shredded works, but fresh often melts smoother.
2 Medium Tomatoes, diced: Ripe, firm tomatoes offer a burst of freshness and color. Dicing them small ensures even distribution.
1 Small Can (2.25 oz) Sliced Black Olives, drained: Black olives add a mild, earthy, briny note and lovely visual contrast. Ensure they are well-drained to prevent additional moisture.
3 Green Onions, chopped: Green onions provide a mild onion flavor and a desirable fresh crunch. They are the perfect aromatic garnish.
The Perfect Scoop: Serving Suggestion Staple
Tortilla Chips, for serving: Sturdy tortilla chips are essential for scooping this hearty dip. Choose your favorite shape and level of saltiness.
Tools of the Trade: Equipping Your Kitchen
Having the right tools ready makes the preparation of this Easy Layered Taco Dip smooth and enjoyable. Gather these essentials before you begin.
Large Skillet: Indispensable for browning your ground beef efficiently.
9-inch Pie Dish or Similar Oven-Safe Dish: This is the ideal vessel for layering your dip. A similar casserole dish of adequate size will also work perfectly.
Medium Bowl: For combining and mixing your creamy base ingredients.
Electric Mixer (Optional but Recommended): For effortlessly whipping your cream cheese base until it’s perfectly smooth.
Colander: Absolutely critical for thoroughly draining the cooked beef, ensuring no excess liquid remains.
Spatulas and Spoons: For mixing, spreading, and serving your delicious creation.
Crafting Perfection: Your Step-by-Step Easy Layered Taco Dip Guide
Getting Started: Preheat & Prep Your Pan
Preheat your oven to a precise 375°F (190°C). This ensures the oven is at optimal temperature for even baking as soon as your dip goes in.
While the oven preheats, get your 9-inch pie dish or chosen oven-safe dish ready. There’s no need to grease it, as the layers will adhere perfectly.
Browning & Draining: The Golden Rule for Ground Beef
In your large skillet, cook the ground beef over medium heat. Use a spatula or spoon to break the beef into fine crumbles as it cooks. Continue until it’s completely browned through, with no pink remaining.
This next step is paramount for a non-watery dip: Thoroughly drain all the grease and liquid from the cooked beef. Transfer the beef to a colander and press firmly to extract every last drop. Return the well-drained beef to the skillet.
Infusing Flavor: Seasoning the Beef
Add the full packet of taco seasoning and 1/4 cup of water to the drained ground beef in the skillet. Stir well to coat the beef evenly with the spices.
Simmer this mixture for 5-7 minutes, stirring occasionally, until most of the liquid has evaporated. You want the beef to be moist and well-seasoned, but definitely not overly saucy or soupy. Set the beef aside to cool slightly while you prepare the creamy base.
Whipping Up the Velvety Cream Cheese Base
In a medium bowl, combine the softened cream cheese, sour cream, garlic powder, and salt. Use an electric mixer on medium speed for about 1-2 minutes until the mixture is completely smooth and wonderfully creamy.
The softening of the cream cheese beforehand is key here, ensuring no lumps remain in your luscious base layer.
The Art of Layering: Building Your Dip
Carefully spread the smooth cream cheese mixture evenly across the bottom of your prepared pie dish. This creates that essential stable, waterproof foundation for your dip.
Next, spoon the slightly cooled, seasoned ground beef evenly over the cream cheese layer. Distribute it gently to maintain distinct layers. The well-drained beef ensures moisture stays contained.
Bake to Bubbly Perfection
Evenly sprinkle the shredded cheddar cheese over the ground beef layer. A generous blanket of cheese is what we’re aiming for.
Place the dish in your preheated oven and bake for 15-20 minutes. You’re looking for the cheese to be fully melted, gloriously bubbly, and slightly golden at the edges.
The Grand Finale: Fresh Toppings After the Oven
Carefully remove the bubbling dip from the oven. Immediately and generously top it with the diced tomatoes, sliced black olives, and chopped green onions.
Adding these fresh ingredients after baking is crucial. It preserves their vibrant color and crisp texture, preventing them from wilting or releasing excess water into the warm dip.
Serve Warm & Watch it Disappear!
Your perfectly layered and scoopable Easy Layered Taco Dip is now ready to enjoy! Serve it warm with a generous pile of sturdy tortilla chips.
Prepare for compliments, as this dip truly holds up beautifully from the first scoop to the last.
If you’re looking to ensure every scoop holds its shape, the same layering method works beautifully for this crisp layered taco dip.
Pro Tips & Clever Customizations for Your Dip
Elevate your Easy Layered Taco Dip even further with these expert tips and creative variations. Small adjustments can make a big impact.
Achieving Optimal Beef Texture
Fine Crumbles: For the best texture, ensure you break the ground beef into very fine crumbles while cooking. This allows for even seasoning and easy scooping.
Perfectly Seasoned: Don’t rush the simmering step with the taco seasoning. Allowing the liquid to almost fully evaporate concentrates the flavors into the beef, making it incredibly savory.
Flavor Boosts for Your Creamy Layer
A Zesty Kick: Stir in a dash of fresh lime juice (about 1 teaspoon) or a few drops of your favorite hot sauce into the cream cheese mixture for an extra layer of brightness or gentle heat.
Aromatic Depth: A tiny pinch of onion powder (1/8 teaspoon) can subtly enhance the savory notes of the creamy base. Be careful not to overdo it.
Unleashing Your Topping Creativity
Heat Lovers: Add thinly sliced jalapeños (fresh or pickled) for a spicy kick. For more heat, a drizzle of sriracha or a sprinkle of red pepper flakes would work.
Veggie Variety: Incorporate fresh or roasted corn, diced avocado, or chopped fresh cilantro for additional textures and flavors. These also go on after baking.
If you love how this dip stays sturdy from start to finish, try the loaded baked taco dip for an even crispier texture.
Creamy Layers: A final drizzle of extra sour cream or a dollop of guacamole on top just before serving adds another luxurious touch.
Making Ahead: Smart Prep for Stress-Free Entertaining
Component Prep: You can cook and season the ground beef, and prepare the cream cheese mixture a day in advance. Store them separately in airtight containers in the refrigerator.
Assemble & Bake Later: Assemble the layered dip (cream cheese, beef, cheddar) in your dish, cover tightly, and refrigerate for up to 24 hours. Add the fresh toppings only after baking just before serving.
Beyond Tortilla Chips: Creative Serving Ideas
Alternative Scoopers: Offer pita chips, sturdy vegetable sticks (carrots, celery, bell peppers), or even mini bell peppers cut in half as delicious and healthy alternatives for scooping.
Lettuce Wraps: Spoon the warm dip into crisp lettuce cups for a lighter, low-carb option that’s equally satisfying.
Troubleshooting: When Your Dip Needs a Helping Hand
Even the most foolproof recipes can sometimes encounter minor hiccups. Here’s how to tackle common issues with your Easy Layered Taco Dip.
“My Dip is Too Greasy/Watery!”
This is almost always due to insufficient drainage of the ground beef. Ensure you thoroughly drain all the grease and liquid after browning, pressing the beef firmly in a colander. Also, be sure to simmer the seasoned beef long enough for the added water to evaporate, preventing a saucy meat layer.
“The Cheese Isn’t Golden Brown!”
If your cheese is melted but lacks that lovely golden-brown bubbly top, simply pop the dip under the broiler for 1-2 minutes. Watch it very closely, as broilers can brown quickly, to prevent burning.
“How Do I Adjust the Spice Level?”
For more heat, choose a “spicy” taco seasoning packet or add a pinch of cayenne pepper or a few dashes of your favorite hot sauce to the beef while it simmers. To reduce heat, select a mild taco seasoning and omit any additional spice, focusing instead on the fresh, mild toppings.
Your Top Questions Answered: Easy Layered Taco Dip FAQs
Can I prepare the dip layers in advance?
Absolutely! You can cook and season the ground beef, and prepare the cream cheese mixture up to 24 hours ahead of time. Store each component separately in airtight containers in the refrigerator.
When ready to serve, assemble the cream cheese, beef, and cheddar layers in your baking dish, then bake as directed. Add the fresh toppings after baking to maintain their texture and prevent sogginess.
What’s the best way to store leftover dip?
Allow any leftover Easy Layered Taco Dip to cool completely before covering it tightly with plastic wrap or aluminum foil. Store it in the refrigerator for up to 3-4 days.
To reheat, you can warm individual portions gently in the microwave or place the entire dish (if still in an oven-safe container) in an oven preheated to 300°F (150°C) until warmed through, about 15-20 minutes. Be mindful that the fresh toppings might soften slightly upon reheating.
Are there vegetarian alternatives for the meat layer?
Yes, you can easily make this dip vegetarian. Substitute the ground beef with a can of well-drained and rinsed seasoned black beans, a can of refried beans (spread evenly as a layer), or a plant-based ground crumble seasoned with taco seasoning. Ensure any bean options are also well-drained to prevent a watery dip.
How can I make this dip dairy-free?
Making this dip dairy-free is achievable with some substitutions. Use a plant-based cream cheese alternative and a dairy-free sour cream substitute for the creamy base. For the cheese layer, opt for a good quality dairy-free shredded cheddar or taco blend that melts well.
Ready to Share? Embrace Your Easy Layered Taco Dip Success!
Now that you have the secrets to a perfectly scoopable, never-watery Easy Layered Taco Dip, it’s time to put your skills to the test. This recipe is designed for effortless entertaining and guaranteed compliments, turning any gathering into a fiesta of flavor.
More Ways to Use Taco Night Ingredients
If you have leftover ground beef or extra taco seasoning, these two recipes use the same core flavors in different forms.
- Turn your taco dip into a full meal by layering the same seasoned beef, beans, and cheese into a Loaded Taco Casserole with Crispy Layers for a crunchy, baked main dish.
- For a side that soaks up any extra salsa or sour cream, bake a pan of Cheesy Beef Jalapeño Cornbread and serve it warm alongside the dip.
Whip up this ultimate party dip and share the joy of perfect layers and irresistible taste with your loved ones. Enjoy every delicious, perfectly structured bite!
Taco Dip
Course: AppetizerCuisine: MexicanDifficulty: easy6
servings20
minutes20
minutes450
kcal40
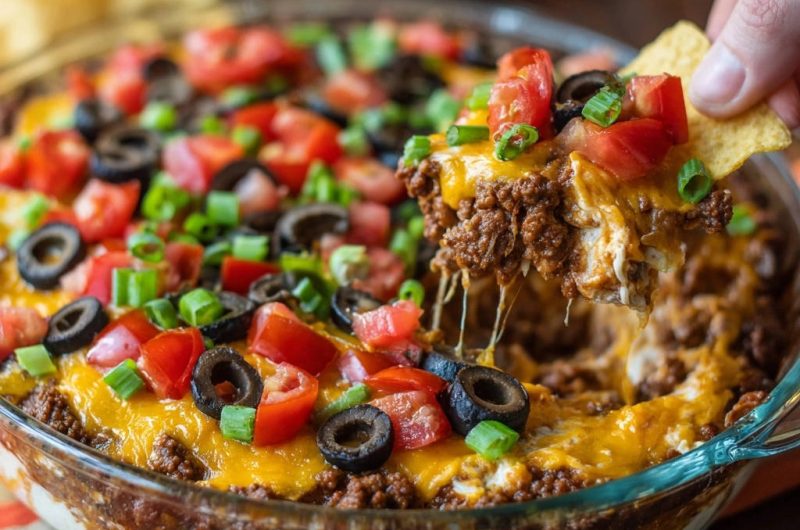
minutesSay goodbye to watery dips with this genius Easy Layered Taco Dip recipe! A stable cream cheese base and well-drained beef ensure every scoop is perfect. Baked until bubbly and topped with fresh veggies, it’s a guaranteed crowd-pleaser that stays delicious from start to finish.
Ingredients
1 lb lean ground beef
1 packet (1 oz) taco seasoning
1/4 cup water
8 oz cream cheese, softened
1/2 cup sour cream
1/2 tsp garlic powder
1/4 tsp salt
2 cups shredded cheddar cheese
2 medium tomatoes, diced
1 small can (2.25 oz) sliced black olives, drained
3 green onions, chopped
Tortilla chips, for serving
Directions
- Preheat your oven to 375°F.
- In a large skillet, cook the ground beef over medium heat, breaking it apart, until fully browned. This is the crucial step: Thoroughly drain ALL the grease and liquid from the cooked beef. Return the beef to the skillet. Cook until no pink remains and it reaches 160°F (71°C).
- Add the taco seasoning and 1/4 cup water to the beef. Simmer for 5-7 minutes, stirring occasionally, until most of the liquid has evaporated and the beef is well-seasoned but not overly saucy. Set aside to cool slightly.
- In a medium bowl, combine the softened cream cheese, sour cream, garlic powder, and salt. Mix until smooth and creamy.
- Spread the cream cheese mixture evenly in the bottom of a 9-inch pie dish or similar oven-safe dish. This forms your stable base.
- Spoon the seasoned ground beef evenly over the cream cheese layer. The well-drained beef helps prevent moisture from seeping into the creamy layer below, which is key to avoiding a watery bottom.
- Sprinkle the shredded cheddar cheese evenly over the ground beef.
- Bake for 15-20 minutes, or until the cheese is melted and bubbly.
- Remove from oven. Top immediately with the diced tomatoes, sliced black olives, and chopped green onions. Adding these fresh toppings after baking helps maintain their texture and also keeps the dip from getting watery while it’s warm.
- Serve warm with tortilla chips and enjoy a perfectly scoopable dip that holds up beautifully!
Notes
- Ensure beef is thoroughly drained to prevent a watery bottom.