Loaded Baked Taco Dip: Crisp Layers That Hold
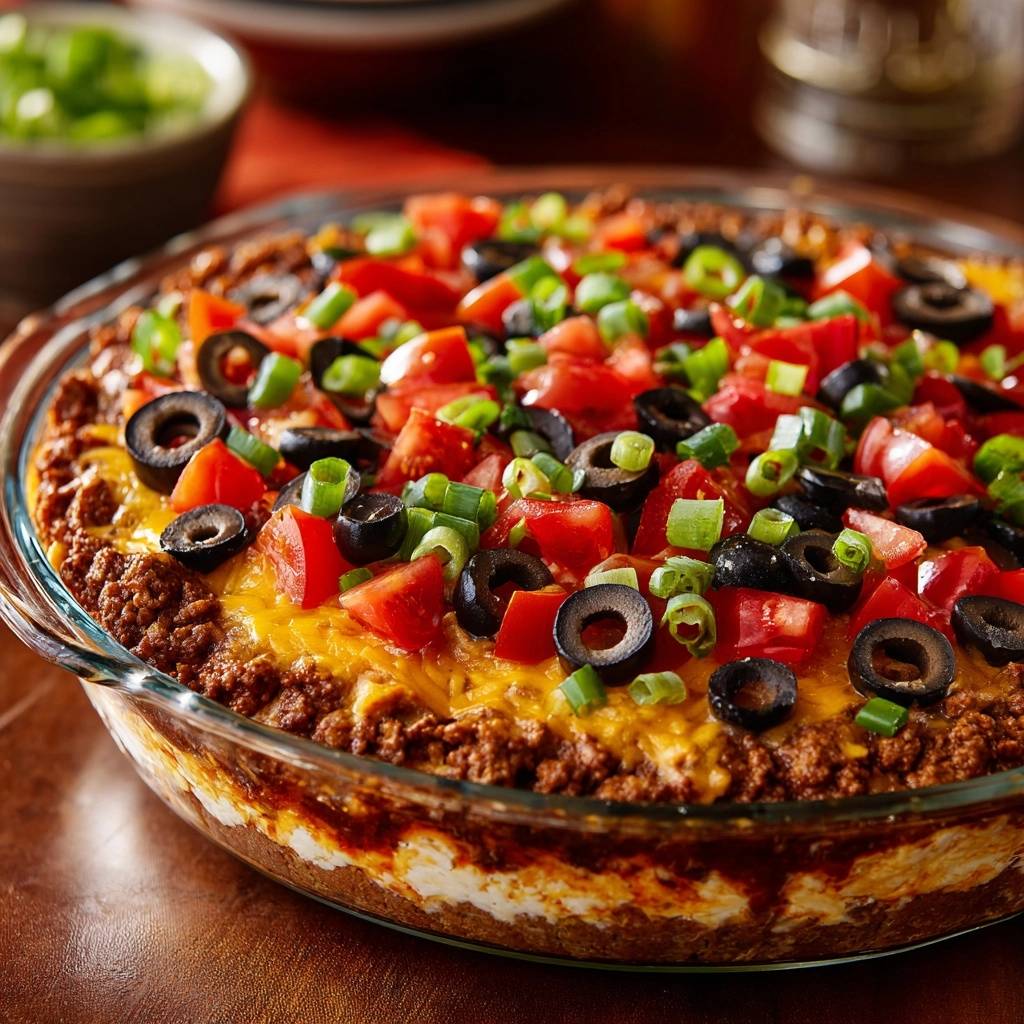
Ever scooped into a layered taco dip only to get a soggy, watery mess? Most cold dips turn into mush because trapped moisture ruins the texture. This loaded baked taco dip fixes that with a drain-and-set method that delivers crisp edges and layers that actually hold up to chips.
Therefore, you get distinct flavors in every bite: creamy beans, spiced beef, gooey cheese, and fresh toppings. No more frustration at parties. In addition, baking at high heat evaporates excess liquid for structure that stays perfect.
The secret lies in pressing every bit of liquid from the refried beans. You’ll see them transform from soupy cans to a firm base that supports everything above. Oh man, that first crispy-edged scoop? Pure game-changer.
Why Loaded Baked Taco Dip Stays Crisp
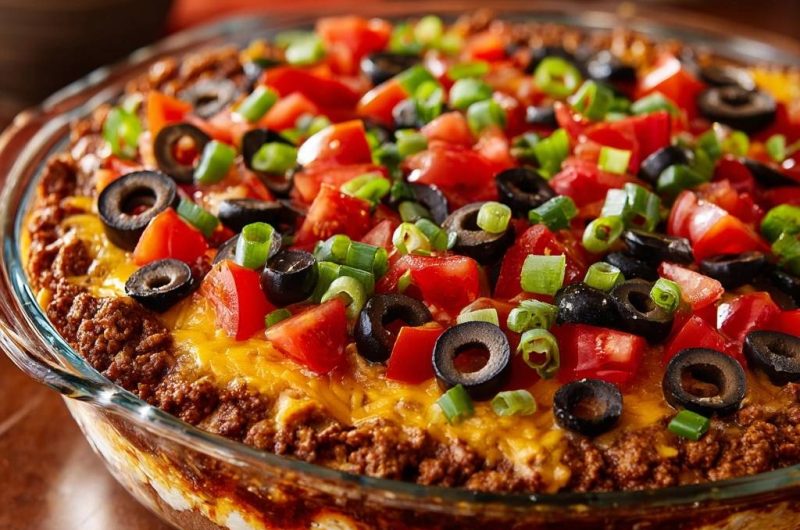
This baked taco dip recipe turns raw layers into a sturdy dip through oven magic. Unlike cold versions, heat crisps the edges while keeping the center creamy. However, the key is moisture control from the start.
First, draining creates separation between beef, beans, and cheese. Then, 375 degrees F bubbles the cheese into a seal. Therefore, your loaded baked taco dip holds shape for hours, never collapsing.
Compare it to no-bake dips that soak through fast. This method locks in textures: crisp outside, distinct layers inside. You’ll crave that contrast every time.
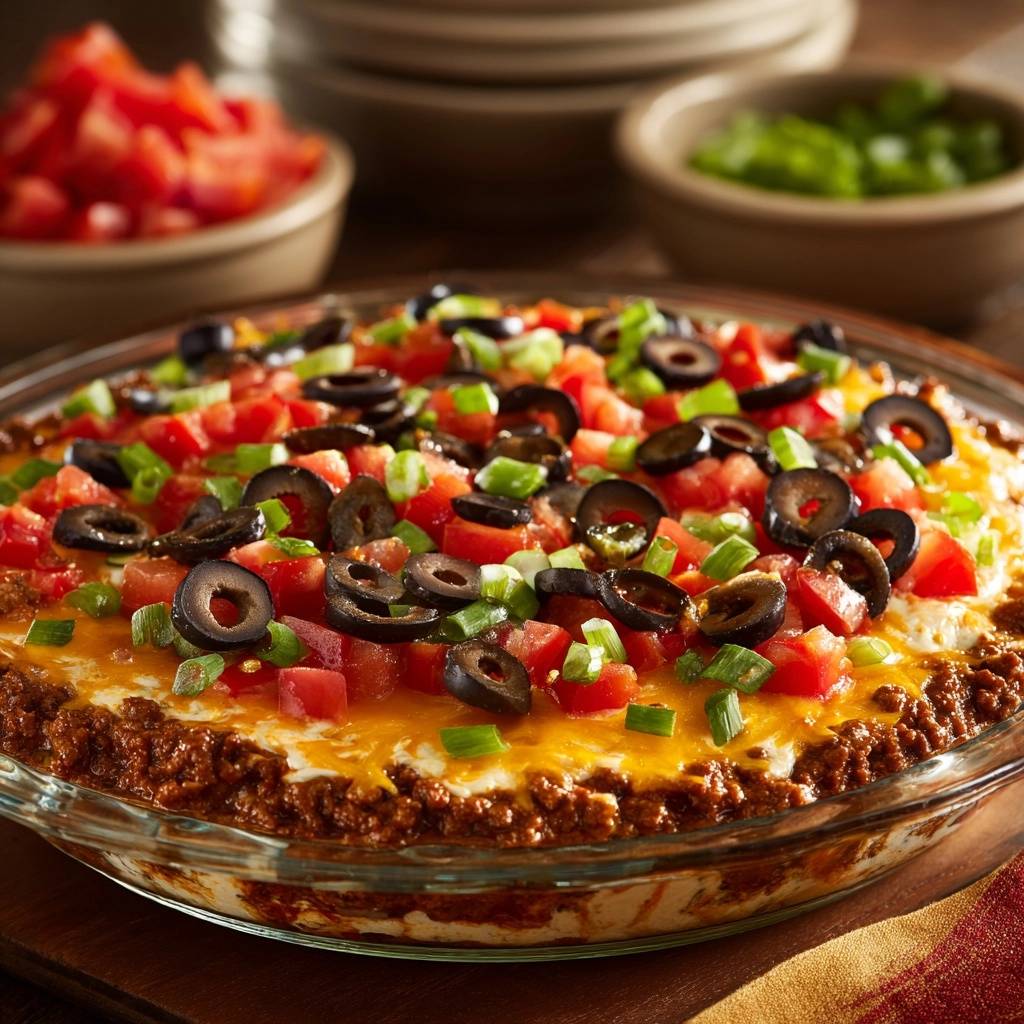
Drain-and-Set Technique Explained
Draining beans and beef removes water that causes sogginess. Press them in a colander with a spoon until no liquid drips. In addition, this step ensures the oven can evaporate any leftovers.
Science backs it: excess moisture steams layers together during baking. But thorough draining plus high heat creates vapor escape. Result? Firm, separated layers that dip cleanly.
Key Ingredients for Loaded Baked Taco Dip
Each ingredient plays a role in crisp taco dip layers. Start with 1 pound ground beef for hearty protein. Then, 30 ounces drained refried beans form the stable base.
Don’t skip 3 cups shredded cheddar; it melts into a binding top. Fresh diced tomatoes, sliced black olives, and chopped green onions add crunch, but pat them dry first. Full-fat cheese works best since low-fat doesn’t seal as well.
One packet taco seasoning brings bold flavor without effort. However, simmer it thick to avoid extra water. These choices keep your loaded baked taco dip textured and tasty.
Ground Beef and Taco Seasoning Base
One pound ground beef gives structure and savoriness. Brown it fully, then drain fat completely. Stir in taco seasoning and 1/4 cup water; simmer until thick for flavor without sogginess.
A packet simplifies seasoning over homemade. Therefore, it clings to beef perfectly. This layer anchors the dip’s heartiness.
Refried Beans as Stable Foundation
Drain two 30-ounce cans thoroughly. Press with a spoon in a colander to squeeze out liquid. Traditional refried beans hold better than fat-free versions.
Spread evenly as the base. This prevents sinking layers later. It’s your crisp foundation.
Cheese, Tomatoes, Olives, Onions Toppers
Three cups cheddar creates a bubbly, golden seal. Shred fresh for smooth melt. Pat tomatoes dry to avoid water spots.
If you love using a pie dish for even heat distribution here, the same principle helps this layered taco dip stay crisp without getting watery.
Drain olives well and chop green onions fresh. These add pop without wilting the structure. Sprinkle post-bake for vibrancy.
Equipment Choices for Perfect Baked Taco Dip
A 9-inch pie dish ensures even baking and layer depth. Use a skillet for browning beef quickly. Grab a colander and spoon for draining.
Preheat oven precisely to 375 degrees F. Cast iron works as an alternative for extra crisp edges. Grease the dish lightly to prevent sticking.
These tools make the process foolproof. Therefore, you focus on flavor, not fuss.
Pie Dish vs Baking Dish Differences
Pie dishes have sloped sides for easy scooping and better heat flow. This crisps edges evenly. Grease it; parchment can trap steam.
Deeper than square dishes, it separates layers. Perfect conduction means no pale spots.
Science of Baking Loaded Taco Dip Layers
At 375 degrees F, Maillard reaction browns edges for crunch. Cheese proteins tighten, binding without mixing. High heat evaporates moisture fast.
Cooling for 10 minutes sets the structure. Therefore, layers firm up instead of sliding. No soggy loaded baked taco dip here.
Physics of vapor escape keeps it dry. Uncovered baking lets steam rise freely. You’ll notice the aroma shift to toasty perfection.
Moisture Control in High-Heat Baking
Simmer beef first to thicken sauce. Then bake uncovered so vapor escapes. This phase change from liquid to gas prevents pooling.
Beans’ starch absorbs any strays during heat. Result: stable dip that holds.
Step-by-Step: Building Loaded Baked Taco Dip
Total time hits 45 minutes. Follow phases for crisp results. You’ll smell the spices building excitement.
Phase 1: Browning and Seasoning Beef
Heat skillet to medium. Brown 1 pound ground beef for 8 minutes until no pink shows. Drain fat well; it looks shiny when done right.
Stir in taco seasoning and water. Simmer 2 minutes till thick. Pro tip: this cuts moisture early.
Phase 2: Draining and Layering Beans
Drain 30 ounces refried beans in colander. Press firmly with spoon; liquid should stop flowing. Spread evenly in greased 9-inch pie dish.
For a dip that stays crisp and never turns watery, try this perfectly scoopable layered taco dip next.
Avoid gaps for uniform base. Don’t mix yet.
Phase 3: Assembling Beef and Cheese
Spoon beef over beans gently. Spread even without stirring below. Cover fully with 3 cups shredded cheddar.
Cheese blankets everything for melt protection.
Phase 4: Baking and Cooling Process
Bake uncovered 15-20 minutes. Watch for bubbles and golden edges. Cool 10 minutes; structure sets as steam escapes.
Patience here prevents mush.
Phase 5: Fresh Toppings Application
Pat dry 1 cup tomatoes, 1/2 cup olives, 1/2 cup green onions. Sprinkle evenly. Serve warm; chips scoop clean layers.
Freshness shines post-cool.
Avoiding Soggy Layers in Taco Dip
Top mistakes include skipping drains, overmixing layers, low oven temps, and wet toppings. Drain beef fat twice if needed. Press beans hard.
Bake hot and uncovered. Pat toppings dry always. These fixes keep troubleshooting loaded baked taco dip simple.
Overmixing mashes flavors together. Layer gently instead. Now your dip stays crisp.
Excess Liquid Fixes During Prep
Bean pressing misses mean runny base; use spoon back for force. Beef fat lingers if not drained fully; tilt skillet to pour.
Both create steam traps. Fix upfront for success.
Flavor Variations for Baked Taco Dip
Swap beef for ground turkey; drain same way. Add diced jalapeños to beef for heat. Blend cheddar with Monterey Jack for stretchier melt.
Try pinto beans instead of refried. Boost spice with extra seasoning. Keep draining for crisp baked taco dip every time.
Vegetarian? Use lentils simmered thick. All variations hold layers.
What to Serve Alongside This Dip
This loaded taco dip is rich, creamy, and layered with crunch. To round out the spread, try these two sides that share the same bold, cheesy spirit.
- The sweet, smoky Skillet Creamed Corn uses a thick, steakhouse-style sauce that contrasts nicely with the dip’s crisp layers.
- A side of Loaded Cheesy Hashbrown Casserole brings
Make-Ahead Guide for Loaded Taco Dip
Assemble without toppings up to 24 hours ahead. Cover and fridge. Bake fresh for parties.
Batch double for crowds. Pro tip: portion into dishes for easy serving. Reheat crisps edges again.
Freezing and Reheating Tactics
Freeze assembled (no toppings) up to 2 months in airtight bags. Thaw overnight in fridge. Bake from thawed at 375 F, adding 5 minutes.
Oven revive beats microwave mush. Edges crisp right up.
Pairing Sides with Baked Taco Dip
Tortilla chips provide ideal crunch against creamy layers. Veggie sticks like carrots add freshness. Upgrade to homemade nachos with extra cheese.
Iced tea cuts the richness perfectly. Build a party spread with guac nearby. Matches make every bite better.
Troubleshooting Loaded Baked Taco Dip Issues
Runny beans? Drain harder next time. Pale cheese means low heat; crank to 375 F. Separated layers from overmixing; spoon gently.
No bubbles? Extend bake 5 minutes. Wet toppings wilt it; pat extra dry. Fixes restore crisp perfection.
Grainy cheese from pre-shredded; grate fresh. Prevention starts with prep.
Loaded Baked Taco Dip FAQ
How do I store leftovers and does it freeze well?
Store in an airtight container in the fridge for up to 3 days. Reheat in a 350 F oven for 10 minutes to recrisp edges; microwave softens layers. It freezes well assembled without toppings for 2 months; thaw overnight then bake as directed, adding 5 minutes. Avoid freezing with toppings as they get soggy upon thaw.
Why did my loaded baked taco dip turn out soggy?
Sogginess comes from skipping thorough draining on beans, beef, or toppings. Press refried beans firmly in a colander until no liquid releases, drain beef fat twice, and pat tomatoes dry. Also, ensure 375 F oven temp and uncovered baking for 15-20 minutes to evaporate moisture fully. Cooling 10 minutes sets it firm.
Can I substitute ground turkey or make it vegetarian?
Yes, swap 1 pound ground turkey for beef; brown and drain identically for same structure. For vegetarian, use cooked lentils or plant-based crumbles simmered with taco seasoning until thick. Refried beans stay the base; draining remains critical to prevent sogginess in all versions.
Can I double the recipe for a crowd?
Absolutely, double ingredients and use a 9×13-inch dish. Bake at 375 F for 20-25 minutes until edges crisp and center bubbles. Drain everything extra well since more volume means more potential moisture; assemble in two pie dishes if you prefer individual crisping.
Why cool the dip before adding toppings?
Cooling 10 minutes after baking sets the cheese structure and evaporates steam, keeping layers distinct. Hot dip wilts fresh tomatoes, olives, and onions, releasing water that soaks in. Patting toppings dry helps, but cooling ensures they stay crisp and flavorful on top.
Can I use a different cheese or make it vegan?
Cheddar melts best, but mozzarella works for stretch or a cheddar blend for flavor. For vegan, use 3 cups shredded plant-based cheddar alternative that melts well, like cashew-based. Drain all the same; it seals layers similarly at high heat.
Taco Dip
Course: AppetizerCuisine: AmericanDifficulty: easyYields8
servingsPrep Time15
minutesCook Time25
minutesCalories450
kcalTotal Time40
MinutesTired of layered dips collapsing into a watery puddle? This recipe uses a simple drain-and-set technique to lock in crisp edges and distinct layers that stay perfect for dipping.
Ingredients
1 pound ground beef
1 packet taco seasoning mix
1/4 cup water
30 ounces refried beans (2 cans, drained)
3 cups shredded cheddar cheese
1 cup diced fresh tomatoes, patted dry
1/2 cup sliced black olives, drained
1/2 cup chopped green onions
Directions
- Preheat oven to 375 degrees F. Grease a 9-inch pie dish.
- In a skillet over medium heat, brown ground beef until no pink remains, about 8 minutes. Drain fat thoroughly. Stir in taco seasoning and water; simmer 2 minutes until thickened. Remove from heat.
- Drain refried beans thoroughly in a colander, pressing out all excess liquid with a spoon to prevent sogginess. Spread beans evenly in prepared pie dish as the base layer.
- Spoon seasoned beef over beans, spreading evenly without mixing layers. Sprinkle all 3 cups cheese on top.
- Bake uncovered 15 to 20 minutes until cheese melts, bubbles, and edges turn golden-crispy. The high heat evaporates any remaining moisture for firm layers. Remove from oven and cool 10 minutes to set structure.
- Pat dry tomatoes, olives, and green onions with paper towels. Sprinkle evenly over cooled dip. Serve warm with tortilla chips. Layers stay separated and never soggy!
Notes
- Drain beans, beef fat, and pat dry toppings thoroughly to prevent sogginess. Cool 10 minutes after baking to set layers.