Mastering Cheesy Beef and Bean Enchiladas with the Anti-Soggy Technique
Nothing ruins a Mexican-inspired dinner faster than a plate of mushy, gummy tortillas that dissolve into a sad puddle of sauce. We’ve all been there, haven’t we? You spend an hour prepping, only to have the enchiladas fall apart the second your spatula touches them. It’s the difference between a professional restaurant plate and a soggy home-cooked casserole.
The secret to that perfect, firm-yet-tender bite isn’t in the brand of sauce you buy or the type of cheese you sprinkle on top. It’s all about the structural integrity of the tortilla itself. Most home cooks skip a vital step that creates a protective shield against moisture, leading to that dreaded “enchilada mush.”
I’m going to show you how to master the “fat barrier” technique. By flash-frying your corn tortillas for just a few seconds, you create a hydrophobic seal that keeps the sauce on the outside where it belongs. This ensures your Cheesy Beef and Bean Enchiladas stay intact from the baking dish to your fork, providing a satisfying chew every single time.
The Anatomy of a Perfect Corn Tortilla Enchilada
When it comes to authentic enchiladas, corn tortillas are the undisputed heavyweight champion. Flour tortillas are great for burritos, but they turn into a doughy mess when bathed in red sauce. Corn has a unique starch profile that holds up much better under heat, provided you treat it with respect.
However, corn tortillas are naturally porous and act like little sponges. If you dip a cold, dry tortilla into sauce, it drinks up the liquid immediately, weakening the fibers. This is why choosing a high-quality, stone-ground corn tortilla is so important. The coarser the grind, the more “backbone” the enchilada will have after twenty minutes in a hot oven.
Think of the tortilla as the foundation of a house. If the foundation is weak, the whole structure collapses. By understanding how corn starch reacts to moisture, you can manipulate the texture to achieve that perfect balance of a soft interior and a slightly crisp, golden edge.
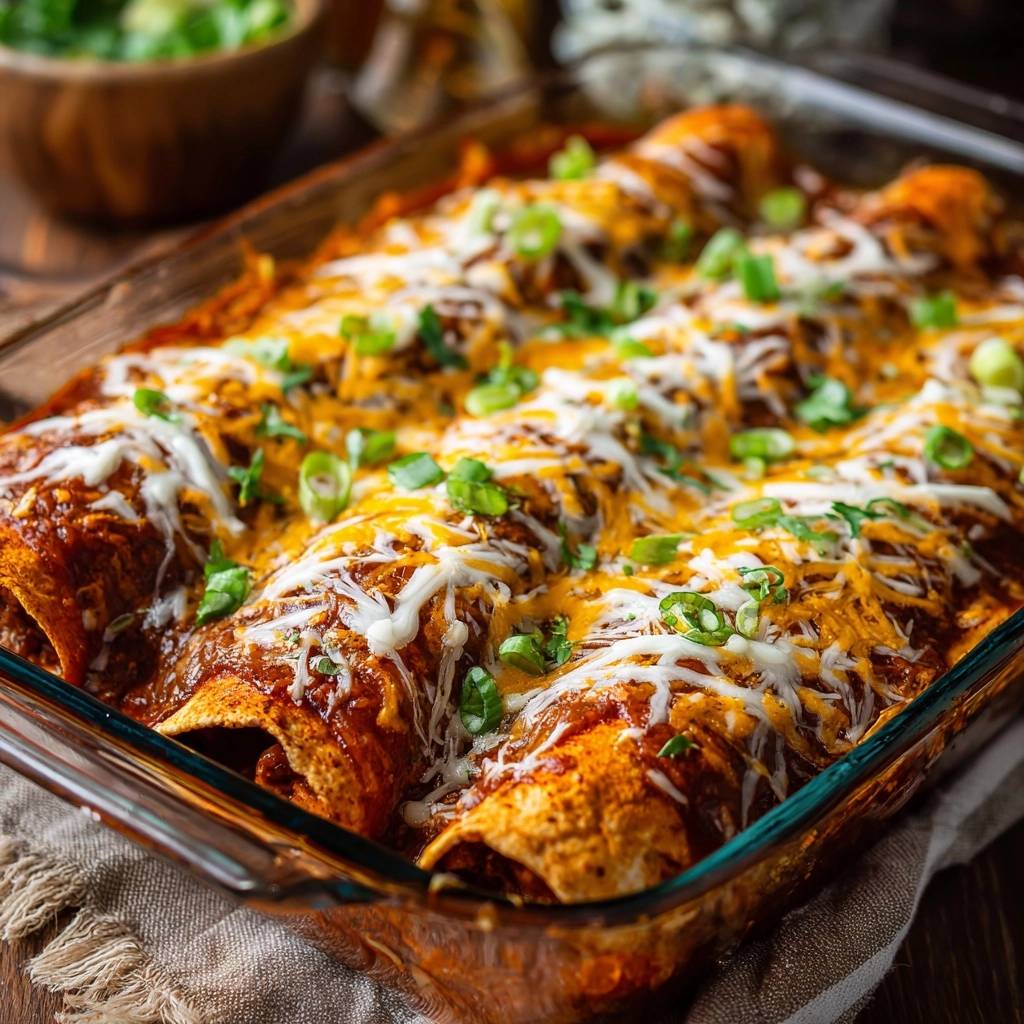
Essential Components for Cheesy Beef and Bean Enchiladas
Quality ingredients make the difference between a “fine” meal and one your family begs for every week. For the protein, I always recommend a lean ground beef, specifically a 90/10 blend. Using lean meat ensures you get all the beefy flavor without a pool of orange grease floating on top of your finished dish.
Black beans add a wonderful earthy contrast to the richness of the beef. They hold their shape beautifully during the bake, providing little pops of texture throughout the filling. If you’re looking for a substitution, pinto beans work well, but black beans offer a cleaner look and a slightly firmer bite that complements the melted cheese.
Speaking of cheese, the blend is everything. I love a mix of Monterey Jack and sharp Cheddar. Monterey Jack is the “melter”—it gets gooey and stretchy—while the Cheddar provides that punchy, salty kick. If you can, grate your cheese from a block. Pre-shredded bags are coated in potato starch to prevent clumping, which can stop the cheese from melting into that silky, unified blanket we’re after.
The spice profile here is classic and bold. Cumin provides a smoky warmth, while garlic powder and chili powder build a base layer of aromatics. These spices bloom when they hit the hot beef, ensuring the filling is seasoned from the inside out rather than just relying on the sauce for flavor.
Selecting and Preparing the Red Enchilada Sauce
The sauce is the soul of the dish, and its thickness matters more than you might think. A watery sauce will bypass even the best “anti-soggy” defenses. If you’re using a canned sauce, look for one with a rich, deep red color and a velvety consistency. You want it to coat the back of a spoon, not run off like water.
For a lighter twist on that cheesy, beefy goodness, try this loaded taco casserole instead.
You can easily “doctor up” a store-bought sauce to make it taste like it simmered all day. Stir in a little extra cumin or a tiny pinch of sugar to balance the acidity of the tomatoes. If the sauce feels too thin, simmer it on the stove for five minutes before you start assembling to concentrate the flavors and thicken the body.
The Science of the Anti-Soggy Tortilla Hack
Let’s talk about the “Flash-Fry” method, which is the absolute game-changer for this recipe. When you pass a corn tortilla through hot vegetable oil for about five to eight seconds per side, something magical happens. The heat and fat seal the outer starch layer of the corn, creating a barrier that is naturally water-resistant.
This isn’t about making a hard taco shell; you aren’t looking for a crunch at this stage. You want the tortilla to remain pliable and soft, but with a shimmering coat of oil. This oil acts as a “fat barrier,” preventing the water-based enchilada sauce from penetrating deep into the corn fibers. Instead of the sauce soaking in and making the tortilla gummy, it sits on the surface, flavoring the dish without destroying its structure.
Compare this to the common “dip and roll” method where cold tortillas are dunked in sauce. Those tortillas start breaking down before they even hit the oven. By sealing them first, you ensure that when you lift an enchilada out of the pan, it stays in one beautiful, rolled piece. It’s a small extra step that yields a massive professional-grade payoff.
Step-by-Step: Preparing the Beef and Bean Filling
Start by browning your beef in a large skillet. As the meat cooks, use your wooden spoon to break it into small, uniform crumbles. Once it’s fully browned, make sure to drain every drop of excess fat. We want the fat from our “barrier” to do the work, not extra grease from the meat which can make the bottom of the dish oily.
After draining, stir in your beans and spices. Now, here is a pro tip: add about a half-cup of the enchilada sauce directly into the beef mixture. Simmering the meat with a little sauce for two minutes “marries” the flavors together. This ensures the inside of your enchilada is moist and seasoned, so you don’t end up with a dry, crumbly center inside a wet tortilla.
The filling should look glossy and hold together slightly. If it looks too dry, the beans might feel chalky after baking. If it’s too wet, it will leak out of the ends. Aim for a thick, hearty consistency that smells like a dream and stays put when you spoon it onto your prepared tortillas.
Assembly Strategy: Rolling and Seam Placement
Assembly is where the “Anti-Soggy” plan comes together. Take your lightly fried and blotted tortilla and give it a quick dip in the sauce. You only need a light coating on both sides. Place a generous line of the beef and bean mixture down the center, add a pinch of cheese, and roll it up snugly.
Always place your enchiladas seam-side down in the baking dish. This uses the weight of the filling to keep the tortilla closed as it expands in the oven. If the seam is on the side or top, the tortilla will unfurl, and your beautiful rolls will turn into a flat mess of meat and cheese. Pack them in tightly, side-by-side, like little soldiers.
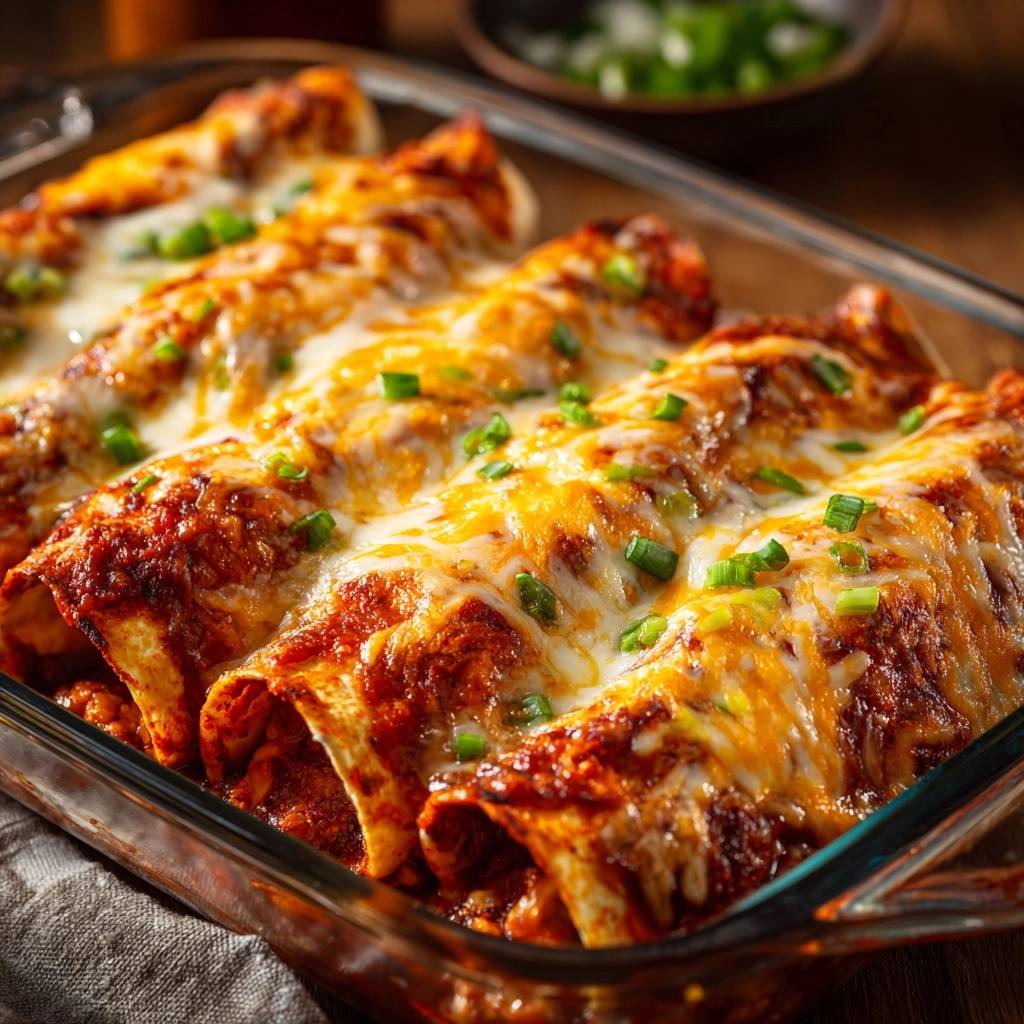
When you pour the remaining sauce over the top, try the “exposed edge” technique. Instead of drowning the whole dish, pour the sauce in a thick strip down the center of the row. Leave the very tips of the tortillas bare. These exposed ends will catch the heat of the oven and crisp up slightly, providing a wonderful textural contrast to the cheesy, saucy middle.
For a version with a thicker, more decadent filling, check out these cheesy shredded beef enchiladas.
Baking Parameters for Maximum Cheese Melt
Set your oven to 375°F. This is the “sweet spot” for enchiladas. It’s hot enough to melt the cheese quickly and crisp those exposed edges, but not so hot that the sauce burns or the tortillas become brittle. Place your rack in the center of the oven to ensure even heat distribution from top to bottom.
You’re looking for specific visual cues to know when they’re done. The sauce around the edges of the pan should be bubbling vigorously, and the cheese should be completely melted. I like to wait for “leopard spotting”—those little golden-brown toasted spots on the cheese—which indicates the proteins have caramelized and the flavor is at its peak.
Expect this to take about 20 minutes. If you notice the cheese is melting but the edges aren’t crisping, you can move the pan to the top rack for the last three minutes. Just keep a close eye on it; the line between “perfectly toasted” and “burnt” is very thin when you’re working with corn tortillas.
Troubleshooting Common Enchilada Textural Issues
If your tortillas cracked while you were rolling them, they likely weren’t fried long enough or were too cold. The flash-fry makes them pliable; if they feel stiff, they need another three seconds in the oil. Also, make sure you aren’t overfilling them. A tortilla can only stretch so far before the fibers give way.
If you find the bottom of the dish is oily, it usually means the beef wasn’t drained well enough or you forgot to blot the tortillas with a paper towel after frying. That extra oil has nowhere to go but down. Always give those fried tortillas a quick pat-down to remove surface grease before dipping them in the sauce.
Lastly, if your cheese looks oily rather than creamy, it might be the brand. Some budget pre-shredded cheeses have a high oil-to-protein ratio. If this happens, try switching to a hand-grated block of Monterey Jack next time. The difference in the “cheese pull” and the overall mouthfeel is honestly night and day.
Make-Ahead Instructions and Freezing Procedures
These enchiladas are fantastic for meal prep, but you have to be smart about it. If you want to make them a day ahead, follow the recipe up until the baking step. Cover the dish tightly with foil and refrigerate. When you’re ready to eat, bake them straight from the fridge, adding about 10 extra minutes to the cook time.
For freezing, I recommend a “deconstructed” approach for the best texture. Freeze the beef and bean filling in one container and the sauce in another. When you’re ready for dinner, thaw them, then do the flash-fry and assembly fresh. This preserves the “Anti-Soggy” barrier perfectly.
If you must freeze the fully assembled dish, do it before baking. Wrap the dish in a double layer of plastic wrap and then foil. To reheat, thaw it in the fridge overnight and bake in the oven. Avoid the microwave for leftovers if you want to keep that firm texture; the oven or a toaster oven will help revive the crisp edges of the tortillas.
Optimal Side Dishes for Beef and Bean Enchiladas
Since these enchiladas are rich, cheesy, and savory, you want side dishes that offer a bright, acidic contrast. A crisp cabbage slaw with a lime-juice dressing is a perfect partner. The crunch of the raw cabbage cuts right through the density of the beef and beans, refreshing your palate between bites.
What to Serve Alongside
These cheesy beef and bean enchiladas are hearty on their own, but a warm side from the oven rounds out the meal nicely.
- For a crumbly, buttery contrast to the saucy enchiladas, bake a pan of Cheesy Beef Jalapeño Cornbread — the cornmeal adds sweetness and the jalapeño heat ties right back to the filling.
- If you want something quick to pull together while the enchiladas are in the oven, these Skillet Cheesy Jalapeno Biscuits use the same cheesy-spicy notes and are ready in under 30 minutes.
12 corn tortillas
1 pound lean ground beef
1 can (15 oz) black beans, drained and rinsed
2 1/2 cups red enchilada sauce (divided)
3 cups shredded Mexican blend cheese (Monterey Jack and Cheddar)
2 tablespoons vegetable oil (for frying)
1/2 cup chopped green onions
1 teaspoon ground cumin
1 teaspoon garlic powder
1/2 teaspoon chili powder
Salt and pepper to taste
- Preheat your oven to 375°F (190°C).
- In a large skillet over medium-high heat, brown the ground beef until fully cooked. Drain any excess fat. Stir in the black beans, cumin, garlic powder, chili powder, salt, and pepper. Add 1/2 cup of the enchilada sauce to the beef mixture and simmer for 2 minutes to marry the flavors.
- The Anti-Soggy Hack: Heat the vegetable oil in a small skillet over medium heat. Using tongs, lightly fry each tortilla for just 5 to 8 seconds per side. You do not want them crunchy or stiff, just lightly sealed and pliable. This flash-fry creates a fat-based barrier that prevents the sauce from soaking into the corn fibers and making them mushy.
- Blot excess oil from the tortillas with a paper towel.
- Pour 1/2 cup of enchilada sauce into the bottom of a 9×13 inch glass baking dish and spread it evenly.
- To assemble: Dip a fried tortilla into the remaining sauce to coat both sides lightly. Place a generous portion of the beef and bean mixture and a sprinkle of cheese in the center, then roll tightly.
- Place the rolls seam-side down in the baking dish. Pour the remaining sauce over the center of the enchiladas in a thick strip, leaving the very edges of the tortillas exposed (as seen in the image) to allow them to crisp slightly in the oven.
- Top generously with the remaining shredded cheese, concentrating it over the sauced areas.
- Bake for 20 minutes until the cheese is bubbly and the exposed edges of the tortillas are golden and slightly firm.
- Garnish with a heavy sprinkle of fresh green onions before serving. The tortillas will stay intact and firm thanks to the oil-seal technique.
Cilantro-lime rice is another classic choice. The citrus notes in the rice highlight the cumin in the beef filling. If you want something even simpler, a bowl of pickled red onions and some fresh radishes can add a sharp, peppery bite that balances the heat of the red enchilada sauce beautifully.
Expert Tips for Customizing Heat and Flavor
If you’re a fan of spicy food, don’t just add more chili powder. Instead, stir a small can of diced green chiles or some chopped fresh jalapeños into the beef and bean mixture. This adds a “bright” heat rather than just a “dusty” heat. It also adds another layer of texture to the filling.
You can also swap the black beans for pinto beans if you prefer a creamier interior. Just make sure to rinse them thoroughly so the canning liquid doesn’t turn your filling grey. For a flavor boost, try topping the finished dish with a dollop of cool sour cream or some sliced avocado to add a buttery finish to every bite.
How do I keep my enchiladas from getting soggy?
The most effective way to prevent soggy enchiladas is the “flash-fry” method. By lightly frying each corn tortilla in a small amount of oil for 5-8 seconds per side, you create a fat-based barrier. This seal prevents the liquid in the sauce from soaking into the corn fibers. Additionally, leaving the ends of the tortillas unsauced allows them to crisp up in the oven, providing a better textural contrast.
Can I use flour tortillas instead of corn?
While you can use flour tortillas, they are much more prone to becoming mushy and doughy when baked in sauce. Flour tortillas lack the structural starch of corn, so they tend to absorb liquid like bread. If you must use flour, do not dip them in the sauce; instead, fill them dry and only pour sauce over the top. However, for the best results and an authentic texture, corn tortillas are highly recommended.
Why did my tortillas tear when I rolled them?
Tearing usually happens for two reasons: the tortillas were too cold or they were too dry. Corn tortillas are naturally brittle when cold. The flash-fry step not only seals them but also makes them incredibly pliable and easy to roll. If you are skipping the fry, you must at least steam the tortillas in a damp paper towel in the microwave for 30 seconds to soften them before rolling.
How long do leftovers stay fresh in the fridge?
You can store these enchiladas in an airtight container in the refrigerator for up to 3 to 4 days. Because of the oil-seal technique used in this recipe, they hold their shape much better than standard enchiladas. To reheat, use an oven or toaster oven at 350°F until the cheese is bubbling again. This helps maintain the texture of the tortilla better than a microwave would.
Can I make this recipe vegetarian?
Absolutely. You can easily swap the ground beef for a double portion of beans (using both black and pinto) or a meat substitute. If using only beans, I recommend mashing about a quarter of them to help bind the filling together. You could also add sautéed bell peppers, onions, and corn to the filling to maintain the bulk and heartiness of the original beef version.
What is the best cheese for enchiladas?
A blend of Monterey Jack and sharp Cheddar is the gold standard. Monterey Jack has a low melting point and provides that classic creamy stretch, while sharp Cheddar adds the necessary saltiness and depth of flavor. For the best melt, avoid pre-shredded cheeses which are coated in anti-clumping starches; grating your own cheese from a block will result in a much smoother, professional finish.
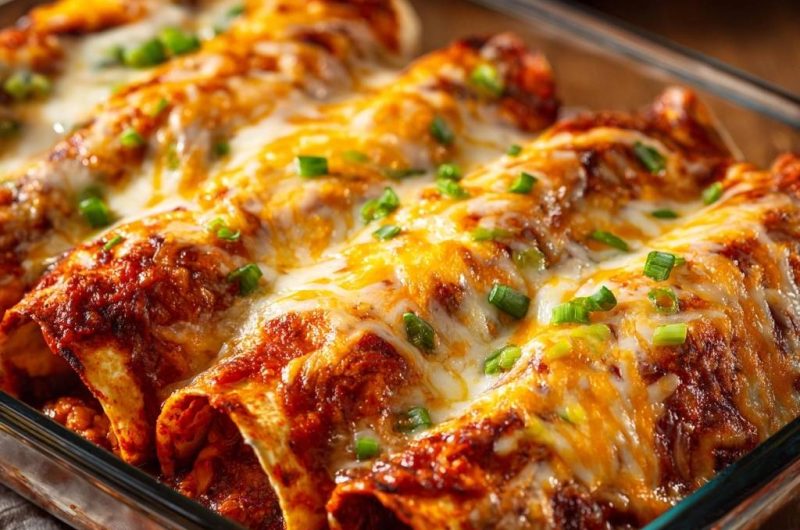
Beef and Bean Enchiladas
Course: Main CourseCuisine: Mexican-AmericanDifficulty: easy4
to 6 servings15
minutes25
minutes550
kcal40
MinutesA hearty beef and bean enchilada recipe that uses a flash-fry technique to create a moisture barrier, ensuring the corn tortillas stay firm and flavorful instead of mushy.
Ingredients
Directions
Notes
- The secret to the texture is flash-frying the tortillas for 5-8 seconds to create a fat-based barrier against the sauce. Leave the edges of the tortillas exposed when saucing to allow them to crisp in the oven.