The Architecture of Ultimate Loaded Beef Nachos
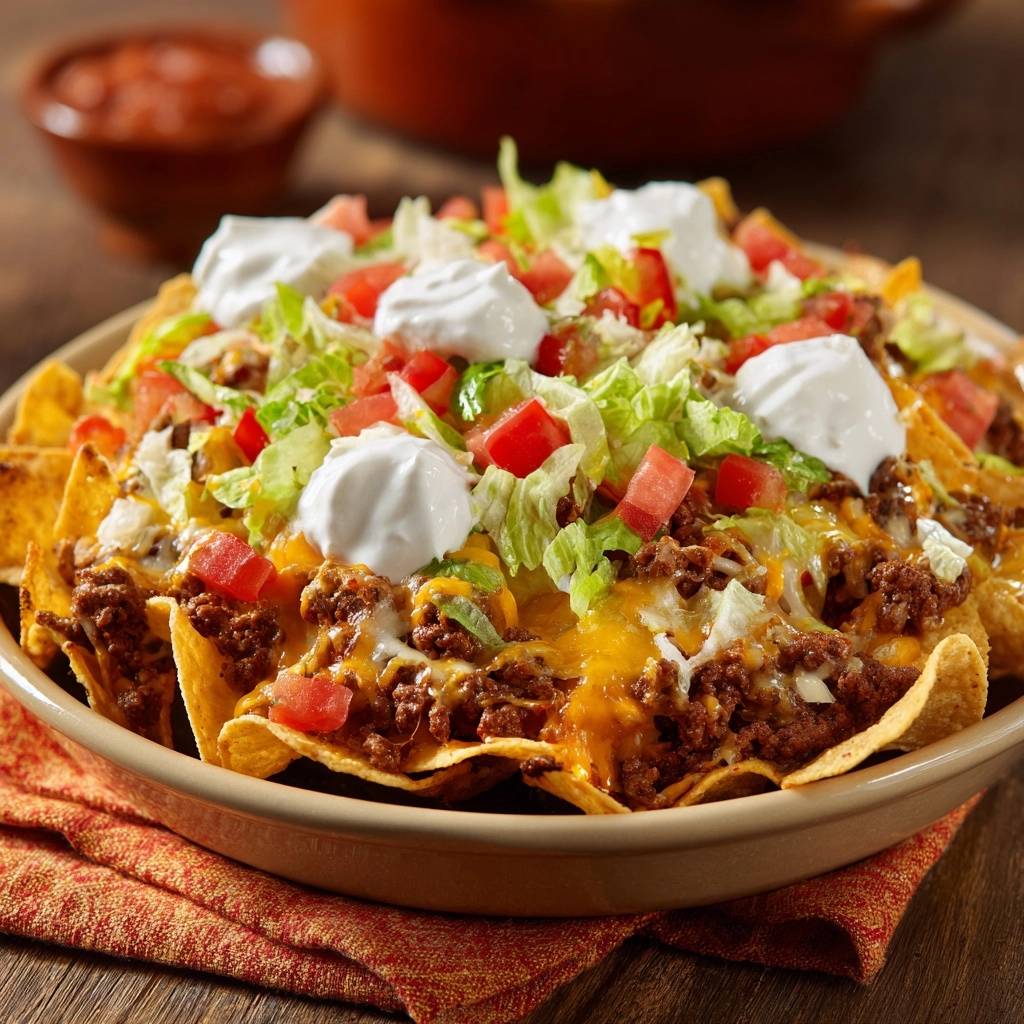
We have all been there. You sit down at a restaurant, eyes wide as a mountain of nachos arrives, only to find that the bottom half is a sad, waterlogged mess of “nacho soup.” It is the ultimate culinary heartbreak. When the chips lose their structural integrity, the entire experience falls apart, leaving you with a soggy pile of corn mush instead of that satisfying, thunderous crunch.
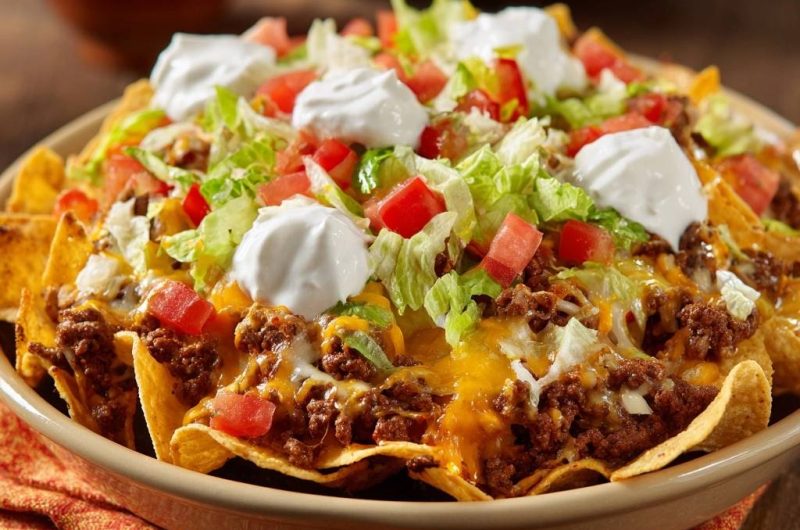
The secret to the Ultimate Loaded Beef Nachos isn’t just about piling on more toppings; it is about engineering. By focusing on the physics of the chip and creating a strategic moisture barrier, you can ensure every single bite stays crispy from the top of the pile to the very last scrap on the plate. We are building a skyscraper of flavor here, and every skyscraper needs a solid, dry foundation.
The real trick to restaurant-quality results at home is managing the water content of your protein. Most people simmer their beef in a watery sauce and pour it directly onto the chips, which is a recipe for disaster. Instead, we use a dry-simmer technique that coats the meat in a concentrated spice paste, ensuring the flavor sticks to the beef rather than soaking into your chips. It’s a total game-changer for your game-day snacks.
The Physics of the Anti-Soggy Bottom
To master the perfect nacho, you have to understand why they fail. Moisture migration is the enemy. When you place hot, steaming beef or watery vegetables directly onto a porous corn chip, the steam breaks down the chip’s cell structure almost instantly. This turns a crispy snack into a limp disappointment within minutes of leaving the oven.
However, we can fight back with science by using a “Cheese Seal.” By layering shredded cheese directly onto the chips before adding the meat, we create a hydrophobic barrier. As the cheese melts, it coats the surface of the tortilla, preventing any residual moisture from the beef or toppings from penetrating the chip. It acts as a delicious, fatty shield that preserves the crunch.
In addition to the cheese barrier, heat management is vital. A shallow dish allows steam to escape rather than getting trapped in the middle of a deep pile. Therefore, choosing the right vessel is just as important as the ingredients themselves. We want evaporation, not condensation, to be the primary force in our oven.
Essential Components for Ultimate Loaded Beef Nachos
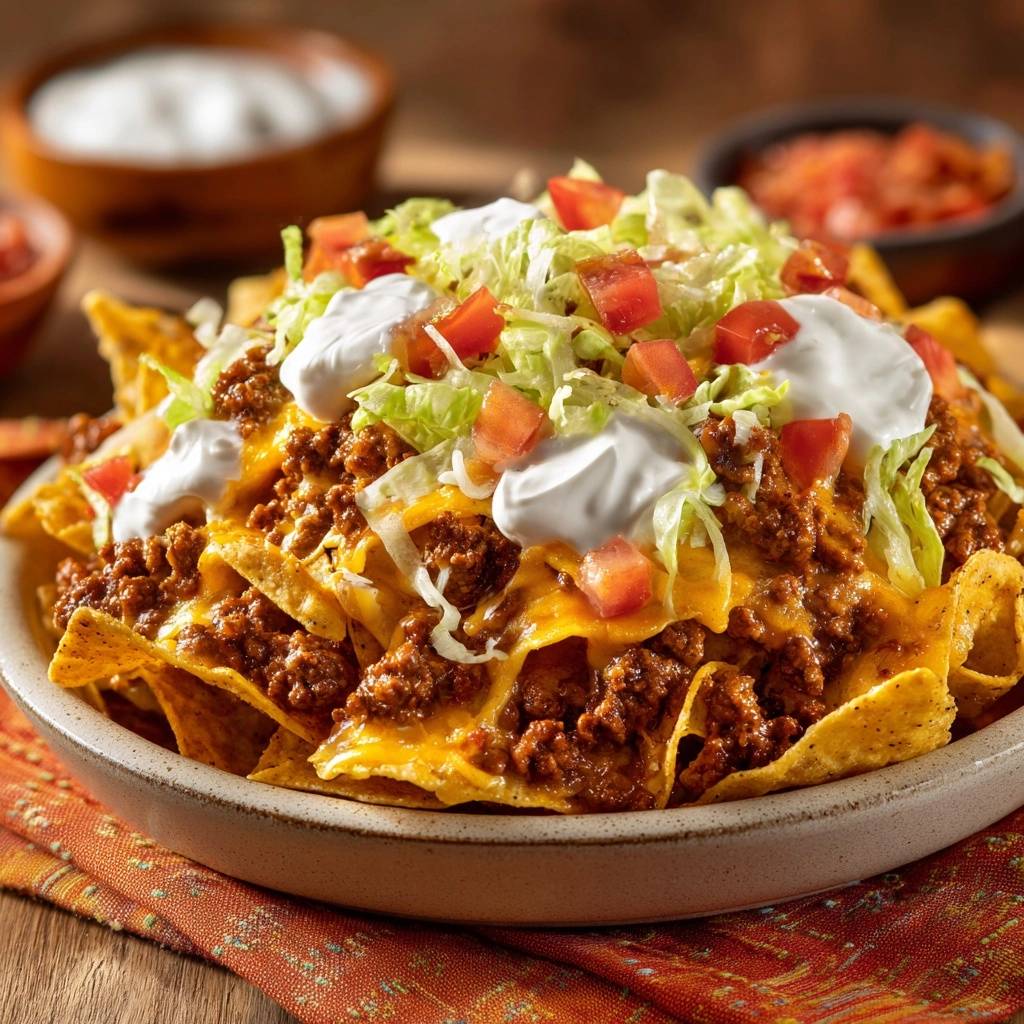
Quality ingredients are the building blocks of a great nacho platter. Firstly, you must choose a 90/10 lean ground beef. While 80/20 is great for burgers, the extra fat in that blend will pool at the bottom of your nacho dish, leading to greasy chips. Lean beef provides all the protein punch without the liquid runoff that ruins the texture.
Secondly, the cheese choice matters immensely. I always recommend a blend of Sharp Cheddar and Monterey Jack. The Cheddar provides that classic, tangy bite and a beautiful orange hue, while the Monterey Jack is the “glue” of the operation. It has a lower melting point and a creamy consistency that flows into the nooks and crannies of the chips to create that perfect seal.
Lastly, don’t settle for thin, translucent grocery store chips. You need a “Restaurant Style” thick-cut yellow corn chip. These are specifically fried to hold weight. If a chip can’t support a heavy scoop of beef, cheese, and sour cream without snapping, it has no business being in your oven. Freshness is key, so make sure that bag is sealed tight until the moment you are ready to build.
Selecting the Right Tortilla Chip Base
Yellow corn chips generally offer a sturdier, earthier flavor profile that stands up well to heavy seasoning. White corn chips are often thinner and more delicate, making them better for light salsas but poor candidates for a loaded bake. Look for chips that feel heavy in the bag; that weight usually indicates the thickness required for a loaded platter.
Avoid flavored chips like “cool ranch” or “nacho cheese” varieties for this recipe. The artificial powders on those chips often burn at high temperatures and clash with the authentic taco seasoning on the beef. You want the toasted corn flavor to be the canvas, not a competing spice. A simple, salted corn chip is the gold standard here.
If you love that crispy texture, check out this no-soggy-chip recipe for nachos.
The Beef Blend: Fat Ratios and Texture
Using lean beef is a strategic move for moisture control. However, lean meat can sometimes become tough if overcooked. To prevent this, we focus on a quick browning process over medium-high heat. You want to see those little crispy, dark brown edges on the meat crumbles, which indicate the Maillard reaction has occurred, adding a deep, savory complexity to the dish.
If you only have 80/20 beef on hand, you must be extremely diligent about draining. I recommend rinsing the cooked beef under hot water in a colander to strip away the excess grease before seasoning. It sounds extreme, but it is a foolproof way to ensure your chips stay dry. Just remember to add a pinch more salt if you use the rinsing method.
Preparing the Seasoned Beef Crumble
Start by heating your skillet until it is hot enough that a drop of water sizzles away instantly. Add the beef and break it apart into small, uniform crumbles. Large chunks of meat are difficult to distribute evenly and can create “heavy spots” on your nachos that cause the chips underneath to break. Aim for a fine, pebbly texture.
Once the meat is browned, the most critical step begins: the drain. Do not just tip the pan and hope for the best. Pour the meat into a colander and let it sit for a full minute. You will be surprised at how much liquid continues to drip out. This step alone separates the amateur nachos from the professional-grade results we are looking for.
The Dry-Simmer Seasoning Technique
After draining, return the beef to the pan and add your taco seasoning and 1/4 cup of water. Now, here is the trick: most people stop once the water is mixed in. We are going to keep cooking. Simmer the meat over medium heat, stirring constantly, until that water has completely evaporated. You are looking for the moment the meat looks “matte” rather than “glossy.”
This process forces the spices to hydrate and then fuse directly to the protein. Instead of a runny taco sauce that will migrate into your chips, you end up with a concentrated spice paste. The beef should be moist to the bite but dry to the touch. This ensures that every ounce of flavor stays on the meat and off the bottom of the pan.
The Strategic Layering Process
Building the nachos is like masonry. Start with a foundation layer of chips that covers the bottom of your dish entirely. You shouldn’t see the bottom of the bowl. This first layer acts as the structural support for everything that follows. If the foundation is weak, the whole tower topples when you try to lift a chip.
Next comes the “First Seal.” Sprinkle half of your cheese blend directly onto these dry chips. This is the most important layer of cheese in the entire recipe. It creates that hydrophobic barrier we discussed earlier. By putting the cheese under the meat, we ensure that any steam released by the beef is blocked by a wall of melted fat and protein.
Creating the Primary Cheese Barrier
When applying the Monterey Jack and Cheddar, don’t just dump it in the center. Use your fingers to ensure the cheese reaches the edges of the pile. Monterey Jack is particularly good here because it melts into a smooth, viscous liquid that acts like a culinary glue. It binds the chips together so you can pull off a “nacho cluster” rather than a single, lonely chip.
Ensure that every chip has at least a little bit of cheese on it. A “naked chip” is a vulnerable chip. If a chip isn’t coated in cheese, it will absorb the moisture from the tomatoes and lettuce we add later. Think of the cheese as the insulation for your crunchy corn house.
For the same reason you want to eat these nachos immediately, my recipe for crispy loaded beef nachos skips any sauce that would make the chips lose their crunch.
Precision Baking for Maximum Crunch
We use a high-heat blast at 400°F because we want the cheese to melt and the chips to toast before the toppings have a chance to soften. A low and slow bake will actually dry out the beef and make the chips brittle. We are looking for a quick transformation—just five to eight minutes is usually all it takes.
If you have a ceramic baking dish, use it. Ceramic retains heat much better than thin metal sheets, which means your nachos will stay hot on the table for much longer. If you must use a metal baking sheet, try to find a heavy-duty rimmed one that won’t warp in the high heat. The goal is even heat distribution across the entire surface area.
Visual Cues for Perfect Melt Consistency
Keep a close eye on the oven during those final minutes. You are looking for the cheese to transition from individual shreds into a unified, bubbling blanket. The edges of the cheese should just be starting to turn a golden brown, but the center should remain soft and gooey. If the cheese starts to look oily or “broken,” you have left it in too long.
The bubbling action is a sign that the cheese has reached its peak melting point and has successfully bonded with the chips. As soon as you see that movement, pull them out. The residual heat of the ceramic dish will continue to cook the nachos for a minute or two after they leave the oven, so don’t wait for them to look “done” in the center.
Fresh Toppings and Temperature Contrast
The magic of a great nacho platter lies in the contrast between the hot, salty chips and the cold, crisp toppings. This is why we never bake the lettuce or tomatoes. Adding them post-bake provides a refreshing “snap” that cuts through the richness of the beef and cheese. It cleanses the palate between those heavy, savory bites.
To keep things dry, you must seed your Roma tomatoes. Slice them open and scoop out the watery gel and seeds before dicing the flesh. This removes about 80% of the tomato’s water content, preventing “tomato puddles” from forming on your perfectly melted cheese. It is a small step that makes a massive difference in the final texture.
The Five-Dollop Sour Cream Method
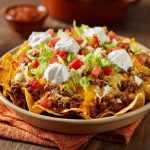
Drizzling sour cream might look pretty for a photo, but it is a disaster for crunch. A thin drizzle of sour cream hits a large surface area of chips, softening them almost instantly. Instead, use the “Five-Dollop Method.” Place five large, distinct mounds of sour cream across the top of the platter—one in the center and four around the edges.
This allows each person to dip their chip into the sour cream as they eat. It keeps the moisture localized and gives the diner control over the ratio of cream to crunch. Plus, it keeps the sour cream cold for longer, maintaining that vital temperature contrast that makes every bite exciting.
Troubleshooting Common Nacho Failures
The most common failure is the “Nacho Clump,” where the entire platter lifts up as one solid piece of cheese. This usually happens when you use too much Monterey Jack or if the cheese is piled too thick in one spot. To fix this, ensure your beef is distributed evenly between the layers of cheese. The meat acts as a “breaker,” preventing the cheese from forming a single, unbreakable sheet.
Another issue is the “Dry Bite,” where you get a chip with no toppings. This is caused by poor layering. Always build your nachos in a wide, shallow dish rather than a deep bowl. A wide surface area ensures that every chip is “exposed” to the toppings. If you are using a deep dish, you must repeat the layering process (chips, cheese, beef, chips, cheese, beef) to ensure the middle isn’t forgotten.
What to Serve with Loaded Beef Nachos
If you’re building a full spread around those nachos, these two casseroles keep the Tex-Mex energy going without repeating the same crunch.
- For another layer of cheese, meat, and crispy bits, try the Loaded Taco Casserole with Crispy Layers — it hits the same savory, crunchy notes as the nachos but in scoopable form.
- Swap the tortilla chips for shredded potatoes with the Loaded Cheesy Hashbrown Casserole, which solves the soggy problem by keeping every bite crisp and cheesy alongside the
Finally, if you find your nachos are still getting soggy, check your salsa. Never pour salsa directly onto the nachos before serving. Salsa is essentially flavored water, and it will destroy your chips in seconds. Always serve salsa in a separate bowl on the side. This keeps the chips crispy and allows people to customize their heat level.
Flavor Variations and Protein Swaps
While beef is the classic choice, you can easily swap the protein as long as you follow the “dry” rule. If you want to use shredded chicken, make sure it is tossed in a dry spice rub and sautéed until any liquid has evaporated. For a vegetarian option, black beans are excellent, but they must be rinsed and patted completely dry with paper towels before being added to the chips.
If you like heat, consider the difference between fresh and pickled jalapeños. Fresh jalapeños provide a bright, grassy heat and stay crunchy when added after the bake. Pickled jalapeños offer a tangy, acidic punch but carry a lot of brine. If you use pickled ones, pat them dry first so the vinegar doesn’t soak into your cheese seal.
What to Serve with Loaded Nachos
Since nachos are incredibly rich and salty, you want to pair them with something acidic and bright. A simple cabbage slaw dressed with plenty of lime juice and fresh cilantro is a perfect side dish. The acidity of the lime cuts through the fat of the cheese and beef, making the whole meal feel lighter and more balanced.
For drinks, look for something tart. A cold hibiscus limeade or a sparkling ginger lemonade provides a sharp contrast to the savory corn chips. The carbonation in a sparkling drink also helps to “scrub” the palate, making that next bite of cheesy goodness taste just as vibrant as the first one. Avoid heavy, creamy drinks, as they will compete with the sour cream and cheese.
Frequently Asked Questions
Can I make these ahead of time?
Nachos are a “live” dish that should be eaten immediately after assembly. However, you can do all the prep work in advance. Brown and season the beef, dice the tomatoes, and shred the cheese up to 24 hours ahead of time. Store them in separate airtight containers in the fridge. When you are ready to eat, simply assemble and bake for a fresh, crispy result.
How do I reheat leftover nachos?
Never use a microwave to reheat nachos! Microwaves work by vibrating water molecules, which will turn your chips into rubber. Instead, use a toaster oven or a standard oven at 350°F. Place the leftovers on a baking sheet and heat for about 5 minutes until the cheese is bubbling again. It won’t be quite as perfect as the first time, but the oven will help restore some of the chip’s crunch.
What is the best cheese for melting?
Freshly grated cheese is always superior to the pre-shredded bags. Pre-shredded cheese is coated in potato starch or cellulose to prevent it from clumping in the bag. This coating prevents the cheese from melting into that smooth, cohesive “seal” we need for the anti-soggy method. Buy a block of sharp cheddar and a block of Monterey Jack and grate them yourself for the best texture and flavor.
How do I scale this for a large party?
If you are feeding a crowd, use the “Sheet Pan” method. Spread the chips across two large rimmed baking sheets in a single, slightly overlapping layer. This increases the surface area, ensuring every guest gets plenty of toppings. You may need to rotate the pans halfway through the bake to ensure even melting if your oven has hot spots.
Why is my beef seasoning too salty?
Store-bought taco seasoning packets can vary wildly in salt content. If you find the meat is too salty after simmering, add a tablespoon of unsalted tomato paste or a squeeze of fresh lime juice. The acidity of the lime or the sweetness of the tomato paste will help balance the sodium. Next time, try using a “low sodium” seasoning packet or making your own blend so you can control the salt levels.
Beef Nachos
Course: AppetizerCuisine: Tex-MexDifficulty: easyYields4
servingsPrep Time15
minutesCook Time15
minutesCalories650
kcalTotal Time30
MinutesA restaurant-quality nacho recipe designed to prevent sogginess using a specific layering process and a ‘cheese seal’ technique to keep chips crispy.
Ingredients
1 large bag thick-cut, restaurant-style yellow corn tortilla chips
1 pound lean ground beef (90/10)
2 tablespoons taco seasoning
1/4 cup water
2 cups shredded sharp cheddar cheese
1 cup shredded Monterey Jack cheese
1 cup shredded iceberg lettuce
2 Roma tomatoes, seeded and diced
1/2 cup thick sour cream
Salsa for serving
Directions
- Preheat your oven to 400°F (200°C). Use a large, shallow oven-safe ceramic bowl or a rimmed baking sheet to allow for even heat distribution.
- In a large skillet over medium-high heat, brown the ground beef until fully cooked and slightly crispy at the edges.
- Drain the excess fat thoroughly using a colander. This is the most critical step in preventing sogginess.
- Return the beef to the skillet. Add the taco seasoning and 1/4 cup water. Simmer over medium heat, stirring constantly, until the liquid has completely evaporated and the meat is coated in a thick, dry spice paste.
- Arrange a thick base layer of tortilla chips in your oven-safe dish.
- Sprinkle half of the combined cheeses directly onto the chips. This creates a “cheese seal” that prevents any remaining moisture from the toppings from soaking into the corn.
- Evenly distribute the seasoned beef over the first layer of cheese.
- Top with the remaining cheese, ensuring the beef is mostly covered to lock in the heat.
- Bake for 5 to 8 minutes, or until the cheese is fully melted and bubbling.
- Remove from the oven. Immediately top with the shredded lettuce and diced tomatoes.
- Using a spoon, place five distinct, large dollops of sour cream across the top as shown in the image.
- Serve immediately while the chips are hot and the “cheese barrier” is firm. Serve salsa on the side to maintain chip crispness.
Notes
- Draining the beef fat thoroughly and simmering the water until completely evaporated are the most critical steps to prevent a soggy base.