Mastering the Spicy Karahi Chicken: The Bhuna Technique
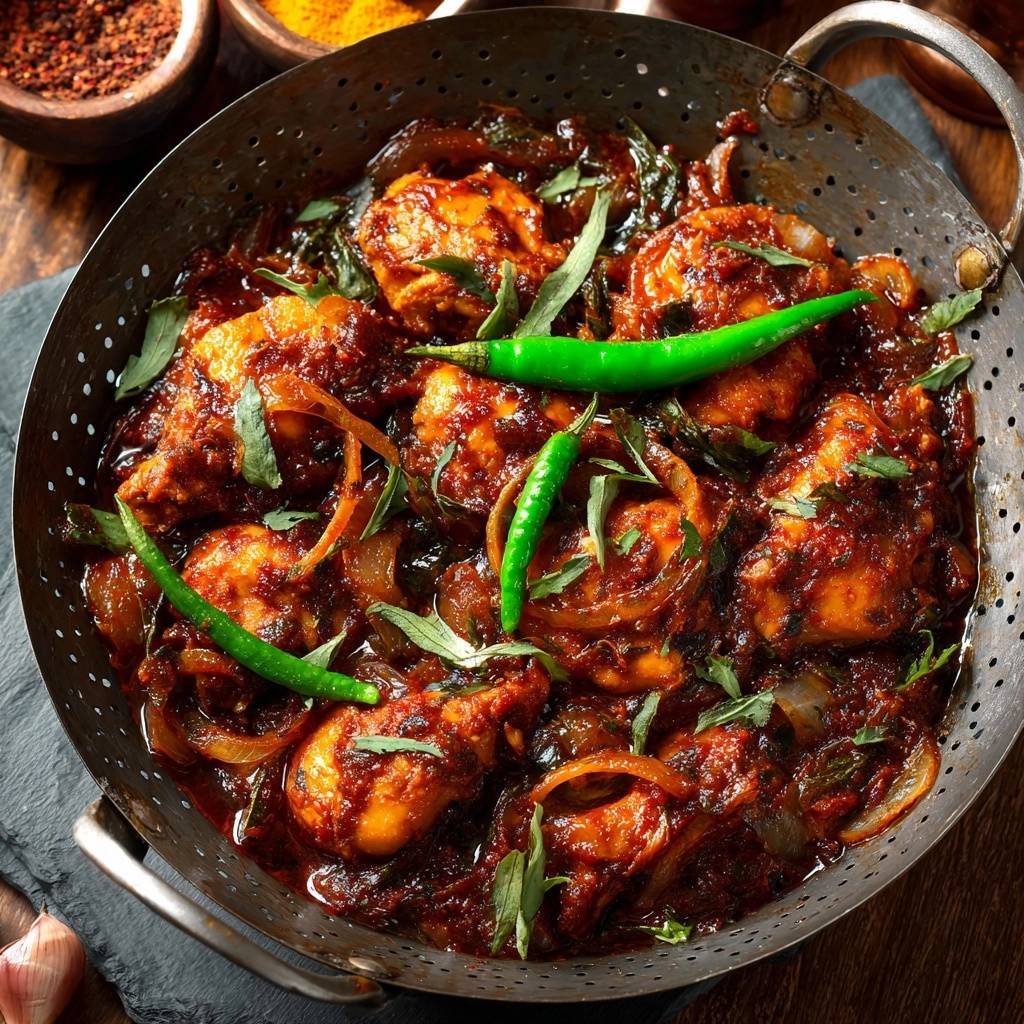
Imagine walking through a bustling street market at dusk, where the air is thick with the scent of toasted cumin and searing meat. You hear the rhythmic clanging of metal spatulas against deep, rounded pans. That is the essence of a true Karahi. Unlike a standard curry that often swims in a thin, watery gravy, Spicy Karahi Chicken is all about intensity. It is a bold, thick, and vibrant dish where the sauce isn’t just a liquid—it’s a concentrated coating that hugs every piece of chicken.
Most home cooks struggle with bland, “boiled” tasting chicken because they add too much water or don’t cook the aromatics long enough. This recipe solves that problem by focusing on moisture control and high-heat searing. We aren’t just making a stew; we are building layers of flavor through a specific frying process. By the time you’re done, you’ll have a dish that boasts a deep red hue and a savory punch that puts takeout to shame.
The secret to this restaurant-quality finish is the “bhuna” technique. This involves frying the spices and meat in oil until the moisture evaporates and the oil separates from the masala. If you see that beautiful red oil pooling at the edges of your pan, you’ve done it right. That separation is the universal sign of a perfectly cooked Karahi, ensuring the spices are toasted and the flavors are fully developed.
The Cultural Roots of the Karahi Vessel
The Karahi is more than just a recipe; it is named after the heavy, circular, deep-sided pan used to cook it. Similar to a Chinese wok but with steeper sides and a flatter base, the Karahi was designed for high-heat cooking. This shape is functional, not just traditional. The wide top allows moisture to evaporate rapidly, which is exactly what you need to create a thick, reduced sauce rather than a soupy broth.
Originating in the Khyber Pakhtunkhwa region, this style of cooking was born from the need for quick, high-flame preparation. It eventually traveled across South Asia, becoming a cornerstone of street food culture. When you cook in a Karahi (or a heavy cast-iron skillet), you are mimicking the intense heat of those roadside stalls. The goal is to achieve a smoky, caramelized finish that you simply can’t get in a shallow frying pan or a slow cooker.
Essential Components for Spicy Karahi Chicken
To get that authentic depth, you must start with 2 lbs of bone-in chicken thighs. I know it’s tempting to reach for boneless breasts, but please don’t. The bones act as a flavor reservoir, releasing collagen and marrow as they simmer, which gives the sauce a silky, rich mouthfeel. Without the bones, the sauce often feels thin and one-dimensional.
You also need 1/3 cup of vegetable oil. While that might seem like a lot, it serves a vital purpose. In this dish, oil isn’t just a lubricant; it’s a heat conductor. It carries the heat of the pan directly into the spices, blooming them and releasing their essential oils. This is what prevents the “raw” spice taste that ruins many homemade curries.
The aromatics provide the foundation. We use thickly sliced onions that eventually melt into a jam-like base, along with a generous amount of minced garlic and julienned ginger. The ginger, in particular, adds a sharp, fresh bite that cuts through the richness of the oil and tomatoes.
The Spice Profile: Heat and Color
The striking red color of this Spicy Karahi Chicken comes from Kashmiri red chili powder. This is a pantry staple for a reason—it provides a brilliant, sunset-red pigment without the mouth-scorching heat of standard cayenne. It allows you to build a visually stunning dish that is flavorful rather than just painful to eat.
If the aroma of curry leaves is something you enjoy, you’ll love the fragrant base in this creamy chicken curry with rice.
For the actual heat, we layer in red chili flakes and whole green chilies. This creates a multi-dimensional spice profile. The flakes provide a slow, lingering warmth, while the fresh green chilies offer a bright, grassy heat. Ground coriander and cumin provide the earthy, citrusy backbone that ties the spices together, while turmeric adds a subtle woodiness and antiseptic brightness.
Texture Management: Tomatoes and Curry Leaves
Texture is everything in a Karahi. This is why you must finely chop your Roma tomatoes instead of using a blender to puree them. Pureed tomatoes create a smooth, commercial-style sauce, but we want a “masala” texture—a chunky, rustic consistency where you can see bits of the aromatics clinging to the meat.
Curry leaves are our secret weapon for aroma. We add them in two stages. The first batch goes in with the ginger and garlic to perfume the oil. The second batch is tossed in at the very end. This ensures that you get both the deep, nutty flavor of fried leaves and the bright, herbal scent of fresh ones in every bite.
The Science of the Bhuna Method
The bhuna method is a technical process of frying spices in oil at high temperatures. During the initial 8-10 minute sear, the chicken undergoes the Maillard reaction. This chemical transformation creates new flavor compounds as the proteins and sugars on the surface of the meat brown. If you skip this and just boil the chicken in sauce, you lose that savory, “roasted” edge.
As the onions cook down with the chicken, they undergo a similar transformation, turning from sharp and crunchy to sweet and jam-like. This provides the natural sugar needed to balance the acidity of the tomatoes. Remember, we never add water to a Karahi. The tomatoes provide all the moisture necessary for the simmer, ensuring the final flavor is concentrated and pure.
Phase One: Searing and Aromatics
Start by heating your oil until it shimmers. When you drop an onion slice in, it should sizzle immediately. Fry the onions until the edges turn golden brown. This isn’t just about softening them; those golden edges represent caramelized sugars that will eventually thicken your sauce.
Add your chicken joints and let them sit for a minute before stirring. You want to see a visible golden crust develop on the skin and meat. Once the chicken is seared, stir in the garlic, ginger, and the first half of the curry leaves. The fragrance will change instantly from sweet onion to a pungent, spicy aroma that fills your entire kitchen.
Phase Two: The Low-Moisture Simmer
Now, stir in the chopped tomatoes, tomato paste, and all your dry spices. The tomato paste is crucial here because it adds a concentrated umami punch and helps the sauce achieve that dark, rich color. Stir everything well so the chicken is completely painted in the red spice mixture.
If you enjoy the rich, spiced tomato base in this curry, you will also appreciate the smooth, creamy sauce in this authentic butter chicken tikka.
Reduce the heat to medium and cover the pan. This is the only time you’ll walk away. For the next 12-15 minutes, the tomatoes will break down, releasing their juices and creating a natural steaming environment for the chicken. When you lift the lid, the mixture will look vibrant and wet, but it isn’t finished yet. It will look more like a soup than a Karahi at this stage.
Phase Three: Achieving Oil Separation
This is the most critical part of the recipe. Remove the lid and turn the heat back up to medium-high. You are now entering the final bhuna stage. You must stir constantly for about 5-7 minutes. As the water from the tomatoes evaporates, the sauce will begin to darken and thicken significantly.
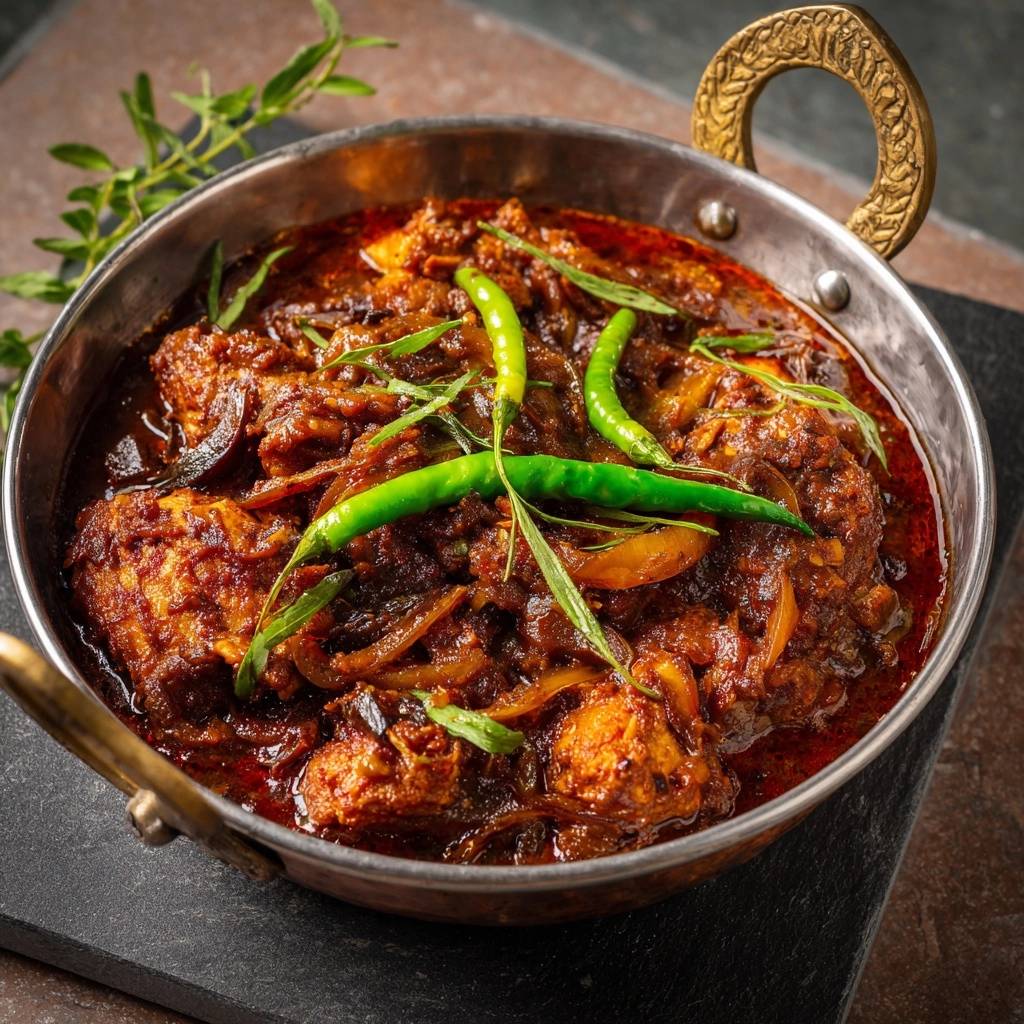
Watch the edges of the pan. You are looking for “Roghan,” or oil separation. When the sauce can no longer hold the oil, the fat will begin to pool in the gaps and at the perimeter of the masala. The sauce should now be a thick, dark paste that sticks to the chicken. If the sauce still looks watery or pale, keep frying. That oil separation is your signal that the flavors are locked in.
Troubleshooting Common Karahi Obstacles
If your sauce is too watery after the simmer, don’t panic. Simply increase the heat and keep stirring. The bhuna stage can sometimes take a few extra minutes depending on how juicy your tomatoes were. The goal is evaporation, so keep that lid off and the heat up until the sauce tightens.
If you find the dish is too spicy for your palate, you can balance it out by adding an extra chopped tomato during the simmer or serving it with a dollop of plain yogurt on the side. If the spices taste “raw” or dusty, it usually means the oil separation wasn’t fully achieved. Make sure you see that oil pooling before you call the dish finished.
Optimal Pairings for Spicy Karahi Chicken
A dish this bold needs the right partners. Traditional Garlic Roti or buttered Naan are the best choices because their chewy texture is perfect for scooping up the thick masala. Since there isn’t a lot of “runny” gravy, rice isn’t the traditional choice, though a light cumin pilaf can work in a pinch.
To contrast the heat and richness, serve a crisp kachumber salad on the side. A simple mix of diced cucumbers, red onions, and tomatoes with a squeeze of lemon juice provides a refreshing crunch. A side of cucumber raita also helps cool the palate between those spicy, ginger-laden bites.
Storage and Reheating for Maximum Flavor
Spicy Karahi Chicken is one of those rare dishes that actually tastes better the next day. As it sits in the fridge, the spices continue to permeate the meat, and the flavors mellow and meld together. You can store leftovers in an airtight container in the refrigerator for up to 3 days.
What to Serve with Spicy Karahi Chicken
This bold, aromatic chicken pairs well with sides that cool or balance the heat. Try these two options:
- The earthy turmeric and creamy texture of Turmeric Spiced Mashed Potatoes soaks up the Bhuna sauce without competing with the spice.
- A bright, tangy Sun-Dried Tomato White Bean Salad (get the recipe
Get the full recipe in your inbox in seconds – perfect for shopping and cooking.
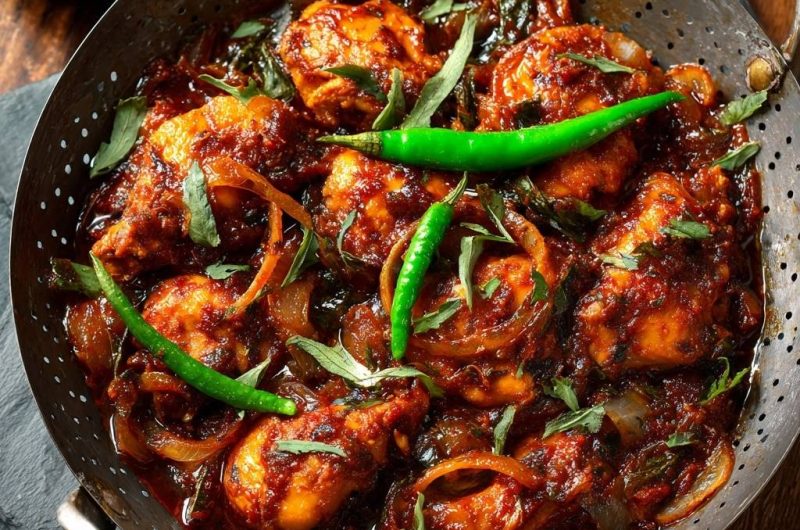
Spicy Karahi Chicken
Course: Main CourseCuisine: South AsianDifficulty: medium4
servings15
minutes30
minutes450
kcal45
MinutesA restaurant-quality chicken curry featuring a deep, concentrated sauce achieved through a specific frying process. This dish uses bone-in chicken, fresh tomatoes, and aromatic spices to ensure every bite is packed with flavor.
Ingredients
2 lbs chicken thighs, bone-in and skinless (cut into small joints)
1/3 cup vegetable oil (essential for the bhuna/frying process)
2 large onions, halved and thickly sliced
5 cloves garlic, minced
1.5 inch ginger, julienned
4 large Roma tomatoes, finely chopped (not pureed, to maintain texture)
2 tablespoons tomato paste
1 tablespoon Kashmiri red chili powder (for the deep red color shown)
1 teaspoon red chili flakes
2 teaspoons ground coriander
1 teaspoon ground cumin
1/2 teaspoon turmeric powder
1 teaspoon garam masala
1 teaspoon salt (or to taste)
4-5 whole green chilies
1/2 cup fresh curry leaves
Fresh cilantro for garnish
Directions
- Heat the oil in a large wok or heavy-bottomed karahi over medium-high heat. Add the sliced onions and fry until the edges are softened and starting to turn golden brown.
- Add the chicken pieces to the pan. Sear the chicken with the onions for 8-10 minutes. You want the chicken to develop a visible golden crust and the onions to begin to dissolve into a jam-like consistency.
- Stir in the garlic, ginger, and half of the curry leaves. Fry for 2 minutes until fragrant.
- Add the chopped tomatoes, tomato paste, Kashmiri chili powder, chili flakes, coriander, cumin, turmeric, and salt. Stir well to coat the chicken.
- Reduce heat to medium, cover, and simmer for 12-15 minutes. The tomatoes will release their juices, cooking the chicken through without the need for added water. The chicken is done when it reaches 165°F (74°C) in the thickest part.
- Remove the lid for the critical bhuna stage. Increase the heat to medium-high. Stir constantly for 5-7 minutes. You must cook off the excess moisture until the sauce thickens into a dark, rich paste and the red oil separates from the masala and pools at the edges of the pan.
- Toss in the whole green chilies and the remaining curry leaves. Stir for 2 more minutes so the chilies blister slightly but remain bright green.
- Sprinkle with garam masala and fresh cilantro. Serve immediately in the pan with warm naan or garlic roti.
Notes
- The critical bhuna stage is essential; do not skip frying the sauce until the oil separates. Use bone-in chicken for maximum flavor and moisture.