Mastering Hearty Beef and Corn Chili
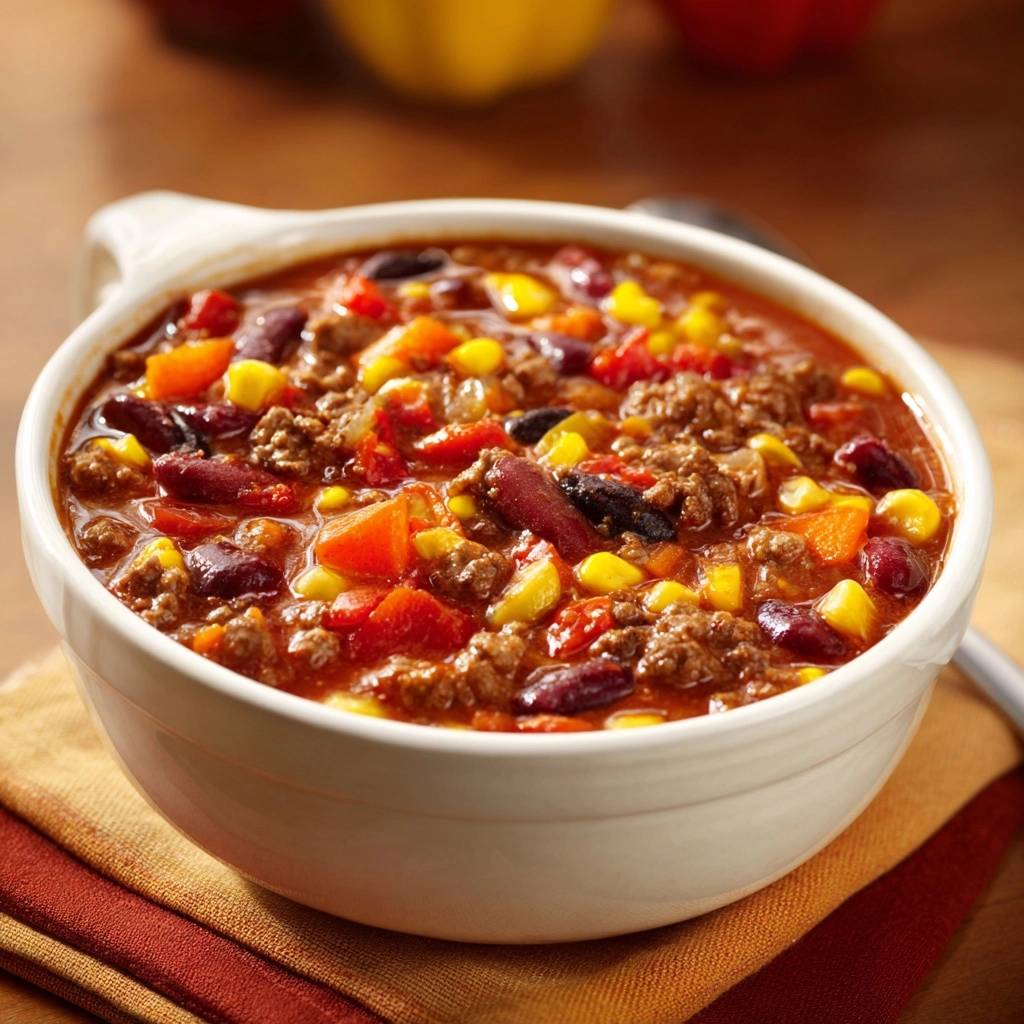
Most home cooks have faced the disappointment of a chili that looks more like a thin, sad soup than a robust meal. You want a bowl that stands tall, where every spoonful is packed with texture rather than a watery broth that pools at the bottom. This Hearty Beef and Corn Chili is the definitive answer to those soupy struggles, offering a thick, stew-like consistency that clings to your spoon.
The secret lies in the contrast between the savory, deeply browned beef and the bright, snappy sweetness of the corn. However, achieving that perfect mouthfeel isn’t about luck; it’s about controlling moisture from the very first step. By focusing on reduction and specific browning techniques, you’ll create a concentrated base that delivers an incredible punch of flavor without needing any artificial thickeners or cornstarch slurries.
I’ve found that the real trick to a “skyscraper” thickness is all in the simmer. While it’s tempting to throw a lid on the pot and walk away, leaving the pot uncovered is what allows the excess liquid to vanish. This leaves behind a rich, velvety sauce that perfectly coats the kidney beans and beef. Trust me, once you see the sauce darken and thicken naturally, you’ll never go back to the lid-on method again.
The Anatomy of a Thick Chili Base
Viscosity in a great chili is a result of science, not just time. When you simmer this recipe uncovered, you’re initiating a steady evaporation process that transforms the water content of the crushed tomatoes into a thick, savory concentrate. Therefore, the liquid doesn’t just sit there; it evolves into a binder that holds the entire dish together.
Tomato paste plays a massive role as a natural thickening agent in this recipe. Because it’s already highly reduced, it acts like a glue for the other liquids. In addition, by using only a half-cup of beef broth instead of the usual full cup, you ensure the flavors stay potent. You aren’t diluting the beefy essence; you’re merely providing enough moisture to deglaze the pot and keep the spices from burning.
As the chili bubbles, the natural starches from the beans and the sugars from the tomatoes begin to break down slightly. This creates a glossy, heavy sauce that has a much better mouthfeel than a flour-thickened gravy. You’ll notice the bubbles becoming slower and heavier as the 20-minute mark approaches, which is your visual cue that the reduction is working perfectly.
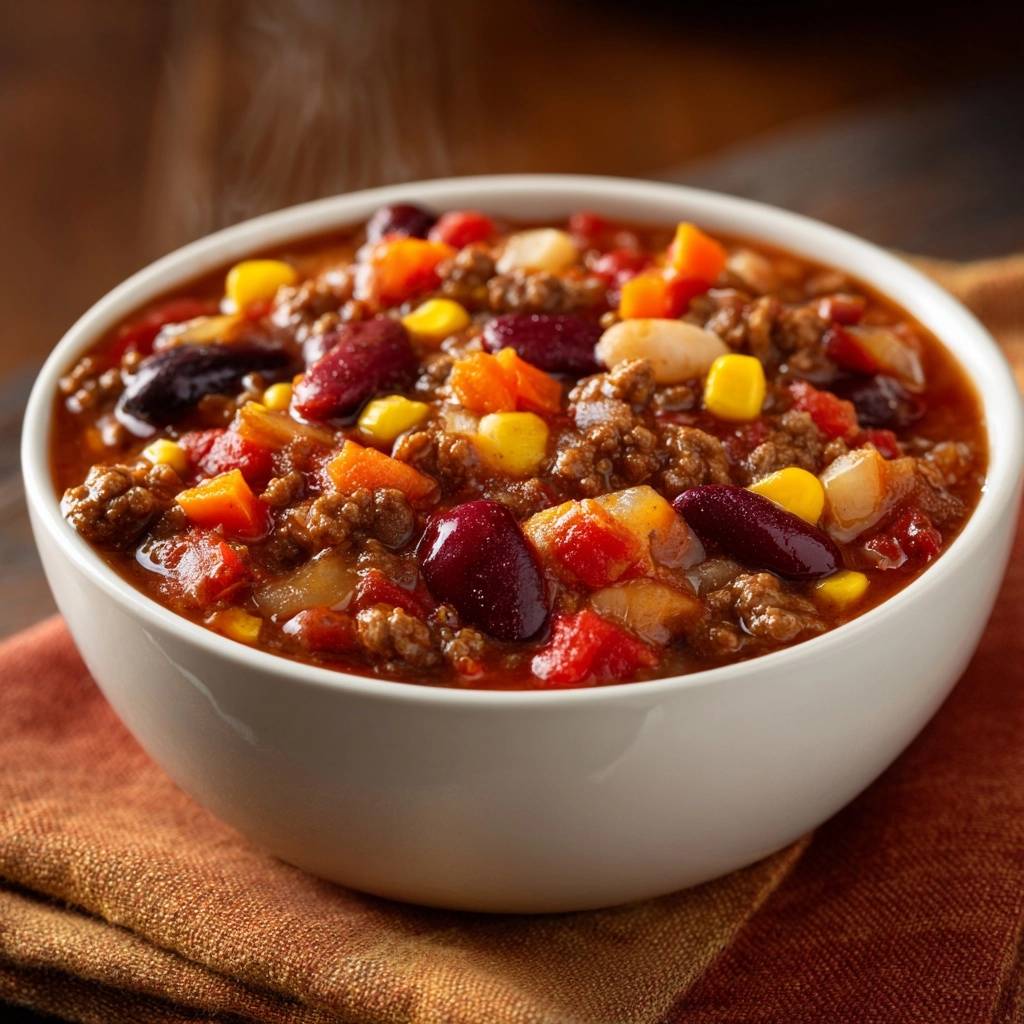
Essential Components for Hearty Beef and Corn Chili
Choosing the right beef is the first step toward a clean, hearty finish. I always recommend lean ground beef, specifically a 90/10 or 93/7 blend. Using a higher fat content often leads to an oily orange film on the surface of your chili, which can make the whole dish feel heavy and greasy rather than rich and savory.
Kidney beans are the traditional choice here because they hold their shape beautifully under heat. However, you must rinse them thoroughly in a colander before they hit the pot. The liquid inside the can is full of excess salt and cloudy starches that can dull the vibrant red color of your chili, making it look muddy instead of bright and appetizing.
When it comes to the corn, frozen sweet corn is usually the winner for texture. It retains a distinct “pop” when you bite into it, whereas canned corn can sometimes be a bit softer. If you do use canned corn, make sure it’s drained well so you don’t accidentally introduce extra liquid into your carefully reduced base.
Selecting the Right Aromatics and Spices
The foundation of your flavor comes from the onion, bell peppers, and garlic. I like to chop the peppers into 1/2-inch pieces because they provide a nice “chunkiness” that matches the size of the kidney beans. This uniformity makes every bite feel substantial and well-planned.
For the spices, smoked paprika is my absolute go-to over the standard sweet version. It adds a subtle, campfire-like depth that mimics the flavor of a slow-cooked brisket. Additionally, check the freshness of your cumin; if it doesn’t smell earthy and pungent the moment you open the jar, it’s time for a new one to ensure your chili doesn’t taste flat.
Phase One: Browning Beef for Maximum Flavor
To get the best flavor, you need to embrace the Maillard reaction. This is the chemical process that happens when meat browns, creating those complex, savory notes we all crave. When you add the beef to your heavy-bottomed pot, don’t start breaking it up immediately. Let it sit undisturbed for a few minutes until a dark, golden-brown crust forms on the bottom.
Once you’ve achieved those slightly crispy edges, break the meat into smaller chunks and finish cooking it through. This is the most critical moment for preventing a watery chili: you must drain every drop of excess fat and liquid from the pot. If you leave that liquid in, you’re essentially boiling the meat instead of searing it, which ruins the texture and dilutes the final sauce.
I usually tilt the pot and use a large spoon to scoop out the grease, or even use a wad of paper towels held with tongs to soak it up. It might seem like an extra step, but it’s your primary defense against a greasy, thin result. Your beef should look crumbly and deeply colored before you even think about adding the vegetables.
Phase Two: Blooming Spices and Caramelizing Paste
Blooming is a professional chef’s trick that most home cooks skip, but it makes a world of difference. After your vegetables have softened, you’ll add the tomato paste and all your dry spices directly to the hot meat and veggie mixture. Stir this constantly for about two to three minutes until the paste turns a shade darker and the spices smell incredibly toasted.
This process allows the fat-soluble compounds in the chili powder and cumin to release their full potential. If you just dump spices into a liquid, they often stay “raw” and can leave a gritty or metallic aftertaste. By toasting them first, you’re building a flavor-packed foundation that tastes like it’s been simmering for eight hours instead of forty-five minutes.
You’ll notice the mixture starts to look a bit thick and pasty at this stage. Don’t worry—that’s exactly what you want! This concentrated “flavor paste” will eventually dissolve into the tomatoes and broth, ensuring that every single drop of the final sauce is infused with deep, smoky heat and savory richness.
Phase Three: The Reduction and Simmering Process
Now it’s time to deglaze the pot with that 1/2 cup of beef broth. Use a wooden spoon to scrape up all those dark, stuck-on bits from the bottom. Those bits, known as fond, are pure flavor gold. Once the bottom of the pot is clean, stir in the crushed tomatoes and bring everything to a very gentle boil.
Immediately turn the heat down to low. The most important rule here is to leave the lid off. Simmering uncovered for 20 minutes allows the steam to escape freely. If you put a lid on, that steam hits the top, turns back into water, and drips right back into your chili, keeping it thin and soupy.
Keep an eye on the pot as it simmers. You’ll see the sauce start to darken from a bright red to a deep, brick red. The bubbles will change, too; they’ll start to pop more slowly and look “heavier.” This is the visual signal that the water has evaporated and you’re left with a thick, hearty concentrate that’s ready for the final ingredients.
Phase Four: Integrating Beans and Sweet Corn
Timing is everything when it comes to the beans and corn. If you add kidney beans too early, the constant bubbling can cause them to break down and become mushy. By waiting until the final 15 minutes of cooking, you ensure they stay firm and provide a great structural contrast to the tender ground beef.
The corn goes in at the same time, providing a beautiful pop of yellow against the deep red sauce. Because the corn is naturally sweet, it acts as a perfect balance to the heat of the chili powder and the acidity of the tomatoes. It brightens the whole dish and adds a fresh, crisp texture that makes the chili feel much more dynamic.
Give everything a final stir and let it simmer just long enough for the beans and corn to get piping hot. At this point, the sauce should be so thick that it barely moves when you drag a spoon through it. Taste a small spoonful—you might want a pinch more salt or a crack of black pepper to finish it off before serving.
Troubleshooting Common Chili Textural Issues
If your chili still feels a bit thinner than you’d like, don’t panic. There’s an easy “chef’s trick” to fix it: take a potato masher or a fork and crush about a half-cup of the kidney beans right in the pot. The starches released from the smashed beans will act as a natural thickener, instantly tightening up the sauce without changing the flavor.
On the flip side, if the reduction went a little too far and the chili looks like a thick paste, simply stir in more beef broth two tablespoons at a time. You want it to be thick, but it should still be spoonable. Remember that chili almost always tastes better the next day because the starches and spices have more time to meld and stabilize.
Another common issue is a “flat” flavor. If the chili is thick but tastes like it’s missing something, it usually needs a tiny hit of acidity. A teaspoon of lime juice or even a tiny splash of vinegar can wake up all the heavy, savory flavors and make the beef and corn really sing. It’s all about finding that perfect balance between salt, heat, and acid.
Optimal Pairings for a Robust Beef Stew
Since this chili is so heavy and hearty, you want side dishes that can stand up to its weight. A thick slice of honey-glazed cornbread is the classic choice for a reason; the sweetness of the bread mirrors the corn in the chili, while the crumbly texture is perfect for soaking up any leftover sauce.
For a perfect pairing, try our Classic Beef & Bean Chili: Unlock Deep, Robust Flavor.
If you want something a bit lighter, a crisp green salad with a sharp lime vinaigrette is a fantastic palate cleanser. The acidity of the dressing cuts right through the richness of the beef, making every bite of chili feel as fresh as the first. Crusty sourdough bread is another great option if you prefer a more savory, chewy pairing.
For toppings, think about adding layers of freshness. Diced avocado adds a creamy element that contrasts with the chunky beef, while pickled red onions provide a bright, tangy crunch. A handful of fresh cilantro or a few slices of fresh jalapeño can also add a nice “zip” to the finished bowl.
Storage, Reheating, and Freezing Protocols
To store your leftovers, let the chili cool down for about 30 minutes before transferring it to airtight containers. Don’t leave it out on the counter for hours; getting it into the fridge quickly helps maintain the best texture. It will stay fresh and delicious for up to four days, and you’ll likely find the flavor improves by day two.
This recipe is a dream for meal prepping because it freezes exceptionally well. Since we’ve already removed most of the excess water through the reduction process, you won’t have to worry about it becoming watery or grainy after thawing. Simply freeze it in individual portions for up to three months for an easy weeknight dinner.
When you’re ready to reheat, the stovetop is always better than the microwave. Put the chili in a small pot over low heat and add a tiny splash of water or broth to loosen it up. Stir it frequently to prevent the bottom from scorching, as the thick sauce can stick easily. Once it’s steaming hot, it’s ready to enjoy all over again.
Frequently Asked Questions
Can I use dried beans instead of canned?
Yes, you can use dried kidney beans, but they require significant prep work. You must soak them overnight and then simmer them in water until they are completely tender before adding them to the chili. Never add dry or partially cooked beans directly to the tomato base; the acid in the tomatoes prevents the bean skins from softening, leaving you with a crunchy, unpleasant texture.
How do I adjust the heat level without losing flavor?
The best way to control heat is by playing with the ratio of chili powder to smoked paprika. If you want it milder, reduce the chili powder and increase the paprika or add more bell peppers for sweetness. If you want a real kick, you can add a minced chipotle pepper in adobo sauce, which provides a deep, smoky heat that complements the beef perfectly without making the sauce too thin.
Why is my chili turning brown instead of vibrant red?
A brown chili usually happens if you over-caramelize the onions or if your spices are very old and have lost their color. To keep it vibrant, ensure you are using high-quality crushed tomatoes and don’t skip the tomato paste. The paste provides that deep red hue. Also, make sure you aren’t burning the spices during the blooming phase; they should be fragrant, not charred.
Is a slow cooker suitable for this specific thick recipe?
You can use a slow cooker, but you have to be careful. Slow cookers trap all the steam inside, which is the opposite of our goal for a thick chili. If you use one, reduce the beef broth to just a tablespoon or two and leave the lid slightly ajar during the last hour of cooking to allow some moisture to escape. You will still need to brown the beef and bloom the spices in a skillet first for the best flavor.
What are the best toppings for a beef and corn profile?
Since this chili has a natural sweetness from the corn, I love toppings that offer acidity and brightness. Freshly squeezed lime juice, pickled jalapeños, or a dollop of cool Greek yogurt work beautifully. Diced white onions or scallions also provide a sharp, fresh crunch that breaks up the richness of the beef and the density of the kidney beans.
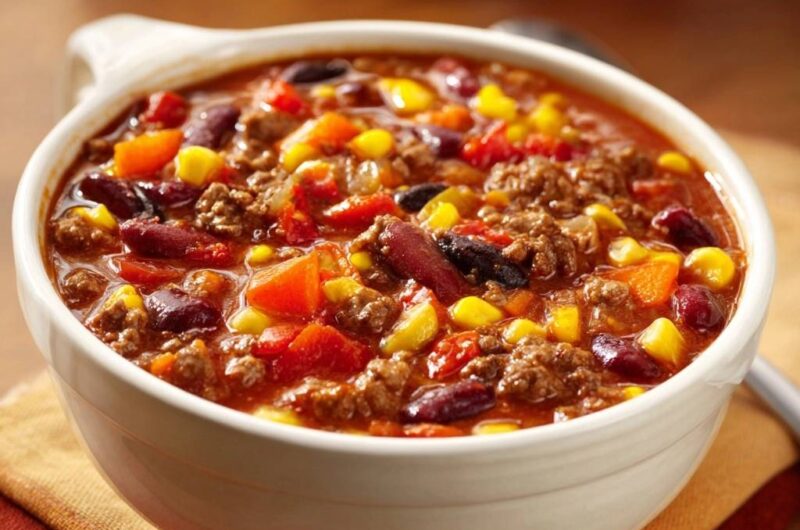
Beef Chili
Course: Main CourseCuisine: AmericanDifficulty: medium6
servings15
minutes45
minutes385
kcal60
MinutesThis hearty chili features lean ground beef, kidney beans, and sweet corn in a deep tomato base. By blooming spices and simmering uncovered, this recipe achieves a thick, stew-like consistency perfect for cold evenings.
Ingredients
1.5 lbs lean ground beef
2 cans (15 oz each) kidney beans, drained and rinsed
1.5 cups frozen or canned sweet corn
1 large onion, finely diced
2 bell peppers (red and orange), chopped into 1/2-inch pieces
3 cloves garlic, minced
1 can (28 oz) crushed tomatoes
2 tablespoons tomato paste
2 tablespoons chili powder
1 tablespoon ground cumin
1 teaspoon smoked paprika
1 teaspoon salt
1/2 teaspoon black pepper
1/2 cup beef broth (reduced from 1 cup to ensure thickness)
Directions
- Heat a large heavy-bottomed pot over medium-high heat. Add the ground beef and cook until fully browned and slightly crispy at the edges. This is the first step to preventing a watery result: drain the excess fat and liquid completely from the pot before proceeding. Cook until no pink remains and it reaches 160°F (71°C).
- Push the meat to the sides and add the onions and bell peppers. Sauté for 5 minutes until the vegetables are softened and the onions are translucent. Add the minced garlic and cook for 1 minute until fragrant.
- Add the tomato paste and spices (chili powder, cumin, paprika, salt, and pepper) directly to the bottom of the pot. Stir them into the meat and vegetables for 2-3 minutes. This “blooming” of the spices and caramelizing of the paste creates a thick, flavor-packed foundation that prevents the final sauce from tasting diluted.
- Pour in the crushed tomatoes and the 1/2 cup of beef broth. Stir well, scraping the bottom of the pot with a wooden spoon to release any browned bits (fond).
- Bring the mixture to a gentle boil, then immediately reduce the heat to low. Simmer uncovered for 20 minutes. Simmering without a lid allows excess moisture to evaporate, naturally thickening the chili to the chunky consistency seen in the image.
- Stir in the kidney beans and corn. Continue to simmer uncovered for another 10 to 15 minutes. This ensures the beans and corn are heated through and the sauce has reduced enough to coat the ingredients heavily rather than pooling at the bottom.
- Taste and adjust seasoning. Serve hot in deep bowls. The result should be a thick, vibrant red chili where the beef, beans, and corn are the stars of every bite.
Notes
- To ensure the thickest texture, drain all fat from the beef after browning and simmer the pot without a lid to allow moisture to evaporate naturally.