Mastering Moroccan Glazed Chicken Thighs with Shatter-Crisp Skin
Most home cooks struggle with a frustrating trade-off when making fruit-based braises. You either get a flavorful, sticky sauce with rubbery, pale chicken skin, or you get crispy skin with a thin, uninspired liquid. It’s a common culinary heartbreak caused by crowding the pan or adding liquids too early, which effectively steams the meat instead of searing it.
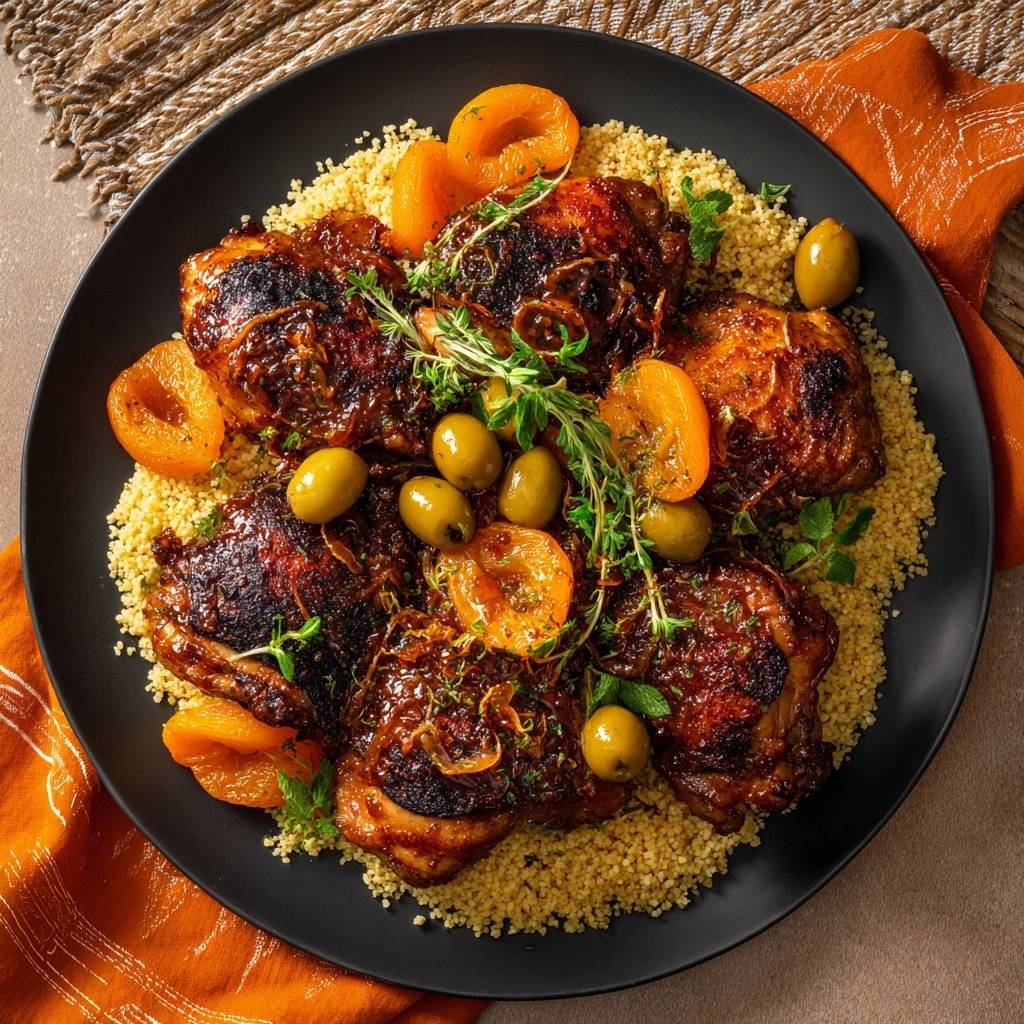
The secret to these Moroccan Glazed Chicken Thighs lies in a specific high-heat rendering technique followed by a late-stage glaze. By managing the moisture levels and the timing of your aromatics, you can achieve a skin texture that is truly shatteringly crisp. This creates a magnificent sensory contrast against the soft, honey-soaked apricots and the savory, tender meat underneath.
I’ve found that the absolute most critical step for success is starting with a cold skillet. While it sounds counterintuitive, placing the chicken skin-side down in a cold pan allows the fat to render out slowly and completely. This professional trick ensures the skin becomes thin and crispy rather than thick and flabby, providing the perfect foundation for the mahogany glaze to cling to later.
The Anatomy of a Perfect Moroccan Glaze
A traditional Moroccan profile often relies on preserved lemons for acidity, but this recipe swaps them for balsamic vinegar. This substitution is intentional; the balsamic provides a deep, dark mahogany color that looks stunning on a dinner platter. It also offers a complex sweetness that bridges the gap between the savory chicken and the sugary dried fruit.
The dried apricots are the heavy lifters here, releasing natural sugars as they simmer in the chicken broth. These sugars thicken the liquid into a syrupy consistency without the need for cornstarch or flour. To balance that intense sweetness, we use whole green olives. Their salty, brine-forward punch cuts through the honey and balsamic, ensuring the dish remains firmly in the savory category.
Essential Components for Moroccan Glazed Chicken Thighs
When you’re shopping, bone-in, skin-on chicken thighs are non-negotiable. The bone acts as an insulator, keeping the meat juicy during the two-stage cooking process, while the skin provides the fat necessary for the glaze to emulsify. If you use boneless meat, the chicken will likely dry out before the apricots have a chance to soften and release their flavor.
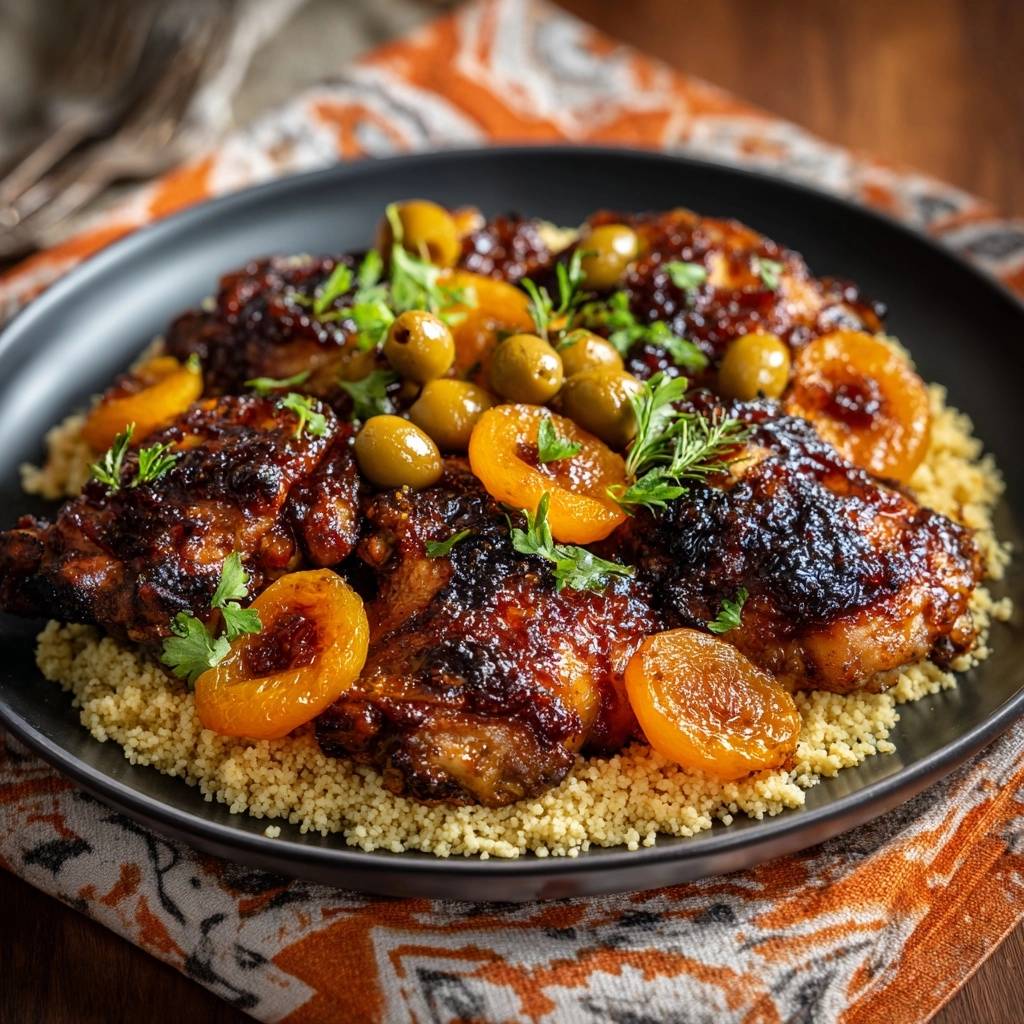
The spice blend is where the warmth happens. Using individual measurements of cumin, smoked paprika, and cinnamon is far superior to using a generic, pre-mixed “Moroccan” spice blend. Fresh spices have volatile oils that bloom when they hit the hot chicken fat, creating a much more vibrant aroma. Smoked paprika, in particular, adds a hint of wood-fired flavor that mimics traditional clay-pot cooking.
Quality chicken broth is another key factor. I always recommend a low-sodium version because the glaze reduces significantly in the pan. As the water evaporates, the salt concentration increases. Starting with a low-sodium base gives you total control over the final seasoning, preventing the dish from becoming overly salty once the olives are added.
Selecting the Right Apricots and Olives
For the best results, look for Turkish dried apricots, which are usually whole and plump. They hold their shape better during the oven finish compared to California apricots, which tend to be tarter and thinner. For the olives, I highly suggest Castelvetrano or Cerignola varieties. Their buttery, mild flesh complements the warm cinnamon and cumin without overpowering the delicate honey glaze.
The Science of Rendering Fat for Crispy Skin
Achieving that perfect crunch is all about thermodynamics. When you drop cold chicken into a screaming hot pan, the skin seizes up, trapping the subcutaneous fat underneath. This results in a layer of grease that stays stuck between the meat and the skin, making it rubbery. It’s the number one reason why home-cooked chicken skin often fails to impress.
By starting in a cold skillet, you allow the pan and the chicken to rise in temperature together. This gradual heat liquefies the fat slowly, allowing it to escape and pool in the pan. As the fat renders out, the skin becomes thinner and thinner. By the time the pan is hot, the skin is essentially frying in its own rendered fat, leading to a professional-grade, parchment-like crispness.
Step-by-Step: Achieving the Mahogany Sear
Once you turn the heat to medium-high, you must follow the “no-touch” rule. It’s tempting to lift the chicken to check the color, but every time you move it, you drop the surface temperature and interrupt the Maillard reaction. This chemical reaction is what creates those deep, savory flavor compounds and that beautiful dark brown color.
Wait for about 10 to 12 minutes. You’ll know the chicken is ready when it releases naturally from the pan. If you feel resistance when you try to flip it, the skin hasn’t finished dehydrating and browning yet. Give it another minute. When it finally flips easily, you should see a deep, mahogany surface that looks almost like glazed wood.
Building the Aromatics and Deglazing the Pan
After removing the chicken, you’ll have a pan full of liquid gold—rendered chicken fat. We use this to sauté the thinly sliced onions. As the onions soften, they pick up the spices left behind from the chicken. This is the foundation of your sauce. Adding the garlic, apricots, and olives at this stage allows them to toast slightly, deepening their flavor before the liquid hits the pan.
Deglazing is the most satisfying part of the process. When you pour in the mixture of honey, balsamic, and broth, use a wooden spoon to scrape the bottom of the skillet. Those stuck-on brown bits, known as “fond,” are concentrated umami. Whisking them into the liquid transforms a simple broth into a complex, professional-level sauce that tastes like it simmered for hours.
For a perfect pairing, try our Glazed Chicken Thighs with Caramelized Onions and Almonds.
The Oven Finish: Protecting the Texture
The biggest mistake people make at the end is drowning the chicken in the sauce. To keep that skin crispy, you must “nestle” the thighs back into the pan. This means the bottom of the meat is submerged in the apricot and onion mixture, but the skin remains completely exposed to the air. If the sauce covers the skin, all your hard work rendering the fat will be undone in minutes.
We finish the dish in a 400°F oven. This high temperature is perfect for two reasons: it quickly brings the internal temperature of the chicken to a safe 165°F, and the dry heat keeps the skin from softening. The honey in the glaze will bubble and thicken around the meat, but the skin will stay dry and crunchy. It’s the ultimate “best of both worlds” scenario.
Optimal Side Dishes for Fruit-Glazed Poultry
The 2 cups of fluffy couscous mentioned in the recipe are the traditional choice for a reason. Couscous acts like a sponge, soaking up every drop of the balsamic-apricot reduction. To make it even better, I like to toss the cooked couscous with a little extra olive oil and maybe some toasted pine nuts for a bit of crunch. The neutral grain provides a necessary break from the intense, sweet-and-savory glaze.
If you want to add more color, a few pomegranate arils sprinkled over the top right before serving add a fresh, tart pop. The fresh mint and thyme are also essential. The mint, in particular, provides a cooling finish that cuts through the richness of the rendered chicken fat and the warmth of the cinnamon. It brightens the entire plate and makes the flavors sing.
Troubleshooting Common Texture Issues
If your glaze looks too thin after the oven finish, don’t panic. Simply remove the chicken thighs to a plate and set the skillet back on the stovetop over high heat for two minutes. Boiling the sauce rapidly will evaporate the excess water and tighten it up. Just be sure to watch it closely so the honey doesn’t burn.
If the skin isn’t as crisp as you’d like, it usually goes back to the very first step: moisture. If the chicken wasn’t patted extremely dry with paper towels before seasoning, the residual water will create steam. Next time, try leaving the chicken uncovered in the fridge for an hour before cooking. This air-dries the skin and guarantees a better crunch every single time.
Expert Tips for Sauce Consistency
Culinary pros look for “nappe” consistency, which means the sauce is thick enough to coat the back of a spoon without immediately running off. The type of honey you use can affect this; darker honeys like wildflower or buckwheat are more viscous and will create a thicker glaze faster than light clover honey. If the sauce feels too sticky, a tiny splash of water can loosen it back up.
Storage and Reheating Without Losing the Crunch
Leftover chicken thighs will stay delicious in an airtight container for up to three days. However, the refrigerator is the enemy of crispy skin. The moisture in the sauce will eventually migrate into the skin, making it soft. Whatever you do, avoid the microwave for reheating, as it will turn the skin into a rubbery mess and overcook the meat.
To revive the texture, use your oven or an air fryer. Place the chicken on a baking sheet and heat it at 370°F for about 8 to 10 minutes. This high, dry heat will re-crisp the skin while warming the meat through. If you have extra sauce, heat it separately in a small saucepan and spoon it around the chicken—not over the top—just before you eat.
Expert Culinary Troubleshooting
Can I use chicken breasts instead of thighs?
You can, but I don’t recommend it for this specific recipe. Chicken breasts have significantly less fat and no skin-to-meat ratio to support a long render. They are much more prone to drying out during the 35-minute cook time. If you must use breasts, reduce the oven time significantly and use a meat thermometer to pull them out as soon as they hit 160°F.
Why does my glaze taste slightly bitter?
Bitterness usually comes from two places: burnt garlic or over-reduced balsamic vinegar. Garlic only needs about 30 seconds of sautéing before you add the liquid. If it turns dark brown, it becomes bitter. Additionally, if you reduce the sauce too far, the sugars in the balsamic and honey can scorch. If it tastes bitter, try adding a tiny pinch of salt or a squeeze of fresh orange juice to balance it out.
What can I use if I don’t have dried apricots?
Dried figs or pitted dates are excellent substitutes. Figs provide a similar honey-like sweetness and a nice texture from the seeds. Dates are much sweeter and softer, so they will melt into the sauce more than apricots do. If you use dates, you might want to slightly reduce the amount of honey used in the deglazing step to keep the dish from becoming cloying.
How do I scale this recipe for a large dinner party?
When cooking for a crowd, the biggest challenge is pan space. Do not crowd the chicken during the searing phase, or it won’t crisp. Sear the chicken in batches, then move all the thighs to a large roasting pan. Build the sauce in the skillet, then pour it into the roasting pan around the chicken. This ensures every piece has enough room for the dry oven heat to circulate around the skin.
Is there a way to make the couscous more flavorful?
Instead of cooking the couscous in plain water, use the same chicken broth you used for the glaze. You can also add a pinch of the cumin and cinnamon blend to the boiling liquid. Once the couscous is fluffed, stir in a tablespoon of butter and some chopped fresh parsley. This creates a much more cohesive meal where the side dish feels like a part of the recipe rather than an afterthought.
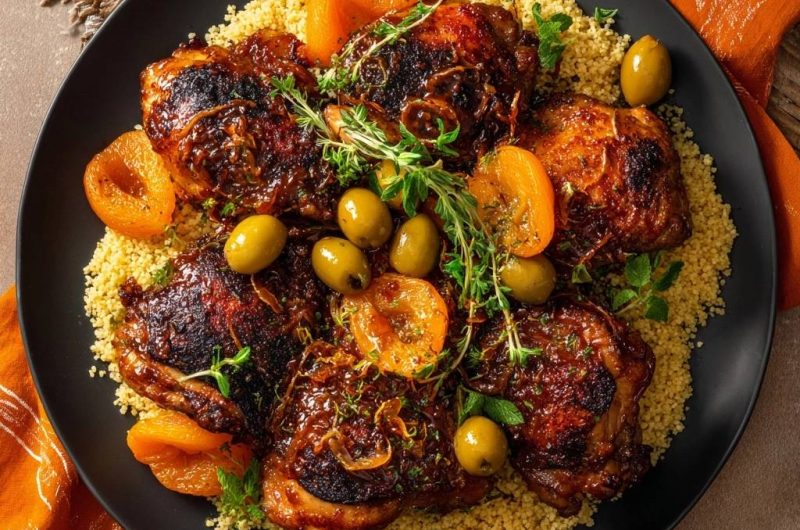
Moroccan Glazed Chicken Thighs
Course: Main CourseCuisine: Moroccan InspiredDifficulty: medium4
servings15
minutes35
minutes540
kcal50
MinutesA high-heat rendering technique ensures perfectly crispy skin in this savory and sweet dish. Bone-in chicken thighs are seared and then finished in the oven with a reduction of apricots, olives, and aromatic spices, served over a bed of fluffy couscous.
Ingredients
6 bone-in, skin-on chicken thighs
1 cup dried apricots, halved
1 cup whole green olives, pitted
2 cups cooked couscous
3 tablespoons olive oil
1 large onion, thinly sliced
3 cloves garlic, minced
2 tablespoons honey
1 tablespoon balsamic vinegar (for the dark glaze color)
1 teaspoon ground cumin
1 teaspoon smoked paprika
1/2 teaspoon ground cinnamon
1/2 cup chicken broth
Fresh thyme sprigs and mint leaves for garnish
Salt and black pepper to taste
Directions
- Pat the chicken thighs extremely dry with paper towels. This is the most critical step for crispy skin. Season both sides generously with salt, pepper, cumin, paprika, and cinnamon.
- Place chicken skin-side down in a cold, large oven-proof skillet. Turn the heat to medium-high. Starting with a cold pan allows the fat to render out slowly, which is the secret to achieving a deep golden crunch without burning the meat.
- Sear for 10 to 12 minutes without moving the chicken until the skin is dark, mahogany brown and releases easily from the pan. Flip and cook for 2 minutes on the other side. Remove chicken and set aside on a plate.
- Drain all but 2 tablespoons of fat from the pan. Add the sliced onions and cook over medium heat until softened and slightly caramelized. Stir in the garlic, dried apricots, and olives.
- Whisk the honey, balsamic vinegar, and chicken broth together. Pour into the pan to deglaze, scraping up the flavorful brown bits. Let the liquid reduce by half until it becomes a thick, syrupy glaze.
- Return the chicken to the pan, nestling the thighs into the onion and apricot mixture. Crucially, keep the skin side exposed and above the liquid line.
- Transfer the skillet to a 400°F (200°C) oven for 10-15 minutes. This finishing step ensures the meat is cooked through while the dry heat of the oven maintains the “shatteringly crisp” texture of the skin seen in the image.
- Spread the fluffy couscous on a large platter. Arrange the chicken thighs on top, then spoon the glazed apricots, olives, and onions around them. Garnish with fresh thyme sprigs and mint leaves.
Notes
- Starting with a cold pan is the secret to rendering fat slowly for maximum crunch. Ensure the skin stays above the liquid line during the final bake to prevent it from becoming soggy.