Mastering Crispy Golden Potato Cakes with the Anti-Soggy Method
Imagine biting through a shatteringly crisp, golden-brown crust into a center so creamy it practically melts on your tongue. That contrast is the hallmark of a perfect potato cake, yet so many home versions end up as sad, oil-soaked discs that fall apart before they even reach the plate. It’s frustrating to put in the effort only to serve something mushy.
The “Anti-Soggy” philosophy changes the game by focusing on moisture control and structural integrity. Instead of fighting against the potato’s natural starch, we use it to our advantage. By mastering the panko-to-heat ratio and a specific chilling technique, you can create a restaurant-quality side dish that stands up to a heavy pour of savory gravy without losing its crunch.
The real secret to this recipe’s success is the double-chill method. Most people try to fry potato cakes while the mash is still slightly warm or at room temperature, which causes the fats to liquefy and the cake to disintegrate. A quick 15-minute flash freeze locks the shape in place, ensuring your cakes stay tall and proud in the skillet.
The Science of Starch: Why Cold Potatoes Matter
When potatoes cook and then cool, the starches undergo a process called retrogradation. This essentially means the starch molecules realign into a more rigid structure. Using cold mashed potatoes isn’t just a way to use leftovers; it’s a chemical necessity for a cake that doesn’t turn into a puddle of grease.
Warm mashed potatoes are full of active moisture and loose starches that act like a liquid. Once chilled, those same potatoes become a workable “dough.” Russet potatoes are the gold standard here because their high starch content creates a fluffier interior, while Yukon Golds offer a buttery flavor but require a bit more care to keep from becoming gummy.
Stiff vs. Runny: Achieving the Ideal Base
The ideal base for these cakes is a stiff, almost dry mashed potato. If your initial mash was loaded with heavy cream or extra milk, you might find the mixture too soft to hold a shape. You want a consistency that feels like damp clay rather than a smooth puree.
If you find your potatoes are a bit too runny, don’t panic. You can fold in a tablespoon or two of instant potato flakes or a little extra flour to soak up that excess moisture. However, the best approach is starting with potatoes that were steamed or boiled in their skins to keep the water out of the flesh from the start.
Essential Components for Crispy Golden Potato Cakes
Quality ingredients make a massive difference when the list is this short. Sharp white cheddar is a fantastic choice because it has a high melting point and a punchy flavor that cuts through the richness of the potato. It acts as an internal glue, binding the mash together as it warms through in the pan.
Using garlic and onion powders instead of fresh aromatics is a deliberate choice for texture. Fresh onions release water as they cook, which can create steam pockets inside your potato cake. The powders provide that savory, umami depth without introducing any unwanted moisture that might compromise the crust.
The Panko Advantage: Texture Over Traditional Crumbs
Standard breadcrumbs are often too fine, creating a dense, sandy coating that absorbs oil like a sponge. Panko, however, consists of larger, jagged flakes. These flakes create more surface area and tiny air pockets, which results in a lighter, crunchier exterior that stays crisp even under a blanket of gravy.
If you enjoy this method for achieving a crispy crust, try it on these loaded chicken club baked potatoes for a similar crunch.
All-purpose flour serves as the essential “primer” for this process. It dries the surface of the potato disc so the egg wash has something to cling to. Without that initial dusting of flour, the egg wash would simply slide off the smooth potato, leaving bald spots where the panko won’t stick.
The Double-Chill Secret for Structural Integrity
The 15-minute flash-freeze step is the bridge between a failed recipe and a masterpiece. When you place the shaped discs in the freezer, you are rapidly firming up the cheese and any residual butter within the mash. This creates a “thermal delay” when the cake hits the hot oil.
This delay allows the outside panko crust to brown and harden before the inside gets hot enough to soften and expand. If you skip this, the internal fats melt too quickly, the steam pressure builds up, and the cake will likely blow out the sides or flatten into a pancake. Patience in the freezer pays off in the pan.
Step-by-Step: Constructing the Perfect Potato Disc
When mixing your ingredients, use a light hand. You want to fold the cheese and spices into the potatoes until just combined. If you overwork the mixture, the starches will break down and become gluey, resulting in a heavy, dense cake rather than a light and fluffy one.
Aim for a thickness of exactly one inch. This height is the “sweet spot” for frying. It’s thick enough to maintain a creamy center that doesn’t overcook, but thin enough that the heat can penetrate to the middle by the time the outside is perfectly golden. Use a measuring tape if you have to; consistency is key for even cooking.
Setting Up a Professional Dredging Station
To keep things efficient, use the “dry hand/wet hand” method. Use your left hand for the flour and panko (dry) and your right hand for the egg wash (wet). This prevents your fingers from becoming breaded along with the potatoes, which keeps the coating on the cakes even and professional-looking.
When you get to the panko stage, don’t just toss the cake in the crumbs. Press the panko firmly into the egg-coated surface. You want to see a thick, rugged layer of crumbs. This creates a physical moisture barrier that protects the delicate potato interior from the direct heat of the oil.
Precision Frying: Temperature and Oil Management
Success in frying is all about thermodynamics. You need about 1/4 inch of vegetable oil heated to 350°F. If you don’t have a thermometer, look for the oil to shimmer and dance. Drop a single panko crumb in; if it sizzles vigorously immediately, you’re ready to go.
Never crowd the pan. Adding too many cold potato cakes at once will cause the oil temperature to plummet. When the oil is too cool, it soaks into the breading instead of searing it, leading to a greasy mess. Fry only two or three at a time so the oil stays hot and the crust sears instantly.
If you enjoy using fresh herbs like chives in your cooking, you might also like this cheesy beef sweet potato casserole.
The Wire Rack vs. Paper Towel Debate
Most people instinctively reach for paper towels to drain fried foods, but that’s a mistake here. When a hot potato cake sits on a flat paper towel, the steam escaping from the bottom has nowhere to go. It gets trapped against the crust, turning your crispy bottom soggy in seconds.
Instead, use a wire cooling rack set over a baking sheet. This allows air to circulate 360 degrees around the cake. The excess oil still drips away, but the bottom stays just as crunchy as the top. This is the only way to maintain that “shatter” texture while you finish the rest of the batches.
Troubleshooting Common Frying Failures
If your cakes are browning too fast, your oil is likely too hot or your mash has a high sugar content. Slide the pan off the heat for a minute to let the temperature stabilize. If the cakes are falling apart, it usually means they weren’t chilled long enough or the oil wasn’t hot enough to set the crust quickly.
For an oily finish, the culprit is almost always low oil temperature. If you notice the oil isn’t bubbling actively around the edges of the cake, pull it out and wait for the oil to reach a shimmer again. You can often “save” a slightly soft cake by giving it an extra minute on the wire rack to firm up.
Flavor Variations and Ingredient Swaps
Once you master the base technique, you can get creative with the flavors. Adding a teaspoon of smoked paprika gives the cakes a beautiful copper hue and a hint of campfire depth. If you like heat, finely diced jalapeños work wonders, provided you pat them dry first to remove excess moisture.
You can also swap the parsley for fresh chives or green onions for a sharper, more onion-forward profile. Just remember the golden rule: any addition must be relatively dry. Avoid adding wet ingredients like salsa or sour cream directly into the potato mixture, as they will ruin the structural integrity.
Vegetarian Gravy Alternatives
A rich mushroom gravy is the perfect partner for these cakes. To get that deep, savory flavor, sauté finely chopped cremini or shiitake mushrooms until they are dark brown and have released all their liquid. This “fond” at the bottom of the pan is where the magic happens.
Deglaze the pan with a little vegetable stock and whisk in a roux made of butter and flour. Simmer until it’s thick enough to coat the back of a spoon. The earthy, umami notes of the mushrooms mimic the richness of a meat-based gravy perfectly, providing a luxurious finish to the crispy cakes.
What to Serve with Crispy Golden Potato Cakes
Because these cakes are rich and savory, they pair beautifully with something bright and acidic. A simple arugula salad tossed in a sharp lemon vinaigrette provides a necessary palate cleanser. The peppery greens cut through the fried exterior and the creamy potato center.
What to Serve with Potato Cakes
These crispy potato cakes pair well with a cool, creamy side and something soft to soak up any extra bits. Here are two recipes that round out the meal nicely.
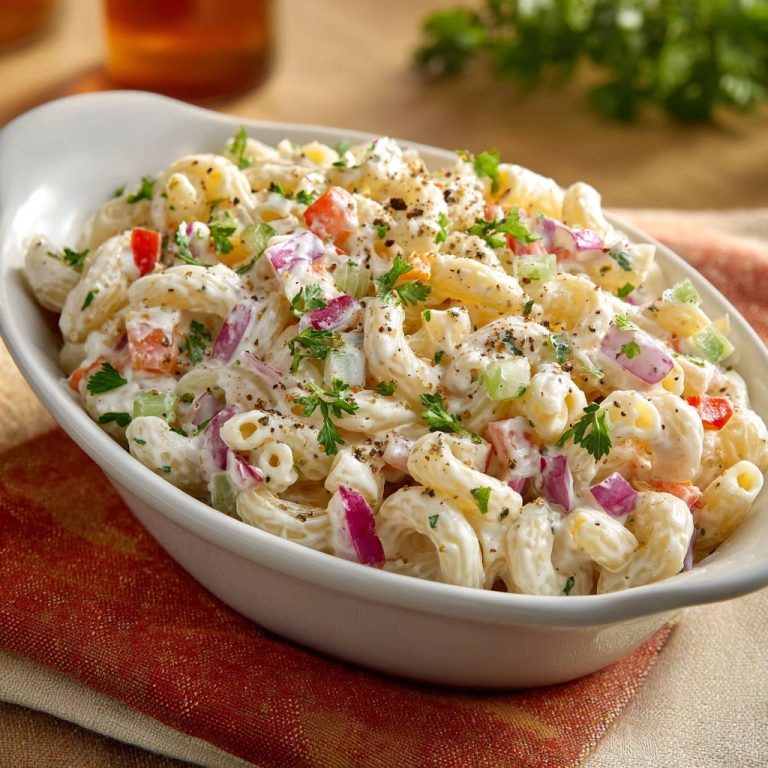
- A creamy Southern-style potato salad adds a cool, tangy contrast to the hot, crunchy cakes.
- Warm soft buttery garlic herb dinner rolls are perfect for pulling apart and pairing with each bite of potato cake.
Pickled red onions or a side of steamed green beans with a splash of vinegar also work well. You want something that offers a “snap” to contrast the soft texture of the gravy-soaked potatoes. Avoid serving them with other heavy, starchy sides like pasta or bread, as the potato cakes are the undisputed star of the plate.
Make-Ahead Strategies and Storage Logistics
You can easily prep these cakes up to 24 hours in advance. After breading them, store them in a single layer on a parchment-lined tray in the fridge. This actually helps the breading adhere even better. When you’re ready to eat, just take them straight from the fridge to the hot oil.
If you have leftovers, avoid the microwave at all costs; it will turn the crust into a rubbery skin. Instead, use an air fryer at 375°F for about 3-5 minutes, or a toaster oven. This dry heat reactivates the oils in the panko and restores that original crunch almost perfectly.
Expert Tips for the Ultimate Presentation
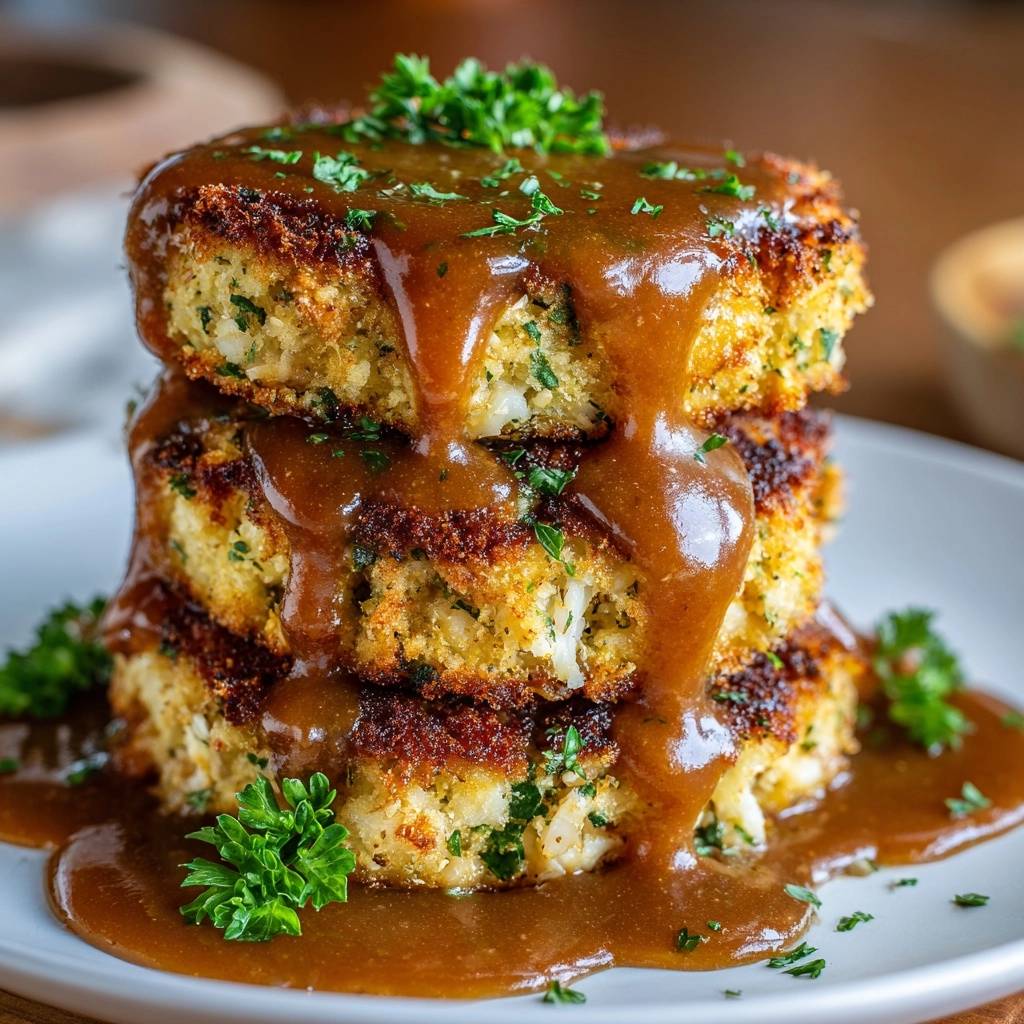
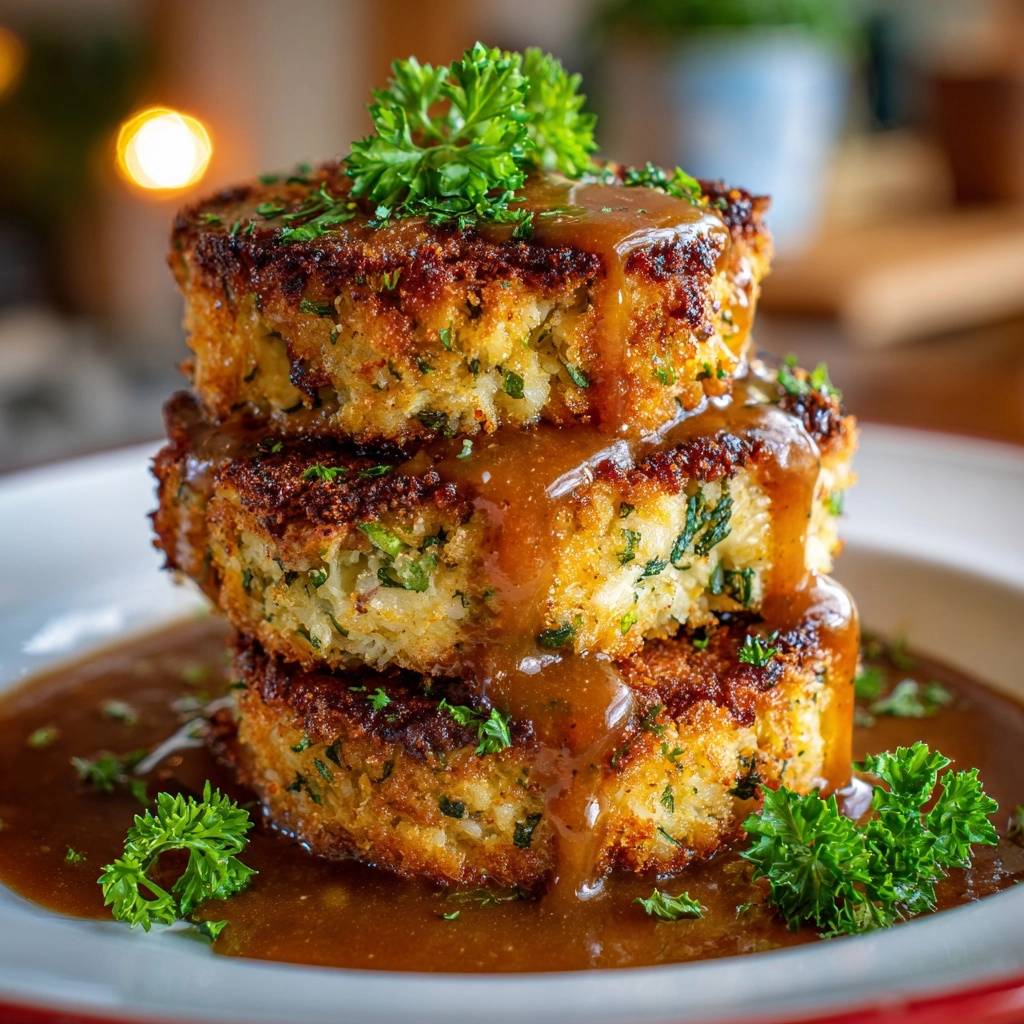
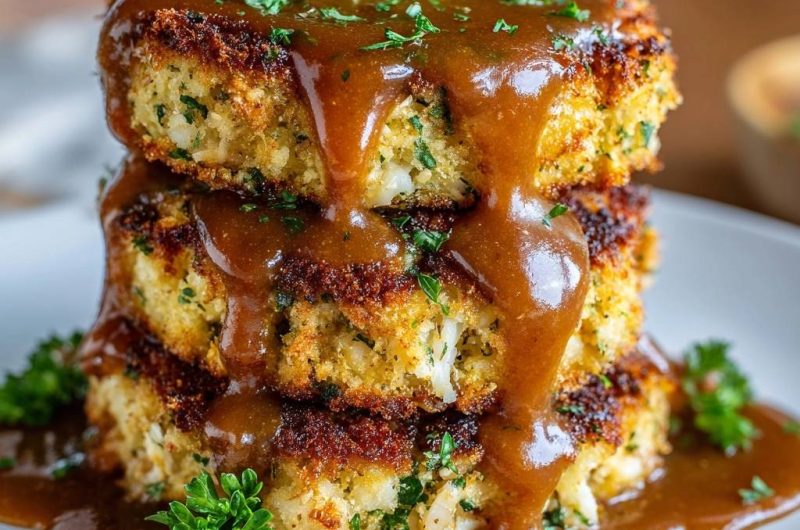
For a “Skyscraper” stack that looks like it came from a high-end bistro, stack three cakes vertically in the center of the plate. Make sure they are stable before you even touch the gravy. This height creates an immediate visual “wow” factor for your guests.
When pouring the gravy, aim for the very center of the top cake. Let it cascade naturally down the sides like lava. This leaves the very edges of the bottom cakes exposed and crispy while the centers get infused with flavor. A final sprinkle of fresh parsley adds a pop of green that makes the golden-brown colors sing.
Frequently Asked Questions
Can I use leftover store-bought mashed potatoes?
Yes, you can use store-bought mashed potatoes, but you must ensure they are cold and stiff. Many store-bought versions are whipped with extra liquid to make them creamy, which can make them difficult to fry. If they seem too soft, fold in a little flour or some extra shredded cheese to help bind them before shaping.
What is the best oil for high-heat frying?
Vegetable oil, canola oil, or grapeseed oil are the best choices for this recipe. They have high smoke points, meaning they won’t burn or develop a bitter taste at the 350°F required for a perfect sear. Avoid using butter for the frying process as the milk solids will burn long before the potato cake is crispy.
Can these be made in an air fryer?
You can make these in an air fryer, though the texture will be slightly different. Spritz the breaded cakes generously with oil spray on all sides. Air fry at 400°F for about 10-12 minutes, flipping halfway through. They will be crunchy, but they won’t have quite the same deep-fried richness as the skillet method.
Why did my cheese leak out during frying?
Cheese usually leaks out if the oil temperature is too low or if the cakes weren’t chilled properly. If the oil is cool, the cake sits in the pan too long, allowing the cheese to melt and find its way through the breading before the crust has set. Ensure your oil is shimmering and your cakes are cold when they hit the pan.
How do I keep them warm while cooking for a large group?
The best way to keep a large batch warm is to place the wire rack (with the finished cakes) into a 200°F oven. The low heat will keep the interiors hot without overcooking the crust. The air circulation from the wire rack is vital here; never stack them or put them in a covered dish, or the steam will ruin the crunch.
Potato Cakes
Course: Main CourseCuisine: AmericanDifficulty: easy4
servings15
minutes20
minutes450
kcal35
MinutesA foolproof method for creating potato cakes that avoid the common pitfall of sogginess. By using cold mashed potatoes and a quick freeze before frying, these cakes achieve a perfect golden exterior and a fluffy, cheesy interior.
Ingredients
3 cups cold mashed potatoes (stiff, not runny)
1 cup shredded white cheddar or mozzarella
1/2 cup fresh parsley, finely chopped (divided: half for the mix, half for garnish)
1/2 teaspoon garlic powder
1/2 teaspoon onion powder
Salt and black pepper to taste
2 large eggs, beaten
1.5 cups Panko breadcrumbs
1/2 cup all-purpose flour
Vegetable oil for shallow frying
2 cups thick beef or mushroom gravy (for serving)
Directions
- In a large bowl, combine the cold mashed potatoes, shredded cheese, 1/4 cup of the chopped parsley, garlic powder, onion powder, salt, and pepper. Mix until just combined. Do not overwork the potatoes or they will become gummy.
- Shape the mixture into thick, even discs (about 1 inch thick). Place these on a parchment-lined tray and freeze for 15 minutes. This is the critical step to firm up the fats and prevent them from falling apart in the pan.
- Set up a breading station with three shallow bowls: one with flour, one with beaten eggs, and one with Panko breadcrumbs.
- Dredge each chilled potato cake in flour, dip in the egg wash, and then press firmly into the Panko breadcrumbs. Ensure every surface is fully coated to create a moisture barrier.
- Heat 1/4 inch of oil in a heavy skillet over medium-high heat. The oil must be shimmering (approx. 350°F) before you start. If the oil is too cool, the breading will absorb the grease and become soggy.
- Fry the cakes for 3 to 4 minutes per side until deep golden brown and the crust is hard to the touch. Work in batches to avoid crowding the pan, which drops the oil temperature.
- Drain the cakes on a wire rack rather than paper towels. Air circulation is the secret to keeping the bottoms crispy while you heat the gravy.
- Stack the cakes in a tower of three and pour the hot, thick gravy over the top so it cascades down the sides. Garnish immediately with the remaining fresh parsley and serve while the crust is at its peak crunch.
Notes
- The critical step is the 15-minute freeze to firm up the fats. Always drain on a wire rack instead of paper towels to maintain air circulation and prevent a soggy bottom.