Mastering Southern Style Sauteed Collard Greens Without the Bitterness
For generations, the standard for Southern greens involved a heavy pot, a ham hock, and about four hours of boiling. While that traditional method has its place, it often results in a mushy, gray pile of vegetables that have lost their nutritional punch. If you’ve ever avoided collards because of that lingering bitter aftertaste or a texture that feels like chewing on wet paper, it’s time to rethink your approach.
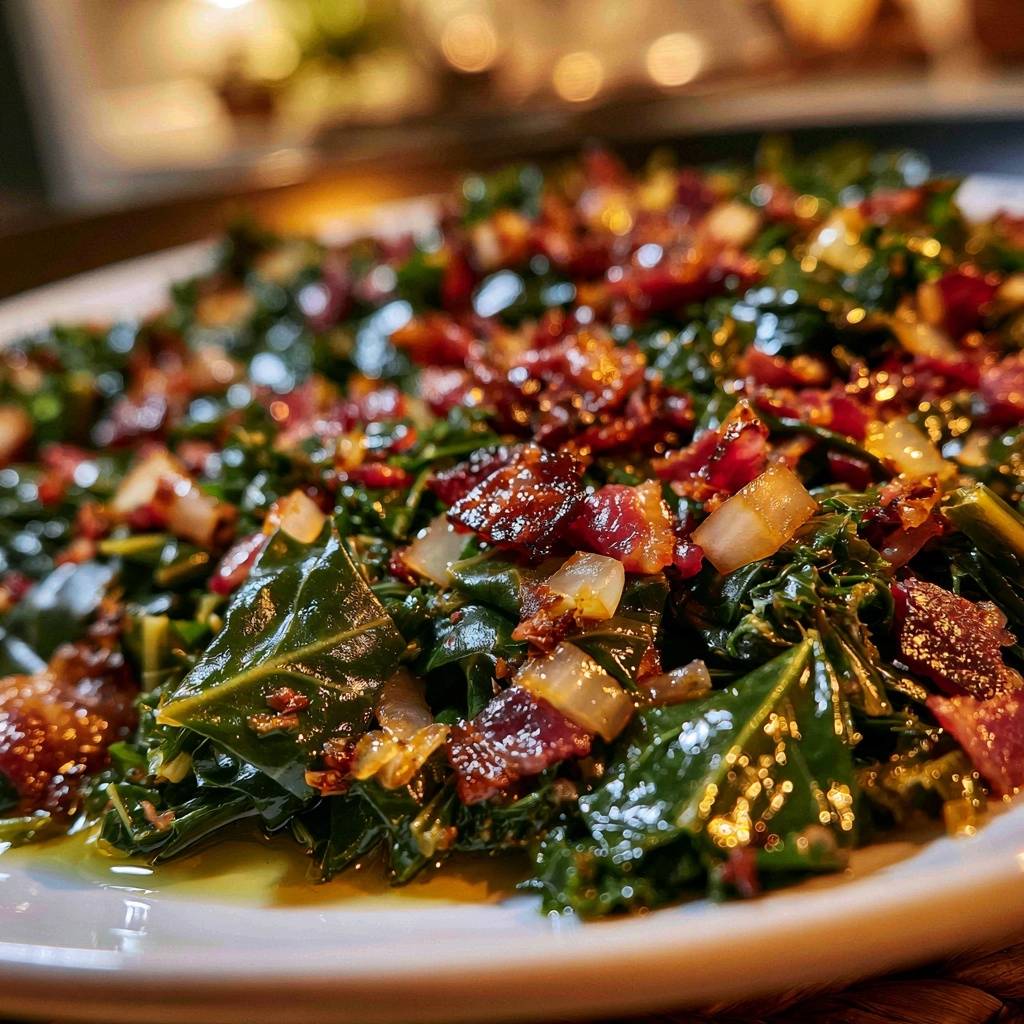
Southern Style Sauteed Collard Greens offer a modern, vibrant alternative that respects the roots of the dish while prioritizing texture and color. By shifting from a long boil to a quick sauté and steam, you preserve the bright chlorophyll and the structural integrity of the leaf. You get all that deep, smoky flavor in a fraction of the time, making this a viable weeknight side rather than just a holiday project.
The real secret to success here isn’t just the heat; it’s the chemistry of the pan. Most people fail because they don’t address the alkaline nature of the greens, which is where that sharp bitterness lives. I’ve found that creating a quick vinegar and sugar glaze before the greens even hit the pan neutralizes those harsh notes instantly. This technique ensures every bite is balanced, savory, and tender in under thirty minutes.
The Anatomy of Fresh Collard Greens
Success starts at the grocery store or farmer’s market. When you’re hunting for the perfect bunch, look for leaves that are deep, dark green and feel firm to the touch. If the edges are yellowing or the leaves feel limp and waxy, they’re past their prime and will likely be excessively tough.
Smaller, younger leaves are generally more tender and carry a milder flavor profile. If you can find “baby” collards, you’re in for a treat, but standard large leaves work perfectly if you handle them correctly. Interestingly, collards harvested after the first frost of the season are often the sweetest because the cold temperatures trigger the plant to convert starches into sugars.
Avoid bunches with large holes or significant bruising. While a few small nicks won’t hurt, you want leaves that can stand up to a vigorous wash and a quick sauté. Remember, the fresher the green, the less time it needs to spend under a lid to become tender.
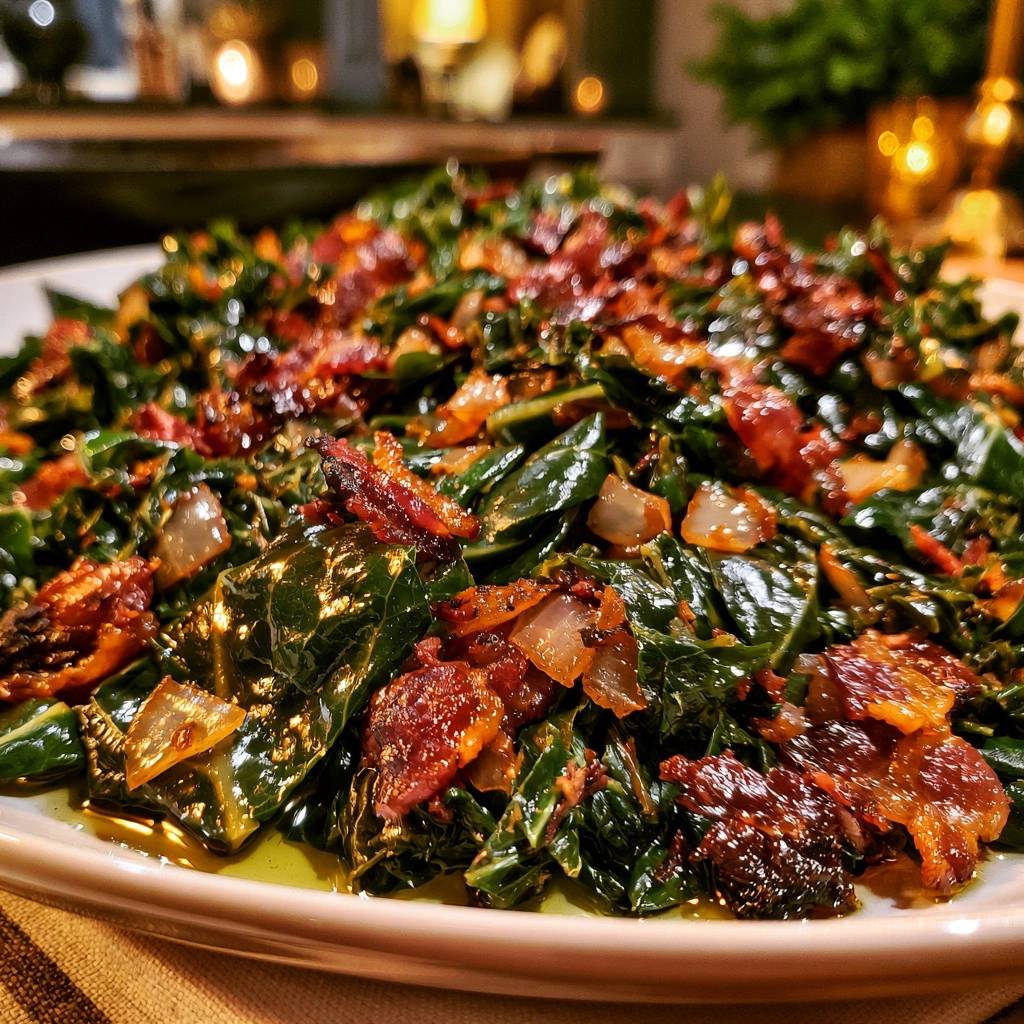
Essential Prep: Stemming and Cleaning Techniques
You must remove the woody central rib from each leaf. That thick stem will never soften at the same rate as the leafy greens, and leaving it in results in unpleasant, fibrous chunks in your finished dish. The easiest way is to fold the leaf in half along the rib and either tear the leaf away or use a sharp knife to slice down the side of the stem.
Once stemmed, stack several leaves on top of each other and roll them tightly like a cigar. Slice across the roll into one-inch strips, a technique known as a chiffonade. This creates uniform pieces that cook evenly and are easy to eat. Don’t cut them too small, or they’ll disappear into the pan; one-inch pieces are the sweet spot for texture.
Cleaning is the most critical safety step. Collards grow in sandy soil, and their crinkled texture is a magnet for grit. Submerge your chopped greens in a large bowl of cold water and swish them around vigorously. Let them sit for a minute so the dirt sinks to the bottom, then lift the greens out. Repeat this process three times until the water at the bottom of the bowl is crystal clear.
Pantry Staples for Southern Style Sauteed Collard Greens
The ingredient list for this dish is short, so quality matters. Thick-cut bacon is the preferred choice here because it provides a significant amount of rendered fat. That fat is the primary cooking medium and carries the smoky essence throughout the entire batch of greens. If you use thin bacon, you might find yourself needing to add extra oil just to coat the leaves.
Apple cider vinegar and a pinch of sugar are non-negotiable. The vinegar provides the acidity needed to cut through the richness of the bacon fat and brighten the earthy flavor of the greens. The sugar isn’t there to make the dish sweet; it acts as a buffer against the natural bitterness of the brassica family. Together, they create a balanced flavor profile that tastes complex and professional.
When it comes to the liquid, a high-quality chicken broth adds more depth than plain water. Look for a low-sodium version so you can control the final seasoning yourself. As the broth reduces during the steaming phase, the salt concentrates, so starting with a lower base prevents the dish from becoming a salt bomb.
The Role of Aromatics and Heat
Yellow onions are the workhorse of this recipe. They have a higher sugar content than white onions, which means they caramelize beautifully in the bacon fat. This caramelization adds a layer of sweetness that further masks any bitter notes in the greens. Make sure to dice them finely so they distribute evenly.
Garlic adds that essential savory punch, but it’s delicate. If you mince it too early and let it sit, or if you burn it in the pan, it becomes incredibly bitter. Always add your garlic during the last minute of sautéing the onions. You only want to cook it until it smells fragrant, which usually takes about sixty seconds.
Red pepper flakes provide a “back-end” heat that wakes up the palate. By adding them to the hot fat along with the garlic, you “bloom” the spice. This process releases the fat-soluble capsaicin, ensuring the heat is evenly distributed throughout the entire dish rather than hitting you in one spicy clump.
Phase One: Rendering Fat and Building the Flavor Base
Start your bacon in a cold skillet. This might feel counterintuitive, but starting cold allows the fat to render out slowly as the pan heats up. If you drop bacon into a screaming hot pan, the outside sears and toughens before the fat has a chance to melt away. You want that liquid gold to be the foundation of your sauté.
Once the bacon is crispy, remove the bits but leave the fat. This is where the Maillard reaction happens. Toss in your onions and let them cook until the edges turn a deep golden brown. This isn’t just about softening them; you’re developing a savory base that will coat every single leaf of the collards.
Keep the heat at a steady medium. If the fat starts to smoke, turn it down. You want a gentle sizzle that coaxes the flavor out of the aromatics without scorching them. The smell in your kitchen at this stage should be heavenly—smoky, sweet, and savory.
Phase Two: The Acid-Sugar Glaze Technique
This is the “secret sauce” moment that separates amateur greens from the best you’ve ever had. Before the greens go in, stir the sugar and apple cider vinegar directly into the hot bacon fat and onions. The vinegar will sizzle and deglaze the pan, lifting up all those browned bits of bacon and onion stuck to the bottom.
This creates a concentrated glaze. By doing this before adding the greens, you ensure that the acid and sugar are perfectly emulsified with the fat. When you finally toss the leaves in, they are immediately coated in this neutralizing mixture. It attacks the bitterness on contact rather than trying to fix it at the end of the cooking process.
Let the mixture bubble for about thirty seconds. You’ll notice the sharp scent of vinegar mellows out as it reduces slightly. This creates a sophisticated flavor profile where the acidity is present but not overwhelming. It’s the bridge between the heavy fat and the earthy vegetables.
Phase Three: Sautéing and Steaming for Perfect Texture
Turn the heat up to medium-high before adding the greens. You’ll likely need to add them in batches, as raw collards take up a lot of volume. Use tongs to toss them vigorously. The goal here is to “sear” the leaves slightly and ensure every square inch is glistening with the bacon fat and vinegar glaze.
Once the greens have wilted down and turned a stunning, vibrant green, pour in the chicken broth. Immediately clap a lid on the pan. This transition from sautéing to steaming is what makes the greens tender without making them mushy. The steam breaks down the tough cellulose in the leaves while the short cook time keeps the color bright.
Eight to ten minutes is the magic window. If you go much longer, the greens will start to turn that olive-drab color. If you go shorter, they might still be a bit too chewy. After the time is up, remove the lid and sauté for another two minutes to let the remaining liquid evaporate into a thick, glossy sauce.
Achieving the Signature High-Shine Finish
The final touch that makes these greens look like they came from a high-end bistro is the finishing oil. Even though we used bacon fat, a final drizzle of extra virgin olive oil adds a fresh, peppery note and a beautiful sheen. It creates a light emulsion with the tiny bit of broth left in the pan.
Toss the greens one last time to distribute the oil. You’ll see them transform from matte to glossy right before your eyes. This isn’t just for looks; the oil improves the mouthfeel, making the greens feel silky rather than dry. It also helps the salt and pepper stick to the leaves.
Finally, stir those crispy bacon bits back in. Adding them at the very end ensures they stay crunchy, providing a fantastic textural contrast to the tender greens. Season with a final pinch of salt and a generous amount of cracked black pepper. Serve them hot, straight from the skillet.
Troubleshooting Common Collard Green Issues
If your greens are still too tough after the steaming phase, don’t panic. This usually happens with older, larger leaves. Simply add another two tablespoons of broth, put the lid back on, and steam for another three to five minutes. The extra moisture and time will eventually win the battle against the fiber.
If you find the vinegar flavor is too sharp or “tinny,” you can balance it by adding a tiny bit more sugar or a knob of butter. The fat in the butter coats the tongue and mellows out the perception of acid. Conversely, if the dish feels too heavy or greasy, a tiny extra splash of vinegar at the very end can cut through that weight.
Over-salting is a common pitfall, especially since bacon and broth both contain sodium. If you’ve gone overboard, add a splash more water and a squeeze of fresh lemon juice. The acid helps mask the saltiness. Next time, remember to taste the greens *after* the broth has reduced before adding any extra salt.
Optimal Pairings for Southern Style Sauteed Collard Greens
These greens are a powerhouse side dish that pairs perfectly with heavy, comforting mains. A classic choice is crispy cornbread. The bread is perfect for soaking up the “pot liquor”—that flavorful liquid left at the bottom of the bowl. The sweetness of the corn also complements the smoky, savory greens.
For a full meal, serve these alongside smoked chicken or a roasted beef brisket. The acidity in the greens acts as a palate cleanser for rich, fatty meats. If you want a vegetarian-style spread (using the substitutions below), pair them with creamy stone-ground grits and a fried egg for a soul-satisfying breakfast or dinner.
Nutritionally, collards are a superstar. They are packed with Vitamin K, Vitamin A, and calcium. Pairing them with a healthy fat like the olive oil we used for finishing actually helps your body absorb those fat-soluble vitamins more efficiently. It’s a rare case where the “tasty” way to cook something is also the “smart” way.
Storage, Reheating, and Meal Prep Strategy
Collard greens are one of the few vegetables that actually taste better the next day. As they sit in the refrigerator, the flavors of the garlic, onion, and vinegar continue to penetrate the leaves. Store them in an airtight container for up to four days. They make an excellent addition to a lunch bowl with leftover rice and beans.
When reheating, avoid the microwave if possible, as it can make the greens rubbery. Instead, toss them back into a skillet over medium heat with a tiny splash of water or broth. Cover for a minute to let the steam revive them, then sauté briefly to restore the shine. This keeps the texture much closer to the original result.
Freezing is possible, but not ideal. The high water content in the leaves means they can become a bit watery upon thawing. If you must freeze them, squeeze out as much liquid as possible before bagging them. They will work best when stirred into a soup or stew later on rather than being served as a standalone side dish.
Expert Tips for Sautéing Leafy Greens
Why do my greens turn gray?
Greens turn gray primarily due to overcooking or a change in pH. Chlorophyll, the pigment that makes them green, reacts to long exposure to heat and acid. By limiting the steaming time to 10 minutes and sautéing quickly, you keep the pH balanced and the color vibrant. If you boil them for hours, the cells collapse and the color fades.
Can I substitute smoked turkey for bacon?
Yes, smoked turkey wings or drumsticks are a popular alternative. However, turkey is much leaner than bacon. You will need to add about two tablespoons of oil or butter to the pan to make up for the lack of rendered fat. Sauté the turkey pieces with the onions to release as much smoky flavor as possible before adding the greens.
Is there a vegetarian alternative for the smoky flavor?
To get that signature Southern smoke without meat, use a combination of smoked paprika and a drop of liquid smoke. Sauté your onions in a generous amount of olive oil or butter, then stir in a half-teaspoon of smoked paprika. This provides the depth and color you’d usually get from bacon fat without using animal products.
How do I scale this recipe for a large crowd without crowding the pan?
If you are doubling the recipe, use a very large Dutch oven instead of a skillet. The high sides allow you to toss a massive volume of raw greens more easily. The most important thing is to not skimp on the “batch” adding process. If you cram too many raw greens in at once, they will boil in their own moisture rather than sautéing, which ruins the texture.
Can I use kale or mustard greens with this same method?
Absolutely. This method works beautifully for almost any hearty, fibrous green. Kale will cook slightly faster than collards, usually needing only 5-6 minutes of steaming. Mustard greens have a natural peppery bite that pairs exceptionally well with the sugar and vinegar glaze. You can even mix all three for a “mixed greens” pot that has a complex variety of textures.
How do I store leftovers and do they freeze well?
Store your sautéed greens in an airtight container in the refrigerator for up to 4 days. They actually improve in flavor after 24 hours as the aromatics meld. While you can freeze them for up to 3 months, the texture will soften significantly upon thawing. If you freeze them, they are best used as an ingredient in soups or omelets rather than a standalone side.
Why are my greens still tough after cooking?
Toughness usually stems from two things: not removing the woody center rib or using older, late-season leaves that have very thick cell walls. If your greens are still chewy after the initial steam, add 1/4 cup more broth and continue steaming for 5-minute increments. The extra moisture and heat will eventually break down the cellulose without turning the leaves to mush.
Can I substitute the apple cider vinegar?
If you don’t have apple cider vinegar, white distilled vinegar or red wine vinegar are the best substitutes. Avoid balsamic vinegar, as its heavy sweetness and dark color will muddy the flavor and appearance of the greens. The goal is a sharp, clean acidity to cut the fat, which white or red wine vinegar provides perfectly.
Southern Style Sauteed Collard Greens
Course: Side DishCuisine: AmericanDifficulty: easy4
servings10
minutes20
minutes30
Minutes195
kcalAmerican
Ingredients
2 large bunches of fresh collard greens, stems removed and leaves chopped into 1-inch pieces
6 slices of thick-cut bacon, diced
1 medium yellow onion, diced
3 cloves garlic, minced
1/2 teaspoon red pepper flakes
1 tablespoon apple cider vinegar
1 teaspoon sugar
1/4 cup chicken broth
2 tablespoons extra virgin olive oil (for finishing)
Salt and black pepper to taste
Directions
- Start by placing the diced bacon in a large, cold skillet or wide sauté pan. Turn the heat to medium and cook until the bacon is crispy and the fat has fully rendered.
- Use a slotted spoon to remove the crispy bacon bits and set them aside on a paper towel. Keep the rendered bacon fat in the pan.
- Add the diced onion to the skillet. Sauté for 5-6 minutes until the edges are golden brown and caramelized. Add the garlic and red pepper flakes, cooking for just 60 seconds until fragrant.
- To remove bitterness: Add the sugar and apple cider vinegar to the pan. Stir into the fat and onions for 30 seconds to create a light glaze. The acidity balances the alkaline bitterness of the greens.
- Increase heat to medium-high. Add the chopped collard greens to the pan in batches, tossing vigorously to coat every leaf in the bacon fat and vinegar glaze.
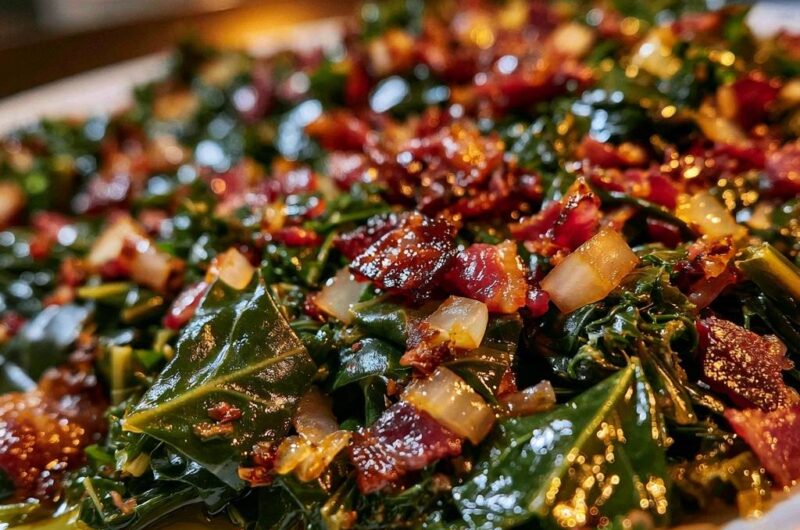
- Once the greens have wilted and turned a vibrant dark green, pour in the chicken broth. Immediately cover the pan with a tight-fitting lid and reduce heat to medium-low. Steam for 8 to 10 minutes. This softens the tough fibers while maintaining the structural integrity seen in the image.
- Remove the lid. Turn the heat back to medium-high and sauté for 2-3 minutes, stirring constantly, until the broth has mostly evaporated and the greens are glossy.
- Drizzle with the extra virgin olive oil and toss to create the high-shine finish shown in the photo.
- Stir the crispy bacon bits back in, season generously with salt and pepper, and serve immediately.
Notes
- The secret to removing bitterness is the combination of sugar and apple cider vinegar which balances the alkaline nature of the greens.