Mastering Cinnamon Sugar Donut Holes Without the Grease
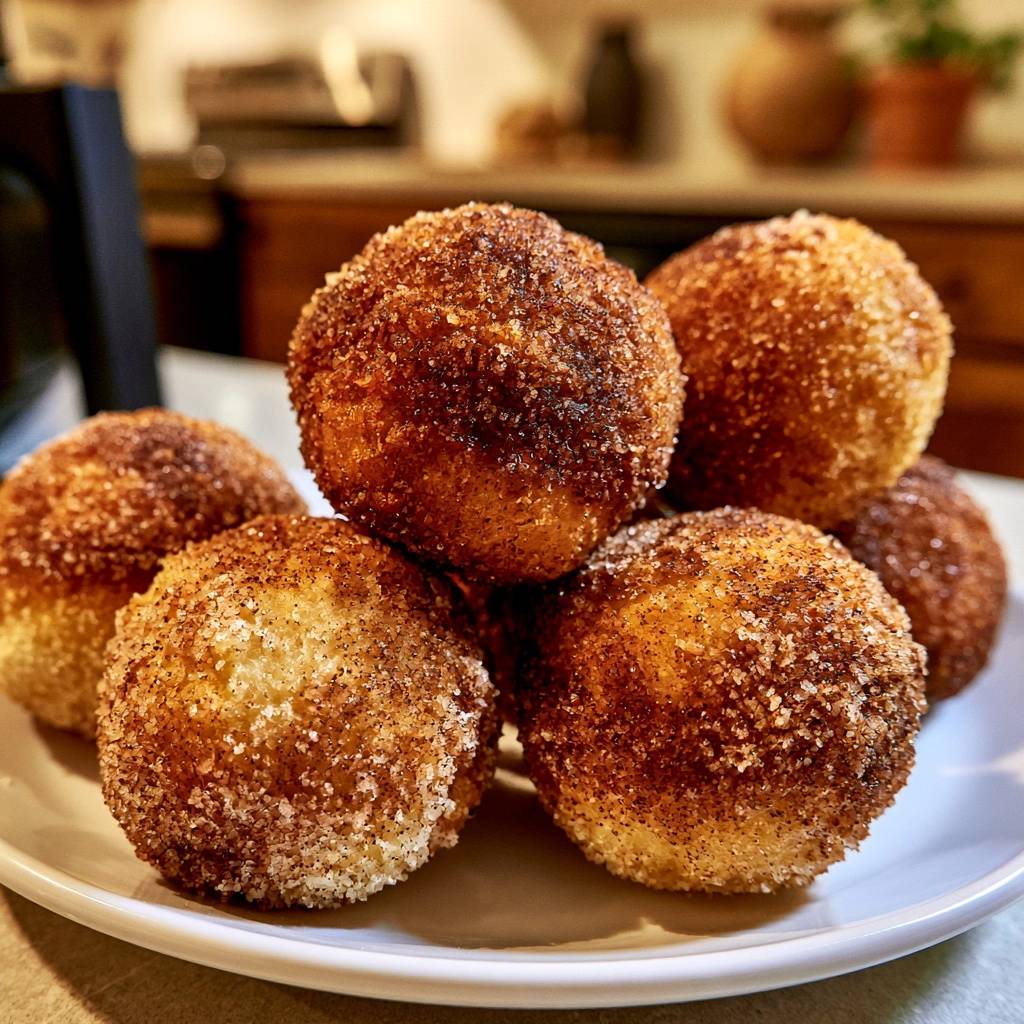
Imagine biting into a warm, golden sphere that shatters slightly under a thick crust of cinnamon sugar before giving way to a center as light as a cloud. There is a specific joy in a perfect donut hole, but most home cooks are haunted by the dreaded “soggy bottom.” You know the one—where the dough drinks up the frying oil, leaving you with a heavy, greasy lump that sits like a rock in your stomach.
The secret to avoiding this oily disaster isn’t just luck; it’s a specific temperature-shock method that seals the dough the second it hits the pot. By creating an immediate barrier, we trap the steam inside to cook the dough while keeping the fat out. This ensures your kitchen smells like a high-end bakery rather than a fast-food fryer, and every bite remains airy and crisp.
I’ve found that the real trick to professional results lies in the protein structure of your batter. While many recipes rely on a loose, pancake-like batter, this version uses a high-protein binder and a specific ratio of leavening to ensure the donut “inflates” instantly. This rapid expansion is what creates that sought-after craggy surface that grabs onto every grain of cinnamon sugar.
The Science of the Anti-Soggy Bottom Secret
Frying is essentially a high-speed moisture exchange. When you drop dough into hot oil, the water inside the batter turns into steam and pushes outward. This outward pressure is what prevents the oil from seeping into the center of your donut hole.
However, if your oil isn’t hot enough, that steam pressure is too weak. The oil wins the battle, soaking into the flour and creating a heavy, leaden texture. By maintaining a strict 350°F threshold, you trigger a “temperature shock” that flash-sears the exterior, creating a structural shell in seconds.
The high-protein binder, provided by the egg and all-purpose flour, acts as the scaffolding for this shell. It sets quickly under intense heat, holding the spherical shape while the baking powder works its magic inside. Without this structural integrity, the donut would simply collapse and absorb the surrounding fat.
Essential Components for Light and Airy Dough
Success starts with the right flour choice. While you might think cake flour would make a lighter donut, it actually lacks the strength to stand up to the bubbling oil. All-purpose flour provides just enough gluten to trap the air bubbles, ensuring your donut holes don’t deflate the moment you pull them out.
Don’t skip the nutmeg! It might seem like a minor addition, but nutmeg is the “secret” ingredient that gives these that classic, old-fashioned bakery flavor. It adds a warm, earthy depth that cuts through the sweetness of the sugar coating and makes the dough taste complex rather than just sugary.
Temperature management starts before you even turn on the stove. You must use room-temperature eggs and milk. If you pour melted butter into cold milk, the butter will seize into tiny, waxy clumps. Using room-temperature liquids ensures the butter stays emulsified, leading to a much smoother, more consistent crumb.
Why Baking Powder Beats Yeast for Speed
Yeast donuts are wonderful, but they require hours of proofing and a lot of patience. Baking powder, a chemical leavener, reacts the moment it hits the heat of the oil. This creates an instant “oven spring” effect in the fryer, making the donuts puff up into perfect rounds without the wait.
This immediate reaction is also why these donuts are so much lighter than their yeast-based cousins. Because the expansion happens so fast, the interior stays incredibly moist. You get all the lift of a traditional donut in a fraction of the time.
The Role of Fat in the Batter
We use a small amount of melted butter inside the dough to create “shortness.” In baking terms, fat coats the flour proteins and prevents them from forming long, tough gluten strands. This ensures that while the outside is crisp, the inside remains tender and easy to bite through.
This internal fat also helps the donut holes stay fresh longer. A lean dough dries out almost immediately, but the butter in this recipe keeps the interior soft for hours. It also adds a rich, creamy flavor that oil-based batters simply can’t match.
Step-by-Step: Mixing for Maximum Tenderness
Start by whisking your dry ingredients thoroughly to ensure the baking powder is evenly distributed. Then, create a “well” in the center of your flour mixture. This classic technique allows you to incorporate the liquids from the center outward, which minimizes the amount of stirring required.
When you add the wet ingredients, use a flexible spatula and stir until the flour just disappears. The dough should look thick, shaggy, and slightly tacky. If you keep stirring until it’s perfectly smooth, you’ll overwork the gluten, and your donuts will end up rubbery instead of tender.
Stop mixing the second you see no more white streaks of flour. It’s okay if there are a few small lumps in the batter. These lumps actually contribute to the craggy, rustic texture of the donut hole, providing more surface area for the cinnamon sugar to cling to later.
Precision Frying: Managing Oil Temperature and Batches
Choosing the right oil is vital for a clean flavor. You want a neutral oil with a high smoke point, like canola or vegetable oil. These oils can handle the 350°F heat without breaking down or adding an unpleasant “fried” aftertaste to your sweets.
The biggest mistake home cooks make is not using a thermometer. Oil temperature is dynamic; it drops the moment you add cold dough. You need to watch that dial and adjust your stove heat constantly to keep it in the 350°F to 360°F range. If it dips below 325°F, pull the donuts out—they are starting to soak up grease.
A heavy-bottomed pot, like a cast-iron Dutch oven, is your best friend here. The thick metal holds onto heat much better than a thin stainless steel pot. This means when you drop the dough in, the temperature won’t crash as severely, giving you a much more consistent fry across the whole batch.
The Dangers of Overcrowding the Pot
It is tempting to dump a dozen dough balls in at once to finish faster, but this is a recipe for soggy donuts. Each piece of dough acts like a little ice cube, sucking the heat out of the oil. If you add too many, the oil temperature will plummet, and the “Anti-Soggy” seal won’t form.
Stick to frying 5 or 6 donut holes at a time. This gives them plenty of room to bob around and expand without sticking to each other. It also allows you to keep a close eye on the browning process so nothing burns while you’re distracted.
Visual Cues for Perfect Donut Doneness
As the donuts fry, you’ll notice a fascinating “self-flipping” phenomenon. As the bottom side cooks and expands, the center of gravity shifts, and the donut will often roll over on its own. If they don’t, just give them a gentle nudge with a slotted spoon.
You are looking for a deep, mahogany golden brown. A pale donut is often undercooked in the center. The exterior should feel firm to the touch of your spoon, indicating that the crisp crust has fully developed and the interior is set.
The 30-Second Cooling Rule for Texture Control
Once you lift the donuts out of the oil, don’t put them directly onto a flat plate or a pile of paper towels. If you do, the steam escaping from the bottom of the donut will get trapped, turning the underside soggy within seconds. This is where most people lose that perfect crunch.
Instead, place them on a wire cooling rack set over a paper towel. This allows air to circulate around the entire donut. Let them sit for exactly 30 seconds. This brief window allows the internal steam to stabilize so the donut doesn’t collapse, but keeps it hot enough for the sugar to stick.
If you wait too long to coat them, the sugar will just fall off. If you do it too soon, the sugar will melt into a sticky syrup. That 30-second sweet spot is the key to a professional, crystalline finish that looks as good as it tastes.
Achieving the Signature Cinnamon Sugar Crust
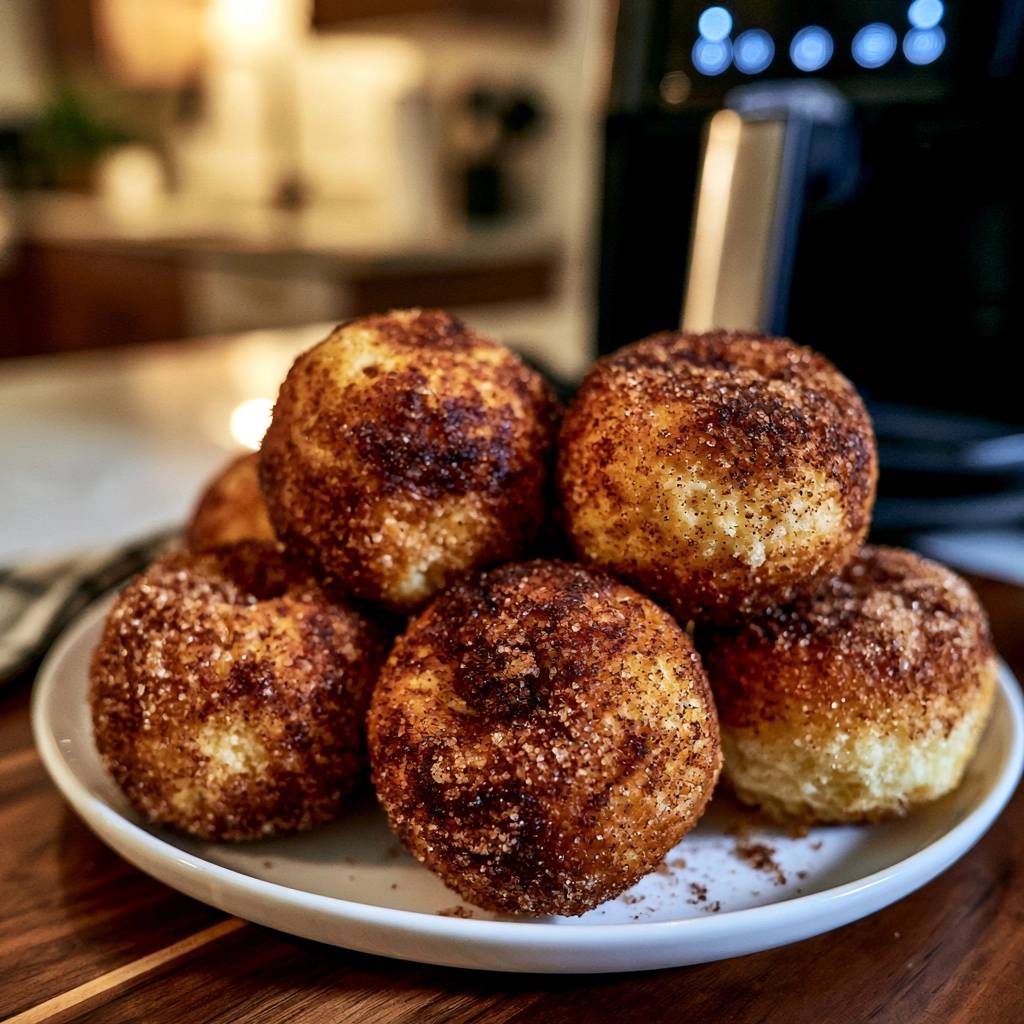
The classic coating is a simple mix of granulated sugar and ground cinnamon. I prefer a ratio of one tablespoon of cinnamon for every quarter-cup of sugar. This provides a dark, spicy contrast to the sweet dough that isn’t overwhelming.
For a light, everyday donut, a quick toss in a bowl of sugar is plenty. However, if you want that heavy, thick crust found in high-end bakeries, there is an extra step. Lightly brush the warm donut with a tiny bit of extra melted butter before rolling it in the sugar.
This butter acts as a “glue,” allowing a much thicker layer of cinnamon sugar to adhere to the surface. It creates a satisfying crunch that contrasts beautifully with the soft interior. Plus, the extra butter adds a hit of saltiness that makes the cinnamon flavor pop.
Troubleshooting Common Frying Failures
If your donuts are beautiful on the outside but raw in the middle, your oil is too hot. The exterior is browning before the heat has a chance to penetrate the center. Lower the heat and wait for the oil to return to 350°F before trying the next batch.
If the donuts are heavy and dripping with oil, your temperature was too low. This usually happens when the cook doesn’t wait for the oil to “recover” between batches. Always check your thermometer before dropping new dough into the pot.
Misshapen or “exploded” donuts usually come from a dough that is too wet or from dropping the dough from too high above the oil. Use a small cookie scoop for uniform spheres, and gently release the dough just an inch above the oil surface to maintain the round shape.
Equipment: Tools for Frying Success
You don’t need a dedicated deep fryer to make world-class donut holes. In fact, a heavy Dutch oven is often better because it offers more surface area and better heat retention. The depth of the pot also helps contain any oil splatters, keeping your stovetop cleaner.
A clip-on candy or fry thermometer is the most important tool in your arsenal. Guessing the oil temperature by looking at bubbles or using a wooden spoon is unreliable. For the “Anti-Soggy” method to work, you need the precision that only a thermometer can provide.
Finally, a small cookie scoop (about 1 tablespoon size) is the secret to professional-looking results. It ensures every donut hole is the exact same size, which means they will all cook at the same rate. This prevents the frustration of having some donuts burnt while others are still doughy.
Flavor Variations and Creative Coatings
Once you master the base recipe, you can get creative with the flavors. Instead of cinnamon, try mixing granulated sugar with freshly grated orange zest and a pinch of cardamom. This creates a bright, floral aroma that is incredibly refreshing.
If you prefer a glaze, whisk together powdered sugar, a splash of milk, and a bit of vanilla bean paste. Dip the warm donuts into the glaze and let them dry on a wire rack. The glaze will set into a thin, crackly shell that is reminiscent of a classic Krispy Kreme.
For a chocolate version, toss the warm donut holes in a mixture of cocoa powder and powdered sugar. The heat from the donut will slightly melt the cocoa, creating a rich, truffle-like coating that feels very indulgent without being overly sweet.
Make-Ahead Strategies and Storage Tips
Donut holes are undoubtedly best eaten within minutes of frying. However, you can make the process easier by prepping your dry mix days in advance. Store the flour, sugar, and spices in an airtight container so you only have to add the wet ingredients when the craving hits.
If you have leftovers, do not put them in the refrigerator, as the moisture will turn the sugar coating into a sticky mess. Store them in a ventilated container (like a cardboard box or a bowl with a loose lid) at room temperature for up to 24 hours.
To revive day-old donuts, pop them into an air fryer at 350°F for about 2 minutes. This will recrisp the exterior and warm the center without making them tough. You can also use a standard oven, but avoid the microwave, which will make the dough chewy and rubbery.
Expert Tips for Large Batch Entertaining
If you are making these for a crowd, you don’t want to be stuck at the stove while everyone else is eating. You can fry the donuts in advance and keep them warm in a 200°F oven. Place them on a wire rack over a baking sheet so the air continues to circulate.
Wait to do the final sugar coating until just before serving. This ensures the sugar stays crystalline and crunchy. You can even set up a “topping station” where guests can toss their own warm donuts in different flavored sugars or glazes.
When scaling the recipe up, remember that the oil will degrade over time. If you are making more than three batches, you might notice the oil getting darker or starting to smell. If this happens, carefully discard the old oil and start fresh to maintain that clean, buttery flavor.
Frequently Asked Questions
Can I bake these instead of frying?
You can bake this dough in a mini-muffin tin at 350°F for about 10-12 minutes, but the texture will be more like a muffin than a donut. Frying creates a specific “crust-to-crumb” ratio and a unique flavor that baking simply cannot replicate. If you do bake them, brush them generously with melted butter afterward so the cinnamon sugar has something to stick to.
What is the best oil for frying donuts?
Neutral oils with high smoke points are the gold standard. Canola oil, vegetable oil, or grapeseed oil are all excellent choices. They allow the flavor of the nutmeg and butter in the dough to shine through without adding any heavy or savory notes. Avoid olive oil or unrefined coconut oil, as their low smoke points will cause them to burn and taste bitter at 350°F.
Why did my donut holes crack open?
Cracking usually happens for two reasons: the dough was too dry or the oil was slightly too hot. If the exterior sets too quickly before the baking powder has finished expanding the center, the pressure will cause the crust to burst. Ensure your dough is tacky to the touch and keep your oil temperature steady at 350°F to allow for a controlled rise.
Can I use gluten-free flour?
Yes, you can substitute a high-quality 1-to-1 gluten-free flour blend that contains xanthan gum. Because gluten-free flour doesn’t develop the same elasticity, the donuts might be slightly more fragile while frying. Be extra gentle when flipping them and ensure the oil is at the correct temperature to help the structure set quickly.
How do I dispose of the frying oil safely?
Never pour used frying oil down the sink, as it will clog your pipes. Let the oil cool completely in the pot. Once cold, pour it into a non-recyclable container (like an old glass jar or a sturdy plastic bottle) and throw it in the trash. Many cities also have oil recycling centers where you can drop off large amounts of used cooking fat.

Cinnamon Sugar Donut Holes
Course: DessertCuisine: AmericanDifficulty: easy24
donut holes15
minutes10
minutes25
Minutes110
kcalAmerican
Ingredients
2 cups all-purpose flour
1/4 cup granulated sugar
1 tablespoon baking powder
1/2 teaspoon salt
1/2 teaspoon ground nutmeg
3/4 cup whole milk
1/4 cup unsalted butter, melted and slightly cooled
1 large egg, room temperature
Neutral oil for frying (Canola or Vegetable)
Coating:
1/2 cup granulated sugar
2 tablespoons ground cinnamon
2 tablespoons melted butter (optional, for extra adhesion)
Directions
- In a large bowl, whisk together the flour, sugar, baking powder, salt, and nutmeg until well combined.
- In a separate medium bowl, whisk the egg into the milk, then slowly whisk in the 1/4 cup melted butter. Using room temperature ingredients prevents the butter from seizing.
- Create a well in the dry ingredients and pour in the wet mixture. Stir with a spatula until just combined. The dough should be thick and slightly tacky. Do not overmix, or the donuts will become tough rather than airy.
- Fill a heavy-bottomed pot with at least 2-3 inches of oil. Heat over medium-high until a thermometer reads exactly 350°F (175°C). This temperature is the “Anti-Soggy” threshold; it flash-sears the exterior to prevent oil penetration.
- Using a small cookie scoop or two spoons, carefully drop rounded tablespoons of dough into the oil. Fry in batches of 5 or 6. Overcrowding the pot will drop the oil temperature, leading to grease absorption.
- Fry for about 2 minutes per side. The donuts will often flip themselves, but use a slotted spoon to ensure they are an even, deep golden brown on all sides.
- Remove the donut holes and place them on a wire rack set over a paper towel for exactly 30 seconds. This allows internal steam to escape without the bottom sitting in pooled oil.
- While still hot, toss the donut holes in the cinnamon-sugar mixture. For the heavy, crystalline crust shown in the image, lightly brush the holes with additional melted butter before rolling in the sugar. Serve immediately.
Notes
- To ensure the best results, maintain an oil temperature of exactly 350 degrees Fahrenheit and avoid overcrowding the pot. Use room temperature ingredients to prevent the melted butter from seizing in the batter.