Mastering the Cheesy Ground Beef and Rice Skillet
We’ve all been there before. You try to make a quick one-pan dinner and end up with a pot of gummy, overcooked rice that lacks any real texture. It’s frustrating when a “simple” meal turns into a mushy mess that feels more like porridge than a savory skillet. This recipe fixes that common heartbreak by focusing on a professional technique that prioritizes the integrity of every single grain.
The secret to this perfect skillet is all in the toast. By sautéing the dry rice in the beef drippings before adding any liquid, you create a protective barrier that ensures every grain stays fluffy and distinct. This isn’t just a dump-and-stir meal; it’s a technique-driven comfort dish that transforms basic pantry staples into a restaurant-quality experience. You’ll notice the difference the moment your fork hits the plate and finds tender, individual grains instead of a clump.
This same approach works perfectly for cheesy beef stuffed peppers, where the filling stays firm without any sogginess.
I’ve found that the most important step is resisting the urge to peek under the lid. When you lift that cover, you release the precise amount of steam required to finish the rice perfectly. Trust the process, keep the heat low, and let the residual heat do the heavy lifting. You’re going to love how the nutty aroma of toasted rice fills your kitchen before the cheese even hits the pan!
The Science of Preventing Mushy Rice
Understanding why rice turns to mush is the first step toward culinary mastery. Long-grain rice is high in amylose, a type of starch that helps grains stay separate and fluffy. However, if you simply boil the rice in liquid, the starch on the exterior of the grain hydrates and bursts, creating that sticky, tacky texture we want to avoid in a skillet meal.
To combat this, we use a process called dextrinization, or toasting the rice in fat. When you stir the dry grains into the rendered beef fat, the heat breaks down the surface starches and creates a physical, hydrophobic barrier. This prevents the rice from absorbing water too quickly and keeps the starch from leaking out into the sauce. Instead of a thick slurry, you get a clean, savory broth that absorbs into the grain rather than sitting on top of it.
Interestingly, you should skip the usual step of rinsing your rice for this specific method. While rinsing removes excess starch, we actually need the rice to be bone-dry so the beef fat can coat the surface effectively. If the rice is damp, it will steam rather than toast, defeating the purpose of the fat-coating technique. By starting with dry grains, you ensure that the beef flavor is locked directly into the structure of the rice.
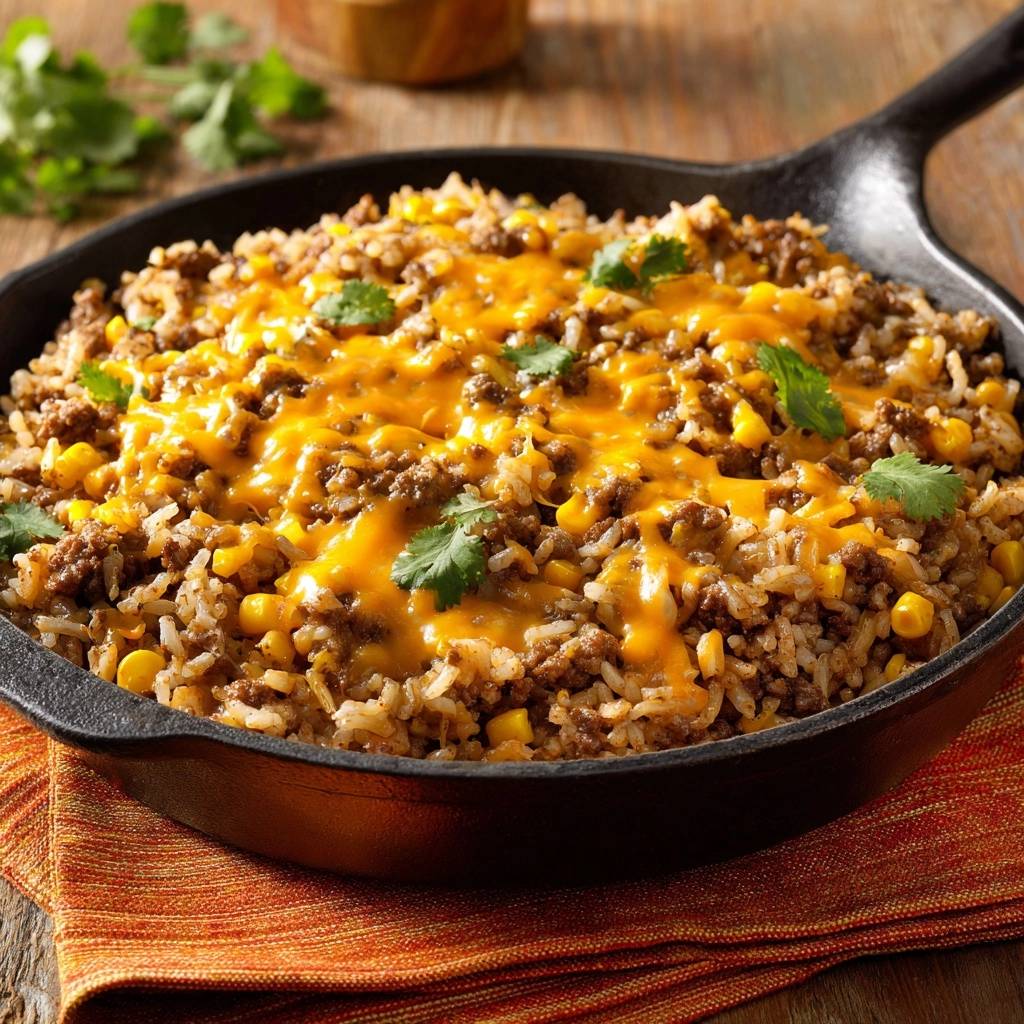
Essential Components for the Beef and Rice Skillet
The foundation of this dish is the ground beef, and the fat content is more important than you might think. I highly recommend using an 80/20 or 85/15 blend. While lean 93/7 beef is great for some recipes, it doesn’t provide enough rendered fat to properly toast the 1.5 cups of rice. That liquid gold in the bottom of the pan is what carries the flavor of the spices and protects the rice grains from becoming soggy.
For the rice itself, stick strictly to long-grain white varieties like Jasmine or Basmati. These varieties have the structural integrity to withstand a simmer without falling apart. Avoid short-grain rice or Arborio, which are designed to release starch and create a creamy, risotto-like consistency. In a beef skillet, we want the opposite of creamy rice; we want distinct grains that can hold up against the weight of the meat and corn.
When it comes to the liquid, beef broth is the way to go, but try to find a low-sodium version. This gives you total control over the salt levels. Since we are simmering the liquid down, the salt concentrates, and using a full-sodium broth can often result in a dish that’s unpleasantly salty by the time the rice is tender. Finally, please grate your own sharp cheddar from a block. Pre-shredded bags are coated in potato starch or cellulose to prevent clumping, which stops the cheese from melting into that silky, gooey blanket we’re looking for.
Phase 1: Rendering Fat and Developing Fond
Start by getting your skillet nice and hot over medium-high heat before the beef even touches the surface. As the beef cooks, don’t be in a rush to move it around. Let it sit for a minute or two to develop a deep, dark brown crust. This is the Maillard reaction in action, and it’s where the “meaty” flavor actually comes from. If the meat is just grey, you’re missing out on layers of taste.
As you break the beef into crumbles, you’ll notice brown bits sticking to the bottom of the pan. This is called “fond,” and it is a concentrated goldmine of flavor. Don’t worry about it burning; we will eventually deglaze the pan with the broth. For now, focus on getting the beef slightly crispy. That texture provides a wonderful contrast to the soft rice and tender corn later on.
Phase 2: The Toasting and Spicing Technique
Once the beef is browned, it’s time for the most critical part of the recipe. Add the dry rice directly to the pan with the beef and its rendered fat. Stir constantly for about 3 to 4 minutes. You’re looking for the rice to change from a translucent, glassy look to a solid, opaque white. You’ll know it’s ready when you smell a distinct, popcorn-like nuttiness wafting up from the skillet.
After the rice is toasted, add your chili powder, cumin, garlic powder, and onion powder. Toasting the spices in the fat for about 30 seconds is a technique called “blooming.” Many of the flavor compounds in these spices are fat-soluble, meaning they release much more punch when heated in oil than they do when just boiled in water. This step ensures the flavor is deep and integrated rather than just sitting on the surface.
Phase 3: The Absorption and Steaming Process
Pour in your beef broth and use your wooden spoon to scrape up all those delicious browned bits from the bottom of the pan. Once the liquid hits a rapid boil, turn the heat down to the lowest possible setting immediately. This transition is vital. If the heat stays too high, the liquid will evaporate before the rice has a chance to soften, leaving you with crunchy centers.
Cover the pan with a tight-fitting lid and walk away. Do not lift that lid! Every time you peek, you lose the pressure and steam that’s doing the hard work. After 18 to 20 minutes, turn off the heat but leave the lid on for another 5 minutes. This “carry-over cooking” allows the moisture to redistribute evenly. When you finally open it, use a fork to fluff the rice. A spoon can smash the grains, but a fork gently separates them, keeping the texture light and airy.
Troubleshooting Common Skillet Cooking Issues
If you find that your rice is still a bit crunchy after the timer goes off, don’t panic. Usually, this means your lid wasn’t tight enough or the heat was a fraction too low. Simply add two tablespoons of broth, put the lid back on, and let it sit on low heat for another 3 minutes. The residual steam is usually enough to finish the job without making the rest of the dish mushy.
On the flip side, if you notice a burnt smell, your heat was likely too high or your pan was too thin. Cast iron is great because it distributes heat evenly, but thin stainless steel can have “hot spots.” If the bottom is scorched, do not scrape it! Serve the top layers of the rice and beef, leaving the burnt bits behind so they don’t ruin the flavor of the entire meal. If the dish feels too oily, you can gently blot the surface with a paper towel before adding the cheese.
Flavor Variations and Regional Swaps
This skillet is a fantastic canvas for different flavors. For a Southwestern twist, stir in a can of rinsed black beans and a small can of diced green chiles when you add the corn. You can even top the finished dish with a dollop of sour cream and some sliced jalapeños for an extra kick. It’s a great way to bulk up the meal if you’re feeding a larger crowd.
If you want something a bit brighter, try a Mediterranean version. Swap the chili powder and cumin for dried oregano and lemon zest. Instead of cheddar, use crumbled feta cheese and stir in some fresh spinach at the very end until it wilts. You could also go for a “Stuffed Pepper” style by dicing up two large bell peppers and browning them right along with the beef. It adds a lovely sweetness and extra crunch to every bite.
Optimal Side Dishes for a Heavy Skillet Meal
Since this is a rich, cheesy, and savory meal, you want side dishes that offer a bit of acidity or crunch to balance the palate. A bright garden salad with a sharp vinaigrette works wonders here. The vinegar cuts right through the richness of the beef fat and cheddar cheese, making every bite of the skillet feel fresh again.
Another great option is a simple lime-dressed cabbage slaw. The crunch of the raw cabbage provides a nice textural contrast to the soft rice. If you’re in a hurry, even some quick pickled red onions or a few slices of fresh avocado can elevate the plate. These small additions make the meal feel complete and prevent it from feeling too heavy.
Storage, Reheating, and Meal Prep Strategy
Rice undergoes a process called retrogradation when it cools, which means the starches harden and the grains can become quite firm in the fridge. To reheat this skillet, place your portion in a bowl and add a tiny splash of water or beef broth. Cover it with a damp paper towel before microwaving. This creates a mini-steam chamber that softens the rice back to its original texture.
I don’t recommend freezing this specific dish. While the beef and cheese freeze fine, the rice and corn tend to lose their structural integrity once thawed. The rice can become grainy or overly soft, and the corn loses its “pop.” This meal is best enjoyed within three to four days of cooking, making it a perfect candidate for a few days of delicious work lunches.
Expert Tips for Skillet Success
For the best results, always use a heavy-bottomed pan like a cast-iron skillet or a tri-ply stainless steel pan. These hold heat much better and prevent the bottom of the rice from scorching while the top is still cooking. Also, make sure your corn is fully drained before adding it to the pan. Any extra liquid from the can will throw off your rice-to-broth ratio and could lead to the very mushiness we’re trying to avoid.
One final pro tip: try to use room temperature broth. If you pour ice-cold broth into a hot pan, it drops the temperature of the beef and rice instantly, which can lead to uneven cooking. Taking the broth out of the fridge 20 minutes before you start makes a noticeable difference in how quickly the pan returns to a boil.
Frequently Asked Questions
How do I store leftovers and how long do they last?
Store any leftovers in an airtight container in the refrigerator for up to 4 days. Because rice can harbor bacteria if left at room temperature for too long, make sure to get it into the fridge within an hour of cooking. When you’re ready to eat, follow the reheating tips above to ensure the rice stays moist and the cheese gets melty again.
Why is my rice still hard even after 20 minutes?
This usually happens if the lid isn’t sealing properly or if the heat was so low that the liquid never actually simmered. It can also happen if you used an older bag of rice, which sometimes requires a bit more moisture. To fix it, add 1/4 cup of warm broth, cover tightly, and simmer on low for an additional 5 minutes. The extra steam should soften the grains without turning them into mush.
Can I use brown rice instead of white rice?
You can, but you will need to adjust the liquid and the timing significantly. Brown rice requires about double the cooking time (usually 40 to 45 minutes) and more broth. If you use brown rice, I recommend browning the beef, removing it from the pan, and then cooking the rice separately in the broth before mixing everything back together at the end to prevent the beef from becoming overcooked and tough.
What can I use if I don’t have beef broth?
If you’re out of beef broth, you can use chicken broth or even vegetable broth in a pinch. The flavor will be slightly less “meaty,” but the rice will still cook perfectly. If you only have water, make sure to increase the salt and spices significantly, or add a tablespoon of Worcestershire sauce to help mimic that deep, savory broth flavor.
Can I add other vegetables to this skillet?
Absolutely! Diced bell peppers, onions, or even small broccoli florets work beautifully. Just be sure to sauté firmer vegetables like peppers and onions with the beef so they have time to soften. If you’re adding something delicate like peas or spinach, stir those in at the very end when you’re melting the cheese so they stay bright and fresh.
Why did my cheese turn out oily instead of melty?
This usually happens with pre-shredded cheese or if the pan is too hot when the cheese is added. The high heat can cause the fat in the cheese to separate from the solids. For the best results, turn off the heat entirely, sprinkle your hand-grated cheese over the top, and let the residual steam do the work under the lid for 2 minutes. This gentle melting keeps the cheese smooth and creamy.
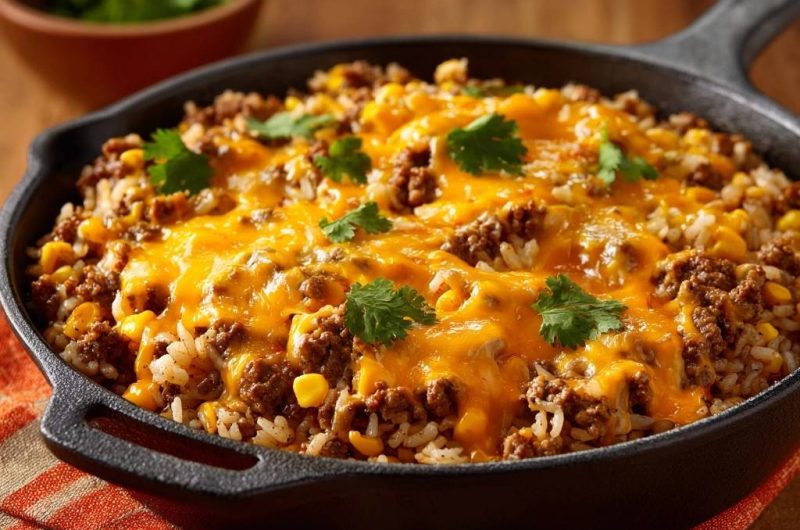
Cheesy Ground Beef and Rice
Course: Main CourseCuisine: AmericanDifficulty: easy4
servings10
minutes35
minutes520
kcal45
MinutesThis comforting one-skillet meal solves the problem of gummy rice by toasting the grains in beef drippings before simmering. Combined with savory spices, sweet corn, and a thick layer of melted cheese, it is a quick and reliable family favorite.
Ingredients
1 pound ground beef (80/20 or 85/15 preferred for fat content)
1.5 cups long-grain white rice, uncooked
1 cup canned sweet corn, drained
2.5 cups beef broth
1 tablespoon chili powder
1 teaspoon ground cumin
1 teaspoon garlic powder
1 teaspoon onion powder
1 teaspoon kosher salt (plus more to taste)
1/2 teaspoon black pepper
2 cups shredded sharp cheddar cheese
Fresh cilantro for garnish
Directions
- Brown the Beef: Place a large cast-iron skillet over medium-high heat. Add the ground beef and cook until fully browned and slightly crispy, breaking it up into small crumbles with a wooden spoon. Cook until no pink remains and it reaches 160°F (71°C).
- Toast the Rice: Do not drain the rendered fat; this is essential for flavor and texture. Add the dry, uncooked rice directly into the skillet with the beef. Stir the rice and beef together for 3 to 4 minutes. The rice grains should turn from translucent to a solid white/opaque color and smell slightly nutty. This toasting process seals the starch and prevents the rice from becoming mushy.
- Season: Stir in the chili powder, cumin, garlic powder, onion powder, salt, and pepper. Toast the spices with the meat and rice for 30 seconds until fragrant.
- Simmer: Add the drained corn and pour in the beef broth. Scrape the bottom of the pan to release any browned bits (fond). Bring the mixture to a rapid boil, then immediately turn the heat down to the lowest setting.
- Steam: Cover the skillet with a tight-fitting lid. Simmer for 18 to 20 minutes. Do not lift the lid during this time; keeping the steam trapped is essential for even cooking and fluffy grains.
- Rest and Fluff: Remove the skillet from the heat and let it sit, covered, for 5 minutes. Remove the lid and fluff the mixture gently with a fork to separate the grains.
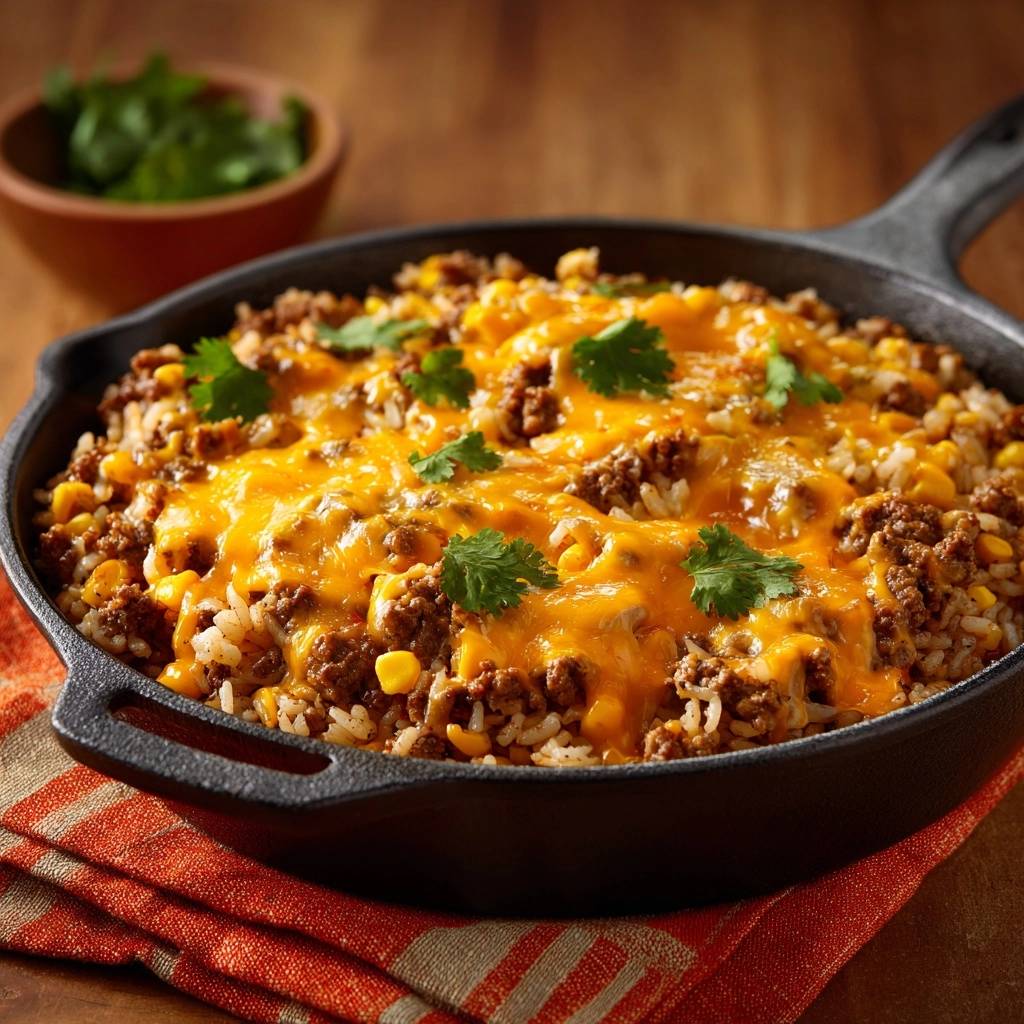
- Melt the Cheese: Sprinkle the shredded cheddar cheese evenly over the top. Cover the pan for 2 to 3 minutes to let the residual steam melt the cheese into the thick, gooey layer seen in the image.
- Garnish: Top with fresh cilantro leaves and serve directly from the skillet.
Notes
- The secret to non-mushy rice is toasting the dry grains in the beef fat until opaque and nutty. Do not lift the lid during the 18-20 minute simmer to ensure the steam cooks the rice evenly.