Pumpkin Spice Cake Pops: Never Lose a Pop Again!
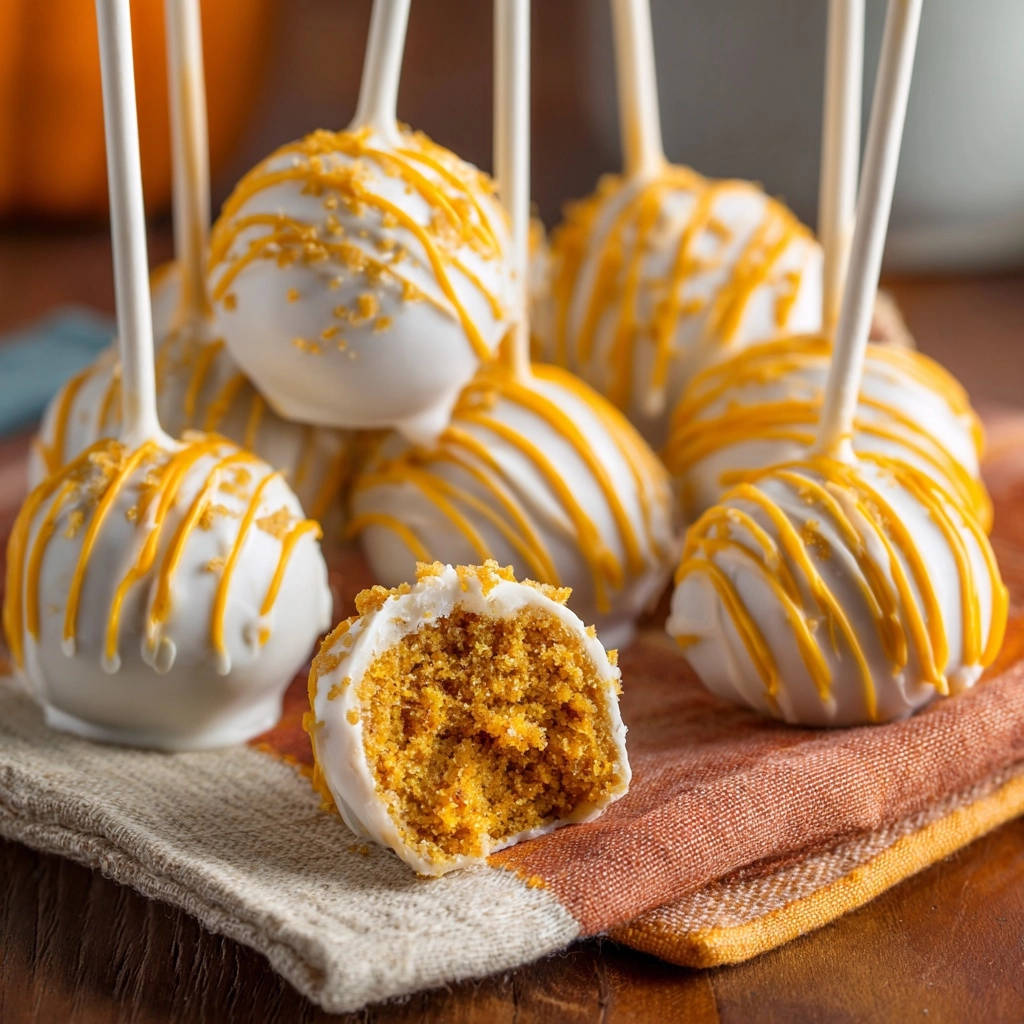
I remember the frustration of seeing a beautifully rolled cake pop crumble right off its stick, especially with something as anticipated as Pumpkin Spice Cake Pops. It’s a common baking heartbreak! But through countless trials, I discovered a game-changing technique to secure them perfectly, ensuring your delightful pumpkin treats stay put from dip to delicious bite.
This recipe provides that crucial secret, transforming potential mishaps into foolproof success. You’ll create moist, flavorful Pumpkin Spice Cake Pops that are as sturdy as they are scrumptious, perfect for any autumn gathering.
Beyond Basic: Why Our Pumpkin Spice Cake Pops Stand Out
Our Pumpkin Spice Cake Pops recipe tackles the notorious cake pop challenge head-on: keeping them firmly on their sticks. The embedded candy “glue” technique is a primary innovation, giving you confidence with every dip.
Beyond structural integrity, these treats boast an irresistible flavor profile. The rich pumpkin cake base, combined with creamy frosting, delivers a quintessential autumn taste in every bite.
For a perfect pairing, try our Raspberry Cake Balls: No-Crumbly Perfection Recipe.
The recipe is designed for maximum enjoyment with minimal stress, offering clear guidance and expert tips. You’ll achieve a smooth, professional-looking coating and vibrant decorations, making these cake pops truly special.
Essential Tools for Your Cake Pop Creation Journey
Mixing Bowl(s):
For crumbling cake, mixing ingredients, and melting candy. Having a few different sizes is always helpful.
Parchment-Lined Baking Sheets:
Crucial for chilling the cake balls without them sticking, ensuring easy removal.
Lollipop Sticks:
The foundation for your delightful cake pops, providing a handle for dipping and eating.
Microwave-Safe Bowls:
Ideal for melting candy melts in controlled bursts, preventing burning.
Deep, Narrow Bowl:
Perfect for dipping the cake pops, allowing for complete submersion with less coating wasted.
Foam Block or Tall Glass:
Essential for drying your coated cake pops upright, preventing flat spots and allowing for even setting.
Small Piping Bag or Ziploc Bag:
For precise drizzling of the orange candy melts, giving a professional finish.
The Building Blocks of Flavor: Essential Ingredients for Cake Pops
The Comforting Cake Base: Pumpkin Perfection
A pre-baked 9×13 inch pumpkin cake forms the flavorful foundation. Ensure it’s completely cooled to achieve the right consistency when mixed.
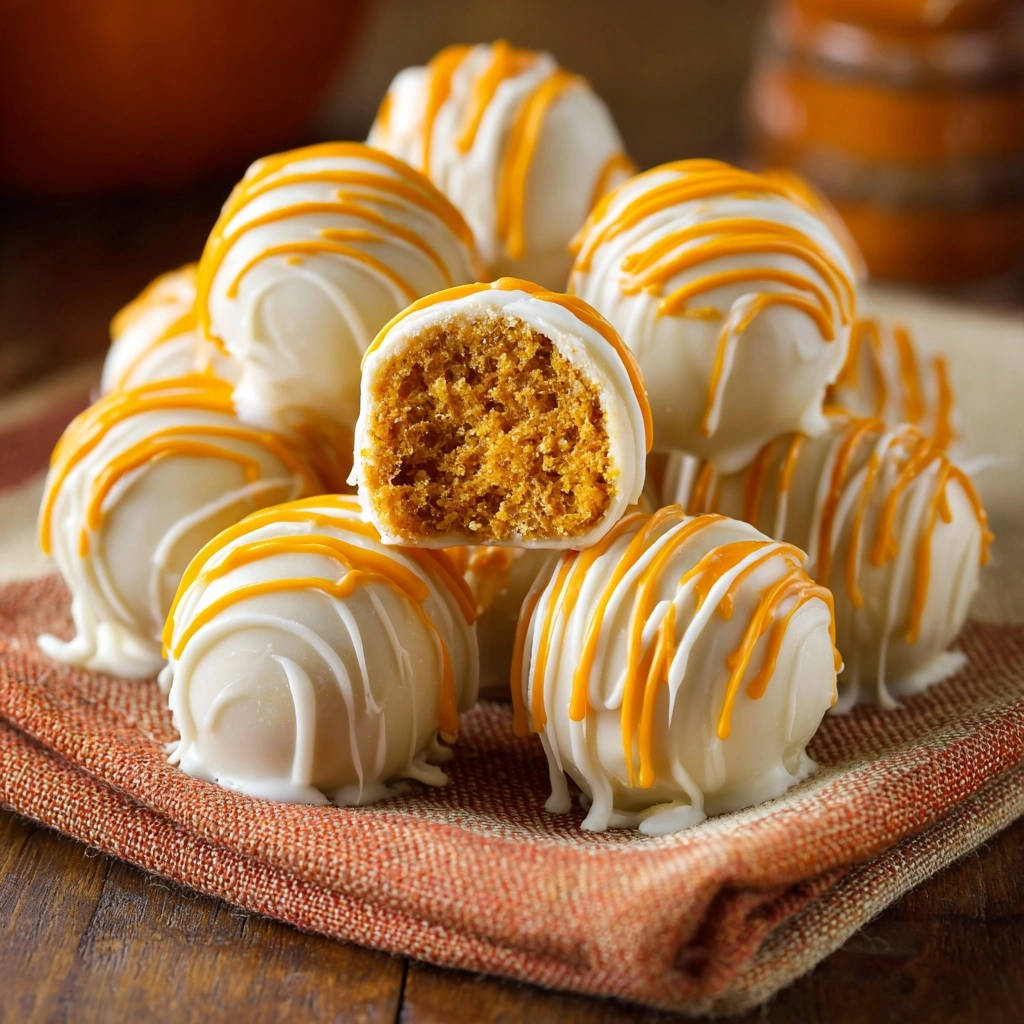
The pumpkin spice flavor is key to the autumnal delight of these treats, offering a warm and inviting taste.
The Creamy Binder: Frosting Finesse
Cream cheese frosting acts as the “glue” that binds the cake crumbs together. It adds moisture, richness, and a tangy counterpoint to the sweet pumpkin.
Its generous half-cup portion ensures a pliable, dough-like mixture that holds its shape well during rolling.
Crafting the Candy Coating: White and Zesty Orange
White candy melts provide the primary, smooth outer shell. They are easy to work with and set quickly, creating a crisp casing for your cake pops.
Orange candy melts are used for decorative drizzling, adding a vibrant visual appeal and a hint of extra sweetness to finish.
The Little Details: Sprinkles & Sticks
Edible orange sprinkles offer an immediate festive touch and textural contrast, applied while the main coating is still wet.
Lollipop sticks are crucial for handling and serving these delightful confections. Their secure attachment is the recipe’s star feature.
From Cake to Pop: A Step-by-Step Guide to Perfection
Preparing Your Pumpkin Cake Crumbles:
In a large bowl, crumble the completely cooled pumpkin cake. Ensure there are no large lumps; uniform crumbs will result in smoother cake balls.
You can use a fork or your clean hands to break down the cake thoroughly for the best texture.
Forming the Balls of Deliciousness:
Add the 1/2 cup of cream cheese frosting to the crumbled cake. Using your hands, mix thoroughly until the cake and frosting are fully combined.
The mixture should resemble a dough-like consistency that holds together firmly when pressed, allowing for easy rolling into spheres.
Roll the mixture into uniform 1.5-inch balls and place them on a parchment-lined baking sheet.
Chill these cake balls in the refrigerator for at least 30 minutes, or in the freezer for 15 minutes, until they are firm. This firmness is critical for the next steps, preventing crumbling.
The ‘Stay-Put’ Stick Secret: A Game-Changer!
Melt about half of the white candy melts in a microwave-safe bowl according to package directions. Use short bursts at 50% power, stirring well after each, to prevent scorching and ensure smoothness.
This is the crucial step to ensure your Pumpkin Spice Cake Pops stay securely on the stick!
Take one chilled cake ball and one lollipop stick. Dip the tip of the lollipop stick about 1/2 inch into the melted white candy coating.
Immediately insert this candy-dipped stick into the center of a cake ball, pushing it about halfway through. The melted candy acts as a strong, edible glue, cementing the stick to the cake ball.
Repeat this process for all cake balls, then place the tray back into the refrigerator for another 15-20 minutes. This chilling time is vital for the candy “glue” to set completely and firmly secure the sticks before dipping.
Dipping for a Smooth Finish:
Melt the remaining white candy melts in a deep, narrow bowl, stirring until completely smooth. A deeper bowl makes for easier, more even dipping with less coating wasted.
Carefully dip each cake pop, holding it by the stick, into the melted white candy coating. Submerge it completely to ensure full, even coverage.
Gently tap the stick against the edge of the bowl to remove any excess coating. Twist the cake pop slightly as you pull it out to help create a smooth, aesthetically pleasing finish.
Adding the Festive Drizzle:
Immediately place the coated cake pop stick-up in a foam block or tall glass to dry. If desired, sprinkle with edible orange sprinkles before the white coating sets completely, ensuring they adhere well.
Once the white coating is completely set, melt the orange candy melts. You can do this in a small piping bag in the microwave or a Ziploc bag with a tiny corner snipped off for easy, controlled drizzling.
Drizzle the orange candy over the white-coated cake pops in a zigzag or patterned design for a decorative, festive touch, enhancing their visual appeal.
Setting and Serving Your Masterpieces:
Allow the orange drizzle to set fully. This can be done at room temperature or by placing them briefly back in the refrigerator for quicker setting.
Once everything is firm, your delightful Pumpkin Spice Cake Pops are ready to be served or stored. Enjoy the fruits of your successful baking!
Chef’s Insights: Elevating Your Cake Pop Game
Achieving the Ideal Cake Ball Consistency:
The key to perfect cake pops is the cake-to-frosting ratio. If your mixture feels too wet, add a tiny bit more crumbled cake. If too dry, a touch more frosting will help.
It should be pliable enough to roll easily but not sticky to the touch.
Mastering the Dipping Technique:
Work with candy melts at the right temperature-not too hot, which can melt the cake, and not too cool, which makes them too thick. A deep, narrow bowl is better than a wide one for complete, even coating with less waste.
Creative Decoration Ideas:
Beyond sprinkles and drizzles, consider crushed nuts, edible glitter, or even different colored candy melts for stripes or polka dots. This allows for personalized cake pops.
Temperature Control is Key:
Ensure your cake balls are properly chilled before inserting sticks and before the final dip. This helps them hold their shape and prevents the cake from crumbling into the melted coating.
Conquering Cake Pop Challenges: Common Fixes
Why Your Pops May Be Falling Apart (And How to Prevent It!)
If your cake pops are sliding off their sticks, it’s likely due to insufficient chilling or skipping the candy “glue” step. Always ensure cake balls are very firm before applying sticks.
Crucially, allow the candy-dipped stick to fully set in the refrigerator before proceeding to the main coating dip.
Dealing with Uneven or Cracking Coatings
Cracks often occur if your cake balls are too cold when dipped into hot candy, causing a sudden temperature shock. Let them sit at room temperature for 5-10 minutes after chilling, just before dipping, to temper them.
Uneven coating can be from overly thick candy melts or not tapping off the excess properly. Adjust melt consistency and technique for a smoother finish.
Candy Melts Not Melting Smoothly?
If your candy melts are too thick, add a tiny amount of vegetable shortening or coconut oil (1/2 teaspoon at a time) and stir until smooth. This thins the consistency without compromising flavor.
Avoid adding water, as this will cause the candy melts to seize and become unusable. Overheating can also make them seize, so melt in short bursts at low power.
Enjoying and Preserving Your Delicious Creation
Best Ways to Serve Your Cake Pops
Cake pops are perfect for parties, dessert tables, or as thoughtful gifts. Display them upright in a foam block for easy access and visual appeal.
Alternatively, use a decorative vase filled with rice or even mini cupcake liners for an elegant presentation that holds them securely.
Storing for Maximum Freshness
Store your finished Pumpkin Spice Cake Pops in an airtight container at room temperature for up to 2-3 days, maintaining their delicate texture.
For longer storage, refrigerate them for up to a week. If refrigerated, allow them to come to room temperature for optimal flavor and texture before serving.
Make-Ahead Strategies
You can prepare the cake balls (before dipping) up to 2-3 days in advance and store them in an airtight container in the refrigerator.
For even longer storage, freeze the undipped cake balls for up to a month. Thaw them in the refrigerator before proceeding with the dipping steps for fresh-tasting results.
Your Top Cake Pop Questions, Answered
Can I use a store-bought cake for this recipe?
Absolutely! Using a store-bought pumpkin cake (or even a spice cake) is a fantastic shortcut that saves time and doesn’t compromise on flavor or the success of the cake pop.
Just ensure it’s cooled completely before crumbling to achieve the right consistency for mixing with frosting.
Flavor Variations for Your Cake Pops?
While pumpkin spice is perfect for fall, feel free to experiment! You could use a chocolate cake with chocolate frosting for a classic, decadent treat.
Red velvet cake with cream cheese frosting, or even a lemon cake with lemon glaze, offers different delightful options for various occasions.
Gluten-Free Cake Pop Options?
Yes, simply substitute the 9×13 inch pumpkin cake with your favorite gluten-free pumpkin cake recipe or a store-bought gluten-free pumpkin cake.
The rest of the ingredients and steps remain the same, making this recipe easily adaptable for gluten-free diets without any extra complications.
Best Practices for Drizzling?
When drizzling, ensure your main candy coating is fully set. Hold the cake pop steady and move your piping bag or snipped Ziploc bag quickly and evenly in a zigzag motion across the top.
Practice on a piece of parchment paper first if you’re nervous about achieving the perfect decorative pattern. This helps build confidence before working on your finished treats.
What if my candy melts are too thick?
If your candy melts are too thick for smooth dipping, add a very small amount (1/2 teaspoon at a time) of vegetable shortening or coconut oil. Stir well after each addition until you reach the desired pourable consistency.
This technique thins the candy melts effectively without altering their taste or setting properties, ensuring a professional finish.
Ready to Roll? Your Pumpkin Spice Cake Pop Journey Begins!
Now that you’re armed with the ultimate “stay-put” trick and all the expert tips, you’re ready to create the most enchanting Pumpkin Spice Cake Pops! Say goodbye to cake pop calamities and hello to perfectly delightful treats every time.
Embrace the joy of baking and sharing these homemade masterpieces, knowing they’ll be a hit at any gathering. Get ready to impress with your secure, delicious, and beautifully decorated cake pops!
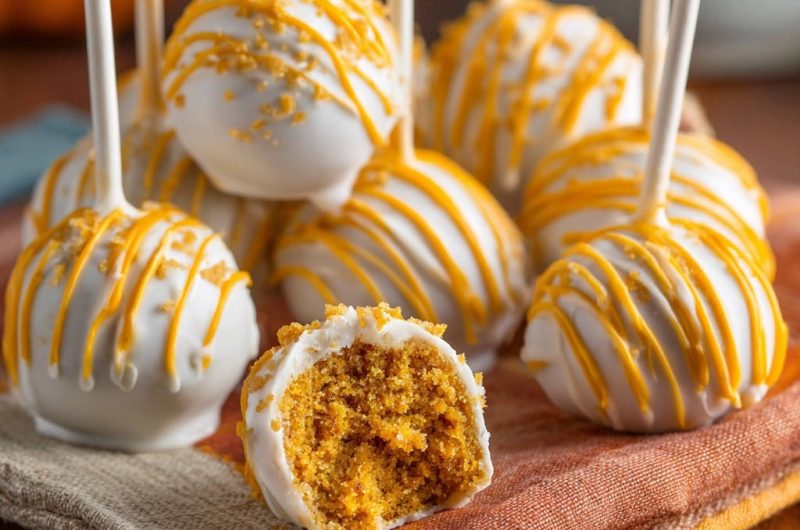
Pumpkin Spice Cake Pops
Course: DessertCuisine: AmericanDifficulty: medium30
cake pops1
hour240
kcal180
minutesNever suffer a fallen cake pop again! This recipe unveils the secret to perfectly secure pumpkin cake pops, ensuring they stay on the stick through dipping and decorating. Enjoy these delightful, spiced treats with confidence!
Ingredients
1 baked 9×13 inch pumpkin cake (cooled completely)
1/2 cup cream cheese frosting
16 ounces white candy melts
4 ounces orange candy melts
Edible orange sprinkles
30-40 lollipop sticks
Directions
- Crumble the cooled pumpkin cake into a large bowl. Ensure there are no large lumps.
- Add the cream cheese frosting to the crumbled cake. Mix thoroughly with your hands until the cake and frosting are fully combined and form a dough-like consistency that holds together when pressed.
- Roll the mixture into 1.5-inch balls and place them on a parchment-lined baking sheet. For best results, chill these cake balls in the refrigerator for at least 30 minutes, or in the freezer for 15 minutes, until firm.
- Melt about half of the white candy melts according to package directions in a microwave-safe bowl (usually short bursts at 50% power, stirring well after each).
- This is the crucial step to ensure your cake pops stay on the stick! Take one chilled cake ball and one lollipop stick. Dip the tip of a lollipop stick about 1/2 inch into the melted white candy coating. Immediately insert this candy-dipped stick into the center of a cake ball, pushing it about halfway through. The melted candy acts as a strong glue.
- Repeat this process for all cake balls, then place the tray back into the refrigerator for another 15-20 minutes to allow the candy “glue” to set completely and firmly secure the sticks. This chilling time is vital!
- Melt the remaining white candy melts in a deep, narrow bowl, stirring until smooth.
- Carefully dip each cake pop, holding it by the stick, into the melted white candy coating. Submerge it completely, then gently tap the stick against the edge of the bowl to remove excess coating. Twist slightly as you pull it out to help create a smooth finish.
- Immediately place the coated cake pop stick-up in a foam block or tall glass to dry. If desired, sprinkle with edible orange sprinkles before the coating sets.
- Once the white coating is completely set, melt the orange candy melts in a small piping bag or a Ziploc bag with a tiny corner snipped off. Drizzle the orange candy over the white-coated cake pops in a zigzag pattern for decoration.
- Allow the orange drizzle to set fully before serving or storing.
Notes
- Ensure cake is completely cooled before crumbling. The candy-dipped stick method is vital for secure cake pops. Chilling times are crucial for best results.