Sticky Garlic Ginger Wings: The Secret to Never-Soggy Perfection
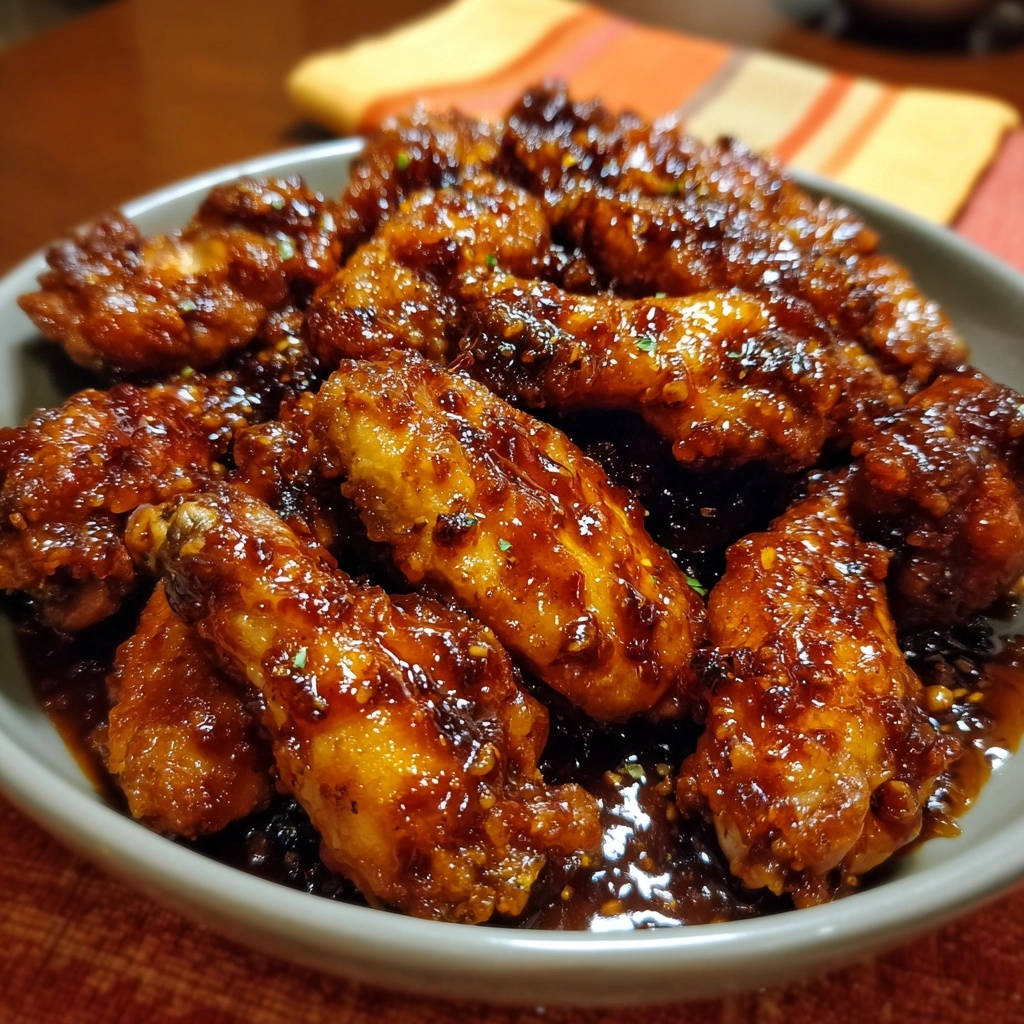
I know the disappointment: you labor over a batch of flavorful wings, only for the sauce to turn them into a soggy mess. I’ve been there too, but after countless experiments, I finally cracked the code to truly crispy, beautifully coated Sticky Garlic Ginger Wings that stay perfectly textured underneath.
This isn’t just another wing recipe; it’s a meticulously developed method that guarantees a restaurant-quality crunch with every bite, bathed in an irresistible, clingy sauce. Prepare to impress with wings that deliver on both flavor and unparalleled texture.
Why Our Sticky Garlic Ginger Wings Won’t Go Soggy (Ever!)
The Crispy Foundation: Oven-Baked to Golden Perfection
The journey to never-soggy wings begins long before the sauce. Our method focuses on eliminating moisture and rendering fat through high-heat oven baking on a wire rack.
This critical step ensures maximum air circulation around each wing, developing a deeply golden, incredibly crispy skin that can withstand even the stickiest sauce.
Thick, Clingy Sauce: The Cornstarch Slurry Magic
A thin, watery sauce is the enemy of crispiness. We utilize a cornstarch slurry to transform our flavorful ginger garlic sauce into a glossy, syrupy coating.
This thickening agent ensures the sauce perfectly adheres to the wings, creating a beautiful glaze without adding excess moisture that would compromise their crunch.
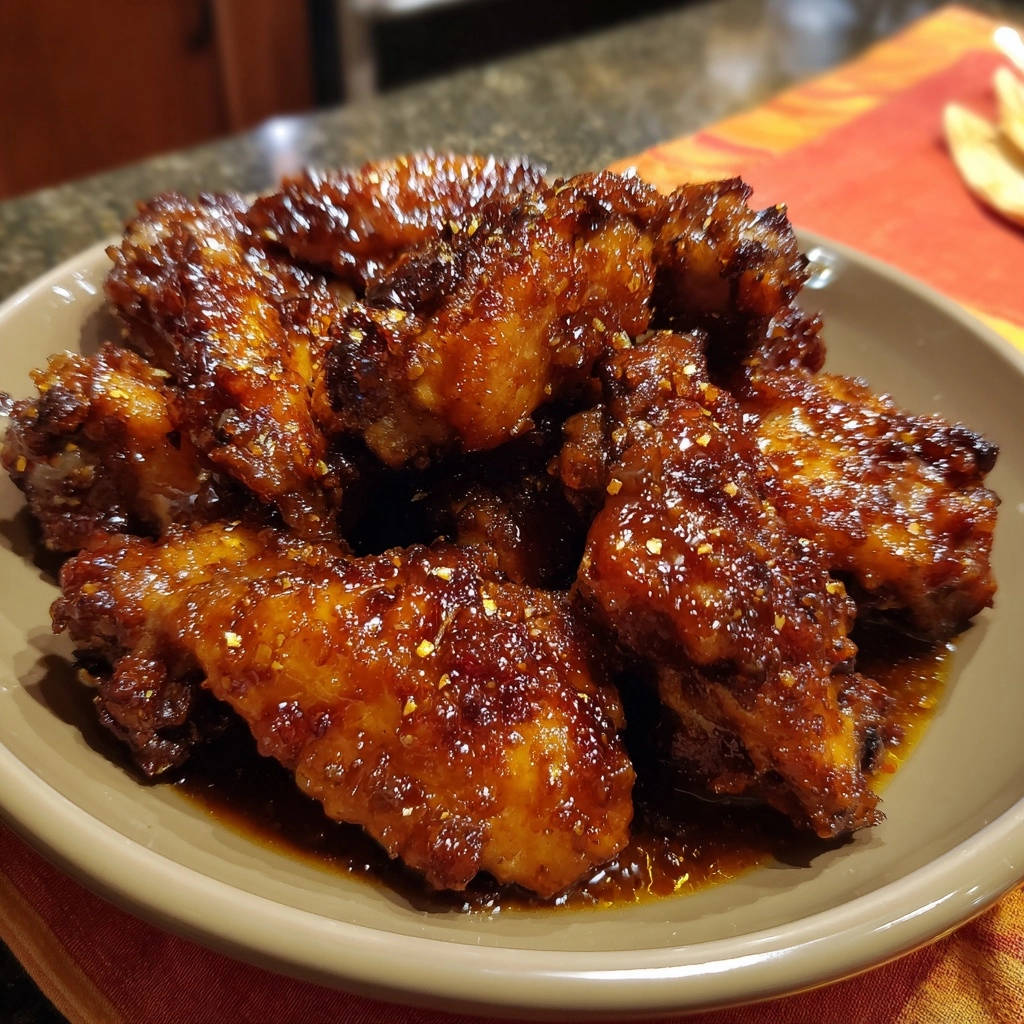
The Immediate Toss: Hot Wings, Hot Sauce, Pure Adhesion
This is the ultimate game-changer. By tossing hot, freshly baked crispy chicken wings with the hot, thickened sauce immediately, you create an instantaneous bond.
The residual heat from the wings and the warmth of the sauce work together to set the coating, sealing in the crispness and preventing any sogginess.
Crafting Flavor: Essential Ingredients for Your Sticky Garlic Ginger Wings
For the Crispy Wing Base
Chicken Wings: Use two pounds, separated into drumettes and flats. Thoroughly drying them is paramount for crispiness.
Vegetable Oil: A light coating helps in rendering fat and achieving a perfectly golden-brown, crispy skin during baking.
Salt & Pepper: These foundational seasonings enhance the chicken’s natural flavor before it even meets the sauce.
The Aromatic Garlic-Ginger Sauce
Soy Sauce: The backbone of our savory and sweet sauce, providing essential umami depth.
Honey: Contributes natural sweetness and is key to achieving that signature sticky, glossy finish.
Rice Vinegar: Adds a bright, acidic tang that balances the richness of the sauce and awakens the palate.
Sesame Oil: A small amount imparts a distinct nutty, toasted aroma that is essential for these Asian wings.
Fresh Garlic: Minced, it provides a pungent, aromatic base that infuses the sauce with deep flavor.
Fresh Ginger: Grated, it delivers warm, zesty, and subtly spicy notes, creating the signature ginger garlic profile.
Red Pepper Flakes (Optional): A touch adds a gentle warmth, allowing you to customize the spice level to your preference.
The Secret to Stickiness: Thickening Agents
Cornstarch: This starch is the scientific key to achieving a thick, glossy, and perfectly clingy sauce that won’t make your wings soggy.
Cold Water: Used to dissolve the cornstarch into a slurry, preventing lumps when added to the hot sauce.
Garnishes for a Fresh Finish
Fresh Parsley or Scallions: Chopped, these provide a vibrant color contrast and a fresh, herbaceous counterpoint to the rich, savory and sweet wings.
Your Kitchen Arsenal: Essential Tools for Flawless Wings
Must-Have Equipment
Large Mixing Bowls: You’ll need one for seasoning the raw wings and another larger one for tossing the hot wings with the sauce.
Wire Rack & Baking Sheet: Absolutely crucial for allowing air to circulate around the wings, ensuring even baking and ultimate crispiness.
Medium Saucepan: The perfect vessel for simmering and thickening your aromatic ginger garlic sauce.
Whisk: Essential for combining sauce ingredients smoothly and for creating a lump-free cornstarch slurry.
Tongs: Ideal for flipping wings during baking and for quickly and thoroughly tossing them in the hot sauce.
Paper Towels: Your best friend for diligently patting the chicken wings dry, a foundational step for achieving a truly crispy texture.
Step-by-Step Perfection: Making Your Sticky Garlic Ginger Wings
- Prepare the Wings for Crispiness:
Thoroughly dry chicken wings with paper towels to remove every bit of excess moisture. This critical first step sets the stage for maximum crispiness.
In a large bowl, drizzle the dried wings with vegetable oil and season evenly with salt and pepper. Toss well to coat every piece, ensuring flavor permeates from the start.
- Bake the Wings to Perfection:
Arrange the seasoned wings in a single layer on a wire rack placed over a baking sheet. Ensure there’s space between each wing for optimal air circulation, preventing steaming.
Bake in a preheated oven at 425°F (220°C) for 40-50 minutes, flipping them halfway through. Continue baking until they are deeply golden brown and very crispy, indicating perfectly rendered fat.
- Make the Sticky Sauce:
While the wings bake, combine soy sauce, honey, rice vinegar, sesame oil, minced garlic, grated ginger, and optional red pepper flakes in a medium saucepan.
Bring the mixture to a gentle simmer over medium heat, stirring occasionally. This allows the flavors to meld beautifully without overcooking the aromatics.
- Thicken the Sauce for Ultimate Adhesion:
In a small separate bowl, whisk together the cornstarch and cold water to create a smooth slurry without any lumps. This ensures a consistent sauce texture.
Once the sauce in the saucepan is simmering, slowly stir in the cornstarch slurry. Continue to cook, stirring constantly, for 1-2 minutes until the sauce thickens significantly to a glossy, syrupy consistency that coats the back of a spoon. This is key for a perfect, clingy coating.
- The “No More Soggy” Coating Method:
Immediately after the crispy wings come out of the oven, transfer them to a large mixing bowl. The wings must be piping hot for this step to work its magic.
Pour the hot, thickened sauce directly over the hot wings. Using tongs, quickly and thoroughly toss the wings until each piece is evenly coated. The residual heat from the wings and the hot sauce creates a perfect, non-soggy, clinging coating that locks in crispness.
- Serve Immediately:
Transfer the beautifully coated Sticky Garlic Ginger Wings to a serving dish. Garnish with fresh chopped parsley or scallions if desired for a fresh touch and visual appeal.
Enjoy these perfectly textured Asian wings while they’re hot and at their absolute best, savoring every savory and sweet bite.
The same sticky glaze technique also works beautifully for this crispy gochujang tofu.
Unlock Next-Level Flavor: Expert Tips for Sticky Garlic Ginger Wings
Maximizing Wing Crispness
Pat Dry, Pat Dry, Pat Dry: Don’t underestimate the power of thoroughly drying your chicken wings. Moisture is the enemy of crispiness, so take the extra time for this crucial step.
Single Layer Spacing: Ensure wings are spread out on the wire rack without touching. Crowding steams the wings instead of crisping them, leading to a softer texture.
High Heat Baking: The 425°F oven temperature is key to rendering fat efficiently and achieving that desirable golden-brown, shatteringly crisp exterior.
Perfecting Your Sauce Consistency
Smooth Slurry is Key: Always whisk cornstarch with cold water until completely smooth before adding to hot liquid. This prevents lumps and ensures a silky, even consistency for your ginger garlic sauce.
Cook to “Coat a Spoon”: Simmer the sauce until it’s thick enough to cling to the back of a spoon without running off. This ensures it adheres perfectly to the wings, creating a delicious, sticky glaze.
Flavor Variations to Explore
Add Citrus Brightness: A squeeze of fresh lime or orange juice to the sauce just before thickening can add an extra layer of zing and cut through the richness beautifully.
Spice It Up: Increase the red pepper flakes or add a dash of sriracha to the sauce for a bolder, fiery heat profile that chili lovers will appreciate.
Smoky Notes: A tiny splash of liquid smoke or smoked paprika can introduce a deeper, more complex flavor dimension, adding intriguing savory depth to your Sticky Garlic Ginger Wings.
Serving Suggestions & Smart Storage for Your Wings
Perfect Pairings: What to Serve with Your Sticky Garlic Ginger Wings
These flavorful wings are excellent as a stand-alone appetizer, a crowd-pleasing party snack, or a delightful main course. Pair them with a simple green salad dressed in a light vinaigrette to cut through the richness and provide freshness.
For a heartier meal, serve these homemade wings alongside fluffy steamed white rice, a side of crisp stir-fried vegetables, or a cooling cucumber salad to complement the bold ginger garlic sauce flavors.
Storing Leftovers: Keeping Them Delicious
Store any leftover Sticky Garlic Ginger Wings in an airtight container in the refrigerator for up to 3-4 days. While they are undoubtedly best enjoyed fresh, they still make for a delicious next-day snack.
Reheating for Best Results
To reheat and retain as much crispness as possible, arrange wings on a wire rack over a baking sheet and bake in a preheated oven at 350°F (175°C) for 10-15 minutes, or until heated through and slightly re-crisped. Avoid the microwave, which can unfortunately make them soggy.
Can You Make Them Ahead?
While the “immediate toss” is crucial for maintaining that desirable texture, you can prep the ginger garlic sauce a day in advance and store it in the refrigerator. Reheat the sauce gently before tossing with freshly baked, hot wings for the best results.
Troubleshooting Common Wing Woes
Why Are My Wings Not Crispy?
The most common culprit is insufficient drying of the chicken or overcrowding on the baking sheet. Always pat wings thoroughly dry with paper towels to eliminate surface moisture and ensure they have plenty of space to allow air to circulate around them.
Another factor could be not baking them long enough or at a high enough temperature. Ensure your oven is preheated correctly and bake until truly golden and firm to the touch, indicating full crispness.
My Sauce Is Too Thin/Thick!
If your sauce is too thin, it likely needs more time to simmer and thicken after adding the cornstarch slurry, or you might need a tiny bit more slurry. Ensure you whisk constantly as it thickens to prevent burning and achieve a smooth consistency.
If it’s too thick, add a tablespoon or two of hot water or chicken broth, stirring until you reach your desired glossy, syrupy consistency. Be careful not to dilute the vibrant ginger garlic flavor too much.
Wings Lost Their Crispness After Coating?
This recipe specifically combats this very problem! The key is to toss the hot wings with the hot, thickened sauce immediately upon removing them from the oven. If either the wings or sauce have cooled significantly, the coating won’t adhere as perfectly, potentially leading to sogginess. Timing is everything here.
Your Sticky Garlic Ginger Wings Questions Answered
What’s the best way to get truly crispy wings?
The absolute best way is to thoroughly pat them dry with paper towels, season them lightly, and bake them on a wire rack set over a baking sheet at a high temperature (like 425°F) for 40-50 minutes, flipping halfway. The wire rack allows for even heat distribution and prevents the bottoms from getting soggy, guaranteeing perfectly textured wings.
Can I use fresh ginger paste or garlic powder instead of fresh?
While fresh ginger and garlic offer the most vibrant, pungent flavor, you can use pre-made ginger paste and minced garlic from a jar as a convenient alternative. If using garlic powder or ground ginger, use about 1/2 teaspoon of each for every clove of garlic or inch of ginger called for, adjusting to taste, but note the flavor will be less intense than fresh.
Is there a gluten-free option for these wings?
Absolutely! The primary gluten-containing ingredient in most recipes is soy sauce. Simply substitute regular soy sauce with a gluten-free tamari or coconut aminos to make the entire Sticky Garlic Ginger Wings recipe gluten-free. All other ingredients are naturally gluten-free.
How spicy are the red pepper flakes?
The 1/2 teaspoon of red pepper flakes specified in the recipe provides a mild, pleasant warmth rather than intense heat, adding a subtle spark. If you prefer more spice, feel free to increase the amount to 1 teaspoon or more, or add a dash of sriracha to the sauce for a bolder kick.
Ready to Dive In? Share Your Sticky Garlic Ginger Wings Creation!
Now that you’ve unlocked the secrets to perfectly crispy, gloriously sticky, and never-soggy Sticky Garlic Ginger Wings, it’s time to get cooking! This recipe promises restaurant-quality results right in your own kitchen, guaranteed to be a hit with family and friends for any occasion.
Don’t keep this deliciousness to yourself! We’d love to see your culinary creations and hear about your success. Share your photos and experiences in the comments below, or tag us on social media. Happy cooking!
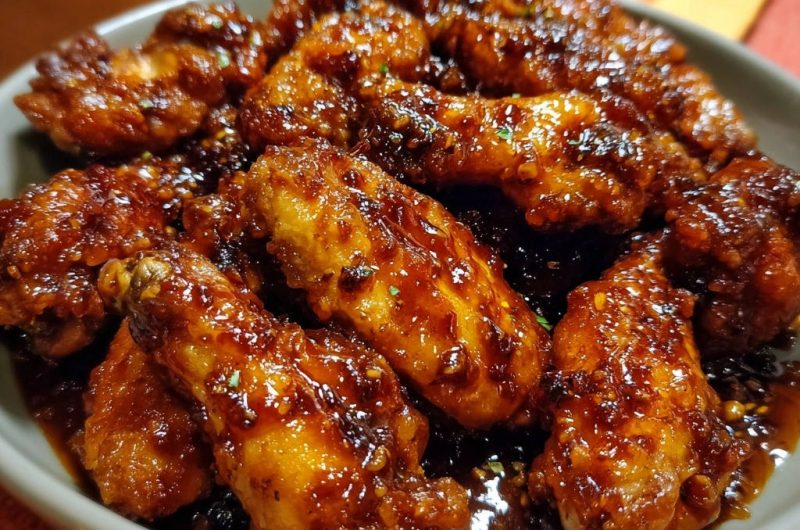
Sticky Garlic Ginger Wings
Course: AppetizerCuisine: AsianDifficulty: medium3
servings20
minutes50
minutes650
kcal70
minutesMaster the art of perfectly coated chicken wings that stay crispy with this recipe for Sticky Garlic Ginger Wings. Discover the key step to prevent sogginess and achieve an irresistible sticky, flavorful glaze every time.
Ingredients
2 pounds chicken wings, divided into drumettes and flats
1 tablespoon vegetable oil
1/2 teaspoon salt
1/4 teaspoon black pepper
1/2 cup soy sauce
1/4 cup honey
2 tablespoons rice vinegar
1 tablespoon sesame oil
4 cloves garlic, minced
1 inch fresh ginger, grated
1/2 teaspoon red pepper flakes (optional)
1 tablespoon cornstarch
2 tablespoons cold water
Fresh parsley or scallions, chopped, for garnish (optional)
Directions
- Prepare the wings for crispiness: Start by thoroughly drying your chicken wings with paper towels. This is the first crucial step to achieving a crispy texture. Place them in a large bowl, drizzle with vegetable oil, and season with salt and pepper. Toss to coat evenly.
- Bake the wings to perfection: Arrange the seasoned wings in a single layer on a wire rack set over a baking sheet. Bake in a preheated oven at 425F for 40-50 minutes, flipping halfway through, until they are deeply golden brown and very crispy.
- Make the sticky sauce: While the wings bake, combine soy sauce, honey, rice vinegar, sesame oil, minced garlic, grated ginger, and red pepper flakes (if using) in a medium saucepan. Bring the mixture to a gentle simmer over medium heat.
- Thicken the sauce for ultimate adhesion: In a small bowl, whisk together the cornstarch and cold water to create a slurry. Once the sauce in the saucepan is simmering, stir in the cornstarch slurry. Continue to cook, stirring constantly, for 1-2 minutes until the sauce thickens to a glossy, syrupy consistency that coats the back of a spoon. This thick sauce will cling to your wings beautifully without making them soggy. The chicken is done when it reaches 165°F (74°C) in the thickest part.
- The “No More Soggy” coating method: As soon as the crispy wings come out of the oven, immediately transfer them to a large mixing bowl. Pour the hot, thickened sauce directly over the hot wings. Using tongs, quickly toss the wings to coat each piece thoroughly and evenly. The residual heat from the wings combined with the hot, thick sauce ensures a perfect, non-soggy coating that locks in crispness.
- Serve immediately: Transfer the coated wings to a serving dish, garnish with fresh parsley or scallions if desired, and enjoy them while they’re hot and perfectly textured.
Notes
- The key to non-soggy wings is tossing them immediately with hot, thickened sauce after baking to lock in crispness.